Why Windows 11 Was Unable to Complete the Format and How to Fix It?
This article will tell you why Windows 11 was unable to complete the format and introduce you to some reliable tools to fix it, including Windows built-in tool and third-party utility.
By AOMEI / Updated on May 12, 2023
Problem: Windows 11 was unable to complete the format

Formatting storage devices is a very important thing. For example, formatting an SD card or USB can free up space. However, you may receive a “Windows was unable to complete the formatting” prompt when you perform formatting. This article will tell you what causes Windows 11 unable to complete the format USB/SSD/SD card and how to solve it.
What caused “Windows 11 was unable to complete format”?
Generally speaking, the reasons why Windows 11, 10, 8, 7 PC encounters “Windows was unable to complete format” are as follows:
☛ Drive is write-protected: When the drive is write-protected, you can only read it but not write to it. If you write at this time, you may receive “The disk is write-protected”.
☛ The file system of the drive is damaged: After the file system of the drive is damaged, it cannot be written to.
☛ The drive is physically damaged: If the drive is damaged, then you will not be able to use it. Repairs can be costly.
☛ Drive has bad sectors: All storage devices have sectors. When there are bad sectors on the drive, it cannot be operated on.
☛ Drives are infected by viruses: As some storage devices are portable and often plugged into different PCs for use, they are likely to be infected by viruses in some PCs.
How do I fix “Windows 11 was unable to complete the format”?
For the reasons mentioned above, you need to first determine whether your storage device is damaged. If it is damaged, then you need to replace it with a new one. If there is no physical damage, you need to consider whether there is a virus infection. In this case, you need to install antivirus software to solve the problem. If it is because of write protection, bad sectors and damaged file system, you can try the following solution.
│Method 1. Remove write protection via Command Prompt
We can use the Command Prompt to remove write protection, the specific steps are as follows:
Step 1. Click the Windows 11 search icon and select Windows Terminal (Admin). Then, in the Terminal window, click the drop-down arrow and click “Command Prompt”.
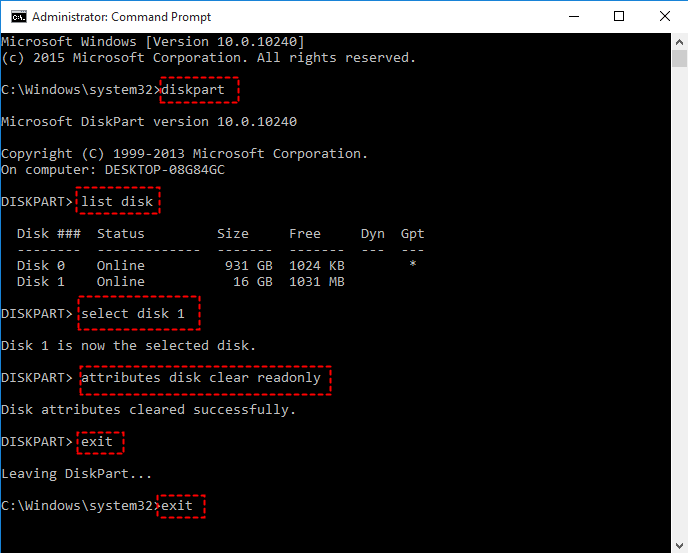
Step 2. Type in “diskpart” and press enter.
Step 3. Type in “list disk” and press enter.
Step 4. Type in “select disk X” (X is the disk number that is write-protected.)
Step 5. Type in “attributes disk clear readonly” to change the disk’s properties so that it is no longer read-only and press Enter.
Step 6. Type in “exit” and press enter twice to leave Diskpart and Command Prompt.
After that, the write protection has been removed. For the specific formatting method, please see Method 3.
│Method 2. Check and fix bad sector with free utility
To fix bad sectors on the device, you can use the AOMEI Partition Assistant standard. This is a very professional disk management tool that provides a lot of very useful functions to solve various problems on disks or partitions. If the formatting fails because of bad sectors, you can try to use the Check Partition function, which can not only help you check out bad sectors, but also fix them.
Step 1. Download this software, install and open it.
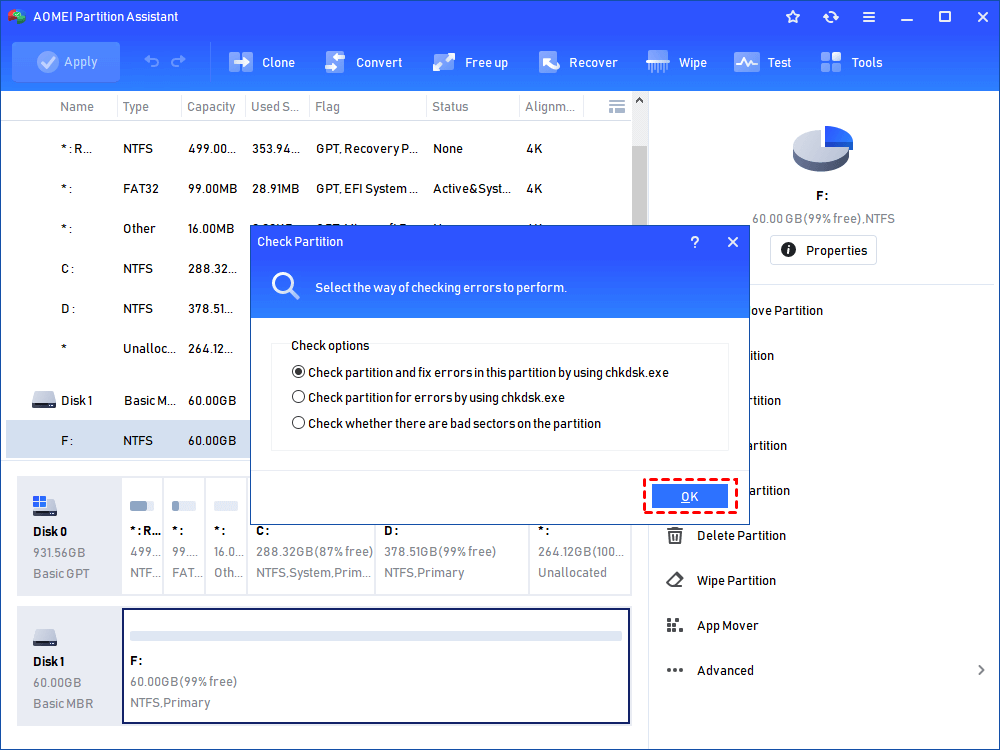
Step 2. In the main interface, right-click on the drive that failed to format and choose Advanced > Check Partition.

Step 3. Choose the first option and click OK to continue.
Step 4. Your computer will be shut down for automatic detection and repair, and will restart after completion.
│Method 3. Force format drive by free partition magic
After removing the disk write protection or repairing the bad sectors, you can use AOMEI Partition Assistant Standard to format your device. This method is also applicable to storage devices with damaged file systems. This utility is completely safe, and the formatting operation with it is also very simple.
What’s more, you can upgrade to AOMEI Partition Assistant Professional to enjoy more advanced features, such as fill sectors with random data, DoD 5220.22-M, Gutmann, SSD Secure Erase and more.
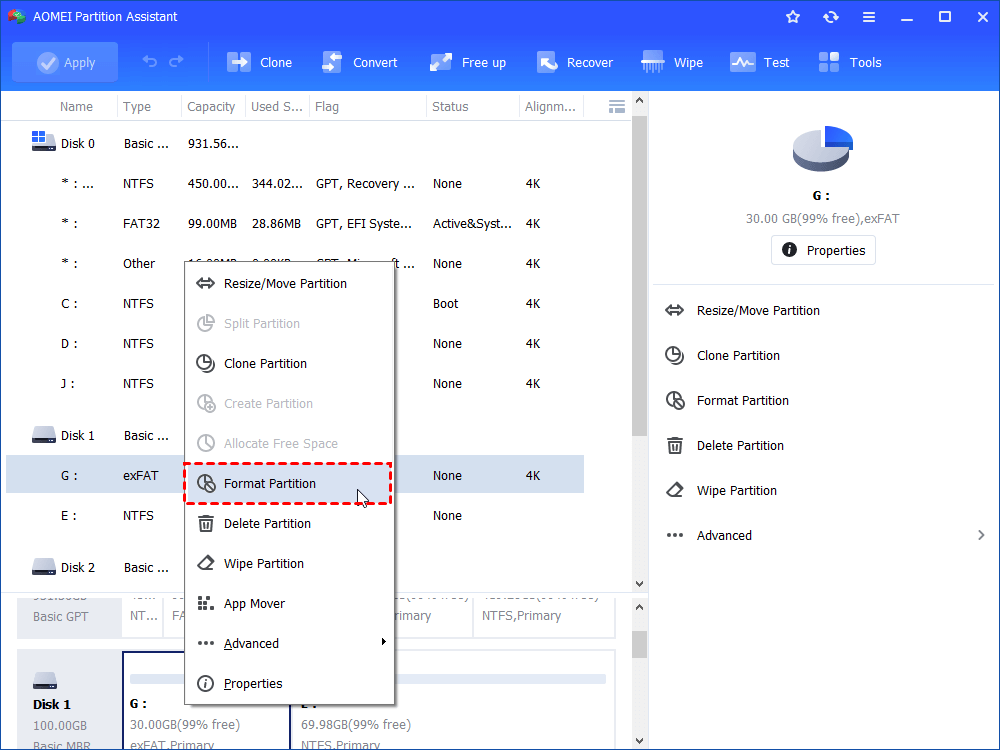
Step 1. Install and launch AOMEI Partition Assistant. Right-click on the drive and select “Format Partition”.
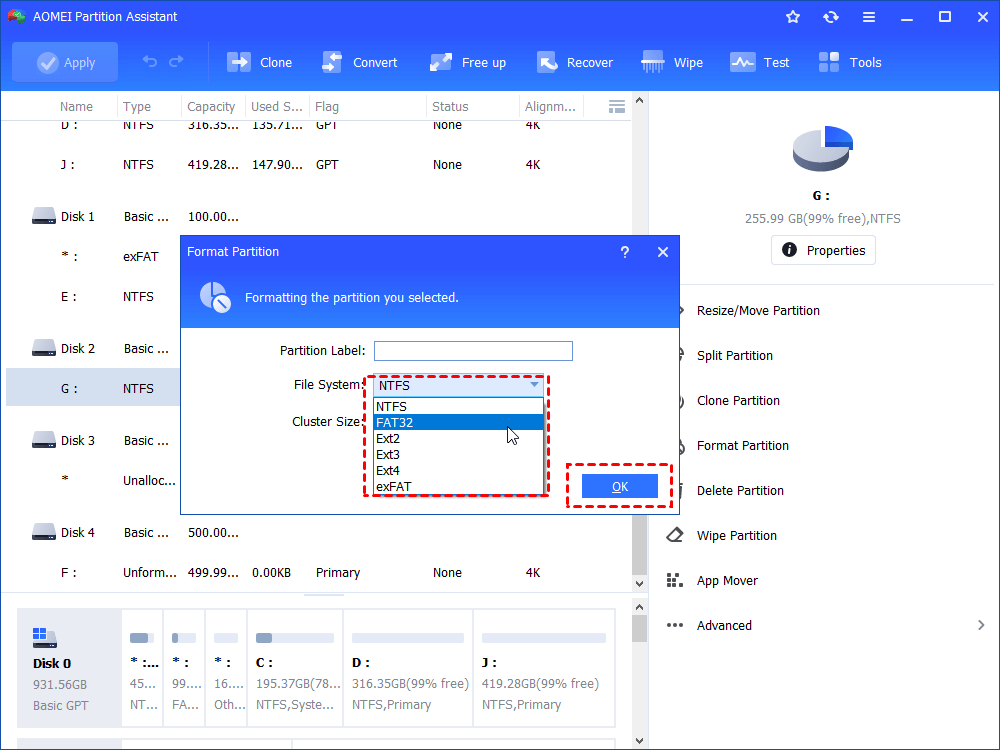
Step 2. In the pop-up window, you can name the USB drive by editing “Partition Label” and change file system based on your needs. Click “OK” to continue.
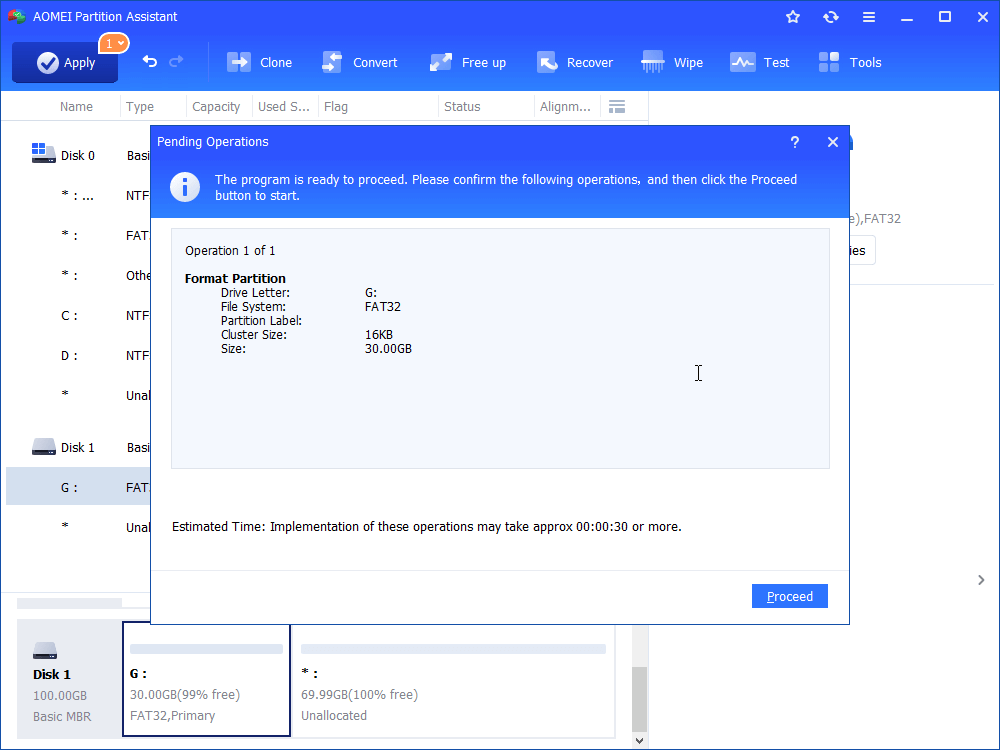
Step 3. Click Apply and Proceed to generate the operation.
Conclusion
Now, do you now know how to solve Windows 11 was unable to complete the format? This article not only finds out the reasons for you, but also provides corresponding solutions. If you want to perform formatting quickly, then using AOMEI Partition Assistant is essential.

