How to Fix the GPT Partition not Recognized in Windows 7?
Why does error "GPT partition not recognized" in Windows 7 appear? You can find the answer here, and there will be detailed steps to teach you how to fix it.
By Cherry / Updated on May 12, 2023
Can’t recognize GPT HDD in Windows Explorer
“I’ve had a Windows 7 computer. Recently, I want to add an HDD as a second drive for storing data. I configured a new WD HDD on my Windows 10 computer as GPT partition style. But, when I connected it to Windows 7 computer, it can’t be recognized in Windows Explorer. I open the Disk Management, just one partition shows as unallocated space. I tried to assign a drive letter to it in Disk Management, the option greyed out. Why is the GPT partition not recognized in Windows 7? How to read GPT partition in Windows 7 successfully?”
Why does the "GPT partition not recognized" error shows in Windows 7?
Many reasons would cause the "GPT partition not recognized" error in Windows. A GPT HDD is not recognized in Windows Explorer but shows in Windows Disk Management, and the GPT partition is shown as unallocated space, it may be because:
▶ 1. Windows sometimes don't recognize the created partition after users reboot the computer.
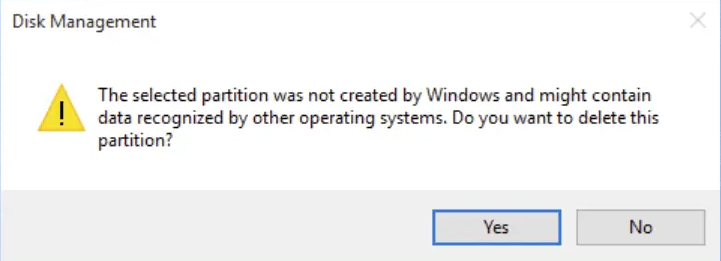
In this situation, when users try to deal with the not recognized partition, Windows will show a message "The selected partition was not created by Windows and might contain data recognized by other operating systems. Do you want to delete this partition?". You can recreate a partition to have a try.
▶ 2. GPT partition style is not recognized by all previous versions of Windows 7.
Only 64-bit Windows 7 with a UEFI-supported motherboard can use a GPT disk as a system disk. If you are not booting from the GPT partition, there may be something wrong with the enclosure or the drive.
4 ways to fix "the GPT partition not recognized" in Windows 7
So here we will give you some advice to fix "the GPT partition not recognized" in Windows 7.
▌1. Create partition to the GPT partition
If the GPT partition is not recognized in Windows 7 File Explorer, you can get into Windows Disk Management to try to fix it. First, you'll need to delete that partition, and then you can follow the guide steps.
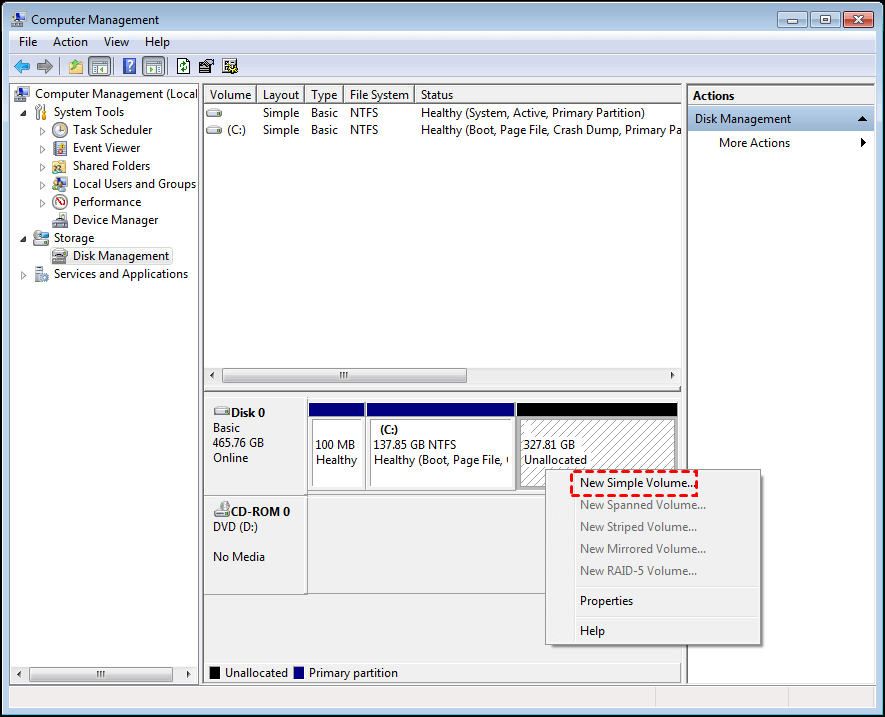
Step 1. Right-clicking "My Computer", select "Manage" and open Disk Management.
Step 2. Right-click the GPT partition that is not recognized in Windows, select "New Simple Volume..." and assign a drive letter to it to create a new partition, it should be recognized after the operation.
Note:
But, if you met the problem that we mentioned in the Scenario that all options are greyed out, you can try to use third-party software like AOMEI Partition Assistant Standard, which can help you create partition successfully and is free. What's more, you can upgrade to its Professional edition to unlock more features such as converting boot disk to GPT, migrating OS, cloning disk, App Mover...
By the way, if you're a Server user, you can choose the Server edition of this tool.
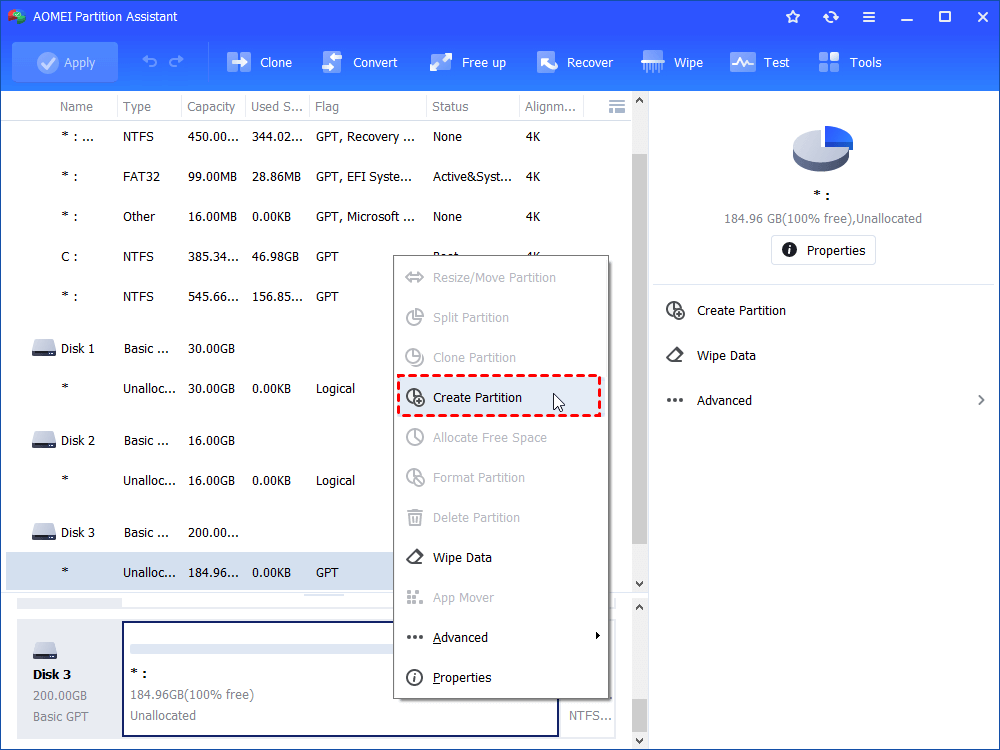
Step 1. Free download this partition manager, install it to your Windows 7 computer and launch it, it will show you all disks on your computer. Right-click the GPT partition, select "Create Partition".
Step 2. It will pop up a dialog box where you can choose the drive letter to assign to the unallocated space. Select one and click "OK".

Step 3. Here you can see that the GPT partition has been assigned a drive letter. Click "Apply" to submit.
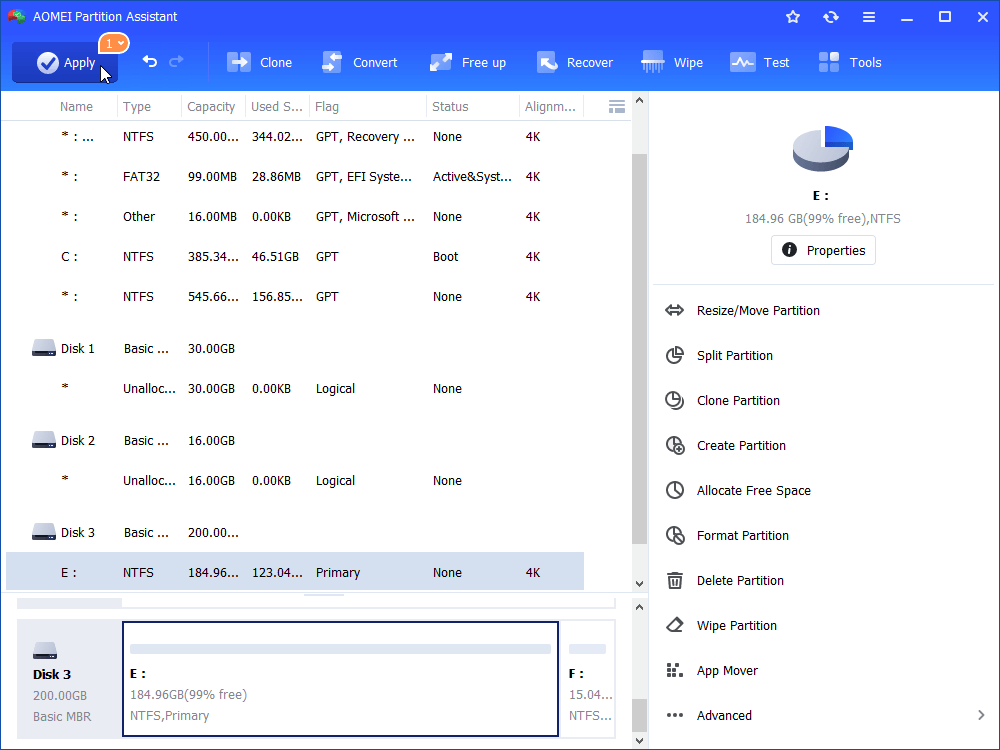
Wait till to proceed reaches 100%. After that, the GPT partition should be recognized in Windows 7.
▌2. Update storage drivers to the latest version
If there is no problem with the GPT partition, but the partition is still not recognized in Windows 7, you should check whether the storage drivers installed for Windows is the latest version. If it is not, you need to update to the latest storage drivers in Windows 7. And you can update the drivers manually via Device Manager as the following steps:
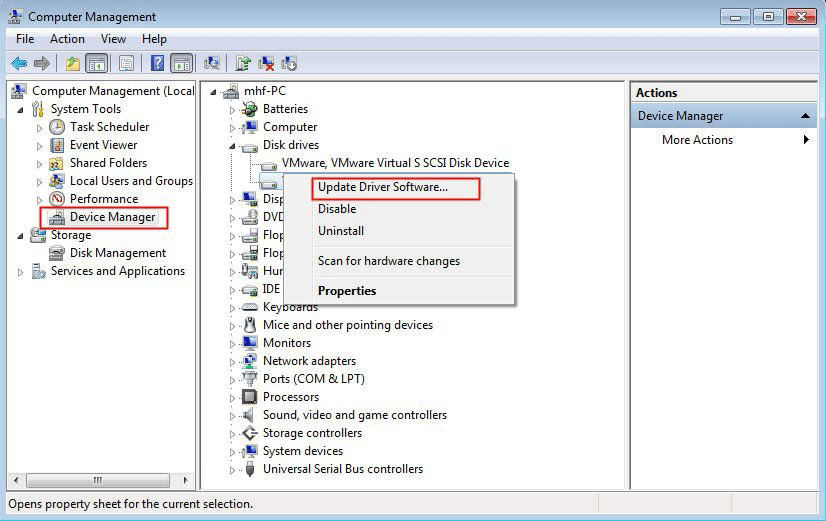
Step 1. On your desktop, right-click "Computer", select "Manage" to open "Device Manager".
Step 2. Click "Device Manager" in the left pane.
Step 3. Double-click the device name that you wish to update the driver to expand the list of this device.
Step 4. Right-click the device name and select "Update Driver Software..."
▌3. Run CHKDSK.exe to check this GPT disk
Also, you cannot deny there is no problem with your GPT partition. Thus, you can run CHKDSK.exe to check and fix this GPT partition. To do so, you can follow these instructions:
Step 1. Right-click on the Start icon.
Step 2. Click "Open Windows Explorer".
Step 3. On the left side of the window, click "Computer".
Step 4. At the Hard Disk Drives section, right-click on the volume you want to check for errors.
Step 5. Click "Properties".
Step 6. Go to the Tools tab, click "Check now".
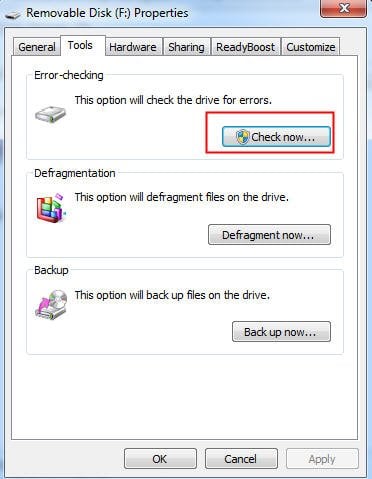
You can now run the check disk utility: select Scan for and attempt recovery of bad sectors to let the utility attempt to repair any hard drive errors found.
▌4. Run Windows Memory Diagnostics
Many users have met the problem when they connect their 4 TB GPT hard drive to Windows 7, the 4 TB GPT hard drive is not recognized in Windows 7. But users can see the drive in the BIOS, and the drive can be shown in Disk Management but only shows 2 partitions: one 2048 GB partition as GPT and another 1678 GB unallocated partition. Disk Management has all options grayed out, and the only option is to take the drive offline. If you have met a similar problem, you can run Windows Memory Diagnostics to check your system for the memory problems.
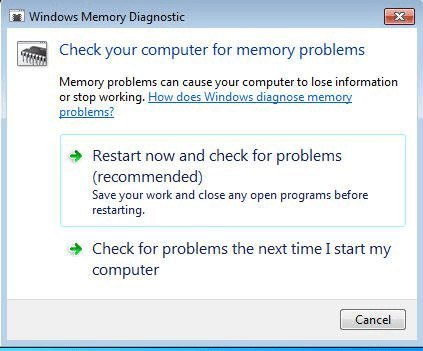
Step 1. Click Start, type "mdsched.exe" in the Search box, and then, right-click the program, select "Run as Administrator".
Step 2. Choose whether to restart the computer and run the tool immediately, or schedule the tool to run at the next restart.
Step 3. Windows Memory Diagnostics runs automatically after the computer restarts and performs a standard memory test automatically. If you want to perform fewer or more tests, press "F1", use the "Up and Down" arrow keys to set the Test Mix as Basic, Standard, or Extended, and then press F10 to apply the desired settings and resume testing.
Step 4· When testing is completed, the computer restarts automatically. You’ll see the test results when you log on.
Step 5. After the system rebooted, all my drives were correctly listed and accessible with none of the files missing or damaged on the original drive.
Hope these methods can help you solve the problem of "GPT partition not recognized" in Windows 7.

