[Bootable] Clone All Partitions to SSD with Few Clicks
This paper shows you how to clone a hard drive with multiple partitions to SSD in Windows 11/10/8/7 within few clicks. And you can boot from the SSD without any hassle after clone.
By AOMEI / Updated on June 12, 2024
Want to clone all partitions (boot partition included) to SSD
“I have a hard disk drive and it has multiple partitions including system partition, recovery partition, and so on. Now, I want to transfer everything on this HDD to my newly bought SSD and then replace HDD with SSD. Is there any advice on cloning all partitions to SSD without boot issue? Thanks in advance!”
Clone all partitions to SSD with cloning software
You can always find reasons to clone a hard drive with multiple partitions to another hard drive: HDD to SSD upgrade without reinstallation, a duplication of operating system and other data saved on these hard drive partitions and etc.
If you want to perform hard drive cloning with all partitions in Windows 11/10/8/7, this powerful and overall cloning software – AOMEI Partition Assistant Professional is highly recommended. It enables you to clone the entire hard drive including boot partition and hidden recovery partition to another disk; it can help you to clone single partition only to another disk as well. Either way allows you to boot from the destination disk successfully after clone. Besides, it has a user-friendly and concise interface, thus you can handle it rather easily.
How to clone hard drive with multiple partitions to SSD?
Now, let’s see how to copy all partitions on hard drive to SSD in Windows via AOMEI Partition Assistant Professional (supposed that the hard drive is installed with Windows 10). Connect the destination SSD to your computer and do as follows:
* You can download the Demo version of AOMEI Partition Assistant Professional and try it.
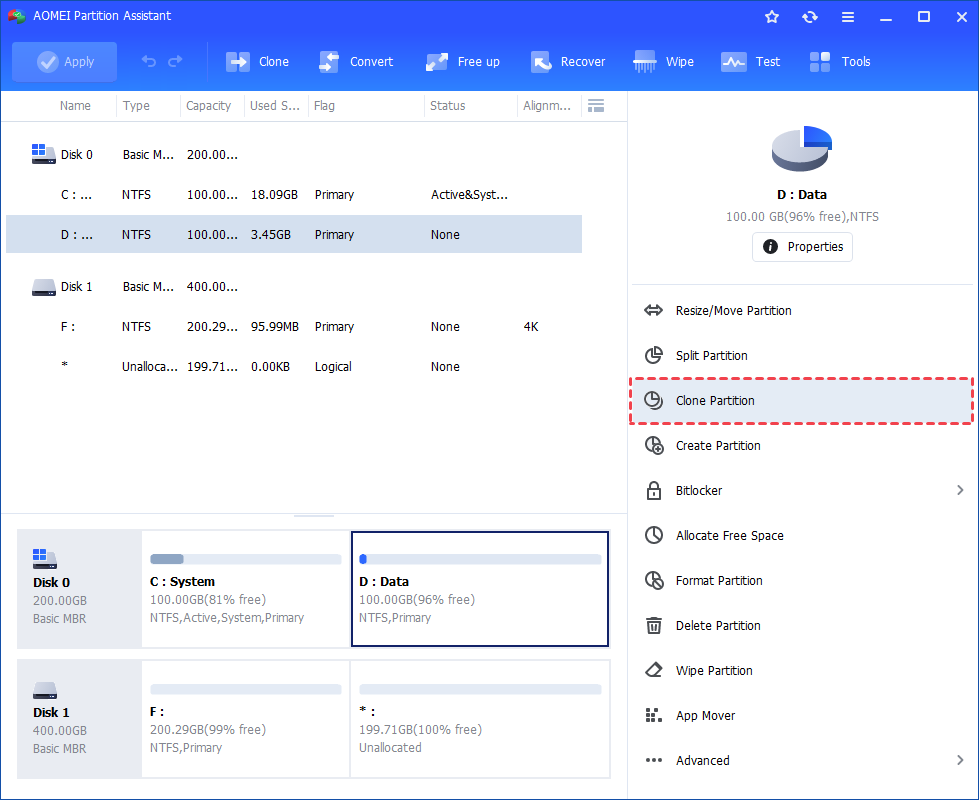
Step 1. Install and launch AOMEI Partition Assistant, right-click the partition you want to clone and select the "Clone Partition" tool to run partition clone. (You can also click the "Clone" main tab and select "Clone Partition".)
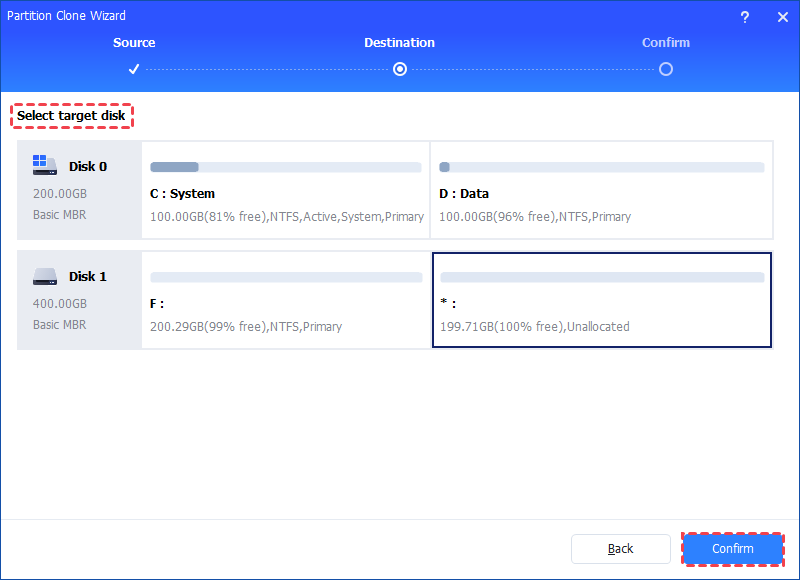
Step 2. In next window, select the destination partition or unallocated space to hold your source partition, and then click "Confirm".
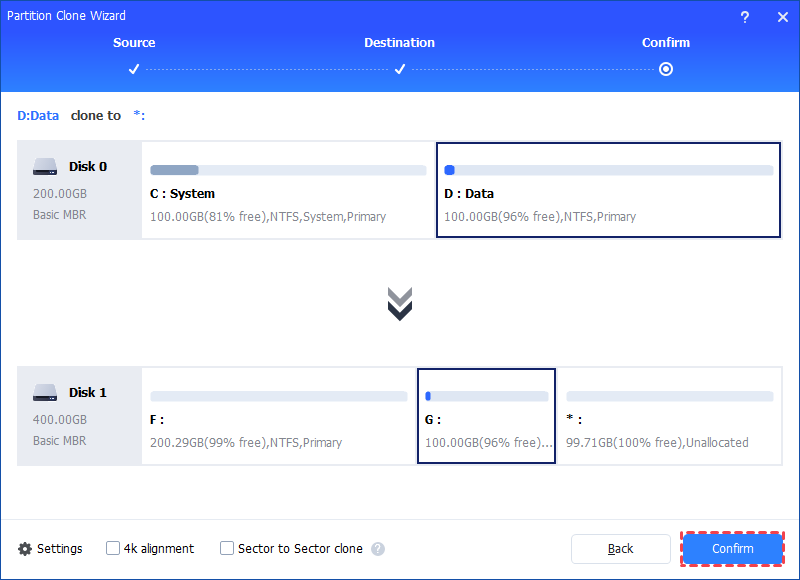
Step 3. Then, you will enter the Confirm interface where you can check the source and destination clone location. After all is set, you can click the "Confirm" button to continue.
Notes:
- There is a "4k alignment" option. If you want to copy a partition onto a SSD (Solid State Drive), ticking this option will optimize the read and write speed on this partition. It can also extend the life of the SSD.
- If you select the "Sector-by-Sector Clone" mode, the unallocated space must be equal or larger than source partition. If you tick the option, it will be unable to resize the destination partition.
Step 4. In the next window, you can click the "Settings" button to adjust the target partition size. As you can see from the screenshot, you could adjust the size of source partition in order to fit the target partition as per your need, or directly skip the step and click "Save".

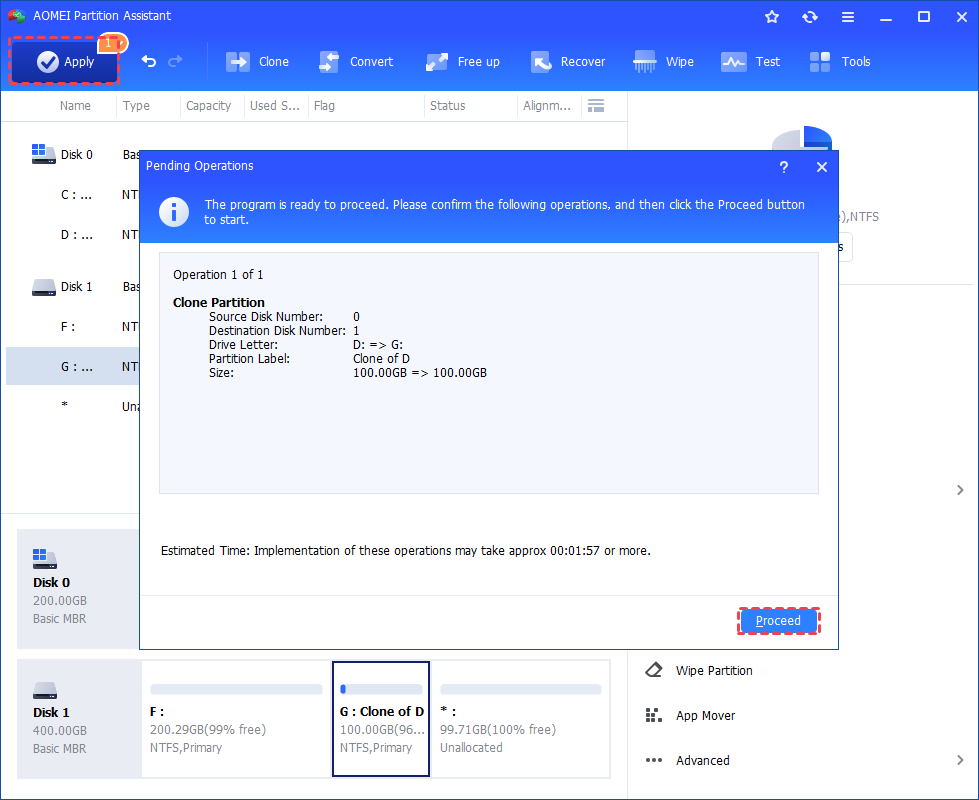
Step 5. You can preview the partition copy operating by viewing the "Pending Operations". To commit the "Pending Operations", please click "Apply" and "Proceed".
The cloning process will start and you can check the cloning process. Once the process is completed successfully, you will get a congratulation window. Finally, you can check the partition layout on the destination disk will be identical to the source partition.
- ★Tips:
- All data saved on the destination hard drive will be erased; you can back up necessary files before cloning.
- When you clone GPT disk with partitions beyond 3 to MBR disk, “Sector-by-Sector Clone” will convert the destination MBR disk into MBR automatically; “Clone Disk Quickly” will convert extra partitions into logical.
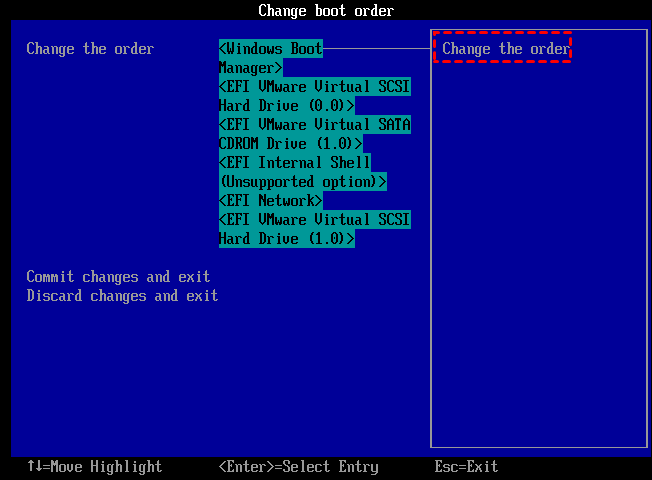
How to boot from the destination SSD drive?
After cloning all partitions to SSD drive, you need to change boot order to boot from the SSD drive.
Step 1.Restart your computer and watch for a message during the POST about a particular key, usually Del or F2, that you'll need to press to access the BIOS setup utility. Press this key as soon as you see the message.
Step 2. After pressing the correct keyboard from the previous step, you'll enter the BIOS Setup Utility.
Step 3. Find and locate the boot order options in BIOS window.
Step 4. Next, move the SSD to the top one and make it as the boot drive.
Step 5. Press F10 to save the BIOS changes you have made and exit.
- If you clone MBR system disk to GPT or GPT system disk to MBR, you need to change boot mode after cloning.
Conclusion
Obviously, it is not a tough task to clone all partitions to SSD or HDD through disk copy using AOMEI Partition Assistant Professional. Actually, it enjoys many other powerful features, allowing you to fix many issues related to partition.
For example, if you encounter C drive full issue, its Merge Partitions function enables you to add non-contiguous unallocated space to C drive; when you accidentally delete partition, Partition Recovery Wizard of it is able to recover deleted partition.

