Easily Create Windows (UEFI) Bootable USB Stick via Diskpart
Learn how to create UEFI bootable USB stick using Diskpart Commands (CMD) and AOMEI Partition Assistant in Windows 7, 8.1, (and install Windows 7, XP using it if necessary).
By Lucas / Updated on May 12, 2023
Why create (UEFI) bootable USB?
UEFI Bootable USB, just as its name implies, is used to boot non-OS computers or OS-corrupted machines.
◤ Bootable USB drive can help to repair the system when it cannot boot due to a virus, major system failure, a faulty hard drive, or other disc issues. You may reboot the machine and fix it using the bootable USB device.
◤ Bootable USB stick can assist you back up the hard drive without booting Windows when Windows is unbootable due to damaged boot files.
◤ It can help you to install the operating system. For example, if you want to install Windows 10/11 on other hard drives or other computers and you don’t have an installer disc around, it is time to create a (UEFI) bootable USB key using Diskpart or other tools. This bootable drive has all the necessary Drivers to boot the machine. So downloading an ISO file to the bootable drive makes the preparation done.
However, either to use third-party software or to use Diskpart in Windows 11/10, you have to figure out how to create a bootable USB.
Use Diskpart to create bootable USB
This part will introduce you to how to create (UEFI) bootable USB using Diskpart. Note that all operations in Diskpart are irreversible. If you are not familiar with Diskpart commands and want to take less risk of losing data, skip to the next part directly.
Step 1. Insert a USB drive into the running computer. All data in the USB drive will be formatted, you can backup files before reformatting. Open a Command Prompt window as an administrator, and type diskpart. Remember to press Enter key after each move.
Step 2. Type the following commands in order.
list disk
select disk X (X stands for the drive letter or disk number of your USB drive)
clean
create partition primary
select partition 1 (this is the partition you just created)
assign letter=N
select partition N
format fs=ntfs quick (if you want to create UEFI bootable USB in Diskpart, format it as FAT32. Type format fs=fat32 quick instead)
active
exit
Place your prepared custom image onto the root of the USB flash drive. Pay attention to that if your USB is showing as a Removable Disk in Windows Explore, you can only create one primary partition there. If it shows as a Fixed Disk, you can create multiple primary partitions in accordance with its size.
Create bootable USB for repairing via AOMEI Partition Assistant
Diskpart to create bootable USB in Windows 7, 8/8.1, 10, and 11 is an effective and advanced operation. If you are a novice to computers and looking for a more graphical and easier solution to create a bootable USB stick for repairing Windows, you can try AOMEI Partition Assistant Professional.
You can download its demo version to have a try!
This partition tool has a user-friendly interface and you can finish making a bootable USB in fewer steps. The most important thing is you don’t need to prepare a custom image (ISO.file) again because Partition Assistant takes care of that. It provides Create Windows PE Bootable Media to follow. No need to worry about potential mistakes you may make.
What’s more, burn Partition Assistant into a bootable device and boot from a bootable device to manage the hard drive, you can manage a mass of computers without directly installing the software on these machines.
Step1. Install and start AOMEI Partition Assistant. Click Make Bootable Media in the Tools menu.

Step2. Click USB Boot Device to select your USB drive as the path to store ISO file, and click Proceed.
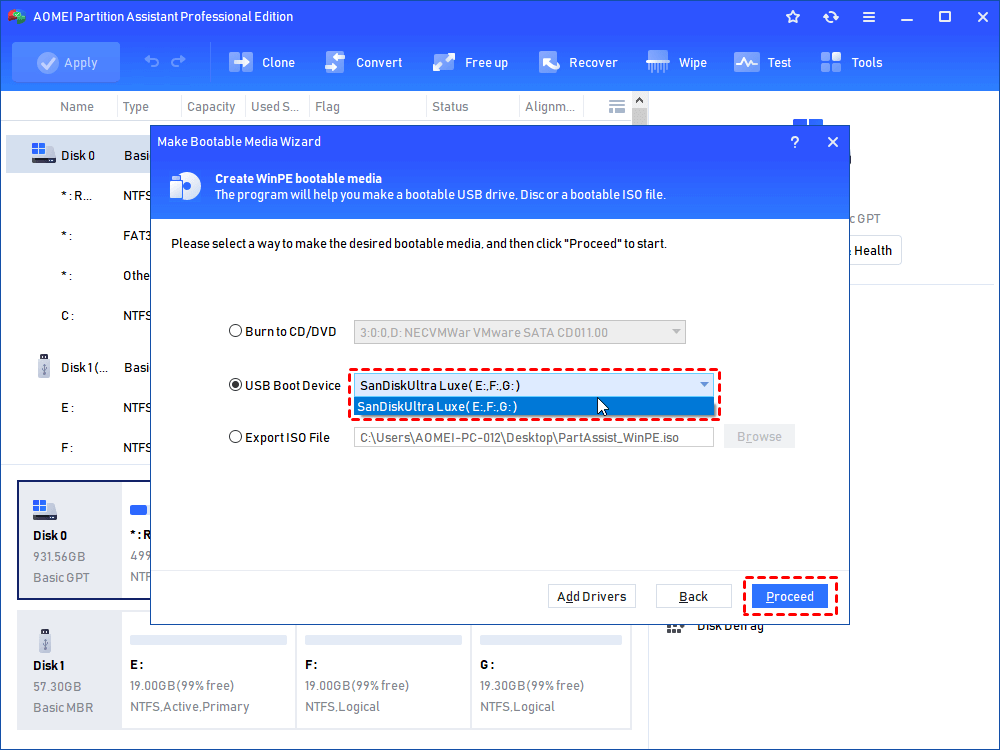
Step3. Click Yes in the pop-up window, and wait for the process completes.
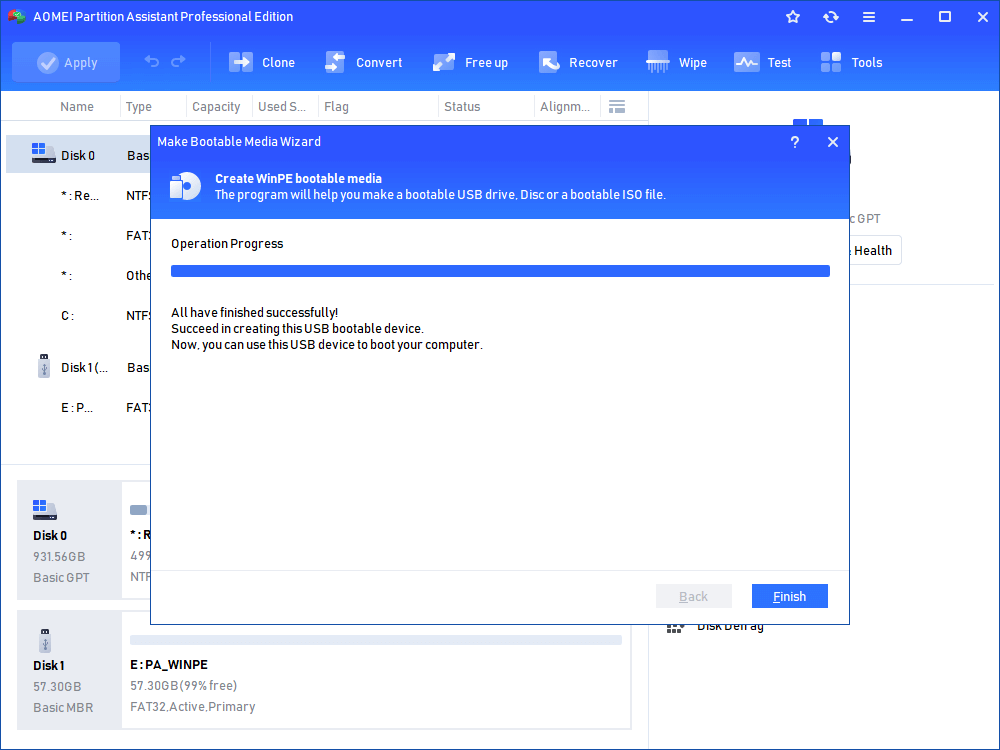
When the process is done, connect the bootable USB drive to the computer with the boot issue, and change the boot order to boot from the bootable USB stick. And then you can fix Windows OS by rebuilding MBR or checking whether there are bad sectors on the partition.
To sum up
All in all, it is easy to use Diskpart create bootable USB drive yet using AOMEI Partition Assistant is much more convenient indeed. After booting from the bootable USB drive created by AOMEI Partition Assistant, you can also use its other functions, like resizing partition, copying disk, copying partition, creating partition in Windows from C drive, etc. If you want to run your own Windows on another computer, you can make a Windows To Go USB drive via AOMEI Partition Assistant.
And if you're using a Windows Server system, you can choose the Serve Edition of this tool.

