How to set up Dual Boot Windows 11 and Windows 10 on One Computer
This article will guide you to set up dual boot Windows 11 and 10. It also introduces an alternative solution for easily enjoying both systems without dual boot Win 10 and Win 11.
By Irene / Updated on July 3, 2023
Can I dual boot Windows 10 and 11?
Windows 11, the latest operating system, has been readily available for quite some time now, showcasing a fresh user interface and many captivating features. While numerous users eagerly anticipate installing and immersing themselves in this innovative system, they may not be prepared to entirely replace their current Windows editions, especially for Windows 10 users. Therefore, dual boot Windows 11 and Windows 10 can be a nice choice.
But dual boot demands your computer meet the minimum system requirements for Windows 11. Many users are not sure whether they can run the system and they ask “Can I dual boot Windows 10 and 11 on my computer?”. In such case, it is recommended to check your PC health first. Once you find the answer is “Yes”, you can continue to follow this guide to dual booting
Stepwise guide: How to dual boot Windows 11 and Windows 10
Whenever you need to make significant modifications to your computer, it is important to be adequately prepared beforehand. In order to successfully set up a dual boot between Windows 10 and 11, please ensure that the following tasks have been completed:
- Before you do:
- Verify that your computer meets the system requirements for Windows 11 to ensure it runs normally.
- Take the precautionary measure of creating a full system backup. This step is essential to safeguard against unforeseen system issues that may arise due to inadvertent errors during the process.
- Obtain an external USB flash drive with a capacity of at least 16GB. This flash drive will serve as the installation media to download and install Windows 11.
Stage 1: Creating Windows 11 Installation Media
To begin the process of dual boot Windows 10 and 11, you first need to download Installation Creation Tool.
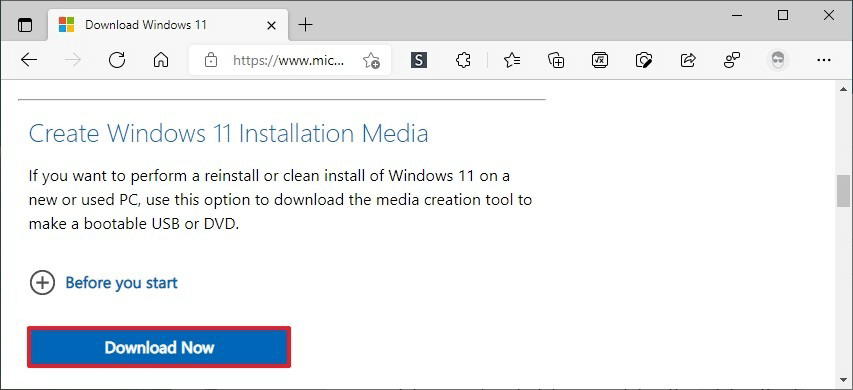
Step 1: Connect the prepared USB to your PC. Visit the official Microsoft website and download the Windows 11 media creation tool, which will help you create a bootable USB.
Step 2: Run the tool and select your preferred language and Windows 11 edition. Click "Next" to proceed.

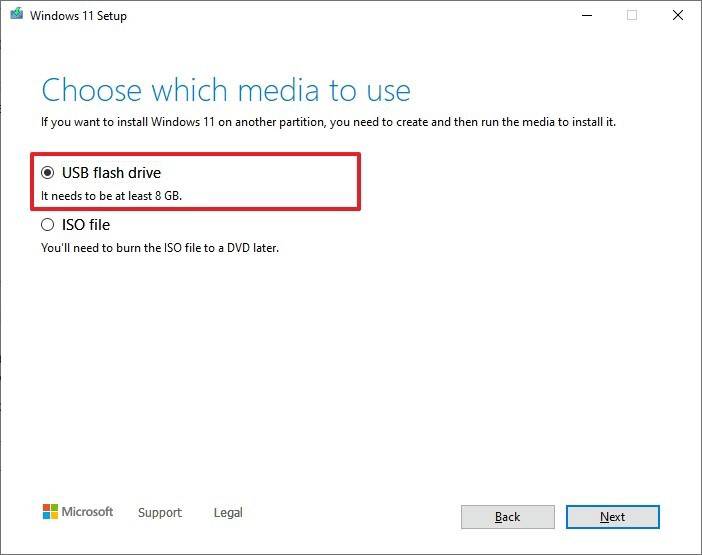
Step 3: Choose the option for a USB flash drive and select "Next".
Step 4: Install Windows 11 onto the USB and safely remove the USB. Congratulations, you now have the Windows 11 operating system on your USB.
Stage 2: Creating a new partition for dual boot Win 10 and Win 11
Once you have downloaded the Windows 11 files, it's essential to decide where to install it. Since two different systems cannot be installed on the same partition, creating a new partition for Windows 11 installation on your current Windows 10 computer is necessary.
• A smooth installation process requires at least 20 GB of free hard disk space; otherwise, you may encounter the error code 0x80070070.
• If you have two separate hard drives on your computer and intend to dual boot Windows 10 and 11 on them individually, you can skip this part.
To create a partition using Disk Management, you need unallocated space on your disk. If it is not available, you should shrink existing partitions first to obtain unallocated space. Follow these specific steps:
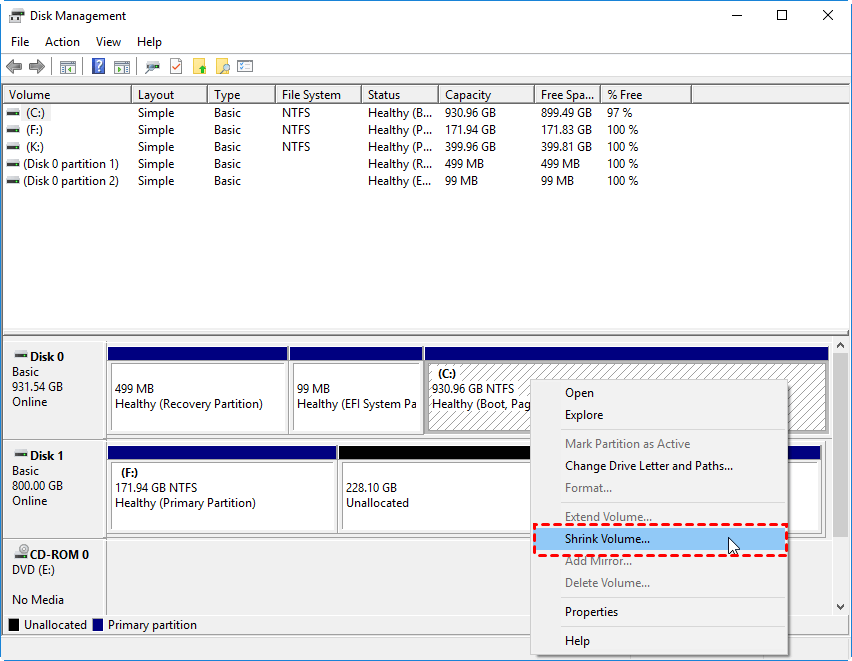
Step 1: Right-click on the partition you wish to shrink and select "Shrink Volume".
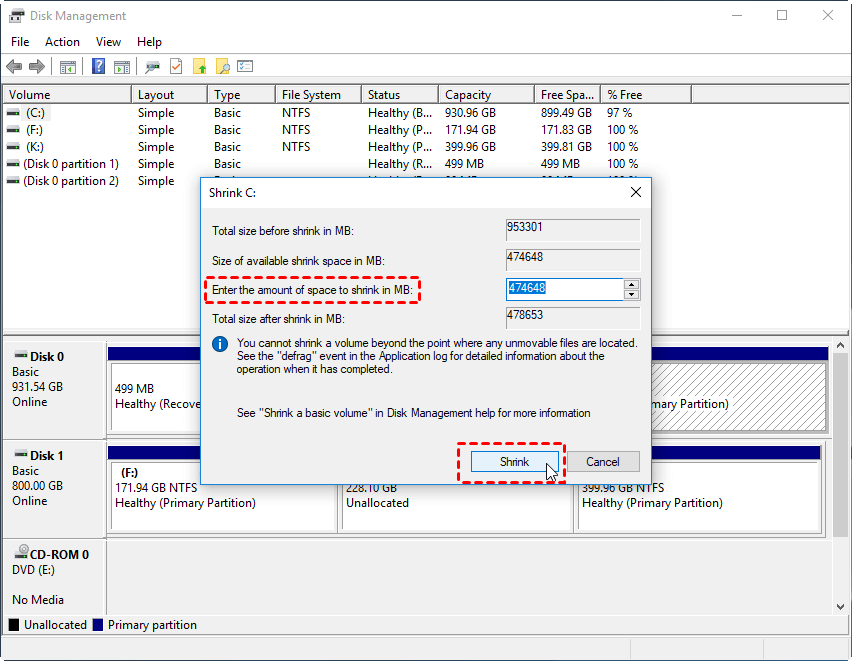
Step 2: In the pop-up window, enter the desired amount of space to shrink and click "Shrink". This action will create unallocated space.
Step 3: Right-click on the unallocated space, select "New Simple Volume," and click "Next" to continue.
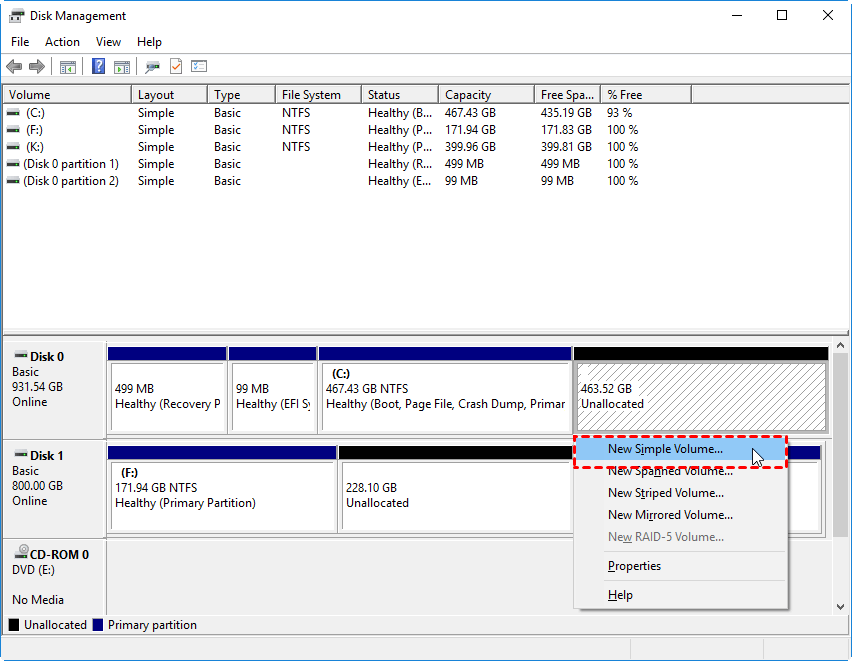
Step 4: Follow the wizard's instructions to set the volume size, drive letter, and file system according to your preferences. After completion, you will have a new partition on your disk.
Stage 3: Installing Windows 11 on the New Partition
Once you have Windows 11 and the new partition ready, it's time to proceed with the installation.
Step 1: Insert the USB with the Windows 11 OS into your current Windows 10 computer and restart it. Access the BIOS/UEFI interface and set the USB as the primary boot device.
Step 2: Restart the computer and boot from the USB.
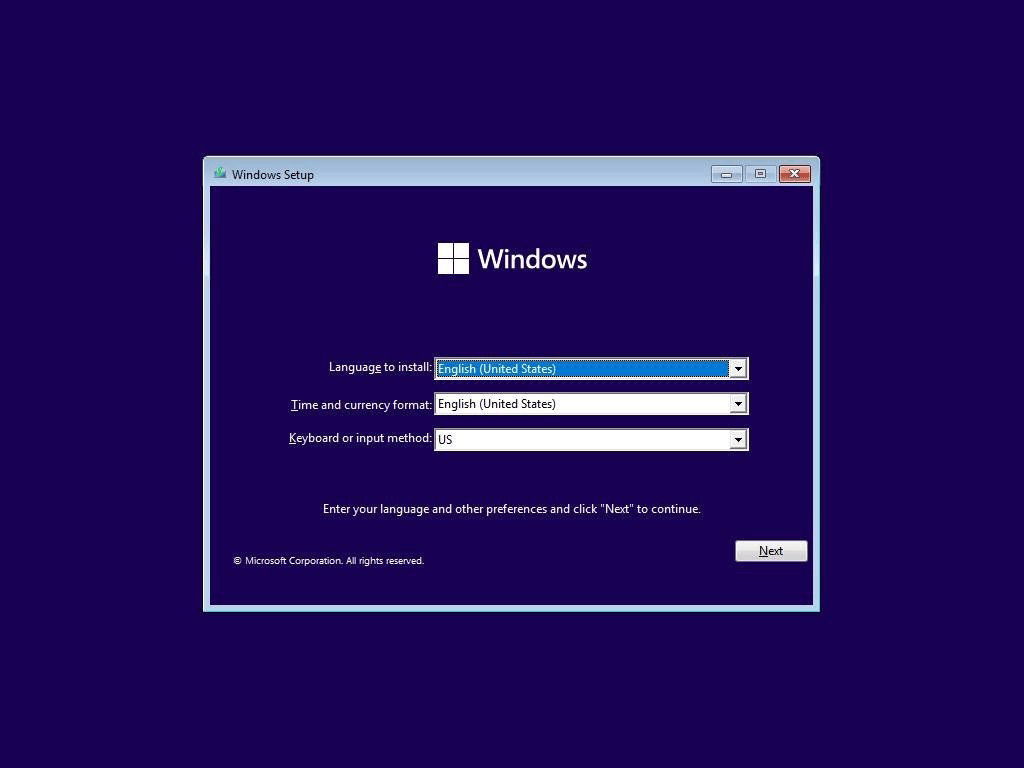
Step 3: The Windows Setup interface will appear. Select the appropriate parameters and click "Next".
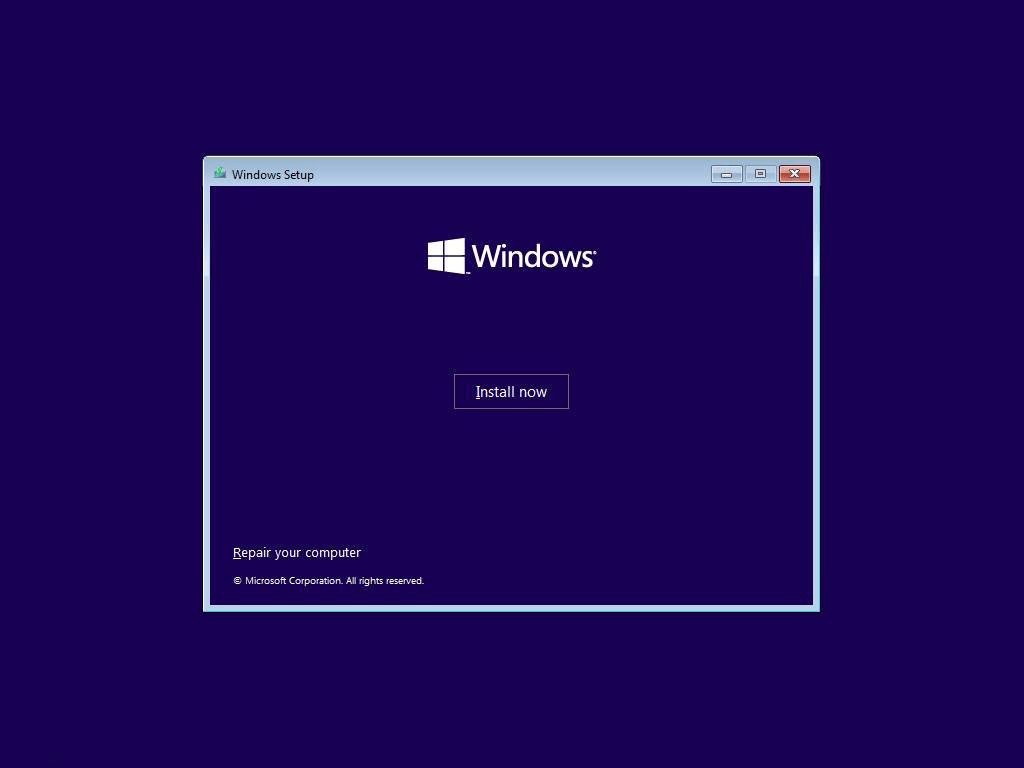
Step 4: Click the "Install now" button.
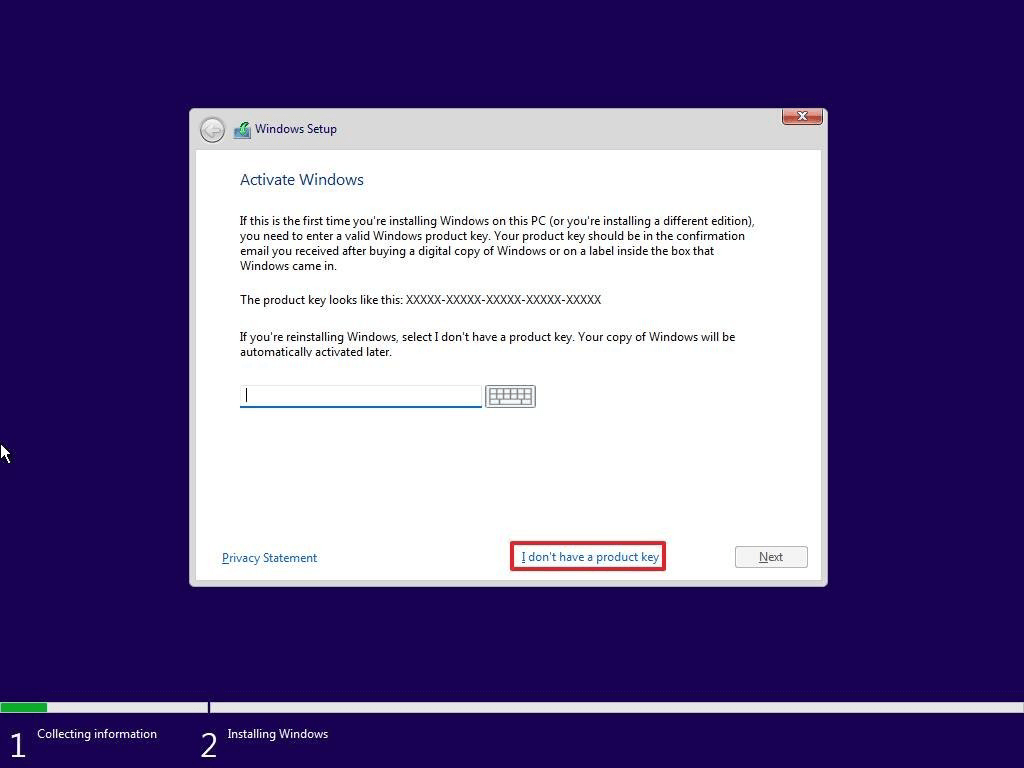
Step 5: Enter your product key if you have one. Otherwise, click "I don't have a product key" to skip this step.
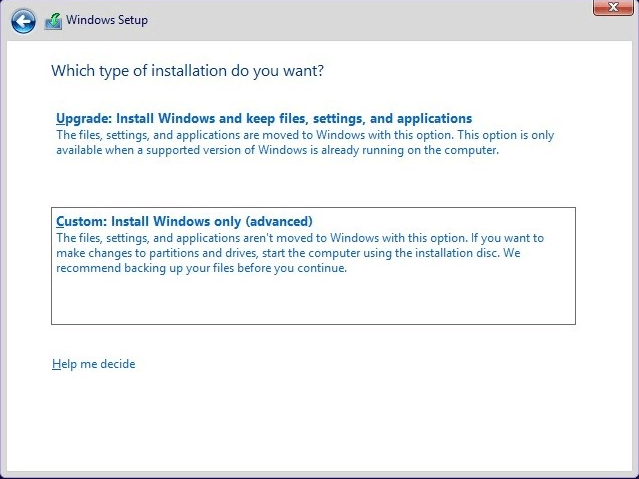
Step 6: In the new window, select "Custom: Install Windows only (advanced)".
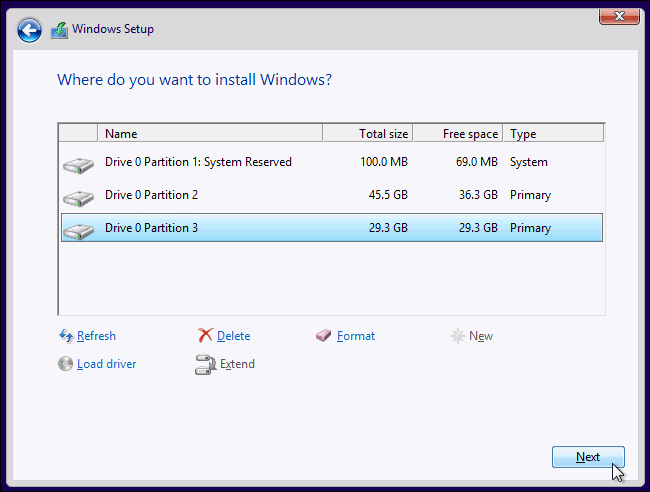
Step 7: Choose the new partition where you want to install Windows 11. Click "New" and then "Next".
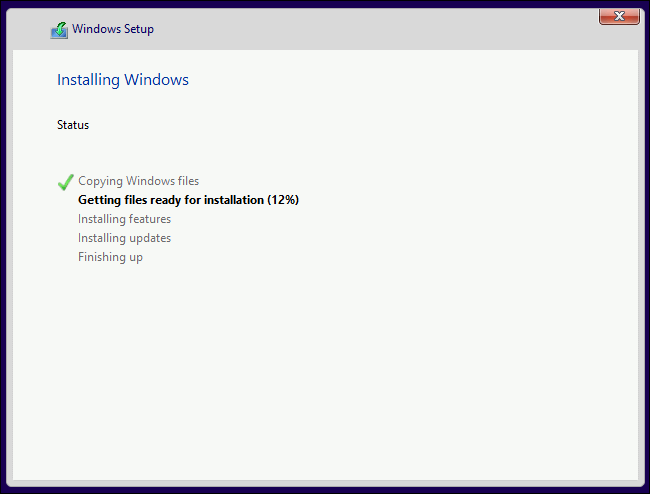
Step 8: Configure any necessary settings and patiently wait for the installation process to complete.
Eventually, your Windows 10 computer will have Windows 11 installed, enabling you to seamlessly switch between the two operating systems whenever you wish.
Stage 4: Setting the Default Operating System
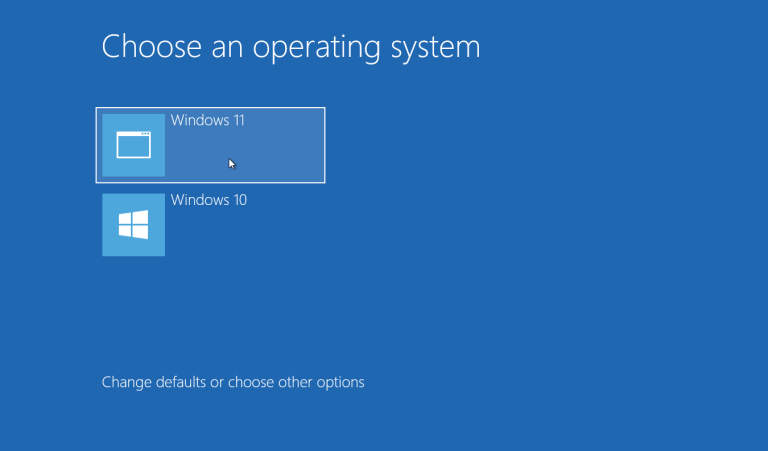
Once you have completed the dual boot setup of Windows 10 and 11, each time you boot your PC, a boot menu will appear, giving you the choice between the two systems. You can select and load into either Windows 10 or Windows 11 based on your current requirements.
If you don't make a choice immediately, your previous Windows 10 will load automatically. However, if you plan to use Windows 11 frequently, you can click "Change Defaults or Choose Other Options" at the bottom of the boot menu and follow the prompts to set it as the default system.
Bonus reading: An alternative to dual boot Windows 11 but easily enjoy two systems
While it is possible to dual boot Windows 11 and 10, there are still concerns, including incompatibility, system instability, and the risk of data loss when running two operating systems simultaneously.
Fortunately, there is an alternative that allows you to enjoy both systems without worrying about the negative impacts or being bothered by complex installation steps.
AOMEI Partition Assistant Professional, a powerful computer management tool for Windows OS provides a convenient feature called "Win to Go Creator" that enables you to create a portable Windows environment on a USB drive or an external hard drive. This means you can carry your complete Windows operating system with you and use it on different computers without the need to install or modify the host system.
1. If you’re using a USB, it must be larger than 13GB and if it has important data, you’d better backup it because all data will be deleted.
2. If you need a new Windows 11, you may need to download Windows 11 ISO file.
Step 1. Insert the USB into your computer and wait for it to be recognized. If it fails, you can refer to the provided solutions for assistance. Then open the installed software and click on "Tools" on the top pane and select "Windows To Go Creator".

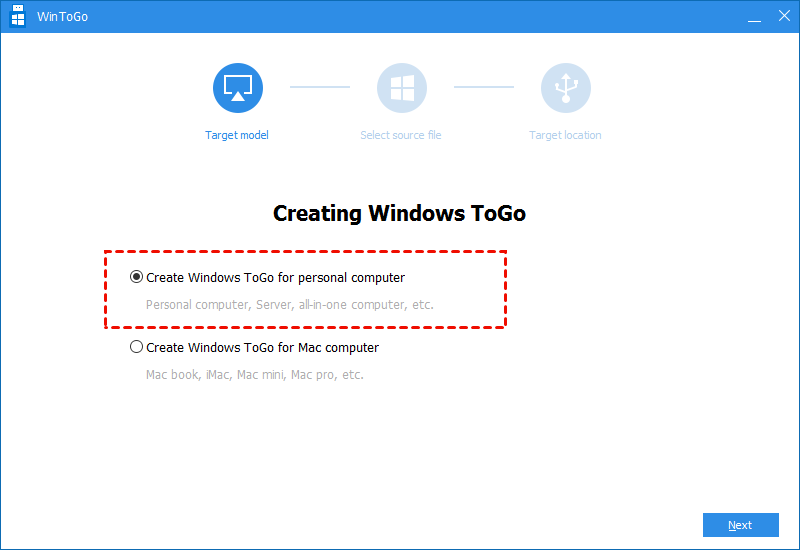
Step 2. Click on "Create Windows To Go for personal computer" and select "Next". For Mac computer users, there is an alternative option called "Create Windows To Go for Mac computer."
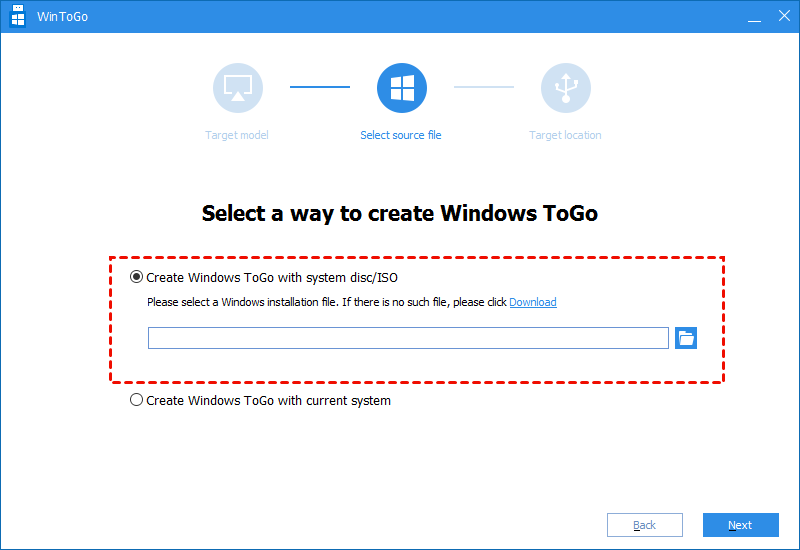
Step 4. Choose "Create Windows To Go with system disc/ISO". The Windows 11 ISO file will be automatically detected, or you can manually select the target file by clicking on the folder icon. Click "Next" to proceed.
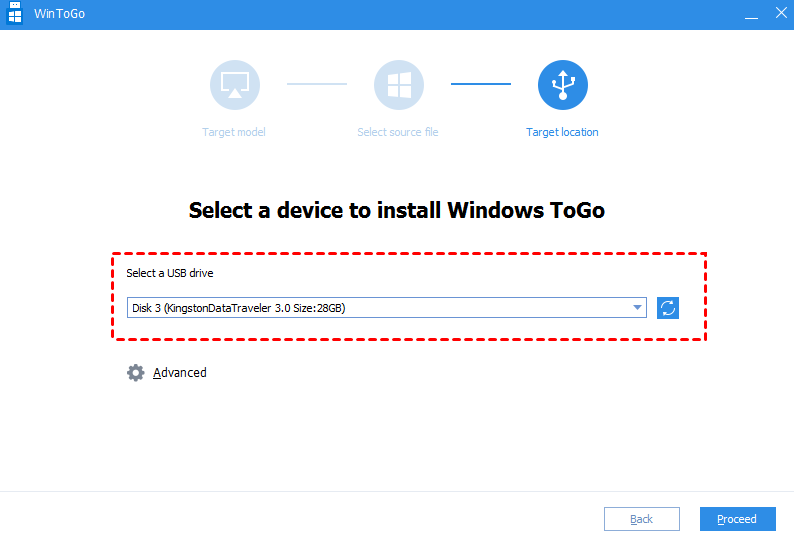
Step 5. Select the USB drive as the target device and click on the "Proceed" button to continue.
Step 6. A warning message will appear, indicating that all data on the USB will be erased. Choose "Yes" to proceed with the process. Afterward, unplug the USB and attempt to boot it on another computer. If you are unsure how to boot from the USB, you can continue following the subsequent steps.
Step 7. Connect the Windows 11 To Go USB drive to your computer. Start the device and press a specific key to access the BIOS/UEFI interface. Each computer brand has a different key for entering the BIOS/UEFI. To find the specific key for your computer, you can visit the official website of the manufacturer and search for the relevant information.
Wrap things up
After reading this detailed guide on setting up dual boot Windows 11 and Windows 10 on the same PC, it becomes apparent that using AOMEI Partition Assistant to create a bootable USB and enjoy both systems can be an ideal choice.
To use this versatile tool, you can also deal with many computer issues on your own. For instance, you can convert system disk between MBR/GPT, migrate OS to SSD to improve computer performance, and move installed programs to another drive to extend drive space. There is also the Server Edition that can be chosen for Windows Server users.

