[Full Guide] Add Windows Boot Manager in BIOS on Dell When Missing
How to add Windows Boot Manager in BIOS Dell if you find it is missing? Here is a stepwise guide for effectively fix Windows Boot Manager issues with explaining the causes.
By Irene / Updated on December 27, 2024
For reasons like reinstalling or updating Windows, dual-boot configurations or BIOS updates, computer users may need to add Windows Boot Manager in BIOS. Today, we will share a step-by-step guide for how to add Windows Boot Manger in BIOS on Dell computers. We hope this guide proves to be beneficial for your needs.
What is Windows Boot Manager in BIOS
The Windows Boot Manager, provided by Microsoft, is an application that sets up the boot environment on a device. It ensures that essential functions are available before the device fully starts up. The Boot Manager identifies the bootable device and loads the operating system into the computer's memory.
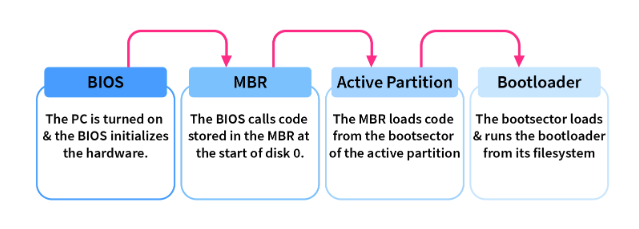
This process is made possible through the BIOS, which is responsible for initializing hardware components and providing boot instructions. The BIOS-based system starts with a power-on self-test to check for any hardware issues and then looks for a bootable device, like a hard drive. Once found, the Boot Manager reads the necessary instructions from the master boot record or boot sector to initiate the Windows operating system. If there is no Windows Boot Manager in BIOS on Dell computer, you may encounter system failures.
Why does the Windows Boot manager missing from Dell computers?
The Windows Boot Manager can go missing on Dell computers for several reasons, often related to issues with the boot process. One common cause is corrupted Boot Configuration Data (BCD), which can result from improper shutdowns, software problems, or malware.
Another reason could be an incorrect boot order in the BIOS/UEFI, where the system tries to boot from a non-bootable device. Sometimes, the problem lies with the hard drive itself—physical damage or bad sectors can make the boot files inaccessible.
Besides, file system corruption, often caused by sudden power loss or software errors, can interfere with the boot process. Changes made during Windows updates or software installations might also accidentally alter or delete critical boot files.
In some cases, adjustments to BIOS/UEFI settings, such as enabling Secure Boot or changing between Legacy and UEFI modes, can lead to this issue. Lastly, accidental deletion or overwriting of essential boot files can prevent the system from finding the Boot Manager. To fix these issues, you can download AOMEI Partition Assistant.
The Best Windows Disk Partition Manager and PC Optimizer
How to add Windows Boot manager in BIOS on Dell computers
If there is no Windows Boot Manager in BIOS on Dell computers, you can follow this part to add Dell BIOS Windows Boot Manager.
- Before you do, please make sure:
- The Dell computer is running Windows OS
- Access to the computer's BIOS or UEFI settings (usually accessed by pressing F2, F12, or DEL during boot)
- You may be asked for an administrator password or BIOS password. If you forget them, you can click the title to reset it.
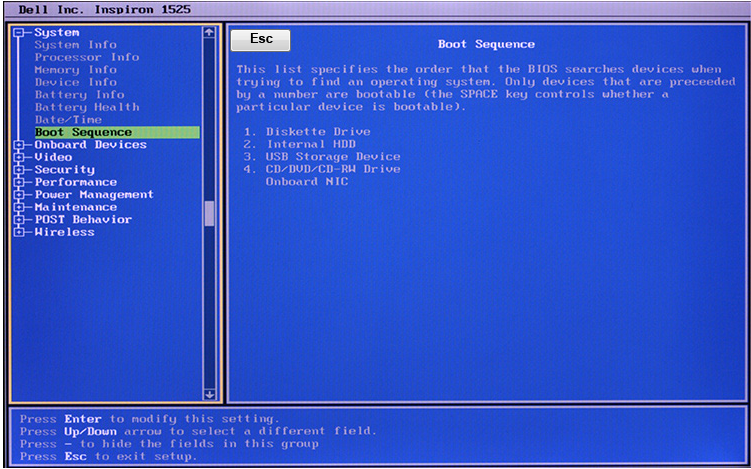
Part 1. Entering BIOS Settings
Step 1. Power on or restart your Dell computer. During the boot process, look for on-screen instructions on which key to press to access the BIOS/UEFI settings (common keys include F2, F12, or DEL).
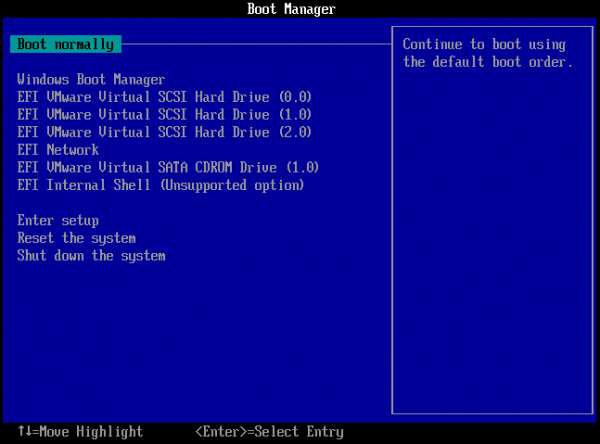
Step 2. Finding the Boot Sequence Option. Once you're inside the BIOS/UEFI settings, locate the Boot or Boot Sequence option. This option determines the order in which your computer looks for bootable devices when starting up.
Part 2. Adding Windows Boot Manager Entry
Step 1. Navigate to the Boot Sequence option. Then look for an option related to adding or editing Boot Manager entries. This may vary depending on your Dell computer model.
Step 2. Select the option to add a new Boot Manager entry.
Step 3. Enter a descriptive name for the new entry (e.g., "Windows Boot Manager").
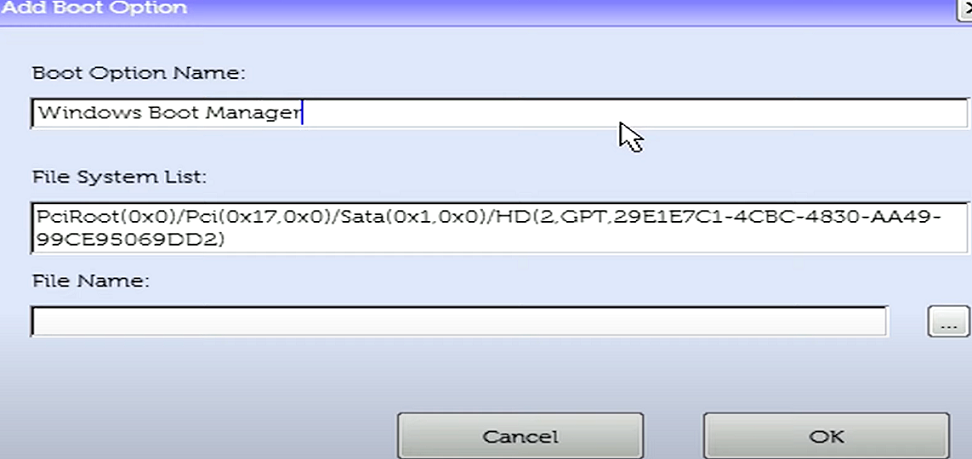
Step 4. Specify the path to the Boot Manager file. For Windows Boot Manager, it is usually located on the primary system partition.
Part 3. Saving and Exiting BIOS
After adding the Boot Manager entry, save your changes and exit the BIOS/UEFI settings. Your Dell computer will restart, and you should see the Windows Boot Manager option during the boot process.
Further reading: Use a powerful Boot Manager to easily manage boot device
Booting into BIOS/UEFI for boot options can be confusing and time-consuming due to varying key combinations across computer brands. Furthermore, manually modifying the boot sequence presents a challenge for individuals with limited computer proficiency.
However, if you try AOMEI Partition Assistant with its "UEFI BIOS Boot Options Manager" feature, things will get much easier. No matter what computer brands you use such as Dell, HP, Lenovo, ASUS, etc., you can run this tool to manage your boot device easily.
With that, you can modify boot order and back up while your PC is running well. If you encounter the sticky situation like "BOOTMGR missing", it is convenient to swiftly restore boot settings with using a USB to avoid downtime and ensure system recovery. Besides, you can also easily adjust, delete, restore, and refresh EFI/UEFI BIOS boot options without manual BIOS entry or complex changes.
The Best Windows Disk Partition Manager and PC Optimizer
You can follow these steps to learn how to add Windows Boot Manager to Dell BIOS.
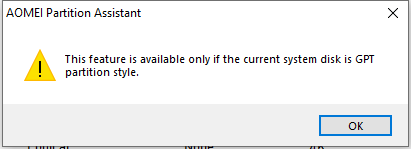
Step 1. Install AOMEI Partition Assistant, click “Tools” in the top menu, and choose “UEFI BIOS Boot Options Manager” function.

If your system drive is an MBR one, after you click the tool you will get a message that the feature is available only if the current system disk is GPT partition type.
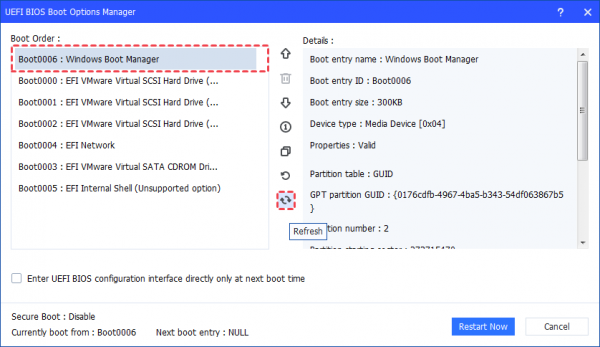
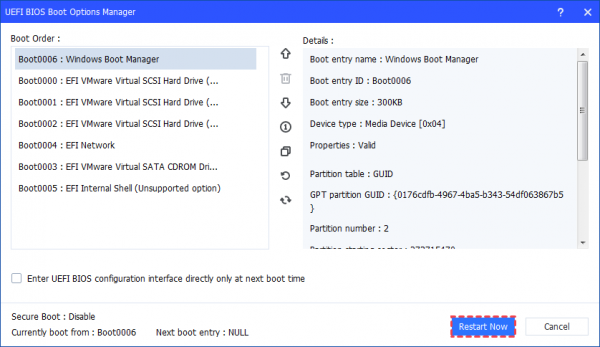
On a GPT drive, the UEFI Boot Options Manager will pop up. In this interface, all UEFI boot orders on your computer will be displayed and you can manage them.
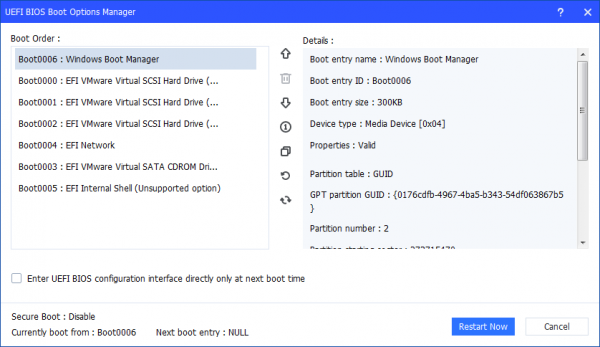
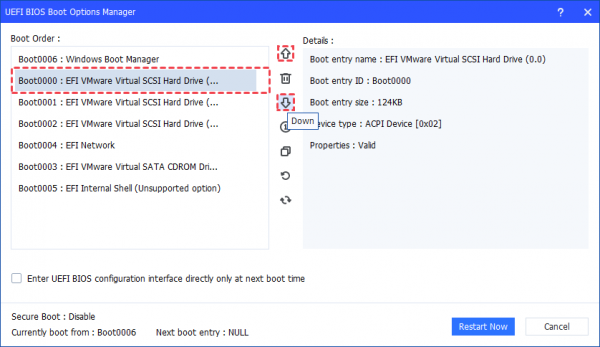
1. How to change boot options
Click a boot option and click the button up and down to change the boot sequence of your computers.
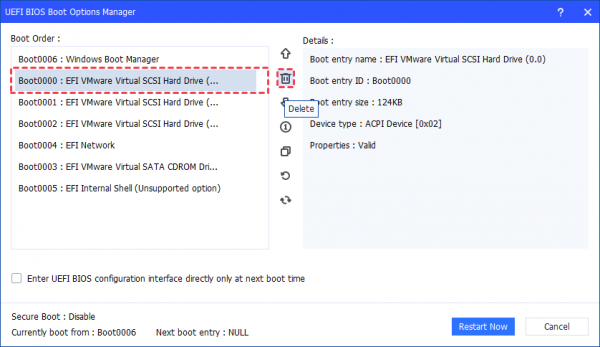
2. How to delete boot options
Click a boot option that is not available or unnecessary to delete the boot option. Please be cautious before you delete a boot option. For system boot and security, it will be unable to delete the current boot option.
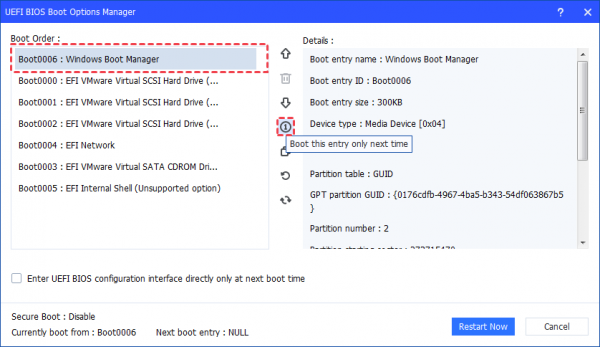
3. How to enable one-time boot entry
Click a boot option and click the button to enable a one-time boot entery. Once you click the option, the computer will boot from this entry only the next time system startup. After the PC boots from the entry once, the PC will boot from the defaulted first entry.
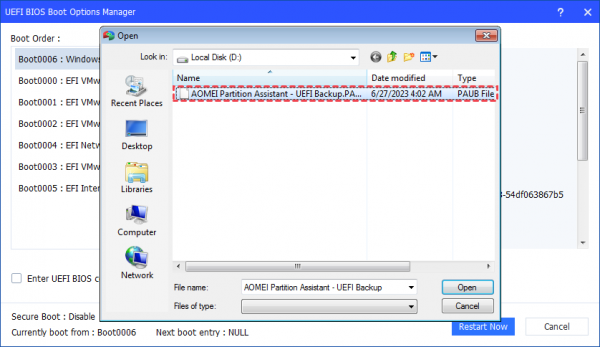
4. How to backup boot options
Click the boot option you want to backup to make a backup so that you can recover if necessary.
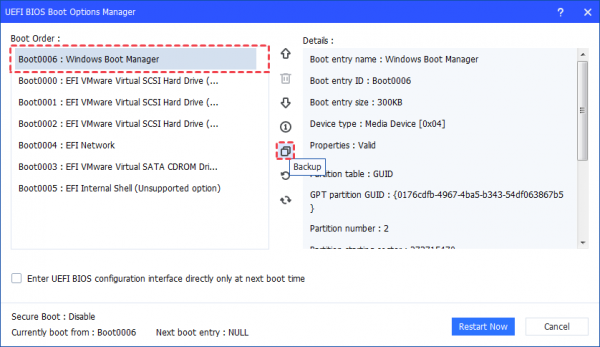
Select a location on your PC and click "Save" to save the backup.
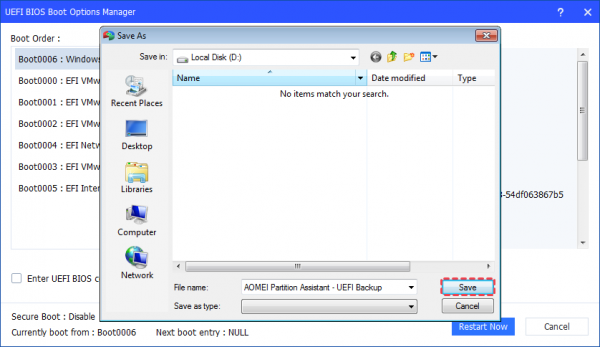
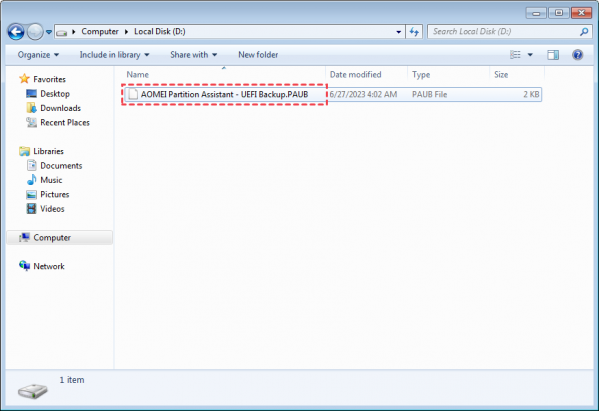
Then the backup will create a .PAUB file.
5. How to Restore Boot Options
Click to restore the boot option you just backed up if the partition or boot files get lost or corrupted.
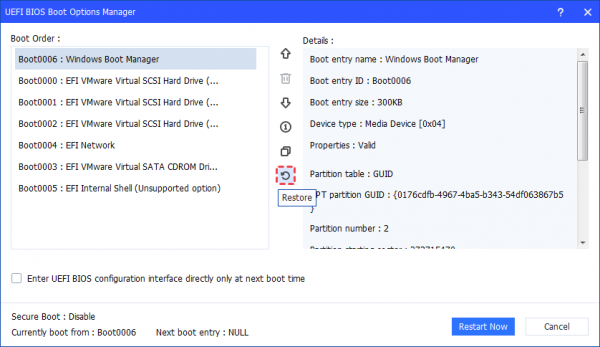
Locate the .PAUB FILE you backed up and select it to restore.
If you have a backup of your boot entries with Partition Assistant and your system cannot boot, you can also create a bootable media with Partition Assistant and restore the boot entries under WinPE.
6. How to refresh boot options
Click the button to refresh the boot options. The "Refresh" button does not mean reset. If you have modified the boot options, the button does not help to reset the boot options.
7. How to boot into UEFI BIOS Boot Options one-time
Please just click the option "Enter UEFI BIOS configuration interface directly only at next boot time".

If you tick this option, the computer will directly boot into the UEFI BIOS configuration interface at the next boot time. After the option is executed once, your computer will still boot from the defaulted first entry.
There is no need to press any hotkey during the next system boot, for example, DEL or F12. In this way, the UEFI BIOS Boot Manager will be launched so that you can easily change boot sequence or configure other BIOS settings.
After you manage the boot options, you can click the "Restart Now" button to restart your computer immediately if needed.
Verdict
After getting to know how to add Windows Boot Manager in BIOS Dell, it can be helpful for fixing no Windows Boot Manager in BIOS on Dell computers and dual boot configuration requirements.
In further days, AOMEI Partition Assistant can help you easily manage your boot device. In addition, you can use it to solve many other computer problems as well. For example, you can extend drive space, clean your computer, migrate OS to SSD, clone disks and so on. By the way, Windows Server users can turn to the Server Edition to enjoy this powerful tool.

