[Full Guide] How to Format Old SSD After Cloning?
This is a comprehensive guide about how to format old SSD after cloning. For users who want to thoroughly delete the data, it will also introduce how to wipe old SSD after cloning.
By Irene / Updated on February 19, 2025
For several reasons, people often choose to format an old SSD after cloning it to a new one. First and foremost, formatting allows the old drive to be repurposed for various uses, such as additional storage or backups, without any leftover data or remnants of the operating system. Furthermore, it ensures the SSD is compatible with any new system or file format it may be used with.
Over time, SSDs can accumulate fragmented files or unnecessary data, which can degrade their performance. A clean format can help restore the drive’s speed and efficiency. Besides, formatting the drive may help identify and isolate potential errors, ensuring smooth operation for its next use, especially when intended for personal use. If you want to know how to format old SSD after cloning, this guide will share the specific steps.
How to format old SSD after cloning?
If you want to successfully format the old SSD without encounter error that may lead to blue screen or irrecoverable data loss like SSD will not format: Windows was unable to complete the format, it is better to choose a professional tool.
AOMEI Partition Assistant is a versatile tool that allows you to format a wide range of storage devices, including SSDs, HDDs, USB flash drives, pen drives, and SD cards, to various file systems such as NTFS, exFAT, FAT32, Ext2, Ext3, or Ext4. This functionality is especially helpful when the disk is displayed as RAW in Disk Management, rendering it inaccessible or unreadable. Additionally, AOMEI Partition Assistant overcomes the 32GB FAT32 formatting limitation imposed by Windows, enabling you to format drives larger than 32GB to FAT32.
The Best Windows Disk Partition Manager and PC Optimizer
Below are the steps about how toformatoldSSD after cloning in Windows 11, 10, 8, or 7 using AOMEI Partition Assistant:
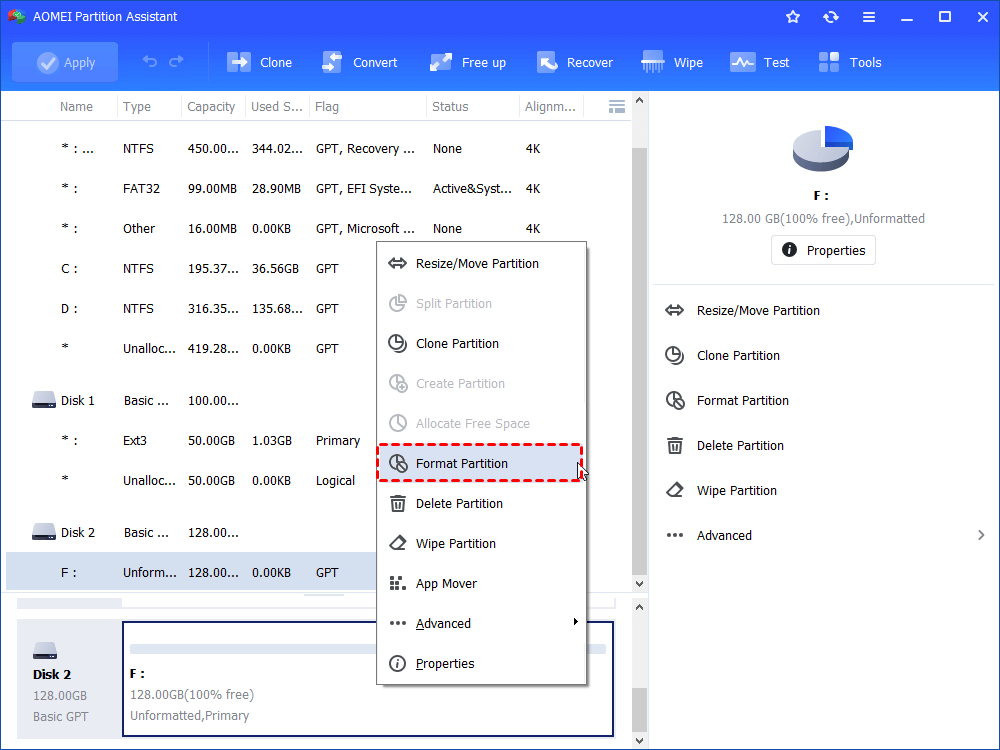
Step 1. Download this format tool, install, and run it. In the main interface, right-click RAW SSD (it will present as Unformatted in AOMEI) and choose “Format Partition”.
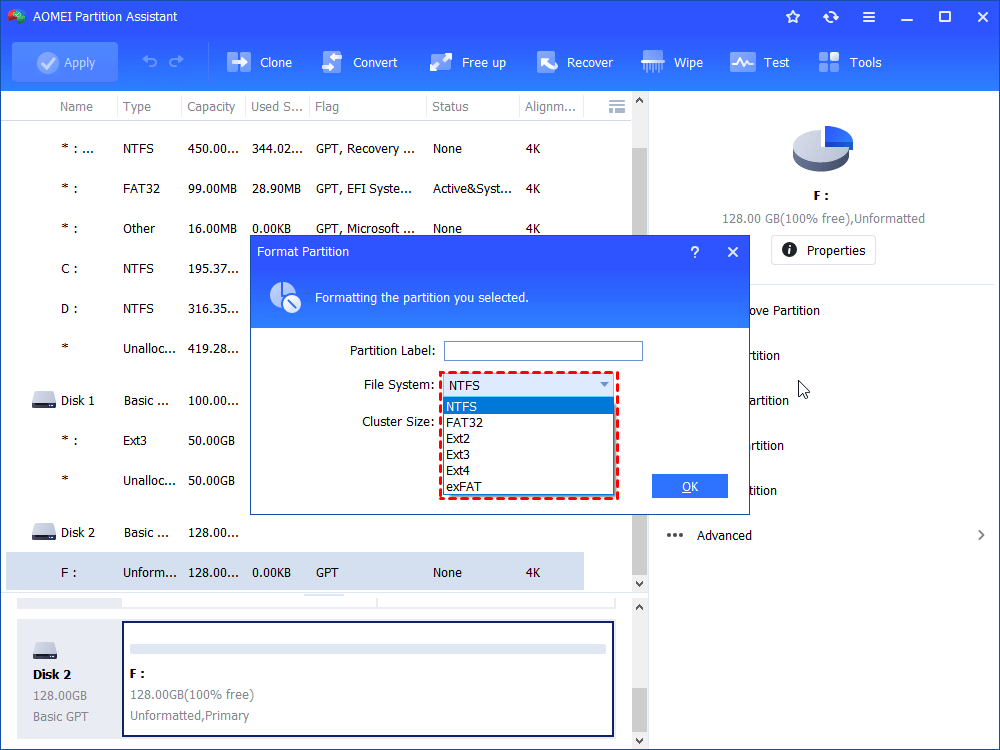
Step 2. Here are five file systems for you to select. Pick one based on your demand. Then, click“OK”.
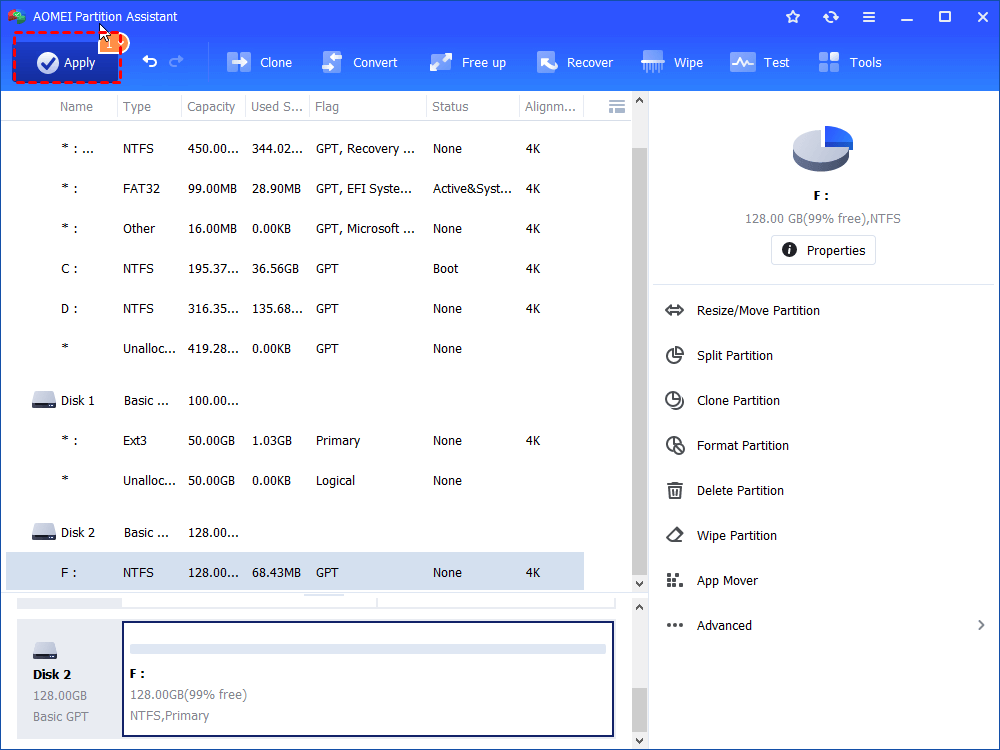
Step 3. Return to the main interface. Click “Apply” and “Proceed” to commit operation.
However, if you want to ensure that any sensitive or personal data is completely erased, reducing the risk of unauthorized access or data theft, especially if the drive is repurposed, sold, or given away, it does not thoroughly erase all information on the old SSD.
While a quick format deletes the file system metadata, the actual data remains intact until it is overwritten by new information. Even a full format may not fully overwrite all data, especially due to the way SSDs manage their storage with wear leveling, which distributes data across different areas of the drive.
As a result, some data could potentially remain in sectors that weren't directly overwritten during the format process. To completely and securely erase all data, it's necessary to use methods designed specifically for SSDs, such as the Secure Erase, which resets the memory cells to their factory state. Unlike traditional data wiping methods that rely on overwriting, Secure Erase is the most reliable and SSD-friendly approach, as it prevents unnecessary wear on the drive and ensures thorough data deletion without reducing the SSD's lifespan.
How to secure erase old SSD after cloning?
AOMEI Partition Assistant is also equipped with a user-friendly and intuitive interface, along with a wide range of disk management features. It allows you to securely erase SSDs or completely wipe all data from HDDs. When it comes to securely erasing an SSD, this tool offers several advantages:
- Simple Interface: Easy to use, making it suitable for beginners.
- Broad Compatibility: Works with SSDs from various brands.
- Data Security: Ensures that personal data or privacy is not compromised.
Additionally, AOMEI Partition Assistant can wipe HDDs, USB drives, and SD cards using methods such as filling sectors with zero, filling sectors with random data, DoD 5220.22-M, and Gutmann. However, please note that the SSD Secure Erase feature must be performed in a Windows 7 environment. If your operating system is not Windows 7, you can remove the SSD and connect it to a computer running Windows 7 to complete the process.
The Best Windows Disk Partition Manager and PC Optimizer
You can follow these steps to learn how to wipe old SSD after cloning without hurting the disk:
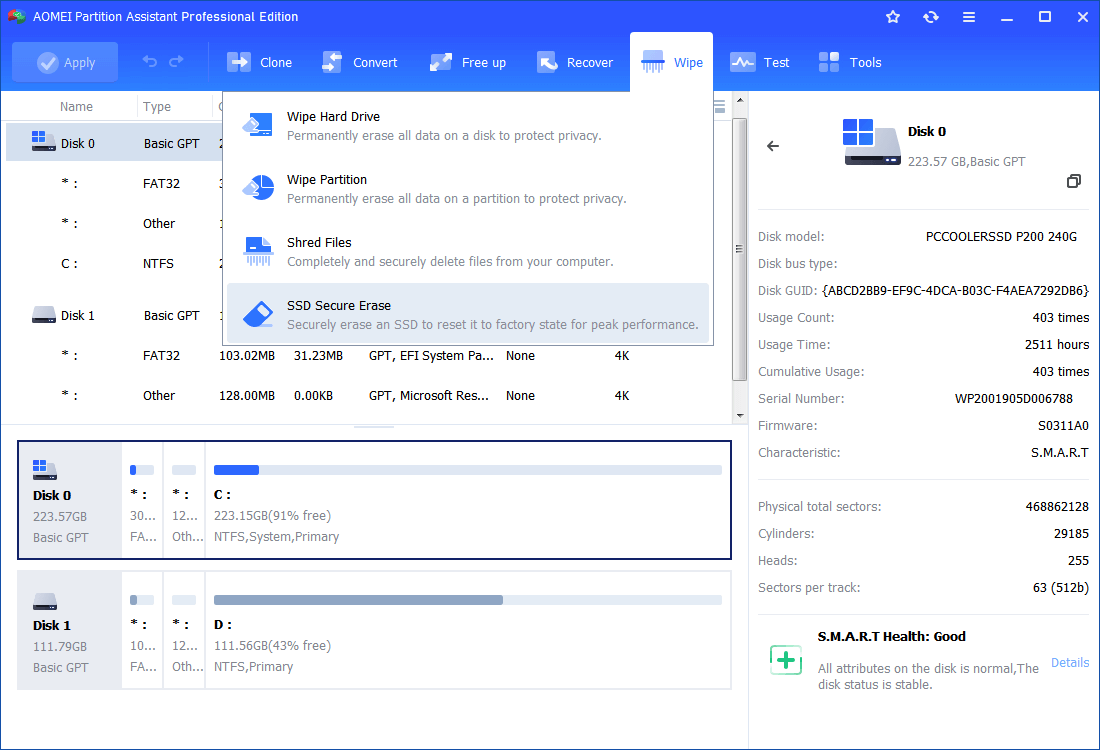
Step 1. On the main interface, click "Wipe" menu and select "SSD Secure Erase".
Step 2. Select the SSD you want to erase from this page.

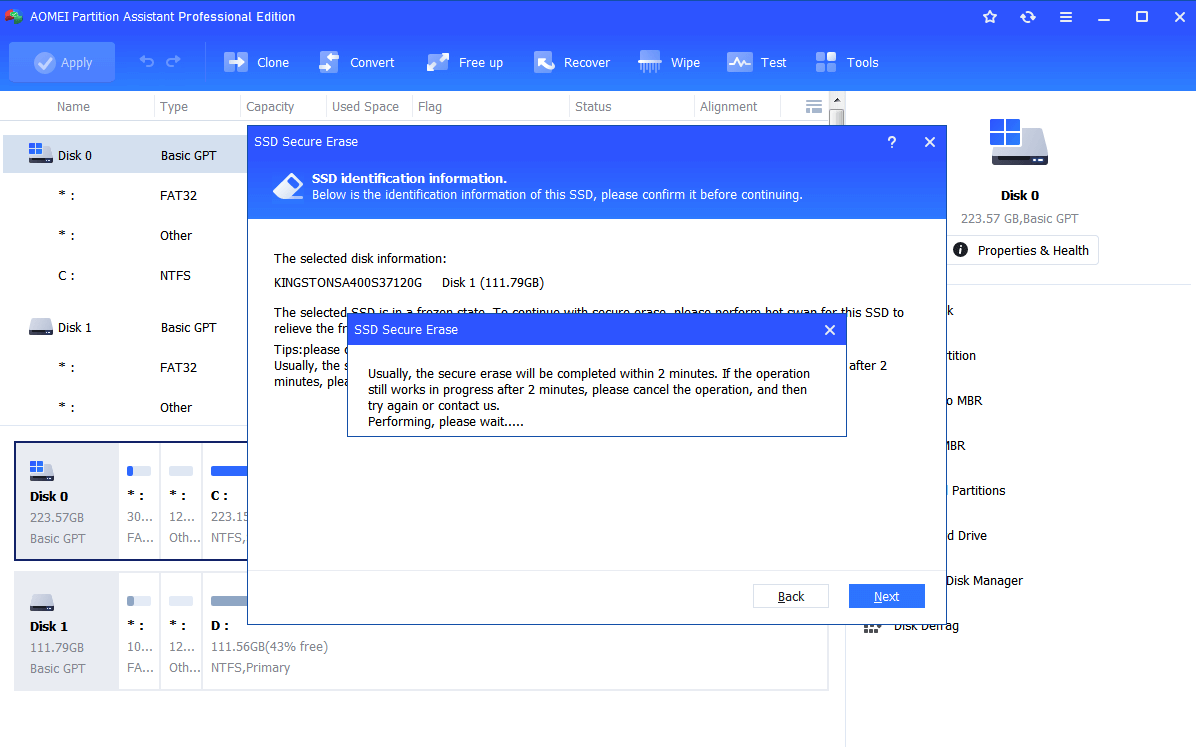
Step 3. Usually, SSD would encounter a frozen state which can be unfrozen by a hot swap.
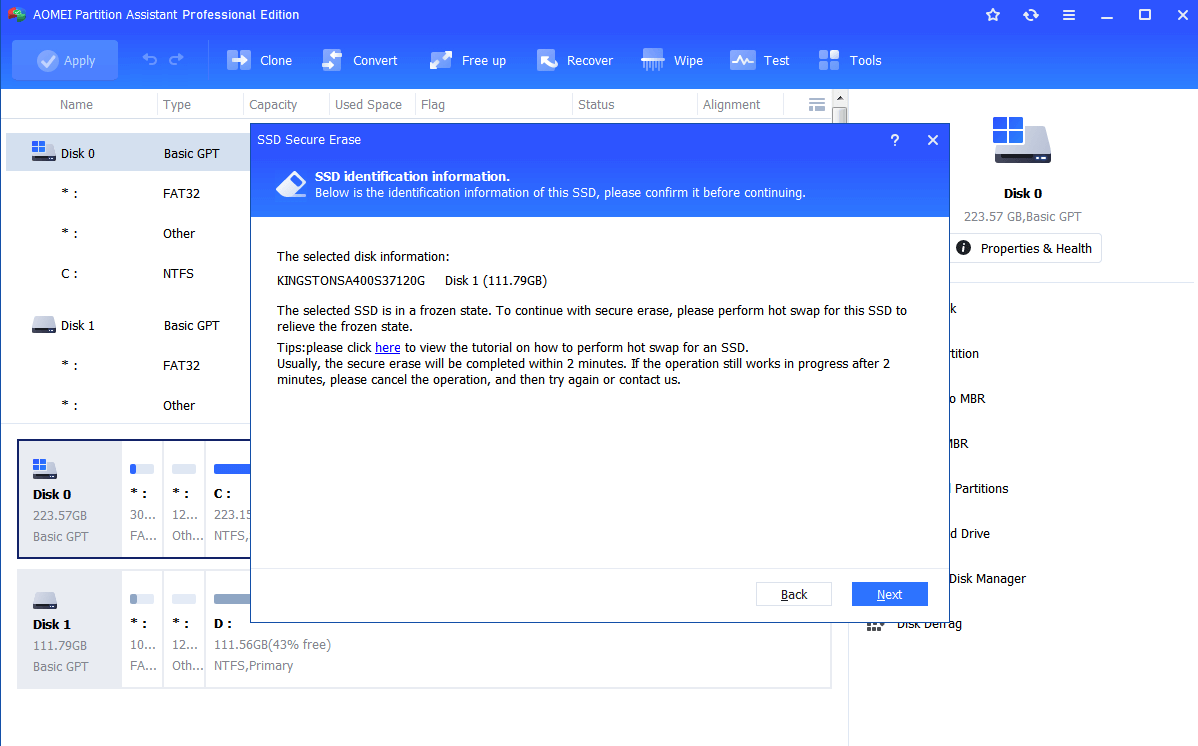
How to perform hot swap:
First, open the PC case and find the SSD to be erased.
Second, unplug the power cable, then disconnect the SATA cable from the SSD.
Finally, wait for a second, connect the SATA cable to the port again. And then plug the power cable back in to complete the hot swap.
Step 4. Click“Next” to secure erase SSD.
Conclusion
This article shares how to format old SSD after cloning. Formatting an old SSD after cloning is an essential step for repurposing the drive, improving performance, and ensuring compatibility with new systems. While a standard format removes the file system metadata, it may not fully erase all data, especially on SSDs.
To completely secure sensitive information, a more thorough method such as SSD Secure Erase should be used. Tools like AOMEI Partition Assistant simplify this process, offering an intuitive interface and secure erasure options to protect your data. Whether you're looking to reuse an old SSD or securely wipe it before disposal, following the proper steps ensures both optimal performance and data security. For Windows Server users, the software offers the Server edition.

