How to Move Premiere Pro to Another Drive Without Reinstalling
You may want to know how to move Premiere Pro to another drive without reinstalling when the C drive is almost full, you can refer to this post to find a effective way.
By AOMEI / Updated on March 5, 2026
Scenario
How to move Premiere Pro to another drive
Hi, I want to move my Premiere Pro to run on another drive in my Windows system, is this possible? If so, can anyone help? When I re-download it, there is no option to choose where it is saved. And when I try to copy the program from the C: drive to another drive, it tells me that the whole program cannot be moved.”
- Question from community.adobe.com
Why move Premiere Pro to another drive?

Adobe Premiere Pro is a video editing software developed by Adobe. It provides a complete set of processes for capturing, editing, color grading, beautifying audio, adding subtitles, outputting, and DVD burning, and efficiently integrates with other Adobe software. It is an essential video editing tool for video editing enthusiasts and professionals.
Since the default download path on Windows 10 is C drive, if you're running out of space on your primary hard drive, or if you want to keep your Adobe Premiere Pro on a separate drive from your other data, you can move installed Adobe programs to another drive to free up space.
However, moving programs cannot copy and paste like moving text files. Premiere Pro may not run successfully without taking reasonable measures. Therefore, this article aims to tell you how to move Premiere Pro to another drive without reinstalling.
Move Adobe Premiere Pro to another drive by Adobe Creative Cloud
As we all know, Adobe Creative Cloud is a collection of cloud software and services developed and distributed for photography, graphic design, video editing, web content creation, and other creative applications. Adobe users can uninstall and install Adobe programs in Adobe Creative Cloud. To change the installation location of Adobe Premiere Pro, you can follow the steps below:
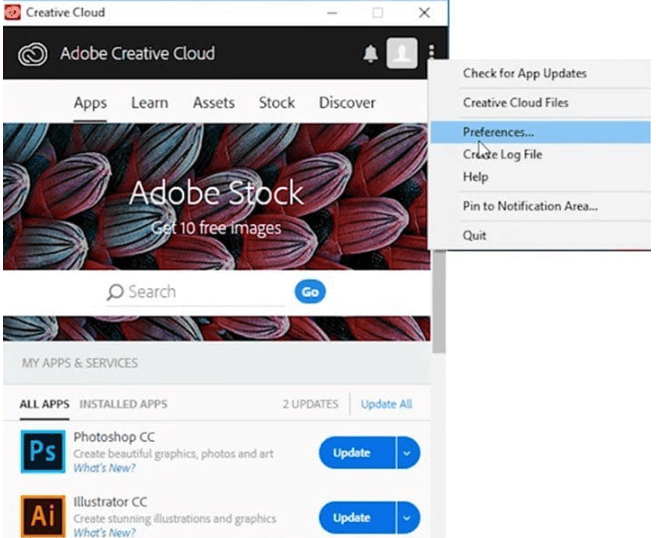
Step 1. Open Creative Cloud app. After that, click the button in the upper right corner to select Preferences.
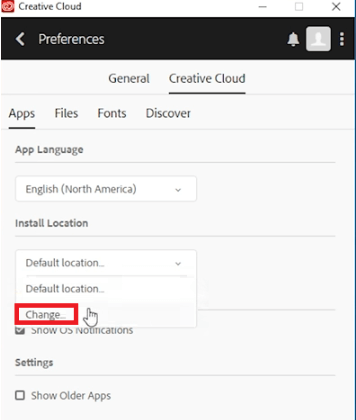
Step 2. Then switch to the "Creative Cloud" tab and click "Change..." to select another drive as the new location for Premiere Pro.
Step 3. “Uninstall” Premiere Pro, and then reinstall it. After a few moments, it will be installed in our new location instead of the previous location.
How to move Adobe Premiere Pro to another drive without reinstalling (recommend)
In order to move Premiere Pro without reinstalling, you can try AOMEI Partition Assistant Professional. This is an all-in-one transfer utility, its App Mover feature supports moving installed programs/folders on PC to another drive without reinstalling. And the program can run normally on the new path. If you want to know how to change Premiere Pro location, please download the Demo version to have a try!
Notes:
✎ If the selected partition does not have enough space to store the Premiere Pro, then you need to free up space or extend the partition and try again.
✎ To move Premiere Pro on Windows Server, please switch to Server Edition which is designed for Windows Server 2022, 2019, 2016, 2012 (R2), 2008 (R2), 2003 users.
▶ Method 1. Move Premiere Pro to another drive
Follow the steps below to learn how to move Premiere Pro to another drive:
Step 1. Install and launch PA Professional, then select the “App Mover” under "Free up".

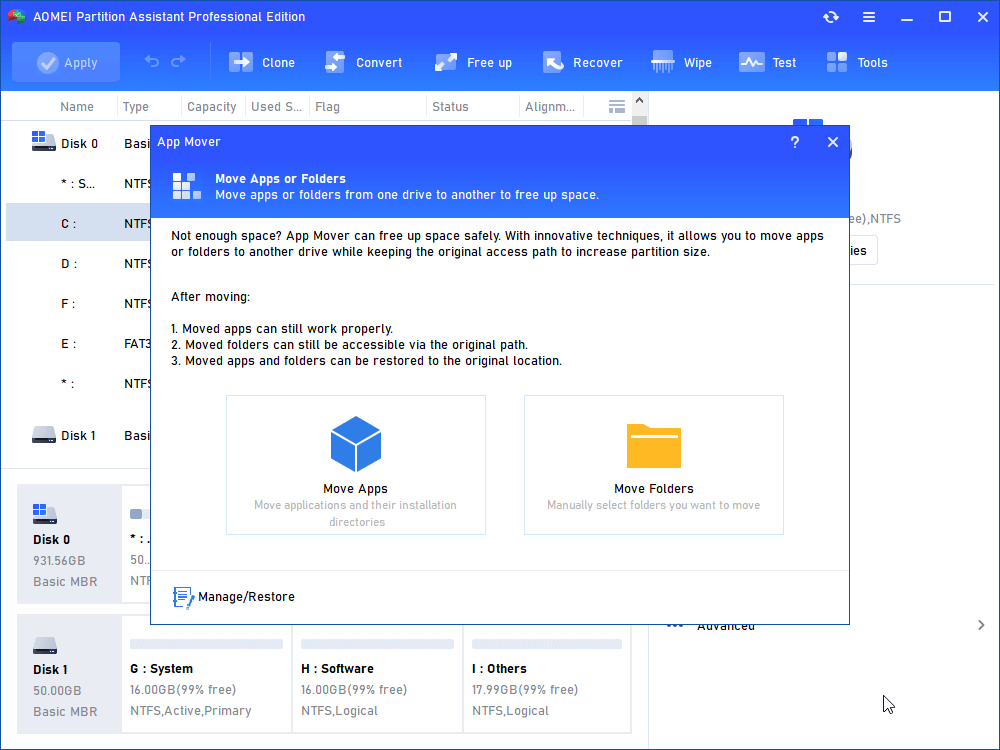
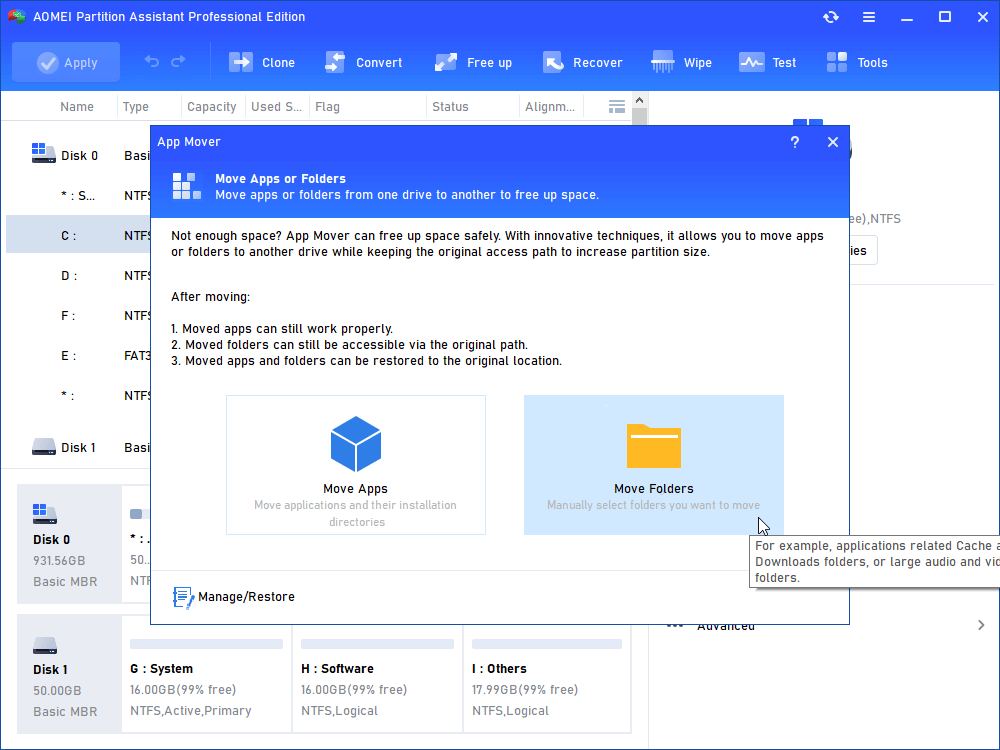
Step 2. In the new window, click “App Mover”.
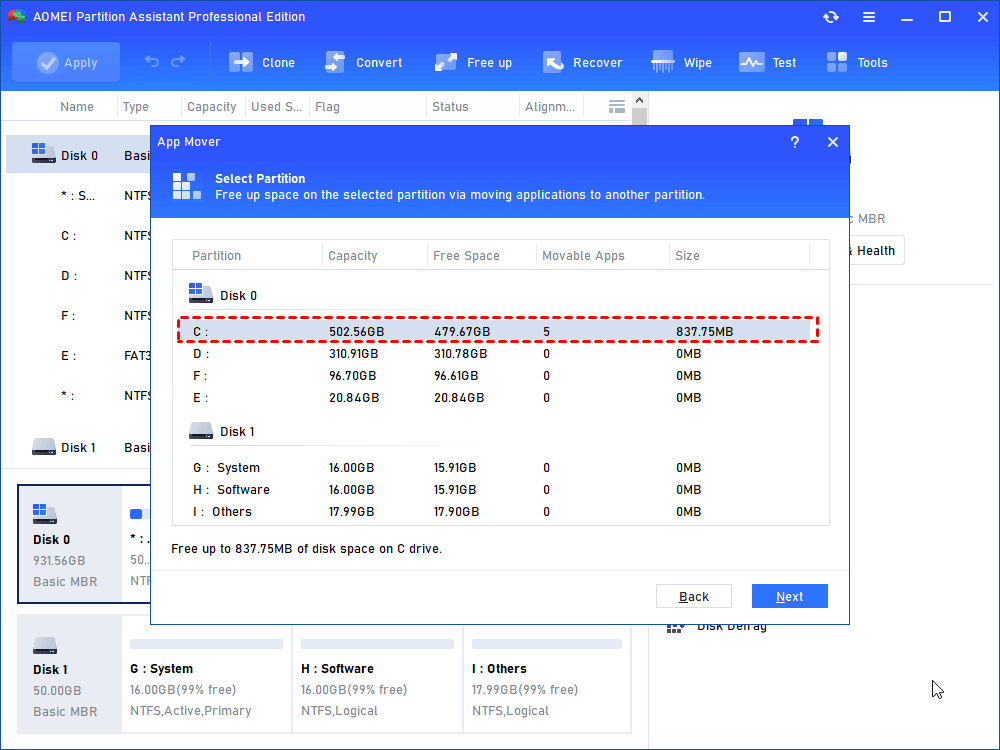
Step 3. Choose one partition that Premiere Pro located and click "Next".
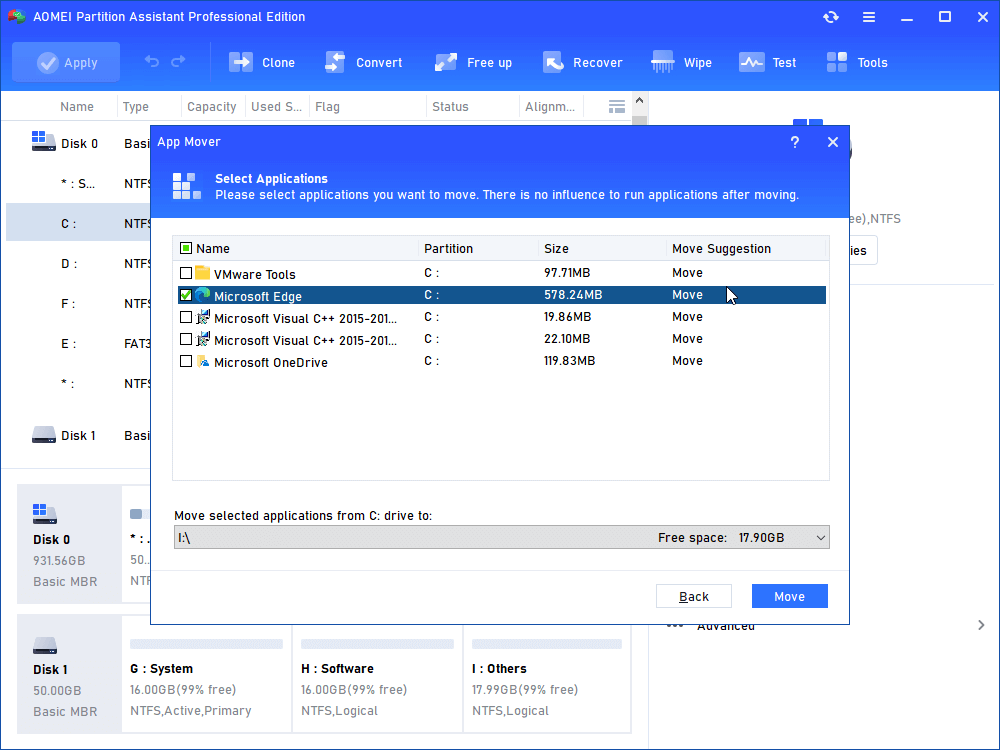
Step 4. All movable apps in the selected partition will be listed, choose Premiere Pro (take Microsoft Office as an example) and select the target location, then click "Move".
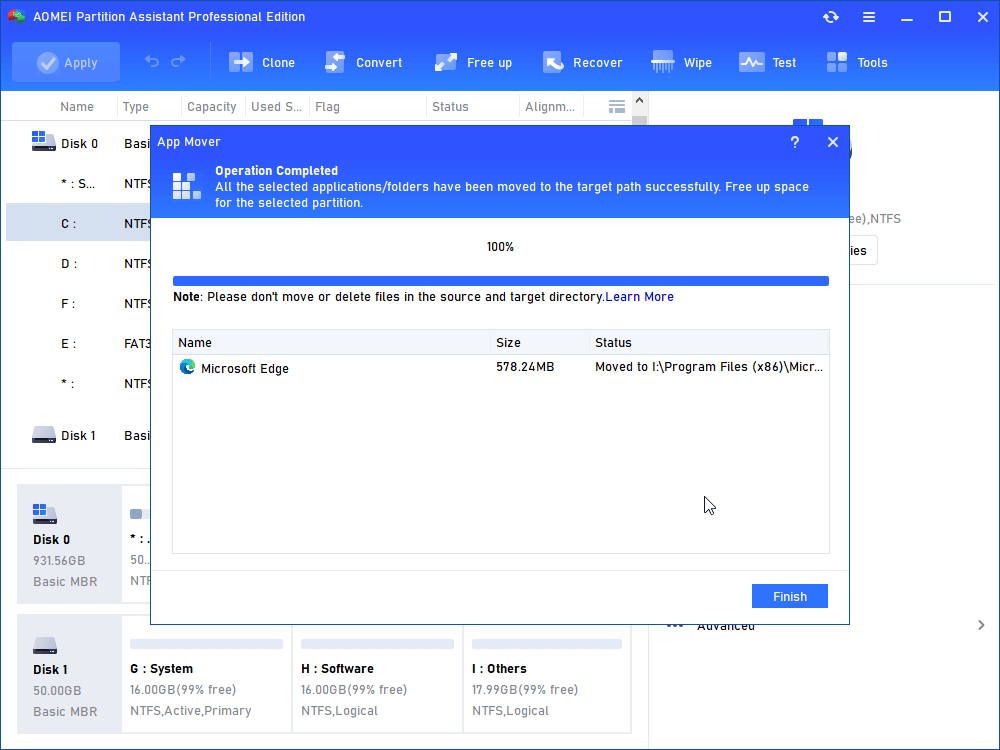
Step 5. Wait a moment, Premiere Pro will be moved to target drive.
▶ Method 2. How to move Premiere Pro cache to another drive
Cache files in Premiere Pro are temporary files that can be recreated at any time and it help keep Premiere Pro running smoothly and efficiently. But cache files will take up a lot of drive space, so some users who install Premiere Pro on SSD want to move Premiere's cache to another drive to free up space on SSD.
Step 1. Navigate to this screen as above, and click "Move Folders".
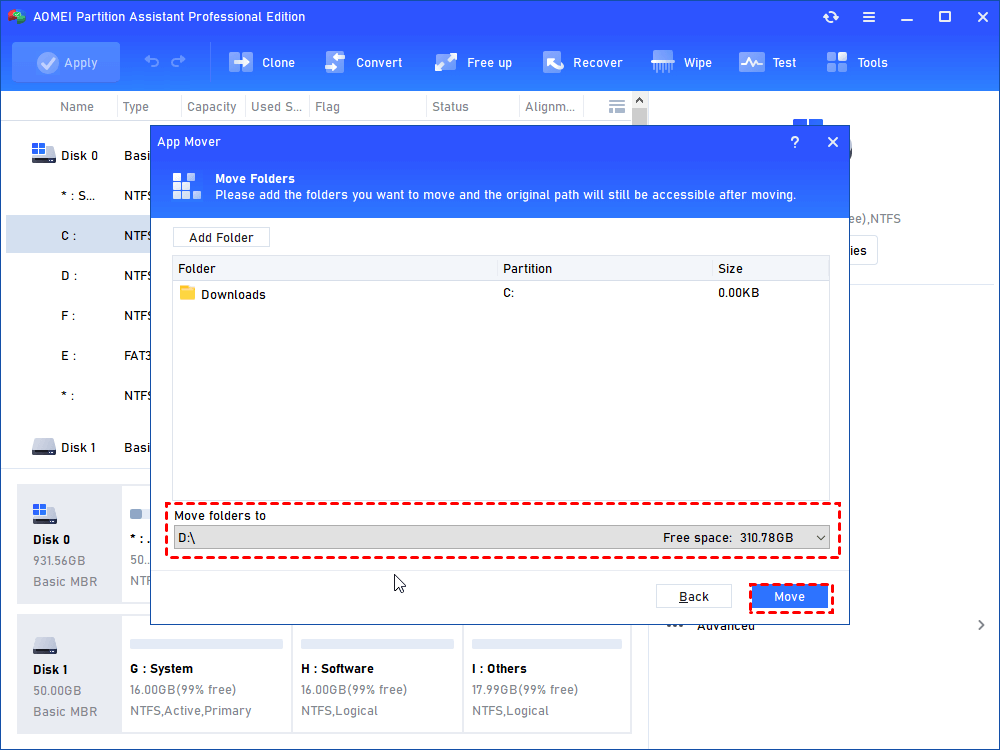
Step 2. Find the cache folder of Premiere Pro(Typically, cache files are stored in Windows: \Users\username\AppData\Roaming\adobe\common). Then, select a new path, and click "Move".
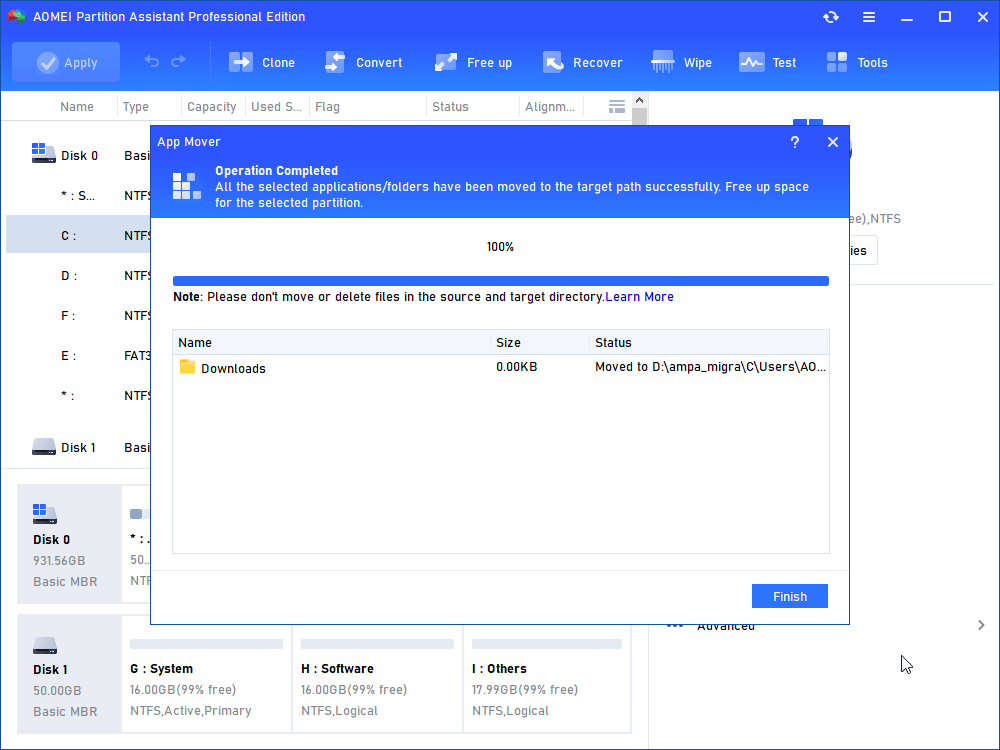
Step 3. Wait for a while and click "Finish" to complete the action.
Tip: If you want to transfer Premiere Pro Project to another computer, you can use the Project Archiver feature (under the File menu) to copy your project and its media files to an external hard drive. Then, plug in your hard drive, launch Premiere Elements and link to your project files.
Conclusion
From what has been discussed above, I believe you already know how to move Premiere Pro to another drive. With the help of AOMEI Partition Assistant Professional, you can do it easily and safely. There are more advanced features you can try, such as, migrating Windows to SSD without losing everything, cloning disk, converting system drive from MBR to GPT, deleting large files by type to save more space on the PC, and more.

