How to Stop Programs Installing on C Drive
In this post, we’ll show you how to stop programs installing on C drive by changing storage settings and how to move installed programs from C drive to other drives.
By Lucas / Updated on December 2, 2024
How do I stop a program from installing on my C drive?
“How to actually see all programs installed on C drive? Is it possible to prevent any software from installing, in whole or in part, on the C drive using a command or a program?” These problems often arise when users find their C drive is occupied by lots of programs and files that were downloaded from the browser.
Normally, the C drive is the boot drive carried by your OS which will store huge amounts of information when your machine is running. So, C drive needs to have sufficient capacity to save all data to ensure your computer works well. If it’s full of installed applications or big files, your PC will soon stick into a bad performance, lagging response, and even blue screen error caused by unknown malware probably bound to other programs.
However, C drive is the default storage location in Windows. If you want to stop programs to install automatically on the C drive, you’ll have to change some default settings. Lots of users don’t know where to find the settings and how to stop programs installing on C drive by changing those settings.
Don’t worry, in the next part, we’ll show you the details.
How to stop programs installing on C drive by changing default settings
Many users don't know how to change default program install location in Windows 10. In fact, you're allowed to use File Explorer to adjust the storage path or Registry Editor in Windows to change default program install location.
▌Way 1. Change download settings in File Explorer
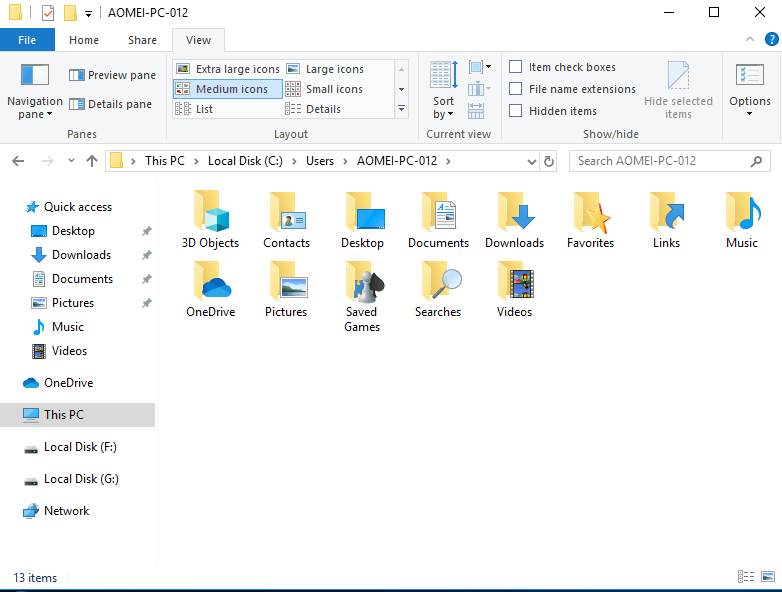
Step 1. Click on “This PC” twice on your desktop to enter Windows Explorer.
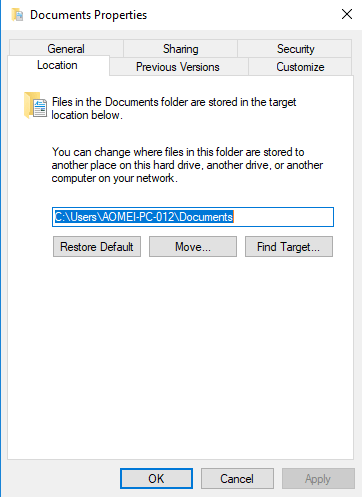
Step 2. Right-click on the “Downloads” folder, and select “Properties”.
Step 3. Click on the “Location” tab.
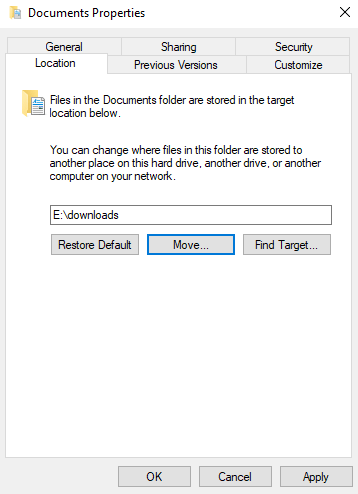
Step 4. Click “Move” to change the default download location to another drive like D drive, and click “Apply” to proceed.
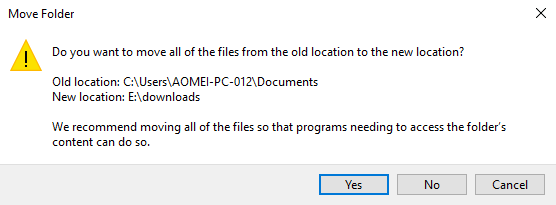
Step 5. Then, you will see a warning “Do you want to move all the files from the old location to the new location”, please click “Yes”.
▌Way 2. Change default storage location in Registry Editor
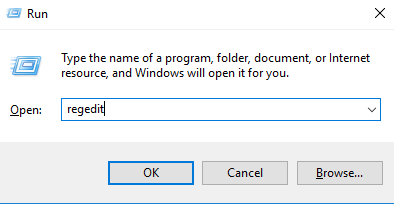
Step 1. Press “Windows + R” to call out the Run box.
Step 2. Type “regedit.exe” and press “ENTER” to open Registry Editor.
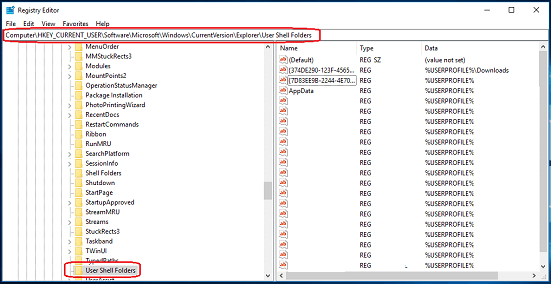
Step 3. Follow the path: HKEY_CURRENT_USER\Software\Microsoft\Windows\CurrentVersion\Explorer\User Shell Folders.
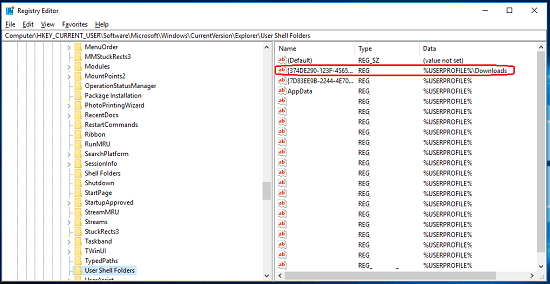
4. Find the data or string named "%USERPROFILE%\Downloads" and click it twice.
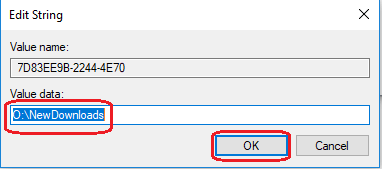
Step 5. Under “Value data”, change the default download location or path, and click on “OK”.
You can choose an easier one for you to change the default save location from the above methods. But for the installed programs, you’ll have to change your tactic.
How to move installed programs to another drive?
But, after stopping programs installed on C drive, what should you do to the installed programs? To move programs that had been installed on your C drive or the programs installed on the wrong drive, the situation will be more different. We all know moving a program can’t use “Copy” & “Paste”, it won’t boot after you changed the location. Thus, to ensure the moving will work and the programs can also boot as before, we highly recommend you AOMEI Partition Assistant Professional.
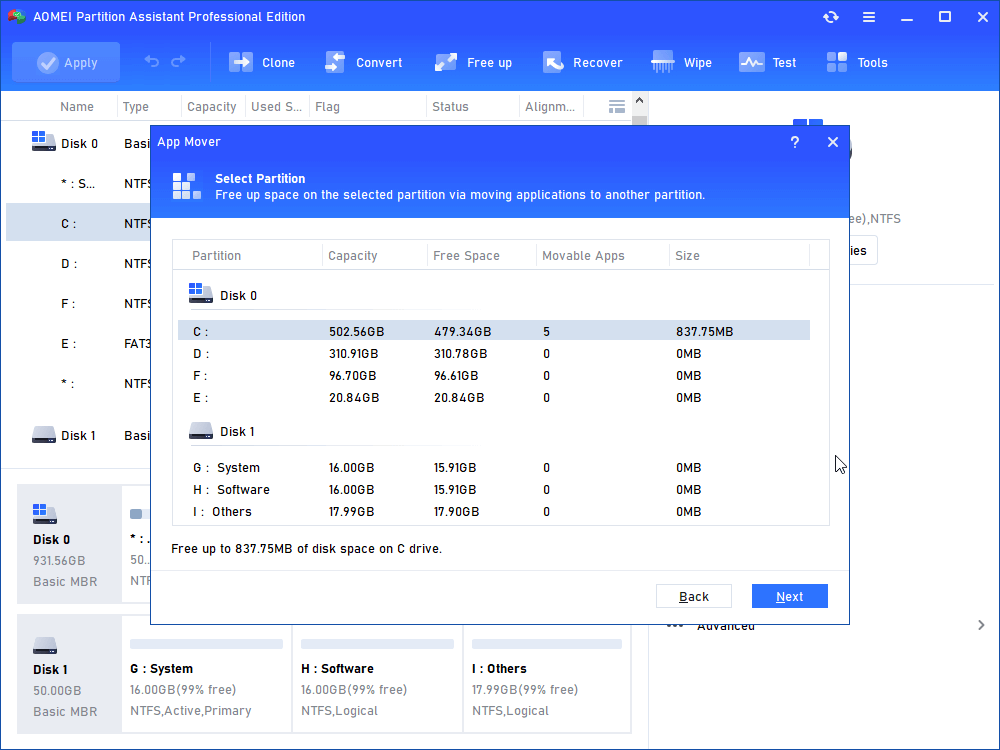
Its “App Mover” function allows users to transfer multiple pieces of software at one time. You can actually see all installed programs on each partition. It can detect all related data files of the programs and move them together to make sure the programs can boot successfully after the moving. And you can move programs between drives with different file systems. Within easy steps, you can finish the moving or restoring operation.
Step 1. After the download is complete, open AOMEI Partition Assistant Pro right-click the drive you need to move the applications and choose "APP Mover".

Step 2. In this window, select the drive to which the target apps are located, and then click “Next”. You can also click “Manage/Restore Apps” to restore the moved programs.
Step 3. Check the applications you want to move, you can select single or multiple installed programs. Then select the drive where you want to move to, and click “Move”.
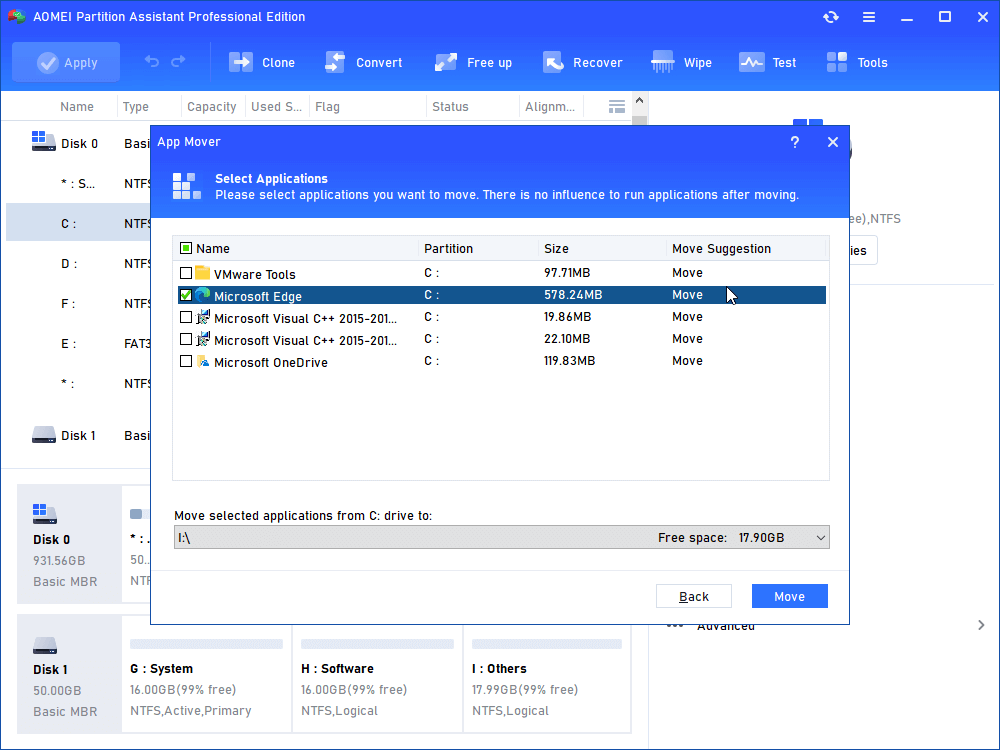
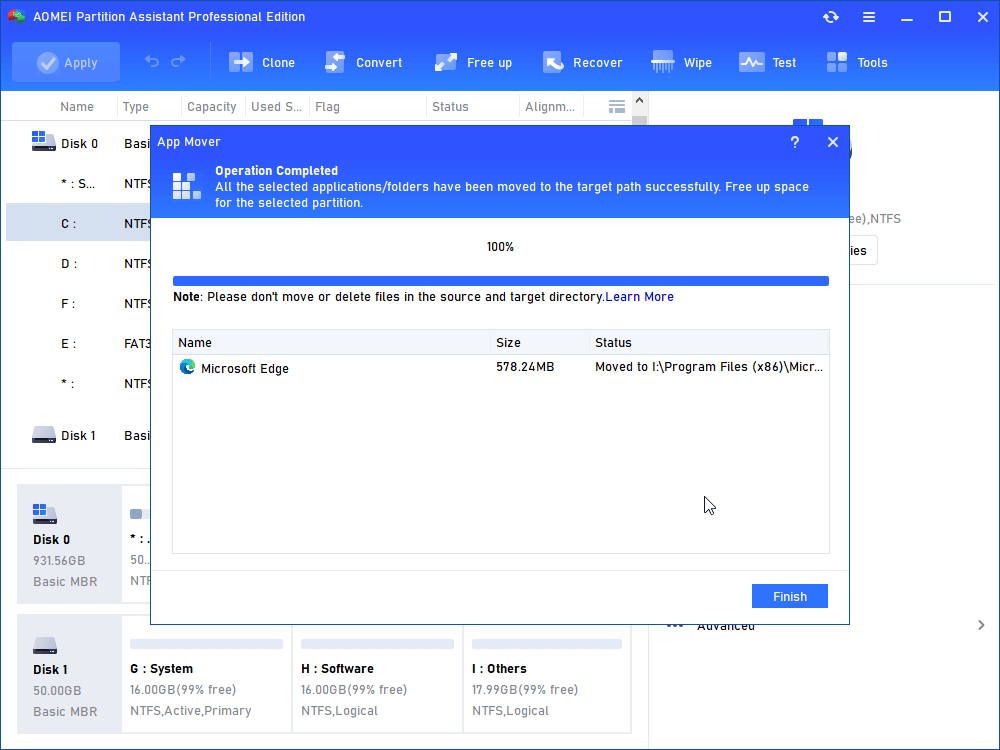
Step 4. Read the prompts carefully, and click “OK” and “Move”.

Then, wait for the process.
After the moving, your C drive will release more free space, and if you wish to add more capacity to it, you can try “Allocate Free Space” or use the unallocated space (even it’s not right behind the C drive) to “Merge Partition”. Or you can try "Delete Large Files" to deeply clean your PC.
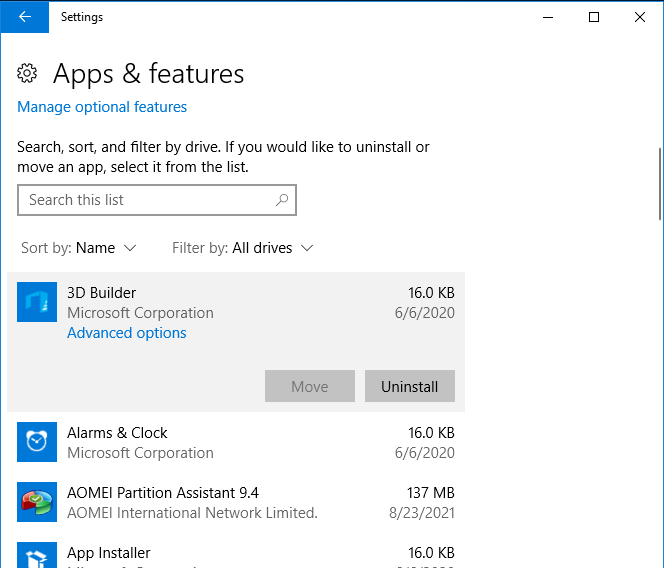
There is a “Move” button in Windows Settings (Settings > Apps > Apps and features), but it only applies to programs downloaded from Microsoft Store (Sometimes it couldn’t move programs from the Store). If the operation is forbidden, the “Move” button will be greyed out.
Conclusion
These are how to stop programs installing on C drive and how to move installed applications to another drive. AOMEI Partition Assistant has many helpful ways to assist Windows users to optimize their devices. It also has AOMEI Partition Assistant Server for Windows Server 2025/2022/2019/2016/2012(R2)/2008(R2) users.
FAQs about apps keeping installing on C drive
1. Why do programs default to installing on the C drive?
Programs typically install on the C drive because it's the default location set by the Windows operating system, often where the OS itself is installed.
2. How can I move already installed programs to another drive?
Use tools like AOMEI Partition Assistant or the built-in Windows "Apps & features" settings for supported programs. These tools ensure all dependencies are moved safely.
3. Does changing the default installation location affect Windows updates?
No, Windows updates are managed separately and are not affected by changes to the default program installation path.

