How to Deal with HP Tools Partition Properly?
This post shows what is HP Tools partition and how to do if you want to remove the partition without losing system diagnostics function.
By AOMEI / Updated on June 5, 2024
What’s the HP tools partition?
If you have an HP desktop or laptop, you are likely to find there is an HP-tools primary partition on your hard drive. It does not have a drive letter, so you cannot see or access it in File Explorer. In Disk Management, you can see that this partition labeled as HP_Tools has about 100MB space and 0nly 10% of used space. This small partition is for BIOS updates and system diagnostics. As you know, for HP computers, you can press Esc at startup, and then F2 to access HP system diagnostic. If you delete this tiny partition or move the files in the HP_Tools partition, then HP System Diagnostics will not work anymore.

How to access HP_tools partition?
To better understand this partition, you can assign a drive letter to it, so you can see what in the HP Tools partition. To assign a drive letter with Disk Management:
1. Open Disk Management. You can type “diskmgmt.msc” in a Run box and press Enter.
2. Right-click on the HP_tools partition, and select ”Change drive letter and path”.
3. In the next window, click “Add” to select a drive letter, for example, E:, and click ”OK”.
After opening this partition, you can see there are only a few megabytes of data on it. Since it has a drive letter, other programs also can access HP-tools (E) drive. Some malware may write data to it, which will lead to HP tools E: drive full.
HP-tools E: drive is full, how to clean up?
By default, the HP-tools partition has enabled System Protection. You can disable it through Control Panel > System Security >System > System Protection. In a pop-up window, click “Configure” to turn off system protection.
You can also open HP-tools partition in Windows File Explorer to delete some unwanted files. Delete the folder with user’s name, HP-HP, and the MediaID.bin file. After that, the low disk space on HP-tools partition should be gone.
Though it is small, it is also a primary partition. As a matter of fact that an MBR disk only allows you to have 4 primary partitions or less than 4 primary partitions and 1 extended partition.
For people who want to create more partitions on the hard drive, they want to delete this partition.
Safely delete the hp_tools partition
If you want to get rid of the HP_Tools Partition without losing the system diagnostics function, you can copy it to a USB flash drive with free partition manager software AOMEI Partition Assistant Standard. Then the USB drive will work just like an HP recovery disk. When you ever need to run the system diagnostics, you just plug in this USB drive. It is also recommended to create an image backup of this tools partition in case any unexpected problems happen. After that, you can safely delete this partition. The specific steps listed below:
Plug in a blank USB drive to your PC. Download this freeware, install and run it.
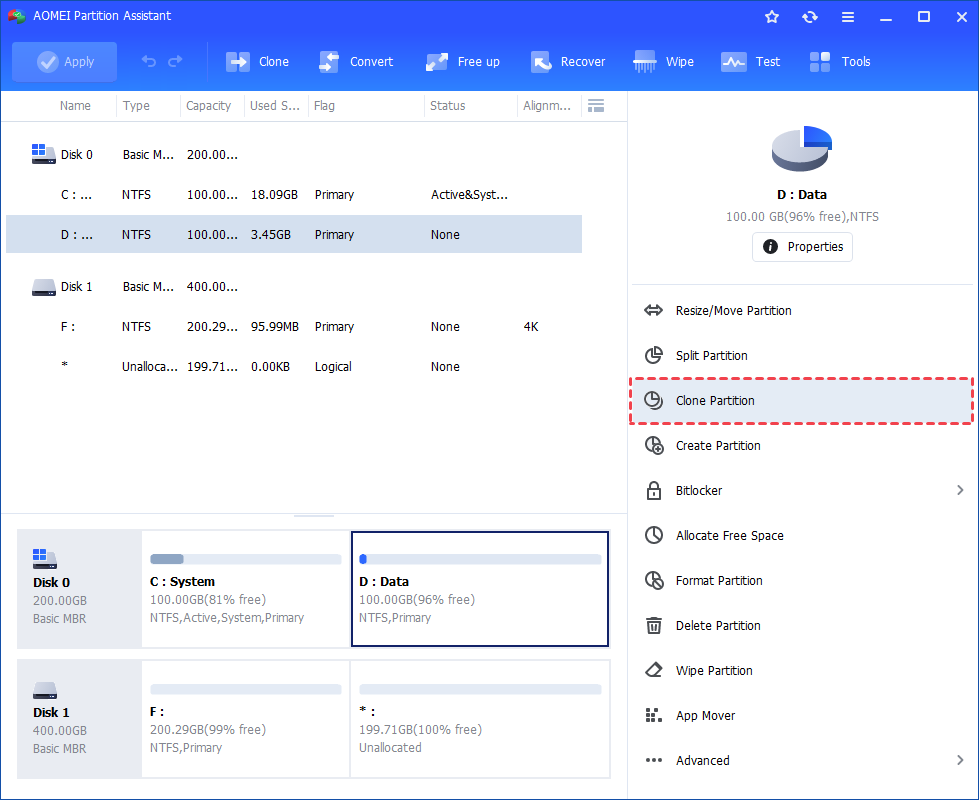
Step 1. Install and launch AOMEI Partition Assistant, right-click the partition you want to clone and select the "Clone Partition" tool to run partition clone. (You can also click the "Clone" main tab and select "Clone Partition".)
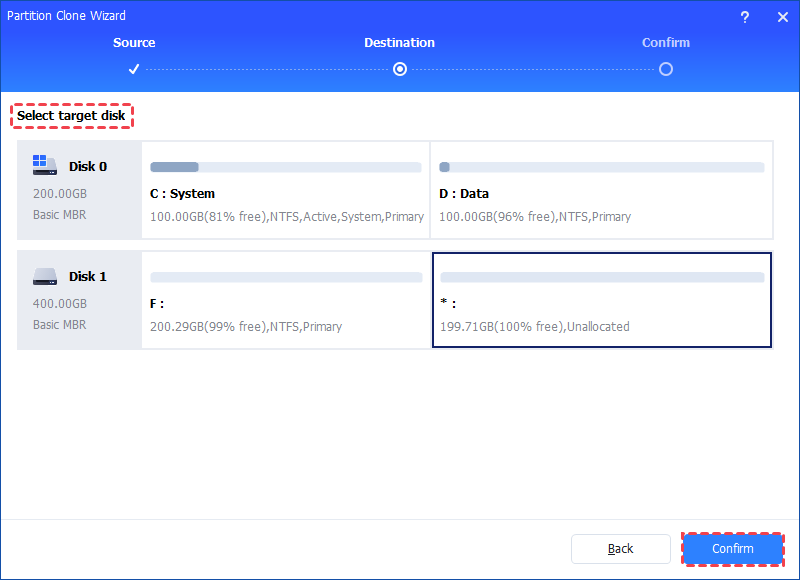
Step 2. In next window, select the destination partition or unallocated space to hold your source partition, and then click "Confirm".
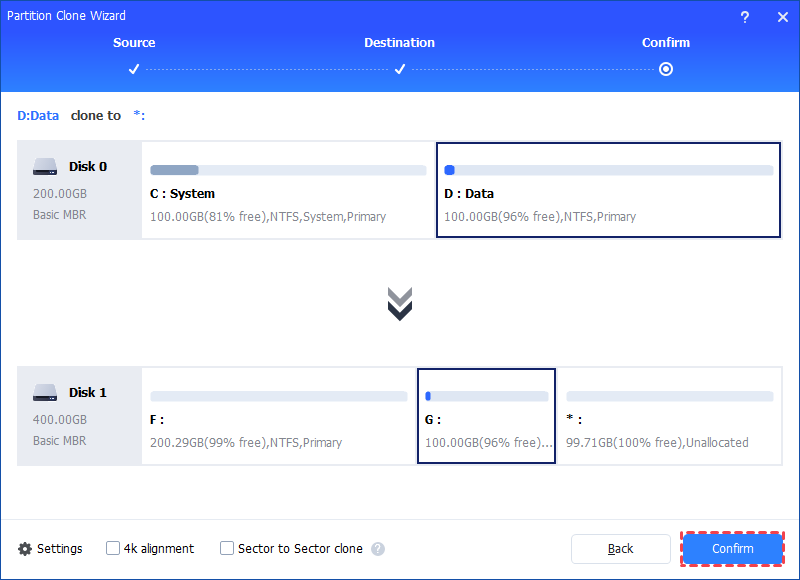
Step 3. Then, you will enter the Confirm interface where you can check the source and destination clone location. After all is set, you can click the "Confirm" button to continue.
Notes:
- There is a "4k alignment" option. If you want to copy a partition onto a SSD (Solid State Drive), ticking this option will optimize the read and write speed on this partition. It can also extend the life of the SSD.
- If you select the "Sector-by-Sector Clone" mode, the unallocated space must be equal or larger than source partition. If you tick the option, it will be unable to resize the destination partition.
Step 4. In the next window, you can click the "Settings" button to adjust the target partition size. As you can see from the screenshot, you could adjust the size of source partition in order to fit the target partition as per your need, or directly skip the step and click "Save".

Step 5. You can preview the partition copy operating by viewing the "Pending Operations". To commit the "Pending Operations", please click "Apply" and "Proceed".
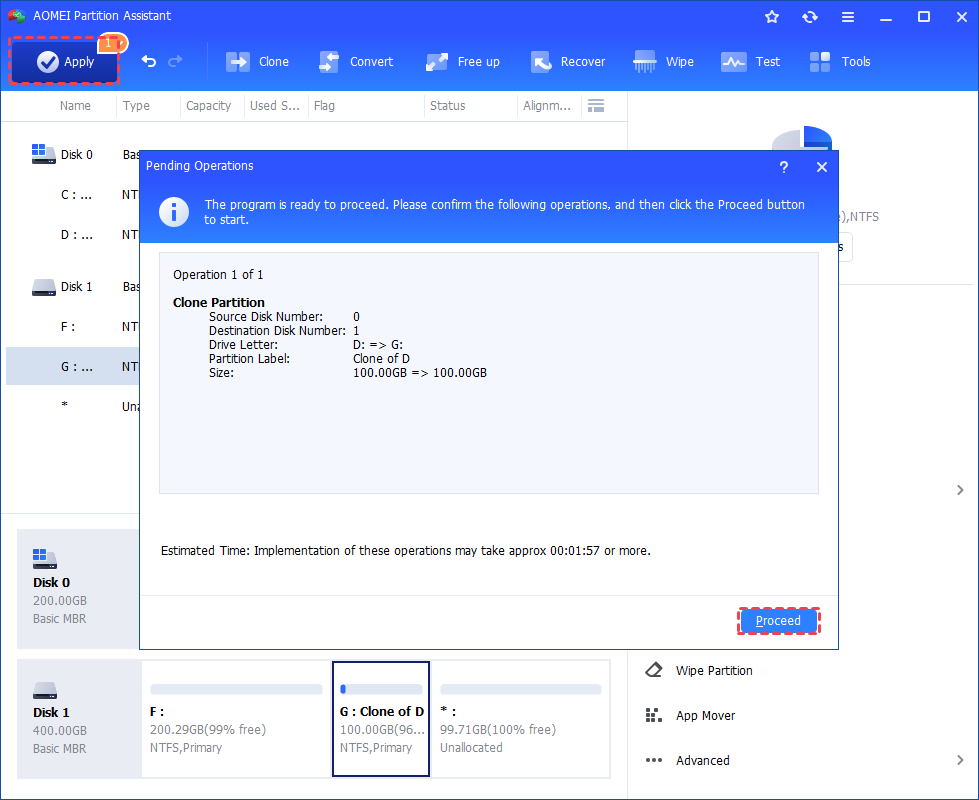
The cloning process will start and you can check the cloning process. Once the process is completed successfully, you will get a congratulation window. Finally, you can check the partition layout on the destination disk will be identical to the source partition.
Then you should be able to create a new partition by shrinking one of the existing partitions. However, this USB drive cannot be used to store other data, which is such a waste. If you use the AOMEI Partition Assistant Professional, you can convert the HP tools partition to logical partition without data loss. Then you can use this software to create more partitions.

