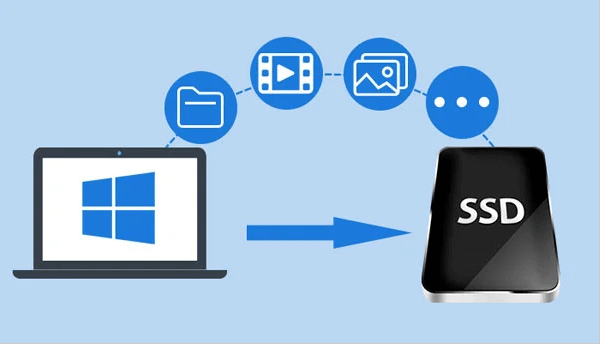
How to Optimize SSD after Cloning [8 Effectives Ways]
How to fix optimize SSD after cloning? This article provides you with 8 ways to solve this problem. You can try any of these solutions to help you get your computer back to normal.
By AOMEI / Updated on May 12, 2023
Help, SSD slow after cloning OS from HDD!
“I bought a Samsung 850 EVO and cloned my system disk from my old HDD to this new SSD (Win 10 64). But the system is still slow, with long boot and load times. I ran a disk speed test with Crystal and the results were pretty bad. From what I understand, SSD should be faster than HDD. I do not know why it happens? Should I completely wipe and reinstall the OS? Ask for help!”
In recent years, as the price of SSD has dropped, more and more users choose to use SSD to improve the performance of their computers. Because the read and write speed of SSD is faster than HDD.
When installing an SSD, most users tend to clone the Windows system from the old hard drive to the SSD to avoid reinstallation. But after cloning, some people will find that the performance of SSD is less than satisfactory. In fact, the reason why cause this problem is that the SSD is not in optimal condition. This article aims to show you how to optimize SSD after cloning.
How to optimize SSD after cloning in Windows 11, 10, 8, 7
Solid-state drives (SSD) can slow down considerably for a number of reasons, which are common in every mechanical device. However, sometimes the SSD itself isn't really slowing down, but an external factor causing it to slow down. So, what to do after you clone HDD to SSD? You can refer to the following methods one by one.
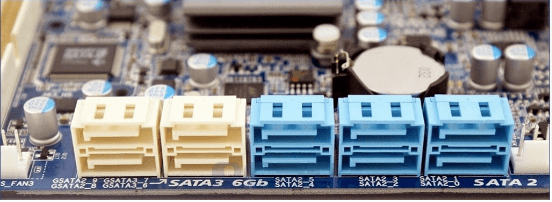
│Solution 1. Check if the SSD is connected to the right port
The first step in SSD optimization is to make sure the SSD is connected to the right port.
The transfer of data is done through the SATA port. Most of the machines now have three SATA ports: SATA I, SATA II, and SATA III. Different ports correspond to different hard drives. Due to the fast read and write speed of the SSD, it needs to be connected through the SATA III port. Because this port can transfer up to 600MB of large data per second.
If the SSD is connected to a different port, there is a high chance of incompatible read and write speeds and various issues and failures. So, when you encounter the “SSD slow down” issue, you need to check if the SSD is connected to the correct port.
│Solution 2. Make sure AHCI is enabled
In AHCI mode, SATA drives can significantly reduce the number of useless seeks and data seek times of the drive, thus effectively using multitasking disks. Compared with the previous IDE hard disk mode, AHCI hard disk mode also provides more support for new functions, which are the key to improving SSD read and write performance.
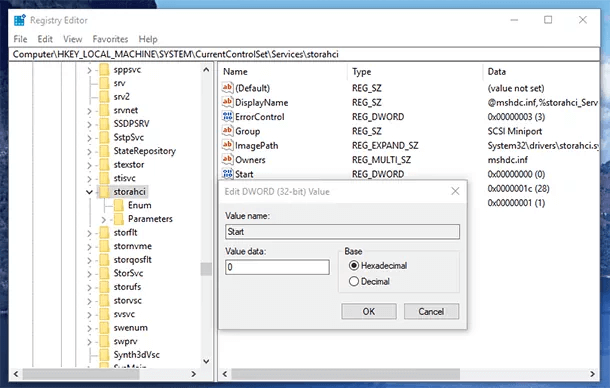
1. Press Win+R, type regedit and hit Enter to open Registry Editor.
2. In the left pane of the Registry Editor, browse to the following key location:
HKEY_LOCAL_MACHINE\SYSTEM\CurrentControlSet\Services\iaStorV. Open Start to modify it, change the Value data to 0, and then click OK.
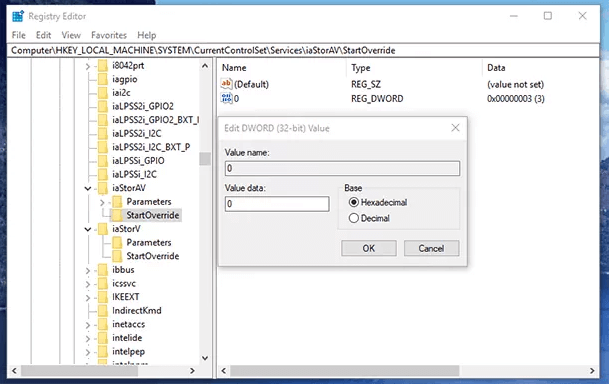
3. Next, browse to the following location:
HKEY_LOCAL_MACHINE\SYSTEM\CurrentControlSet\Services\iaStorAV\StartOverride and open the 0 file to change the Value data to 0.
4. After that, browse to
HKEY_LOCAL_MACHINE\SYSTEM\CurrentControlSet\Services\storahci, open the Start file and change the Value data to 0.
5. Quit Registry Editor, restart the PC, and go to BIOS. You are recommended booting Windows in safe mode the first time after the restart.
6. In BIOS, locate SATA settings and select the mode for memory devices. Switch them to AHCI Mode, save settings and reboot your PC.

│Solution 3. Perform SSD 4K alignment(recommend)
As we all know, SSD uses the smallest 4K sectors in the file system to hold data. If the smallest 4K allocation unit doesn't always align with the 4K pages in the SSD, then the SSD suffers badly. 4K partition alignment better serves the OS and provides higher performance. Therefore, when the SSD clone is completed, 4K SSD alignment in Windows 10 is a must-take measure.
To accomplish this task easily, I recommend you to use AOMEI Partition Assistant Professional. This is a powerful partition disk management software that supports users to complete 4K alignment with a few clicks. The whole process is safe and error free. Please download the Demo version to see how to optimize SSD after cloning.
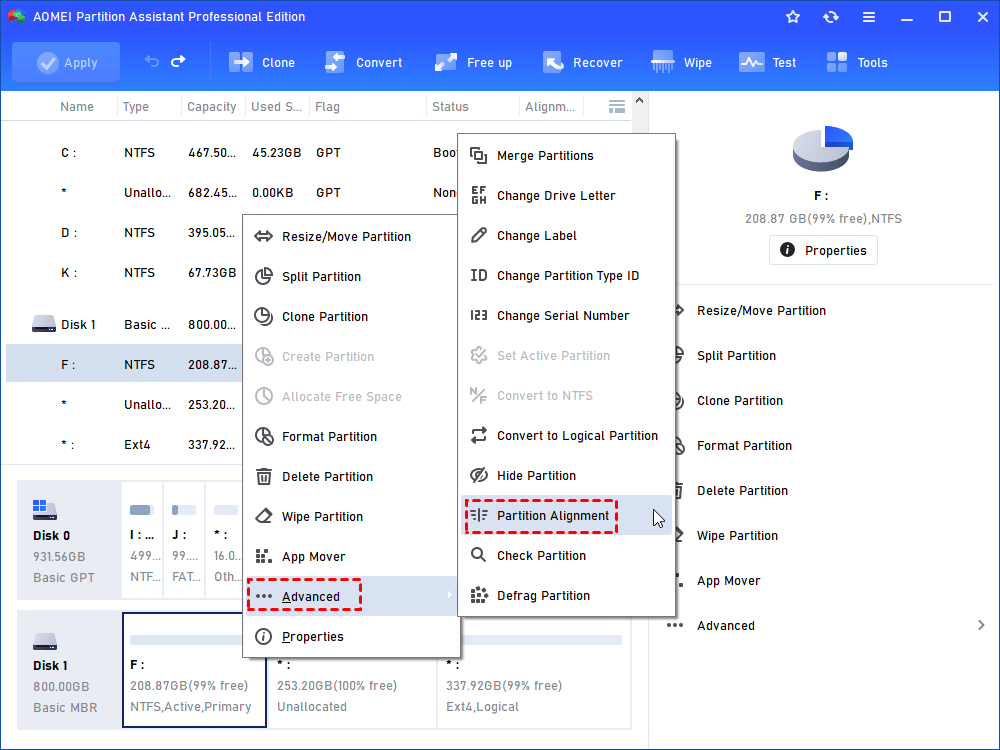
Step 1. Install and run AOMEI Partition Assistant. Right-click the partition you want to align and select Advanced > Partition Alignment.
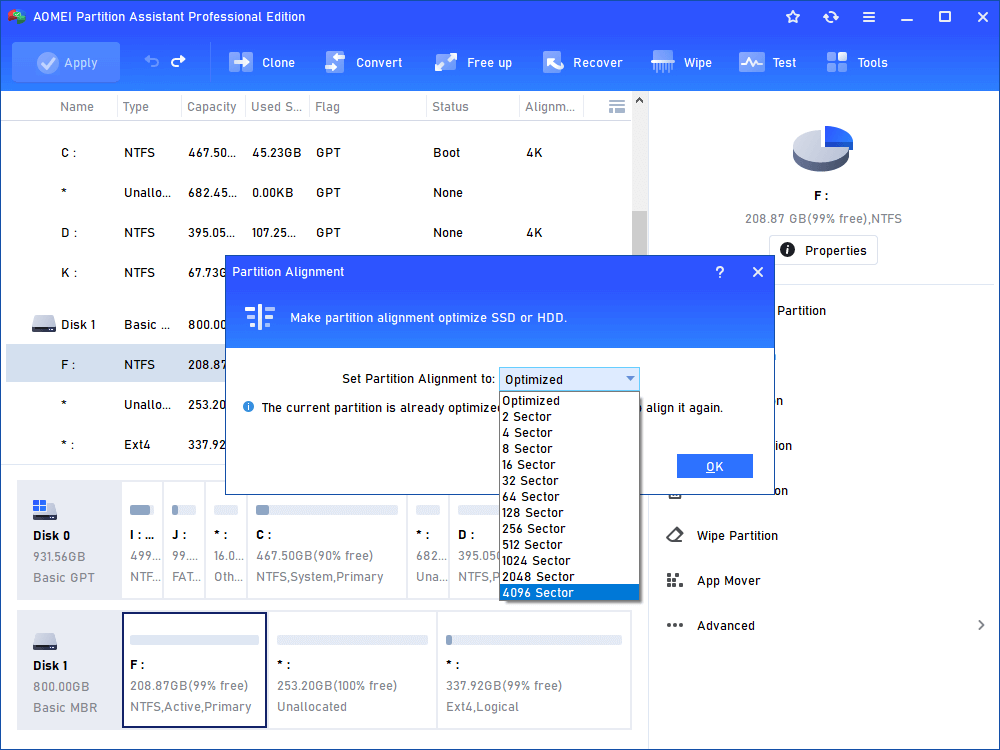
Step 2. In the pop-up window, select 4096 sectors from the given list and click OK.
Step 3. Click Apply > Proceed to execute the operation.

│Solution 4. Extend system drive
In addition to SSD alignment, low disk space on the system drive is also a factor that can cause SSD to run slowly. When the system disk is almost full, Windows will run very slowly. So we must leave enough space for the system drive.
To do this, AOMEI Partition Assistant Professional can also help you. It supports to allocate free space from one partition to another. You can refer to the following steps:
Step 1. Find a partition with a large storage space, right-click and select "Allocate Free Space".

Step 2. In the Allocate free space window, modify the storage space to be allocated change the target partition to (C:), and click "OK".

Step 3. Click Apply to submit the operations.

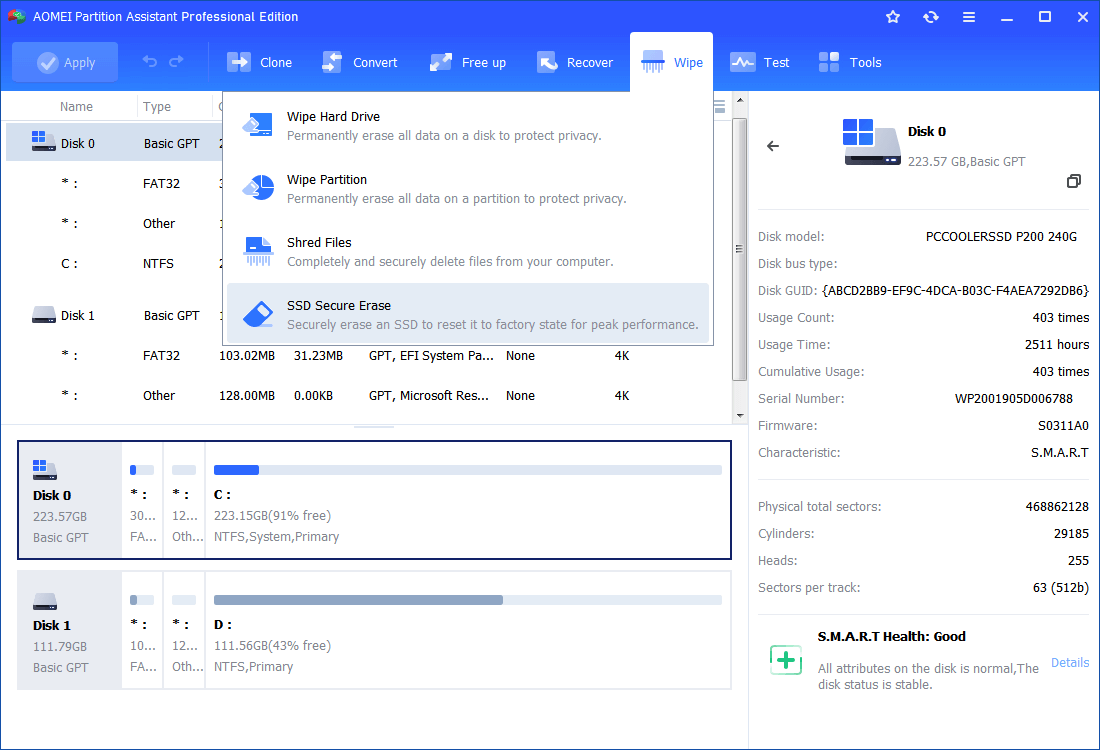
│Solution 5. SSD secure erase
If your SSD has been used for a long time, its performance may degrade a lot. At this point, if you want to improve its performance, you can perform a Secure Erase. This operation will restore SSD to peak performance.
Warning:
1. This function will erase all data on the SSD, please back it up in advance.
2. SSD Secure Erase is currently only available for Windows 7.
│Solution 6. Avoid and disable disk defrag
People probably know that disk defrag can help improve performance. However, you need to be aware that we cannot defrag the SSD, as this will negatively affect the SSD. We need to cancel the automatic defrag.
1. Press Windows + R, type dfrgui and hit Enter to open Disk Defragmenter.
2. Select your SSD from the device list and click Configure Schedule.
3. If checked to disable disk defragmenter from running automatically, uncheck Run on schedule.
│Solution 7. Verify if TRIM is enabled or not
Because SSDs take time to clean up data marked as deleted before adding new data, SSDs are slower on writes. TRIM technology is to let Windows tell the SSD data blocks are unnecessary and can be deleted, and then automatically erase. This will increase the write speed of the SSD. So, we need to make sure the system has TRIM enabled.
Step 1. Search for cmd in the taskbar. Then right click on it and select Run as administrator.
Step 2. In the Command Prompt window, type: fsutil behavior query disabledeletenotify and hit Enter.
Step 3. After a few moments, the command prompt will display one of the following two messages:
• "NTFS DisableDeleteNotify = 0": Indicates that TRIM is enabled on your SSD.
• "NTFS DisableDeleteNotify = 1": Indicates that TRIM is disabled on your SSD.
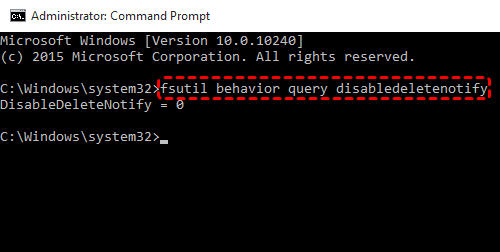
Step 4. If the SSD does not have TRIM enabled, type in: fsutil behavior set disabledeletenotify 0 and hit Enter to enable it.
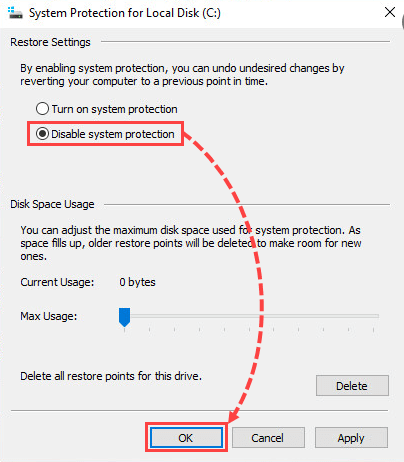
│Solution 8. Turn off system restore
System Restore is a built-in feature that restores a failed computer to a working state. Since Windows regularly backs up your computer, the backup files can take up a lot of space on the SSD system partition, slowing down your computer. Therefore, you can turn off System Restore to free up some space on the SSD.
1. Right-click “This PC” and then click “Properties”.
2. In the left pane click “System Protection”.
3. Select the disk you want to turn off System Protection for and click “Configure”.
4. Select “Turn off system protection”, click OK, and then click OK again.
Conclusion
From what has been discussed above, do you know how to optimize SSD after cloning? This article introduces the 8 most effective methods for you, you can try one by one to until to solve your problem.
Also, if you want to optimize SSD with AOMEI Partition Assistant in Windows Server, you can switch to AOMEI Partition Assistant Server which is designed for Windows Server 2025/2022/2019/2016/2012/2008 users.

