Why PC Takes Forever to Open Programs & How to Fix?
Why PC takes forever to open programs? You can learn some highly practical solutions to fix this issue and make your computer faster.
By Lucas / Updated on March 5, 2026
PC takes too long to open any programs
Although our computers have developed fast performance thanks to the new generation of technology, users still often confront the bothering issue of running speed. Some have slow system performance, while some have the PC takes forever to open programs problem. Here, in this article, we’ll do a full tutorial of the latter problem-- programs taking a long time to open in Windows.
“Why does my PC take so long to open programs?” many users are confused, especially those users who only use their PC for some routine work. Various reasons might lead your PC to this issue:
• Programs are not the newest version
• Errors in OS or corrupted program files
• Incompatible programs
• Virus/malware
• Install too many never-used programs
• Low capacity C drive or disk
…
We can’t know all reasons but we do have some solutions that may help you to fix PC taking forever to open programs. Let’s go ahead to the part of the solutions.
How to fix PC taking forever to open programs issue (7 ways)
We’ll show you 7 methods for your reference, and you can try one by one, or choose some of them if you’ve got a probable idea about why your PC opens programs slowly.
1. Run SFC to scan PC & Security to scan virus/malware
The System File Checker – syc.exe utility can assist you in scanning all protected system files. If an issue arises, it will locate and resolve for you.
To do the system scan, you need to launch the Command Prompt as administrator.
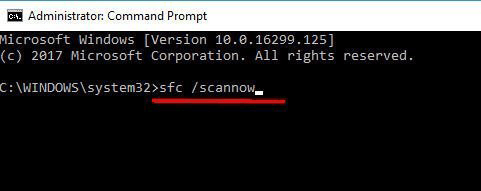
Step 1. Type “cmd” in the Search box. Right-click Command Prompt and choose “Run as Administrator”.
Step 2. Type “sfc /scannow” and press "Enter".
It will take a while to scan, after that you need to reboot your computer.
For viruses and malware, you can use Windows Defender Security Center.
Step 1. Go to "Settings" > "Update & Security" > "Windows Security".
Step 2. Click "Virus & threat protection".
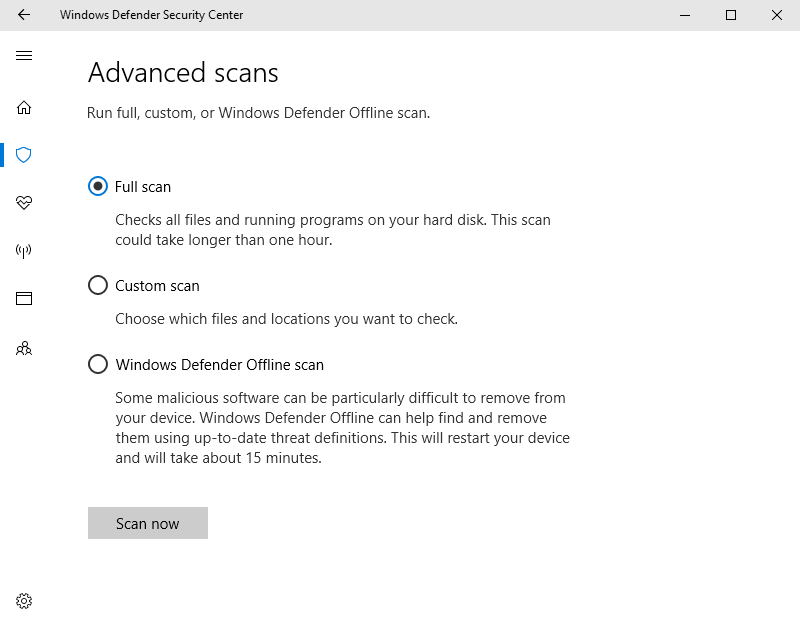
Step 3. In the "Threat history" section, click "Quick scan" to scan. Or you can click “Advanced scan” under the “Quick scan” to choose the scan mode and click “Scan now” to start.

Wait for the task to finish.
2. Clean up your drives
In File Explorer, you can clean up the drive.
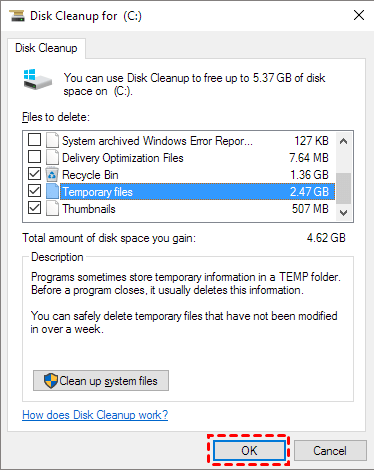
Step 1. Open File Explorer and right-click on the C drive and select “Properties”, and then click the "Disk Cleanup" button in the disk properties window.
Step 2. Select the files you want to delete and click “OK”.
You can also select other drives one by one to clean up.
3. Repair corrupted Windows system files in PowerShell
In PowerShell, DISM.exe can find the corrupt files and replace them.
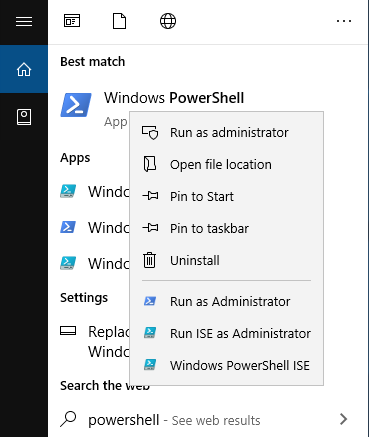
Step 1: Type “PowerShell” in the Windows search bar. Once the desktop application pops up, right-click and click “Run as Administrator”.
Step 2: Type “dism.exe /Online /Cleanup-image /Restorehealth” and hit “Enter”.
4. Update/reinstall Apps & uninstall unused programs
You can uninstall some unused programs in Windows Settings or go to Microsoft Store to update Apps.
Step 1. Click “Start” and open Settings, click “Apps”.
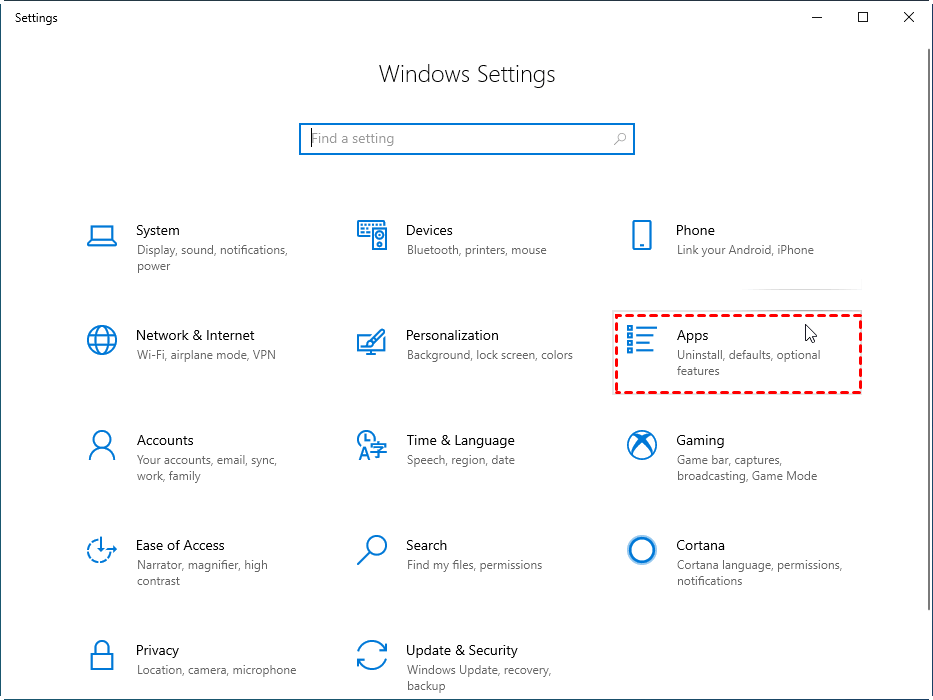
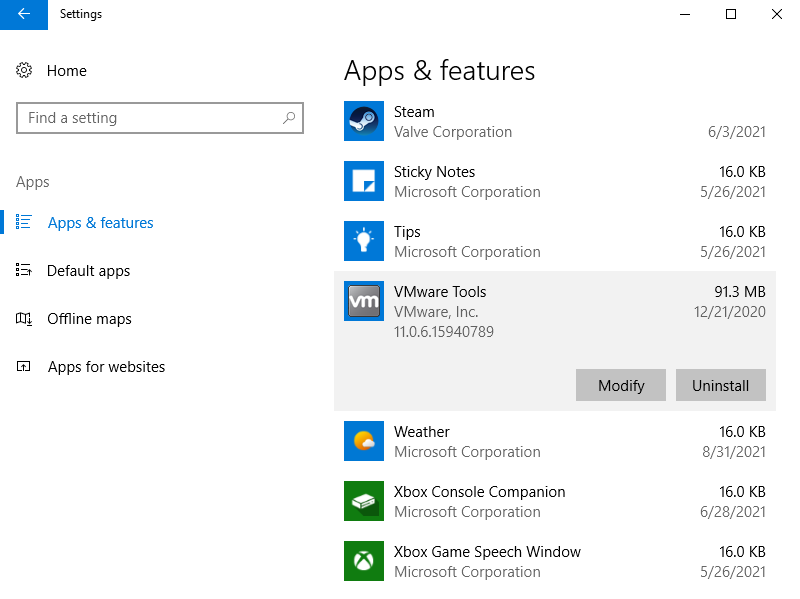
Step 2. Click the App you don’t need, and choose “Uninstall”.
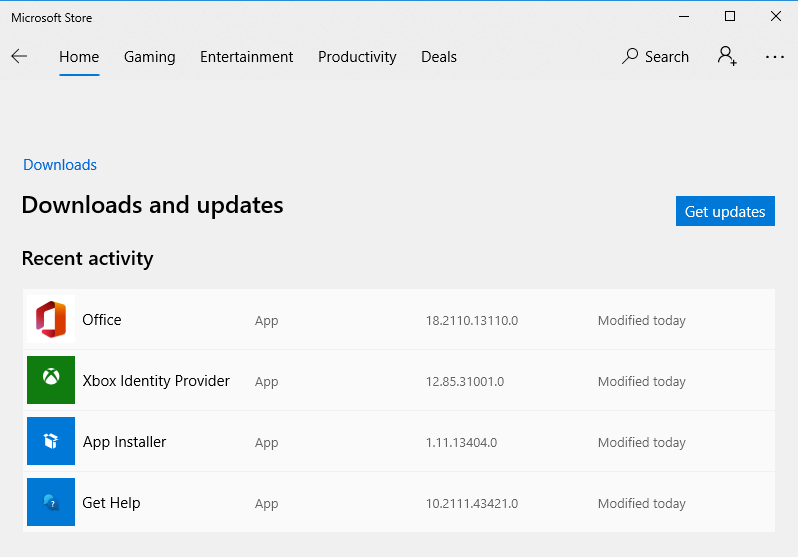
To update all programs, you can click “Start” and go to Microsoft Store to check.
5. Do a Clean Boot
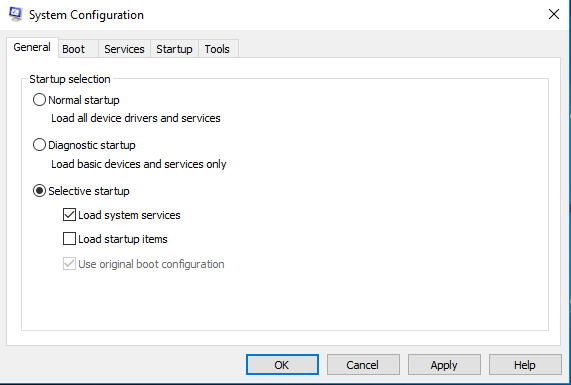
Step 1. Type “msconfig” in the Search box and hit “Enter” to open “the System Configuration Utility”.
Step 2. Click the “General” tab, and then click “Selective Startup”. Cancel “Load startup items” and make sure “Load System Services” and “Use Original boot configuration” are ticked.
Step 3. Click the “Services” tab. Select “Hide All Microsoft Services” under the list box and click “Disable all”.
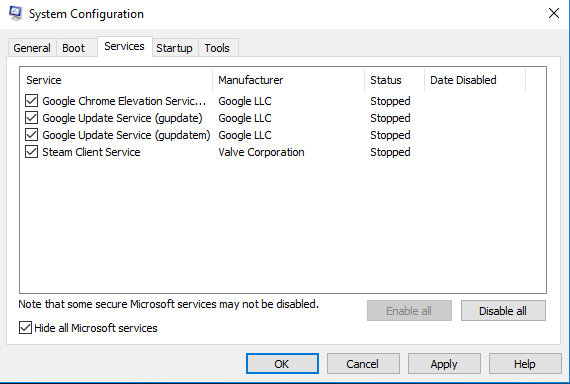
Step 4. Click “Apply/OK” and restart the computer.
6. Extend C drive capacity
If your OS drive is nearly full and your computer is performing slowly, extending the C drive is a nice way. We know that the software is default stored on the C drive. If the C drive lacks insufficient capacity, the computer's and software's performance will suffer. As a result, your PC takes forever to open programs.
If you open Disk Management and find there’s an unallocated space that adjacently stays right the C drive, lucky you, you can extend volume now. But if you find there’s no unallocated space or it’s not adjacently behind C drive, don’t panic, AOMEI Partition Assistant Professional can help you.
It’s a Windows PC disk/partition manager for Windows 11/10/8/8.1/7/XP to organize devices easily and securely. Its “Allocate Free Space” can share free space from another drive to the target drive, and the “Merge Partition” function can merge non-adjacent unallocated space to the target drive.
Actions speak louder than words, let’s see the detailed steps.
▶ Way 1. Allocate Free Space
Step 1. Launch AOMEI Partition Assistant, right-click the partition from which you want to allocate free space, and select "Allocate Free Space".

Step 2. In a pop-up window please type in the size of the free space which you want to split from the D drive and add to the C drive.

Step 3. Then click "Apply" on the toolbar to execute pending operations.

Now, please restart your PC to finish the task.
▶ Way 2. Merge Partition
To merge non-adjacent unallocated space, you change choose “Merge Partition”.
Step 1. Right-click the C drive at the main interface, choose “Advanced” and select “Merge Partition”.
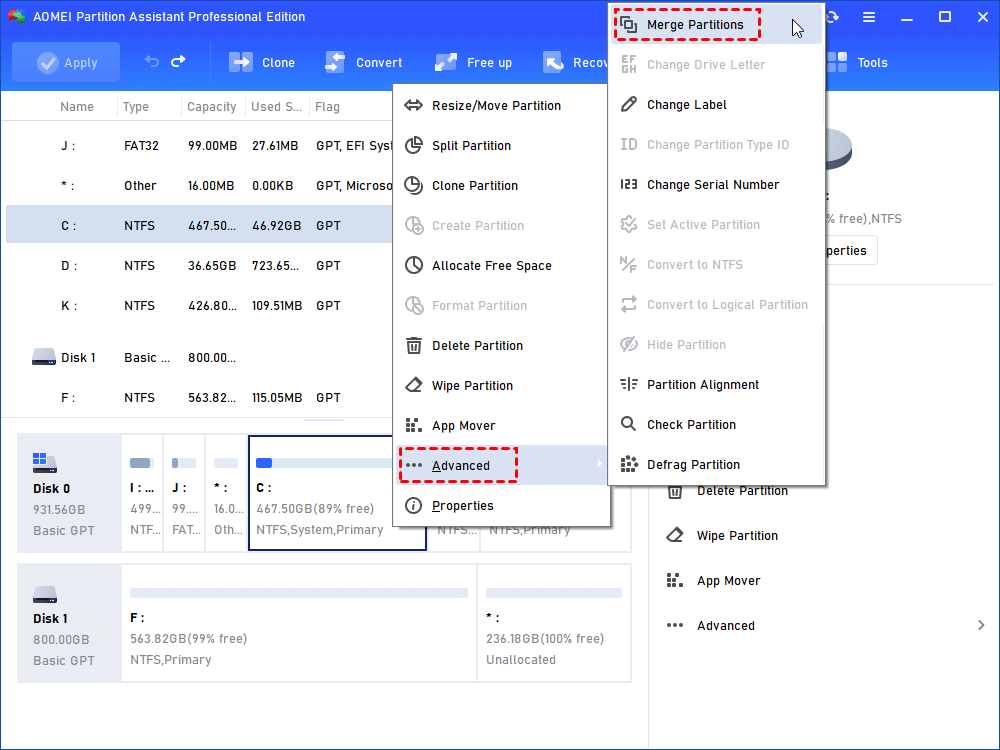
Step 2. In the new window, you can add the unallocated space to the C drive by selecting the partitions in the box. Click “OK”.
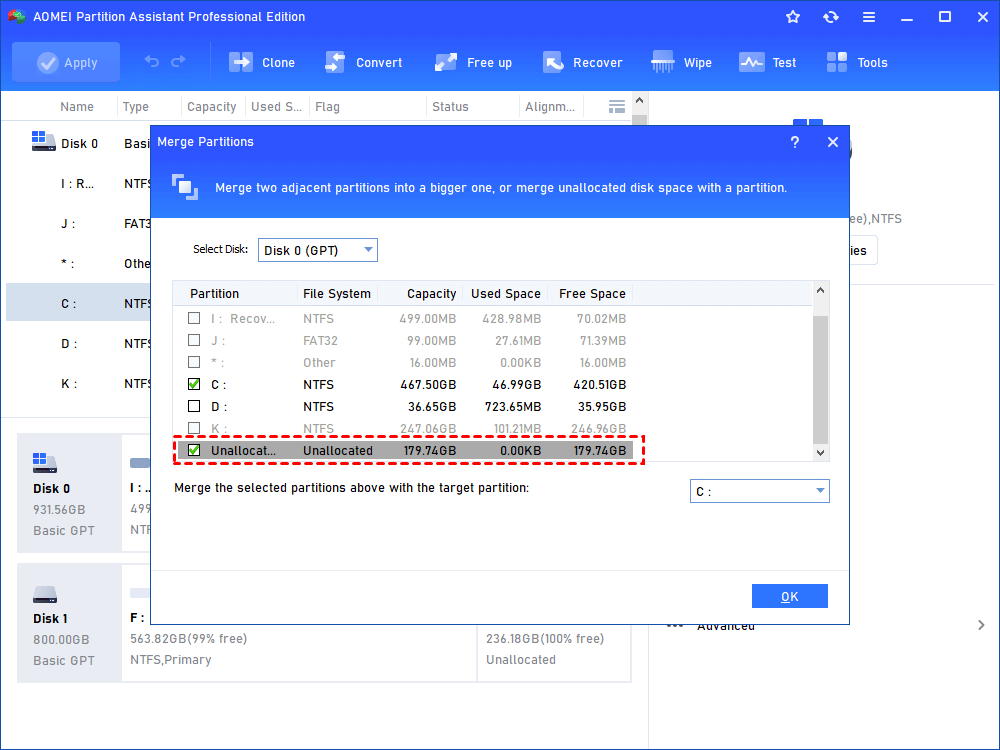
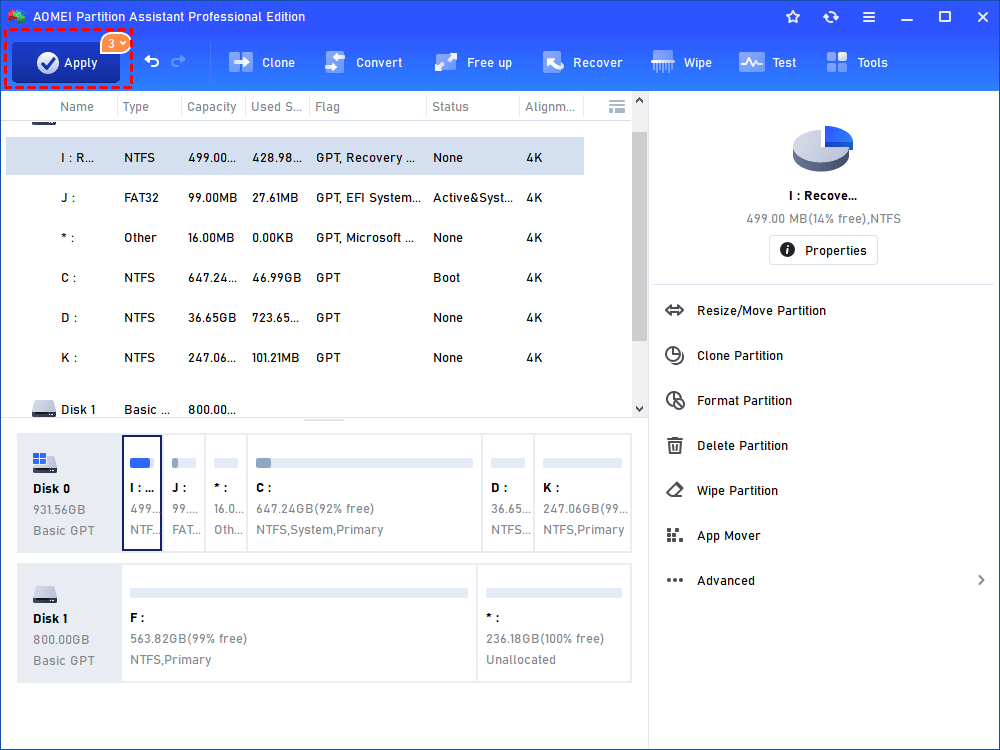
Step3. Click “Apply” to submit the whole operations.
7. Upgrade your HDD to SSD
If your hard drive has been in service for several years, then you might need to change a new disk. SSDs are becoming increasingly popular since they are smaller, lighter, quicker than HDDs, and more suitable for modern computers.
Someone might think it’s troublesome to reinstall the system and programs they need. AOMEI Partition Assistant can make this easier. Users who only want to keep the original OS can choose “Migrate OS to SSD”. This function will migrate OS and the related partition to the target disk (SSD and HDD are both workable). Users who wish to keep all original can go to “Disk Clone Wizard” which can clone all data on the original disk.
Both functions use the hot clone method which allows users to run OS and programs in the cloning process. And you don't need to reboot your PC immediately.
▶ Way 1. Migrate OS to SSD
Step 1. Connect the SSD to your computer. Click “Clone” in the top toolbar, and choose “Migrate OS”.
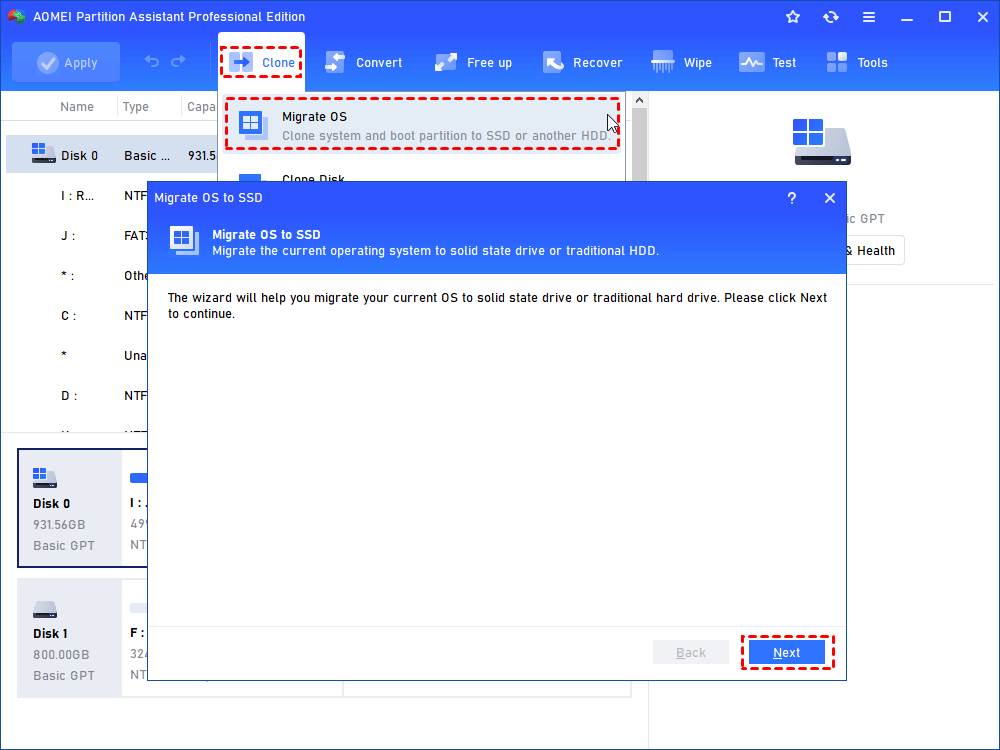
Step 2. Select a partition or unallocated space on the destination disk. Click “Next”.

Note: if you select a partition, all data on the partition will be deleted.
Step 3. Now modify the size, location, and drive letter of the partition on the new disk. Click “Next”.

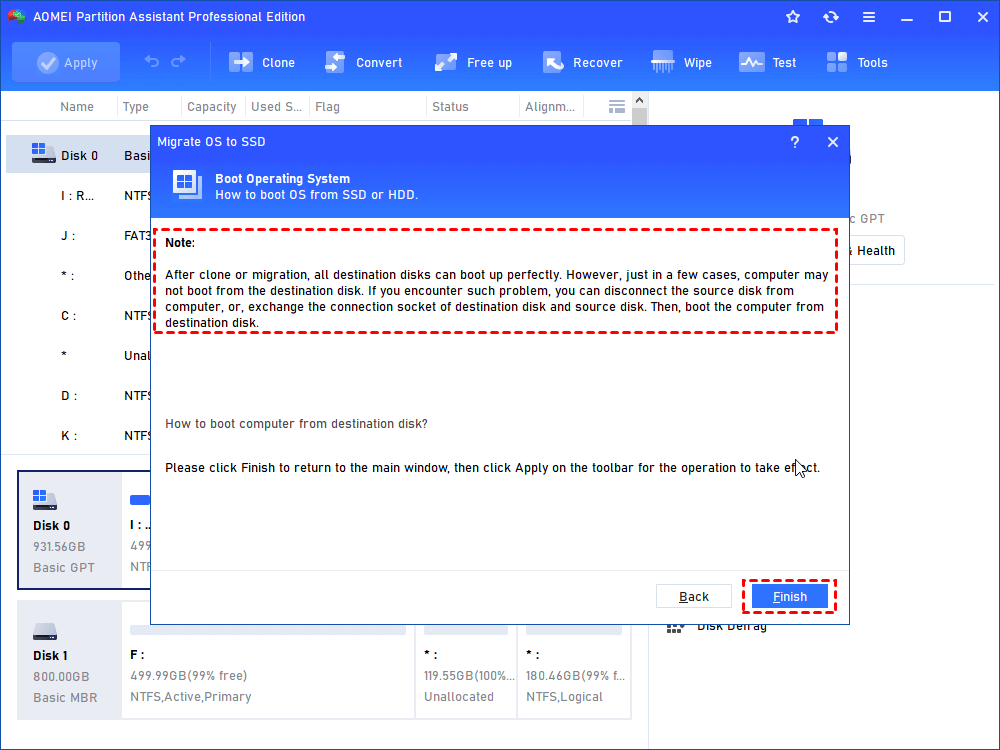
Step 4. On a note, you can see how to boot from SSD or HDD. Read it and remember it, click Finish.
Step 5. Then you will back to the main interface of AOMEI Partition Assistant and preview the operations in “Pending Operations”. If there is no problem, click “Apply” to submit all.
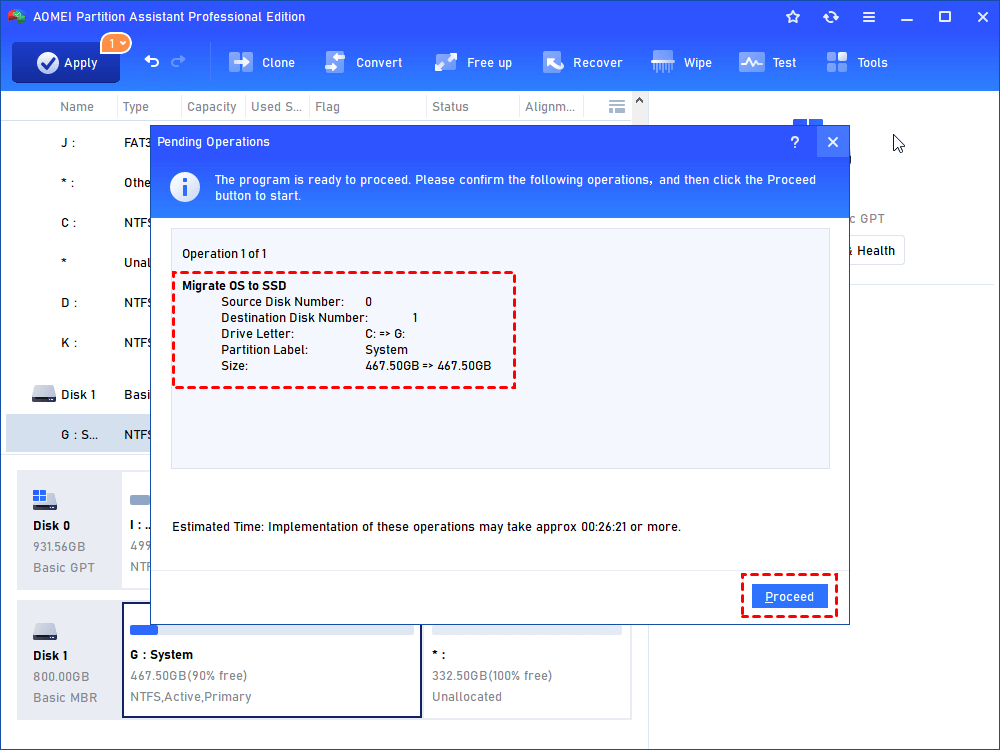
Then you can restart your PC from the target disk.
▶ Way 2. Disk Clone Wizard
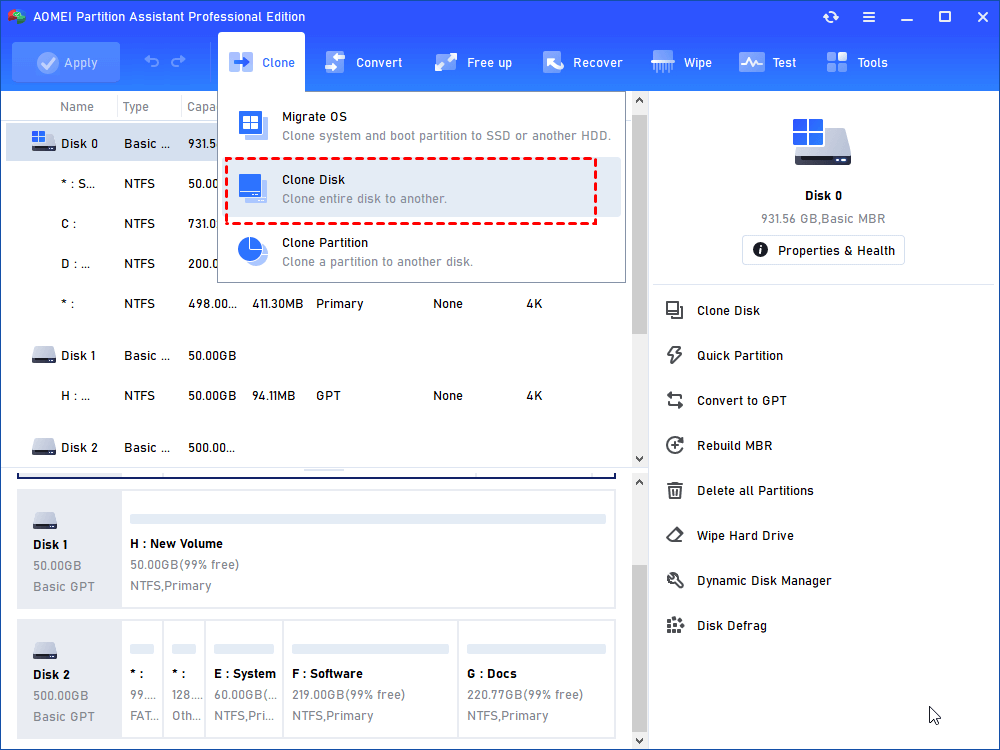
Step 1. Click “Clone Disk” in the right menu.
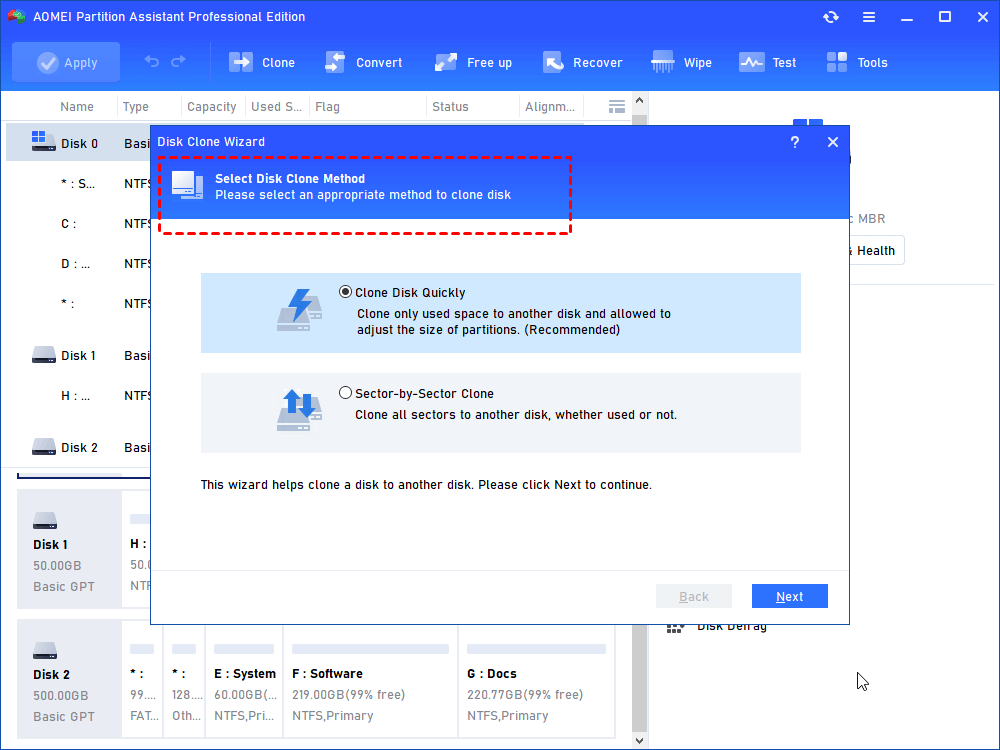
Step 2. Select a method from "Clone Disk Quickly" and "Sector-by-Sector Clone". Here we select “Clone Disk Quickly” as an example.
◤ “Sector-by-Sector Clone” will copy all sectors to the target disk, so the destination disk must be equal to or larger than the source disk.
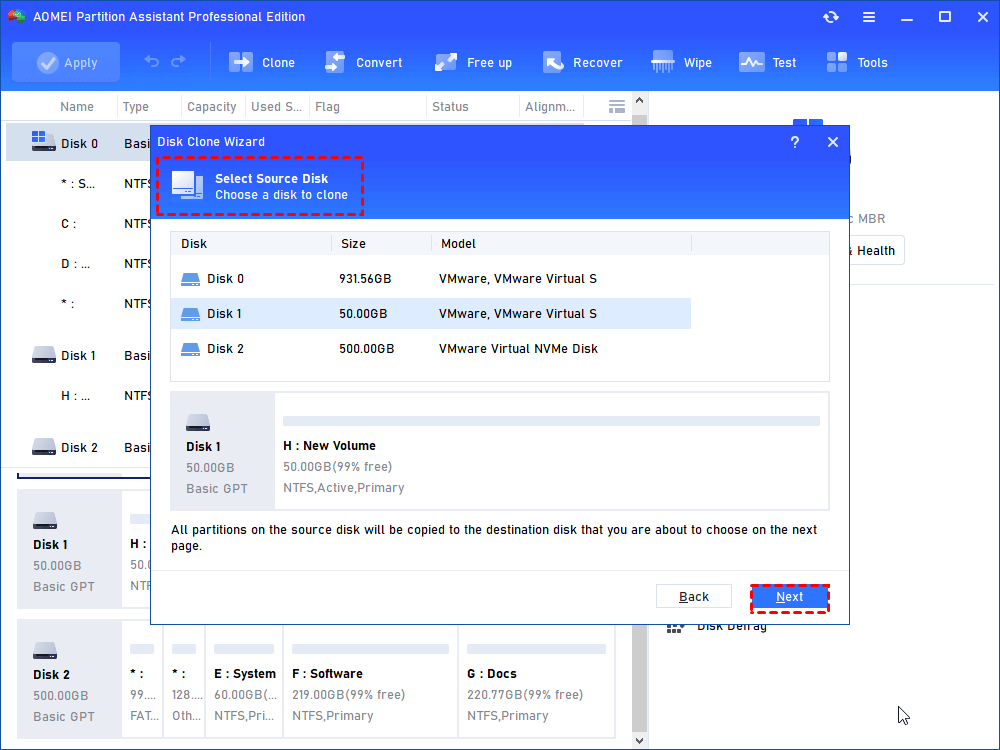
Step 3. Select the Windows system disk as the source disk and click on “Next”.
Step 4. Then select the SSD drive as the destination disk and click “Next”.

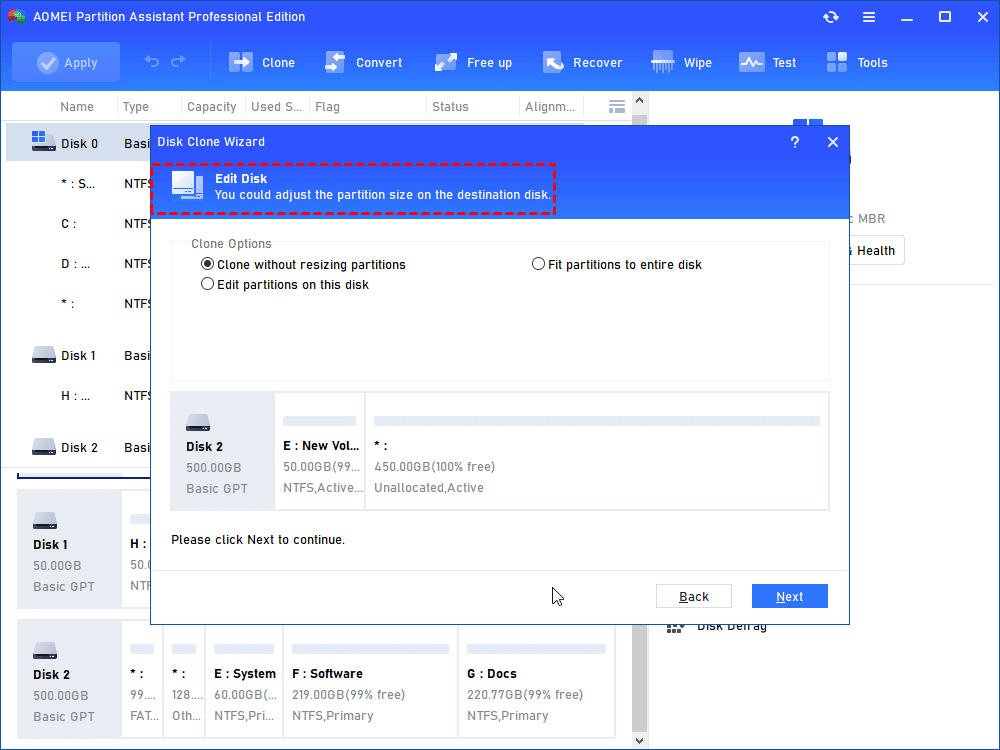
Step 5. Resize partition just being created on SSD drive.
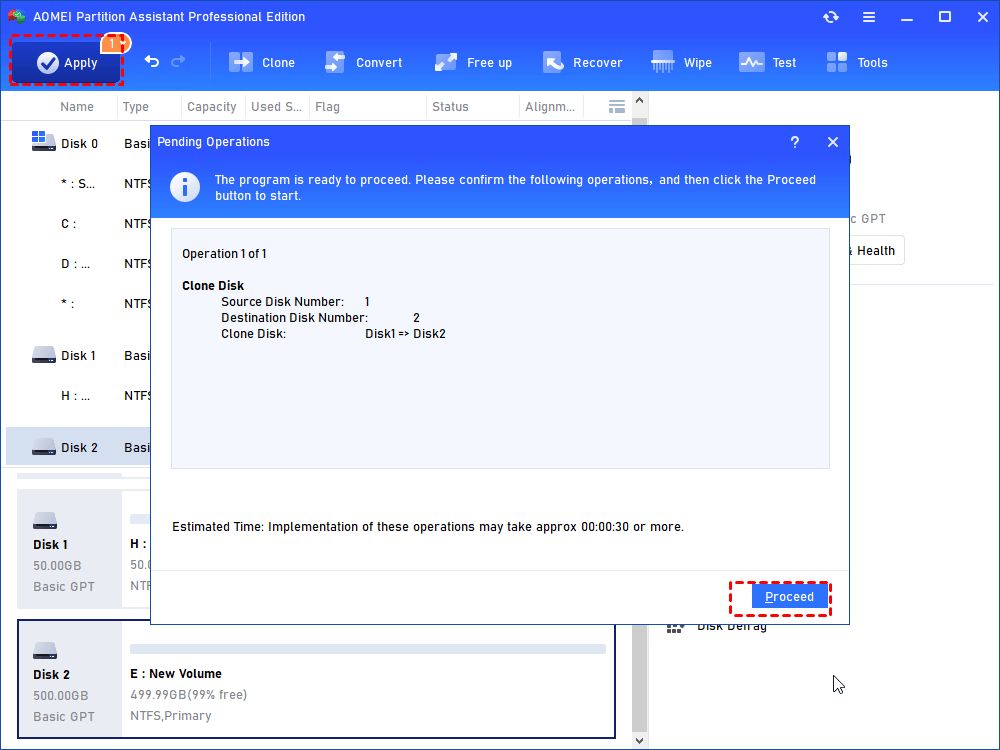
Step 6. Read the boot note, click “Finish” and then click “Apply” to execute the pending operation.
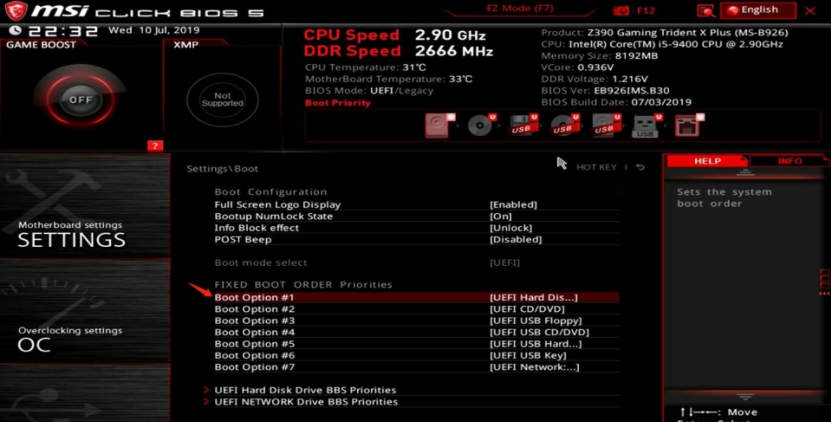
Step 7. Reboot the PC from the cloned SSD. You’ll need to change the boot order in the BIOS menu (press the F2 key or other keys like Del, F8, and F12) and select the Boot tab.
All system devices will appear in order of priority. Save your change and exit the BIOS, your PC will boot from the target SSD.
Conclusion
With this article, “PC takes forever to open programs” won’t be a difficult problem for you. AOMEI Partition Assistant also has other helpful features like “Convert to GPT/MBR”, “App Mover”, and “Disk Defrag”…You can rely on this powerful tool to manage your devices.

