How to Boot Computer from Destination Disk?
In this post, you will learn how to boot computer from destination disk after OS migration. No matter you are using a laptop or desktop, here you can find the tutorial.
By Lucas / Updated on March 6, 2024
How do I get my computer to boot?
Booting a computer refers to the process of initiating it with an installed operating system. This involves loading essential software into the main memory, facilitated by hardware or firmware like MBR or UEFI in the CPU. Let's delve into the detailed booting procedure.
To commence, simply press the power button to activate the power supply.
Subsequently, the BIOS stored in the read-only memory (ROM) kicks in, conducting a Power-On Self Test (POST) to ensure all hardware components are functioning correctly.
Following this, the BIOS proceeds to identify the bootable device according to the boot sequence, typically locating the boot loader or Volume Boot Record (VBR) on the active primary partition, typically in the initial 512-byte sector.
Once identified, the boot loader or VBR initializes and executes essential operating system boot loader files such as io.sys, ntldr, bootmagr, loading the operating system, its kernel, system drivers, applications, or necessary commands for the boot process.
Finally, as the files are loaded, a boot screen appears, displaying computer information and providing a prompt to access BIOS setup. Adjust the boot order in BIOS settings to initiate the computer correctly.
Another situation is that some users may clone or migrate a system disk to a new disk. In this case, they need to boot from new disk, which means they should choose the boot disk before all processes.
After you migrate OS to SSD/HDD, you need to replace the current system disk with the cloned one and get into BIOS to set the new drive as the prior boot device to boot. Well, how to do it step by step? The following content offers very clear instructions for your reference.
Boot from destination disk on a laptop
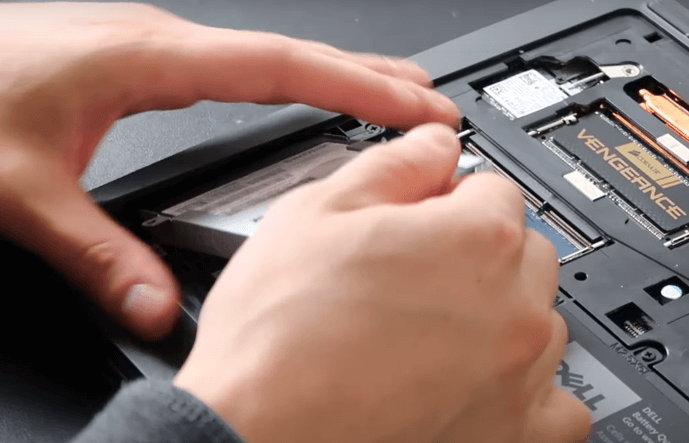
1. First, power off your laptop completely and slip it over.
2. Use a screwdriver to remove some screws on the bottom case.
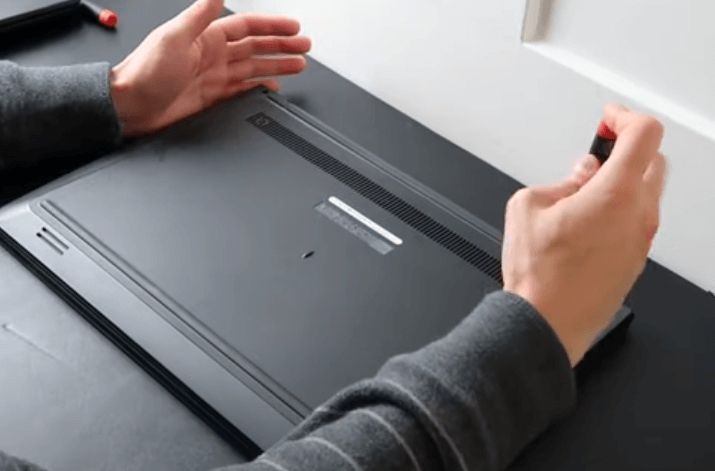
3. Remove the entire hard disk back cover panel carefully and you will see the inside of your laptop.
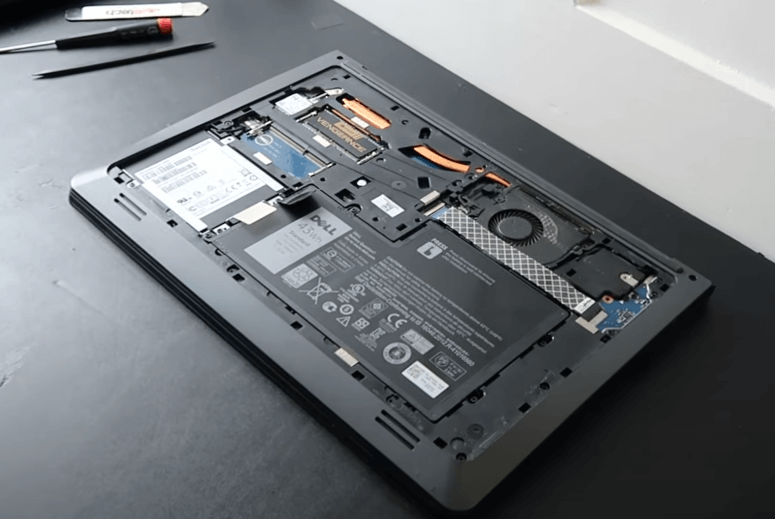
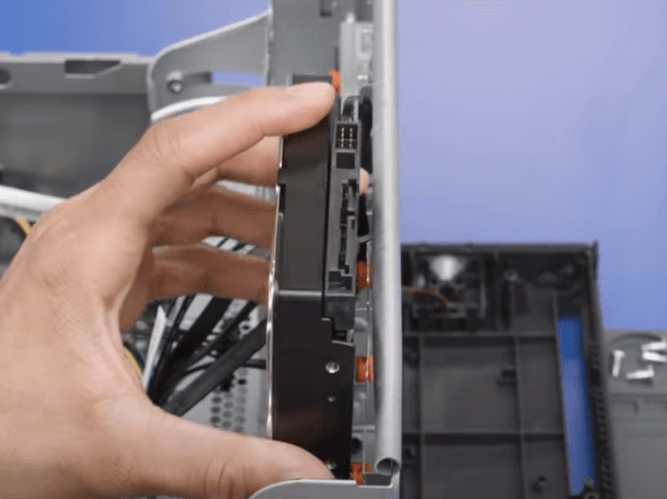
4. Locate where your current hard drive locates. Generally speaking, it is held by a hard drive caddy, which can help fasten the drive to your computer and prevent it from shifting.
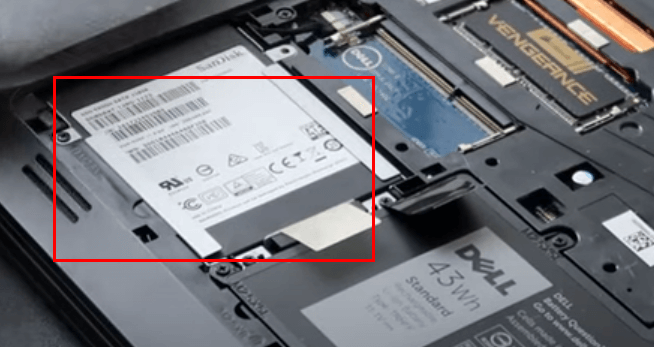
5. Then use the screwdriver to take the hard drive caddy from the computer case. Then you will find it is connected to your motherboard via a cable, unplug it carefully.
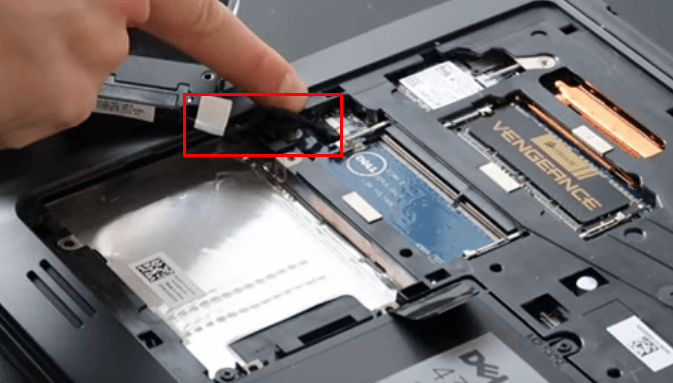
6. Remove the screws on the caddy to take the hard drive out correctly.
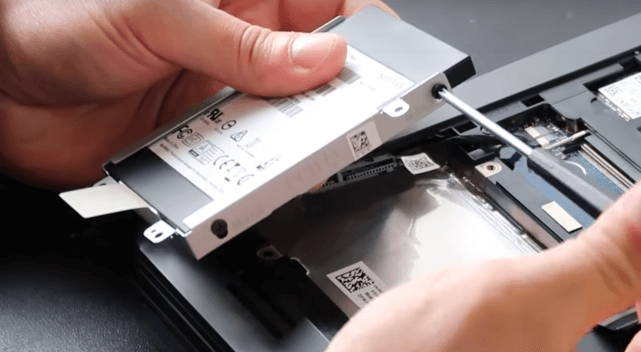
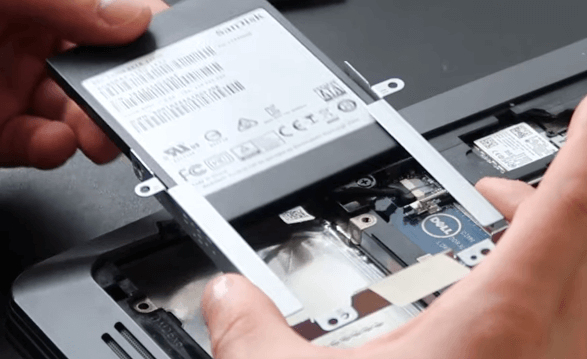
7. Now, put your new hard disk into the caddy and do what is the opposite of the above steps. Reboot yout computer and it will boot from the destination disk.
Boot from destination disk on a desktop
Usually, a desktop allows you to install multiple hard drives on the host, which is different from a laptop. To install the new disk, do as following:
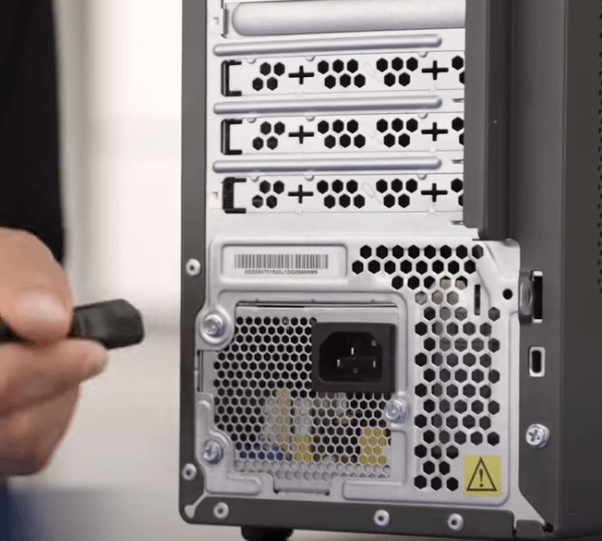
1. Turn off your computer. Make sure all keyboard and power lights are off and no fats are running.
2. Unplug the power cord as a safety measure. Press and hold the power button for about10 seconds to drain any lingering power. It is recommended to wait for another five minutes before proceeding to the next step.
3. Remove all the peripherals, such as keyboards, printer, mouse, and so on. (Note: you can take a few pictures so that you can know how to reconnect them later).

4. Now use the correct screwdriver size to remove screws.

5. Remove the cover and access the internal components of the computer. Locate the internal drive.
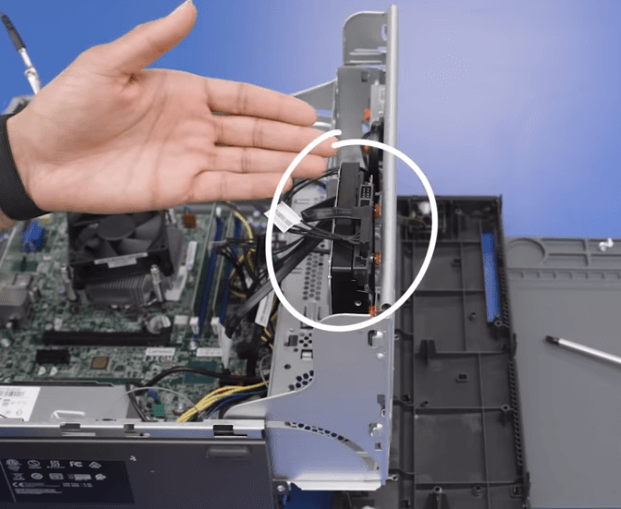
6. Disconnect any cables and remove all screws that are used to hold the drive in place.
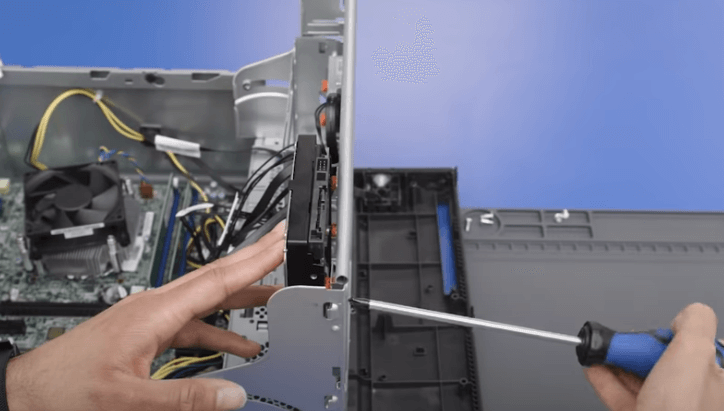
7. Pull out the old hard drive and insert the new drive carefully. Secure it using the screws that were attached to the old one.
8. Then reconnect all the cables and peripherals. Put the cover back on.
When rebooting your computer, it will boot from the new disk. If you keep both the old and the new hard drive connected to your computer, to boot the computer from the cloned SSD/HDD, you need to get into BIOS to set the new drive as the prior boot device to boot.
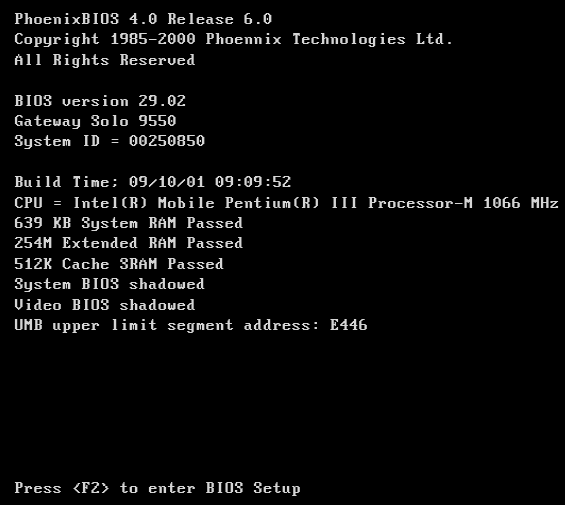
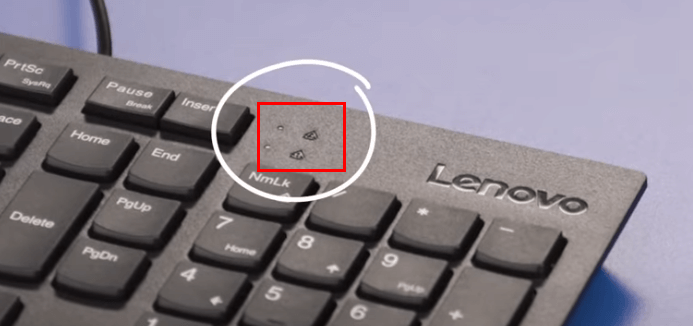
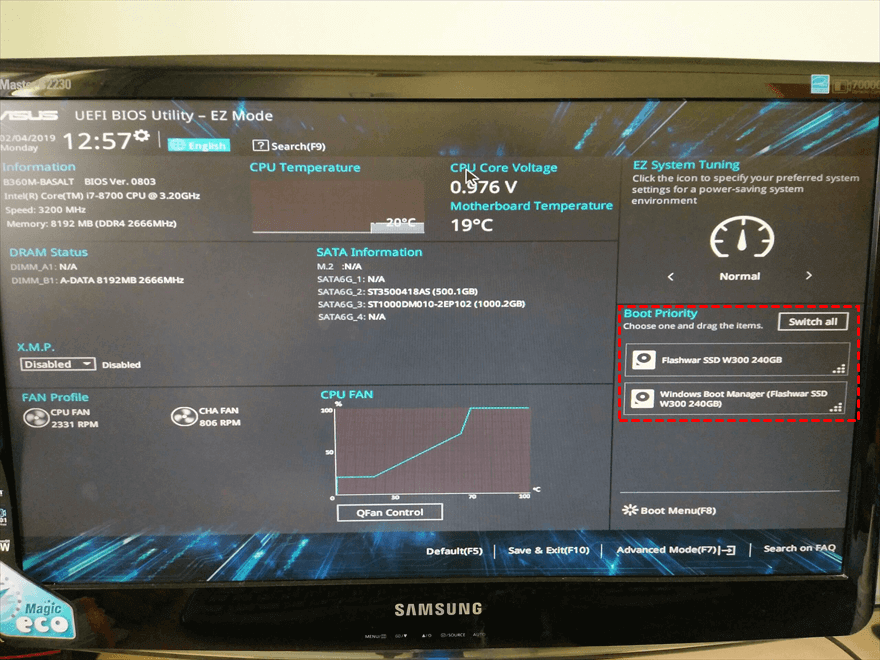
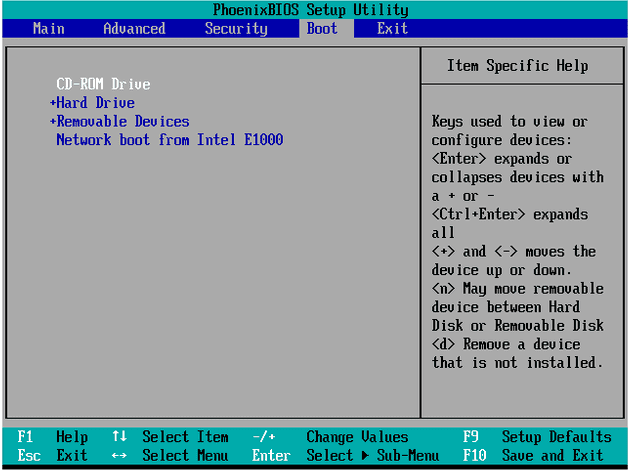
1. Reboot your computer and press a specific key (usually the DEL, ESC, F1, F2, F8, F9, F10, F11,F12 key) constantly to get into BIOS.
2. When you get into the BIOS, you can use the arrow keys to select the cloned SSD/HDD as the prior boot drive, and press Enter key to boot from it. Such as the following pictures:
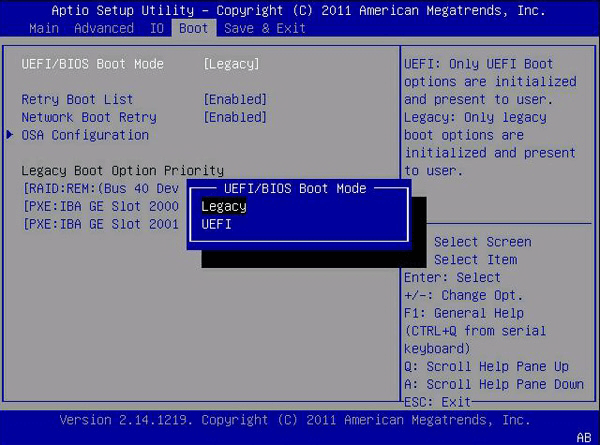
Change legacy/CSM boot mode when necessary
However, many users could not boot the computer from the destination disk successfully. The big possibility is that the computer is not using the correct boot mode.
▸ If the cloned drive is an MBR disk, then you need to make sure the boot mode has been set as Legacy/CSM boot mode. Otherwise, the computer cannot boot from the drive.
▸If the cloned drive is a GPT disk, you need to make sure that the computer’s motherboard supports EFI/UEFI boot mode, and that it has been set as EFI/UEFI boot mode. Otherwise, you cannot boot from the drive successfully.
Fortunately, many computers with UEFI firmware will allow you to enable a legacy/CSM BIOS compatibility mode. If not, you can convert the disk from MBR to GPT without losing data or GPT to MBR for the current boot mode.
Tip: You may need to disable the Secure Boot control under Boot tab (or Security tab, or the Authentication tab) before changing boot mode.
1. When you get into BIOS, look for a setting called “UEFI Boot”, “Launch CSM”, change the boot mode from UEFI to Legacy/CSM: disable the UEFI Boot option and enable CSM Boot support.
* If you need to boot from UEFI, just keep the Launch CSM “Disabled”.

2. Or, find the Boot tab, and change the boot mode to Legacy or UEFI according to your need with the arrow keys. Press Enter to boot from it.
If you have any other boot problems or technical issues regarding one of our products, please contact us via [email protected].
Common problems during computer boot
Here are some common problems users might encounter when trying to boot their computers, along with brief solutions:
-
Hardware Failure: If the computer fails to start due to hardware issues, such as a faulty power supply, malfunctioning RAM, or a dead motherboard, users should check connections, replace faulty components, or seek professional repair services.
-
Corrupted Boot Sector: A corrupted boot sector can prevent the operating system from loading. Users can use recovery tools or boot from a recovery disk to repair the boot sector, or reinstall the operating system.
-
Incorrect BIOS Settings: Incorrect BIOS settings, such as an incorrect boot order or disabled devices, can prevent the computer from booting. Users should enter the BIOS setup utility, verify settings, and adjust them as needed to ensure the correct boot sequence.
-
Software or Driver Issues: Incompatibility or corruption of system files or drivers can cause boot failures. Users can try booting into Safe Mode to troubleshoot and fix software-related issues, update drivers, or perform a system restore to a previous working state.
-
Virus or Malware Infections: Viruses or malware can infect the boot process and prevent the operating system from loading properly. Users should run antivirus or antimalware scans from a bootable disk or use a rescue disk to remove the infections.
-
Hardware Incompatibility: New hardware installations or upgrades may cause boot problems if they are incompatible with existing components or drivers. Users should ensure all hardware components are compatible, properly installed, and have updated drivers.
-
Firmware Issues: Outdated or corrupted firmware, such as BIOS or UEFI firmware, can lead to boot failures. Users should check for firmware updates from the manufacturer's website and follow instructions to update the firmware.
-
Disk Errors: Disk errors, such as bad sectors or file system corruption, can prevent the operating system from booting. Users can use disk repair tools or boot from a recovery disk to fix disk errors and restore the boot functionality.

