Fixed: PC Won't Boot After Adding Second Hard Drive
Why PC won’t boot after adding second hard drive? And how can you fix it to ensure your system boots correctly? Keep reading to explore the possible causes and learn step-by-step methods to get your Windows 10 system running smoothly again.
By Hedy / Updated on April 3, 2025
Why PC won’t boot after adding second hard drive?
If your PC won’t boot after adding a second hard drive, several potential reasons could be causing the issue:
♦ Incorrect boot order: The BIOS/UEFI may prioritize the new drive over the original boot drive, preventing the system from loading the OS.
♦ Faulty or loose connections: Improperly connected SATA or power cables can prevent the system from recognizing either drive.
♦ Insufficient power supply: Adding another drive increases power consumption, which may exceed the PSU’s capacity, leading to boot failures.
♦ Drive conflict: If the new hard drive has its own bootable OS, it may interfere with the existing OS, causing boot issues.
♦ BIOS/UEFI compatibility issues: Some motherboards may struggle to detect or properly configure additional drives, especially older models.
♦ Corrupt bootloader: Installing a new drive could unintentionally alter the bootloader settings, making the original OS unbootable.
♦ Drive format issues: If the new drive is not formatted correctly or has an incompatible partition style (MBR vs. GPT), the system might fail to boot.
Automatically fix PC won’t boot after adding second hard drive
For those with limited experience in handling computer issues, relying on third-party software is often the safest and most efficient solution. AOMEI Partition Assistant is a powerful partition management tool that offers a wide range of features to help users clone disks, resize/move partition, and manage their disk partitions.
One of its standout features is Boot Repair, designed to help users fix boot issues on their computers, even if the system fails to load due to issues like a corrupted Master Boot Record (MBR), corrupted or missing BCD (Boot Configuration Data), or other critical boot-related problems. It can be a lifesaver when your system is stuck in a boot loop or when Windows fails to load properly.
Step 1. Install AOMEI Partition Assistant on a working PC and connect a USB drive with enough storage to this PC.
Step 2. Open this software and select the Boot Repair tool below the Recover section.

Step 3. Click the create a bootable disk option to create a WinPE Boot Repair USB drive.

Step 4. Plug the created drive into the non-booting computer, then enter the BIOS settings to change the boot order so that the computer boots from it. It will automatically load the Boot Repair tool and perform a scan of boot entries.

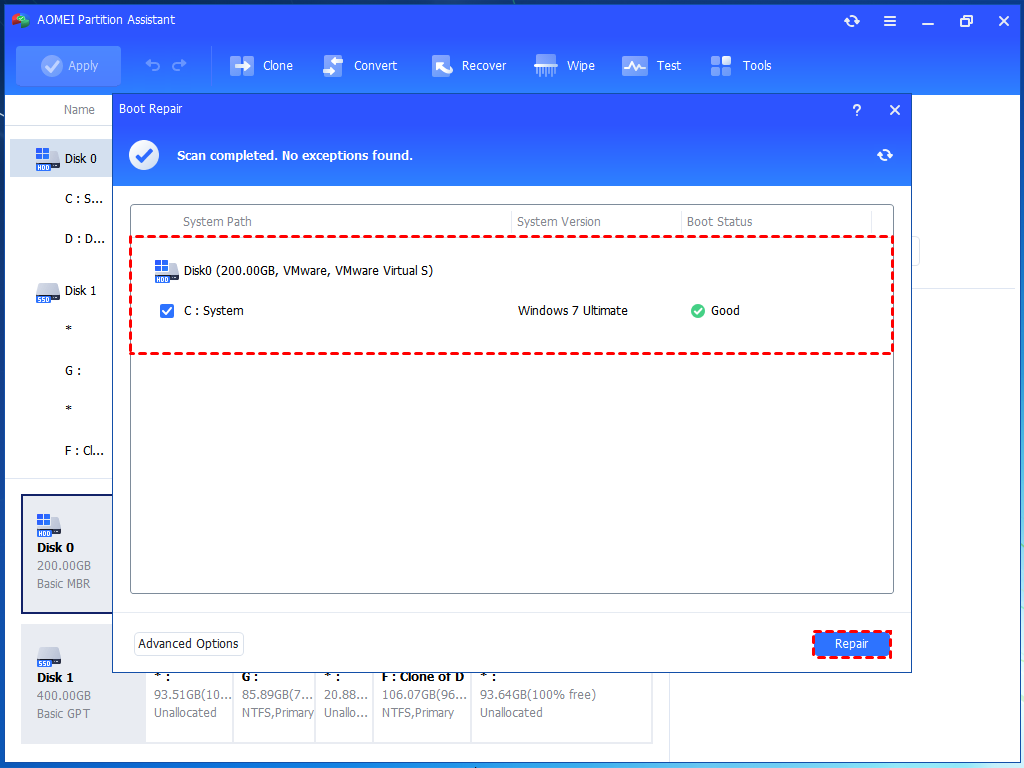
Step 5. Once the process completes, you will see all scan results, including system paths, system versions, and boot status. Select the repairable boot entries you want to repair and click the Repair button.
Step 6. Wait for the repair process to finish, then remove the bootable USB drive and boot the PC from the original system drive.

How to fix Windows 10 won’t boot after adding second hard drive manually
If your computer fails to boot after installing a second hard drive on Windows 10/11, there are several manual solutions worth trying. In addition to the automatic fixes mentioned earlier, we’ve compiled seven effective troubleshooting methods to resolve the issue. Work through them step by step until the problem is resolved.
Fix 1. Ensure the boot drive order is correct in the BIOS
Start by ensuring that your startup disk is set as the first boot device in the BIOS. Follow these steps to adjust the boot order:
Step 1. Power on your computer and immediately press F2, DEL, or the designated hotkey before the system starts. This will open the BIOS menu.
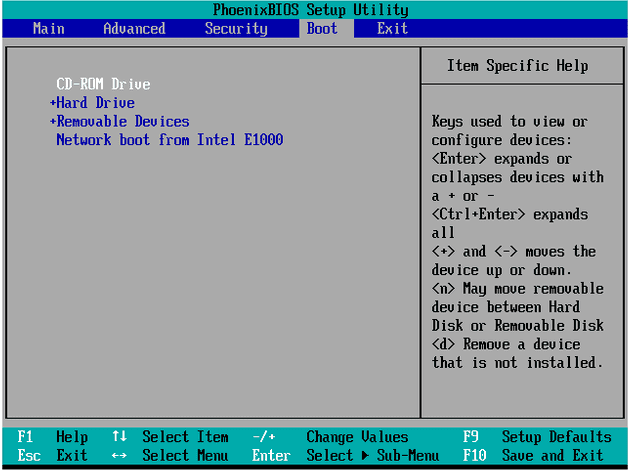
Step 2. Navigate to the Boot tab, locate your startup disk, and use the arrow keys along with the "+" key to move it to the top of the list.
Step 3. Press F10, then hit Enter to confirm the changes and exit the BIOS Setup Utility.
Fix 2. Check the connection between the computer and the hard drive
A faulty or loose connection between the hard drive and the computer can also trigger boot issues. To rule out connection problems, follow these steps carefully:
Step 1. Shut down your computer completely and remove the battery (if applicable).
Step 2. Use a screwdriver to open the computer case and gently detach the second hard drive.
Step 3. Examine the SATA cable and power cable for any loose or damaged connections.
Step 4. Firmly reattach the hard drive, ensuring all cables are properly secured.
Note: Fixes 3, 4, 5, and 6 require booting into Safe Mode first. Click the provided link for a step-by-step guide on how to do this.
Fix 3. Update the Motherboard and disk drivers
If your second hard drive won’t boot, outdated chipset or disk drivers could be the culprit. Updating these drivers may resolve the issue. Follow the steps below to update them:
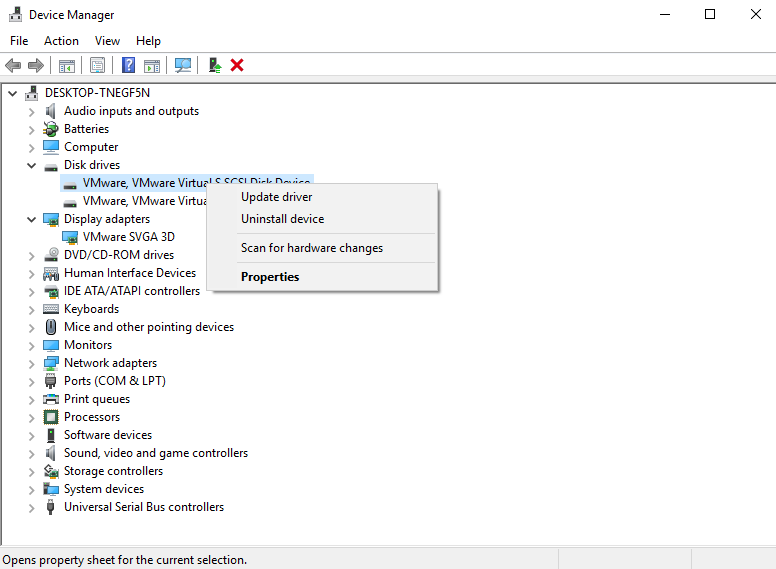
Step 1. Press Win + X, then select Device Manager from the menu.
Step 2. Expand the Disk Drives section, find the unbootable SATA internal hard drive, right-click it, and choose Update Driver.
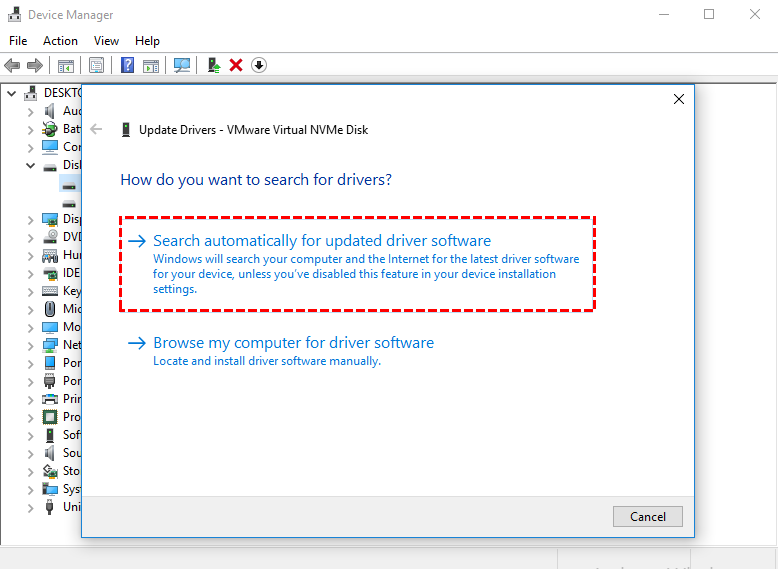
Step 3. In the pop-up window, select Search automatically for updated drivers software and follow the on-screen prompts to install the latest driver.
Fix 4. Run Startup Repair
If critical system or startup files become corrupted after installing a second hard drive, your computer may fail to boot. Using Windows installation media (a bootable USB or installation disc) can help perform an automatic startup repair. Follow these steps:
Step 1. Insert a Windows installation USB or disc, restart your computer, and press any key when prompted to boot from the media.
Step 2. Choose your language preferences and continue until the Install Now screen appears. Click Repair your computer to open the Advanced Options menu.
Step 3. Navigate to Troubleshoot > Advanced Options > Startup Repair.
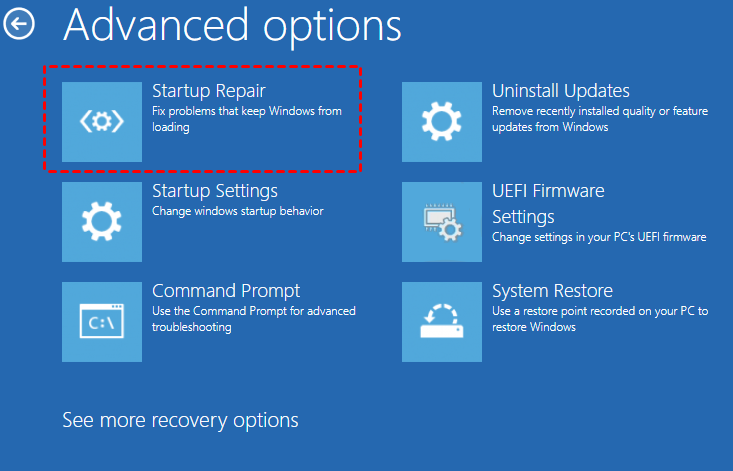
Step 4. The tool will automatically scan for problems and attempt to repair them. Once the process is complete, restart your PC and check if it boots properly.
Fix 5. Check the hard drive for problems
If the newly added hard drive is damaged or corrupted, your computer may fail to boot. To determine if the drive has issues, run a disk check using Command Prompt:
Step 1. Type cmd in the Windows search bar, right-click Command Prompt, and select Run as administrator.
Step 2. In the Command Prompt window, type the following command and press Enter:
chkdsk g: /f /r /x
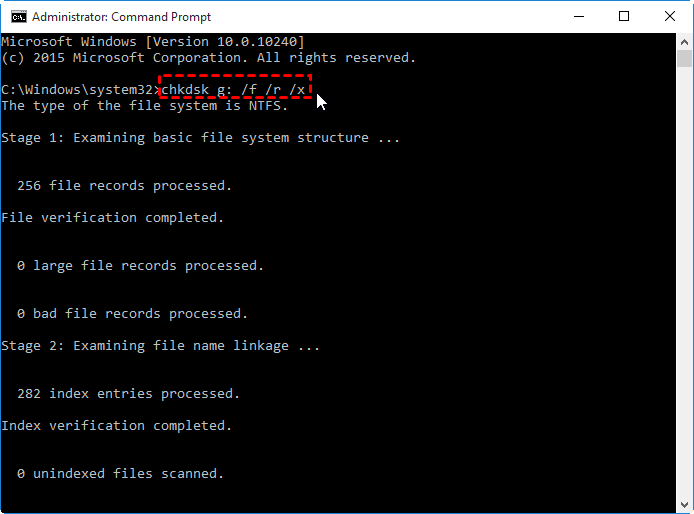
(Replace "g" with the actual drive letter of the hard drive you want to check.)
Step 3. Type Y, then restart your computer. The system will scan and attempt to repair the drive on the next reboot.
Fix 6. Format the hard drive
Some users have resolved this error by formatting the hard drive. If you want to give this a try, follow the steps below:
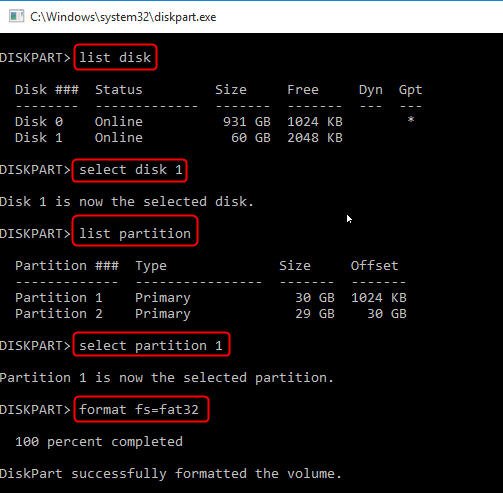
Step 1. Press Win + R to open the Run dialog box, type diskpart, and press Enter. Confirm the action by clicking Yes in the pop-up window.
Step 2. In the Command Prompt window, enter the following commands:
-
list disk: see all disks connected to your computer, and you need to identify which drive needs to be formatted by size.
-
select disk 1: select the disk which contains the target drive.
-
list partition: list all partitions on the disk.
-
select partition 1: 1 refers the partition number that you need to format.
-
format fs=fat32 or format fs=fat32 quick
Fix 7. Change another hard drive
If the issue of the computer not booting with the second hard drive continues, it may be a sign that the hard drive is damaged. In this case, the best course of action is to either replace the hard drive with a new one or seek assistance from the manufacturer or a professional repair service.
Conclusion
Our survey indicates that the primary cause of boot issues after adding a second hard drive is that the new drive may interfere with the existing BIOS boot settings, preventing the computer from starting. If the boot drive is not set as the first boot device, the second hard drive won't boot on Windows 10/11.
So, how can you fix PC won’t boot after adding second hard drive? This article outlines eight effective troubleshooting methods to resolve the problem. The most labor-saving way is to use AOMEI Partition Assistant's Boot Repair feature.

