[3 Ways] How to Permanently Assign Drive Letter to USB?
A permanent drive letter prevents us from being confused with multiple USB drives. Then, how to permanently assign drive letter with ease? This post offers three effective ways to make it.
By AOMEI / Updated on July 18, 2025
Why Assign Permanent Drive Letter to a USB Drive?
Windows assigns drive letters to all the drives that are available on the computer, such as internal hard disks, SD cards, and external USB drives. Drive letters are alphabetical identifiers for volumes and each drive letter can be used once on one computer.
However, some users discover USB drive letter keeps changing each time they connect it to the same computer. It happens frequently if they use multiple USB drives on one computer. Assigning permanent drive letters to USB drives is needed.
In addition, some users perform regular backup between the USB drive and the computer via a USB hidden copier. With a persistent drive letter, the backup task can be recognized and repeated by the backup utility smoothly. What we need to do is to perform a drive letter assignment.
How to Permanently Assign Drive Letter with 3 Ways?
How do I permanently set a drive letter? There are three efficient solutions I’d like to recommend to you. Learn how to assign a static drive letter in Windows 10 below:
- 🔥#1: Assign drive letter permanently with the best freeware - High efficiency and easy for all
- #2: Assign a persistent drive letter with Disk Management - for experienced
- #3: Diskpart change drive letter permanent - Users need to be familiar with command parameters
Let's begin with the easiest solution to assign drive letters to external hard drive.
Solution #1: Assign drive letter permanently with the best freeware
AOMEI Partition Assistant, the best partition manager, can help you assign a permanent drive letter to a USB drive. It can be operated with mouse-clicking and it’s totally free. Besides, it offers many other powerful features to help you manage disks and partitions better such as resizing/moving partitions, deleting partitions, formatting partitions, deleting large files, etc.
With this method, you can even change drive letter without formatting. Just follow the instructions below to see how to permanently assign drive letter:
Step 1. Download, install, and launch AOMEI Partition Assistant. Right-click the USB drive which you want to give a permanent drive letter to, select “Advanced” and then “Change Drive Letter”.
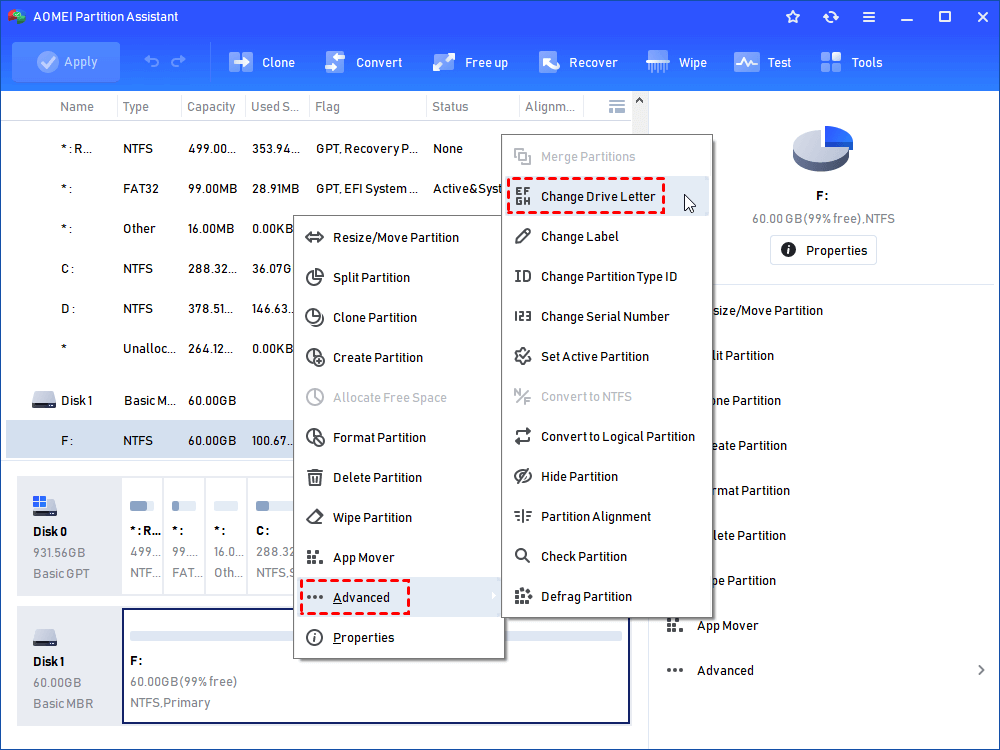
Step 2. Select a new drive letter in the pop-up window. You are suggested to choose a rarely-used drive letter like M-Z.

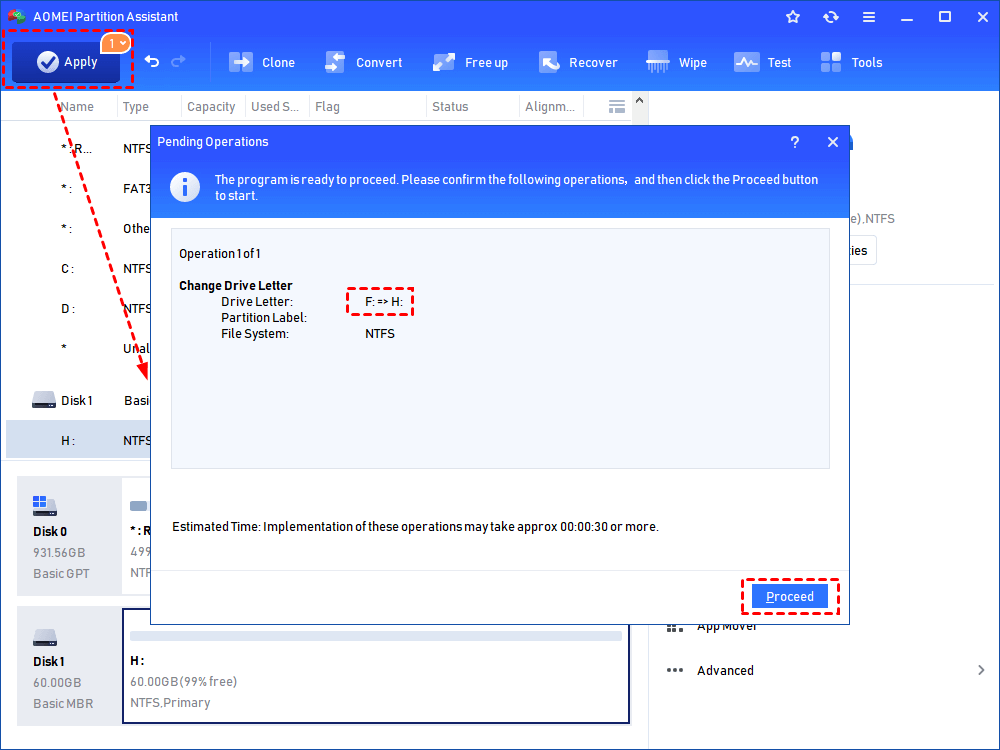
Step 3. Click “Apply” to view pending operations and then “Proceed” to commit the operations.
✍ Note: To change partition type ID for MBR disk partitions and change serial number on a certain partition, please upgrade to AOMEI Partition Assistant Professional.
Solution #2: Assign a persistent drive letter with Disk Management
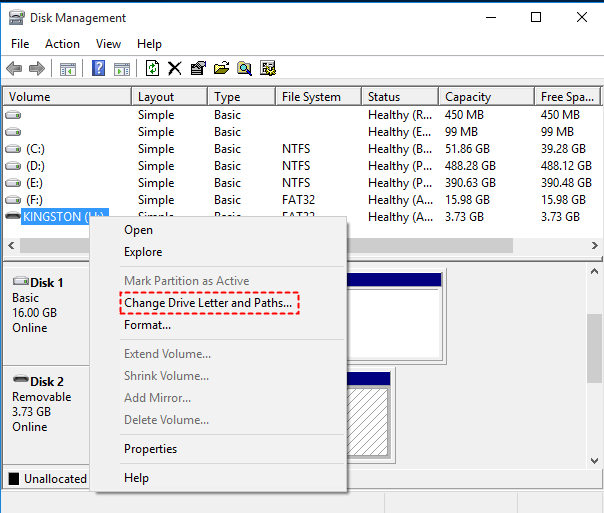
Step 1. Hit Windows Key + X on your keyboard, and select Disk Management from the menu.
Step 2. Right click the USB drive to which you want to assign a persistent drive letter and select “Change Drive Letter and Paths.”
Step 3. In the pop-up window, click “Change”.

Step 4. In the next window, choose a proper drive letter for your USB drive using the drop-down menu and click “OK”.
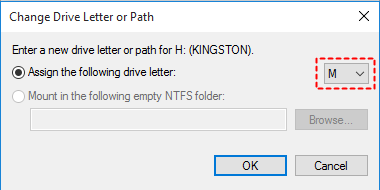
✐ Tips: You may choose a rarely-used drive letter like M-Z, thus avoiding possible drive letter conflicts.
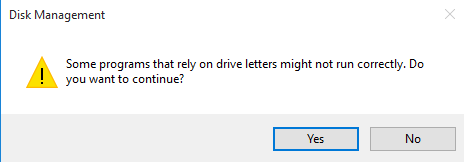
Step 5. You will get a prompt that some programs might rely on drive letters to run properly. Click “Yes” to continue as long as the drive letter you assign here is not occupied by another drive where the programs are installed.
If you can't assign a drive letter in Disk Management, it may be because the volume is not ready to receive a drive letter, it has not been assigned, or the drive is inaccessible. Please try AOMEI Partition Assistant to fix it.
Solution #3: Diskpart change drive letter permanent
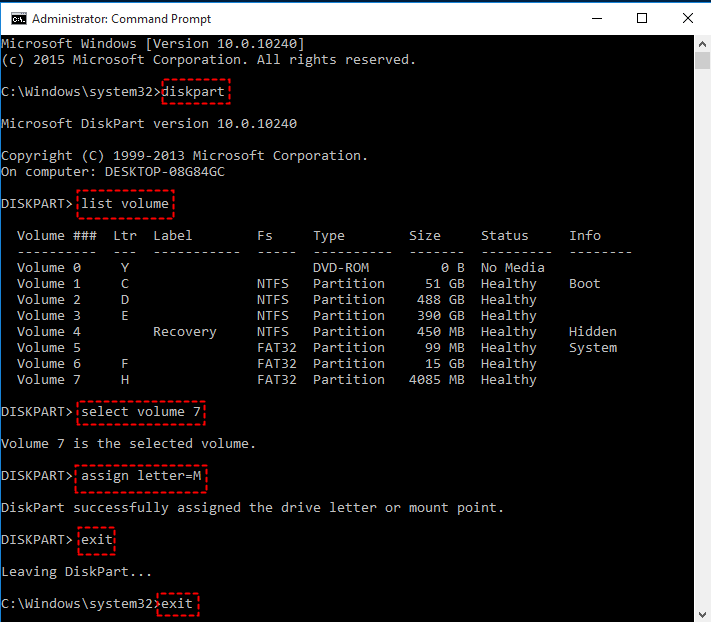
Step 1. Tap the Search button on the taskbar and type “cmd” in the search box. Right-click “cmd” and select “Run as administrator”.
Step 2. Type diskpart and press Enter. Type list volume and press Enter.
Step 3. Type select volume # (ex: volume 7) and press Enter to select the USB drive to be assigned a static drive letter. You may get indication from the size of the volume. Type assign letter=# (ex: letter=M) and press Enter to assign a new drive letter.
Step 4. Double type exit and press Enter to exit Diskpart and Command Prompt successively.
The Diskpart assign letter will be more complex. You need to be careful when typing each parameter. If you are unfamiliar with the commands, try AOMEI Partition Assistant - the best alternative to change drive letter or assign permanent drive letter for USB.
Verdict
You have learned three exact ways to permanently assign drive letters for USB drives. After you commit one of the solutions, every time you connect the same drive to the same computer, Windows 10 will automatically recognize it and set the same letter. However, if you insert your external drive into another computer, it is likely to get a different drive letter. Apart from assigning a drive letter to a certain drive permanently, you can also repair pen drive not detected and fix the error that C drive is RAW with AOMEI Partition Assistant. Go for this tool and you won’t regret!

