[Tutorial] How to Use PowerShell Change Drive Letter
In this post, I will show you how to use PowerShell to change drive letter. In addition, another simple and free methods will also be introduced to you.
By AOMEI / Updated on May 12, 2023
What is PowerShell?
Windows PowerShell is a command-line shell and scripting language developed by Microsoft for the Windows operating system. It provides a powerful command-line interface (CLI) that allows users to perform various system administration tasks by executing scripts or commands.
PowerShell is designed to automate administrative tasks across a wide range of Windows applications and services. It includes a set of command-line tools, known as cmdlets, which are designed to perform specific tasks, such as managing files, configuring networking settings, and managing Active Directory.
PowerShell is based on the .NET framework, which allows users to access the full range of .NET classes and libraries. This means that PowerShell scripts can be used to automate a wide range of tasks beyond just Windows administration, including interacting with databases, working with web services, and more. PowerShell is an incredibly versatile tool that can be used by system administrators, developers, and power users alike.
Use PowerShell command to change drive letter
It is a good idea to use PowerShell change drive letter which is safe for your drive. Next, I will show you how to use PowerShell change partition drive letter step by step.
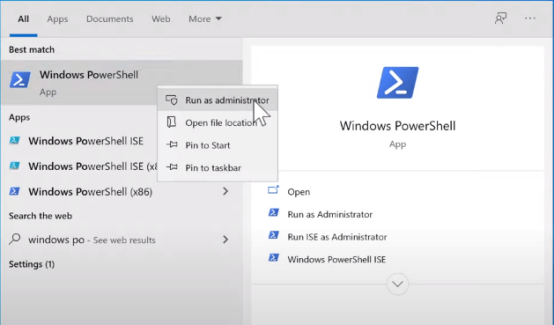
Step 1. Click Star Bar, find PowerShell. Then, right-click the icon and select the "Run as administrator" option.
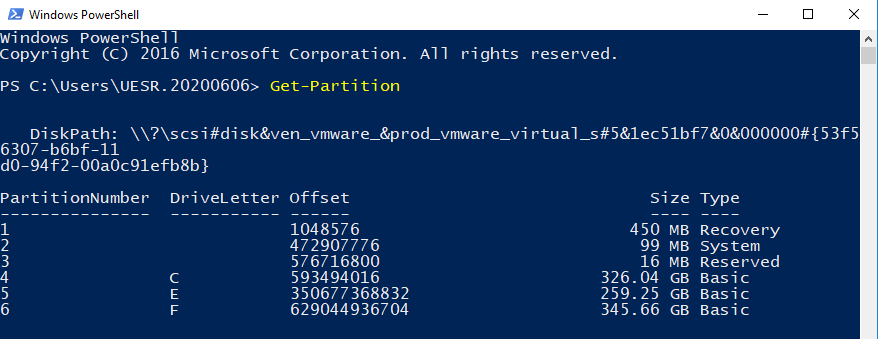
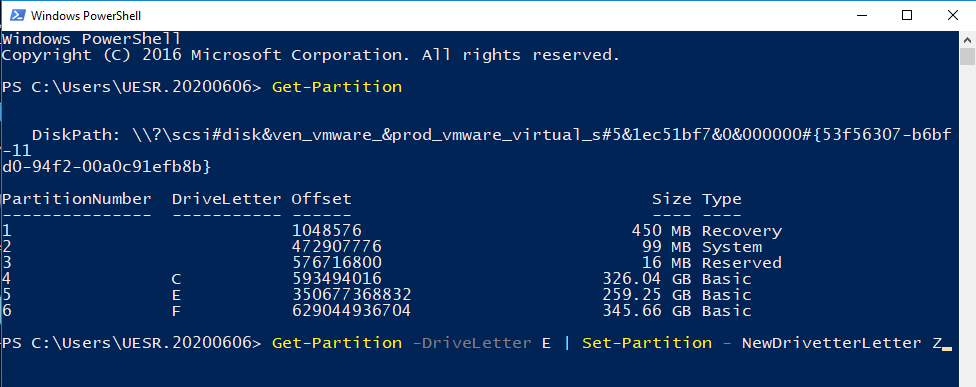
Step 2. On the page that appears, type: Get-Partition, then press Enter.

Step 3. Then, you will see your computer disk. (Think clearly about the old drive letter and the new drive letter you want to change in this step)
Step 4. Enter a new line: Get-Partition -DriveLetter X| Set-Partition -NewDriveLetter Y (Here is an example of replacing E with Z)
Tip: X represents the old drive letter, Y represents the new drive letter.
After these steps, you have successfully changed the drive letter in PowerShell. But sometimes you will find that PowerShell is not installed on your computer, and it may be troublesome to download it again. So you can try some alternative methods.
Two alternatives to use PowerShell change drive letter
In this part, I will introduce you to the other two ways to change the drive letter. One is Windows built-in tool Diskpart, and the other is to use excellent third-party software.
▶ Change drive letter with Diskpart
Using Diskpart to change drive letter also requires you to have certain computer skills, because enter command lines is inevitable.
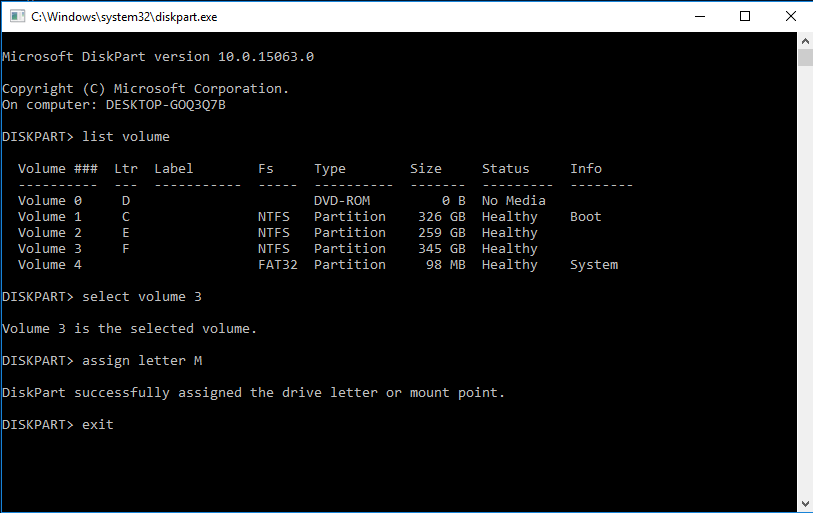
Step 1. Search for Diskpart from the star bar, right-click the icon, and then select the "Run as administrator" option.
Step 2. Please enter the following commands, please hit enter after each input:
● list volume
● select volume 3(here take volume 3 as an example)
● assign letter=M
● exit
▶ Change drive letter with a free third-party tool (hot)
Although Diskpart’s commands are simpler than PowerShell, do you think it’s still a bit complicated? Because Most users do not have professional computer knowledge. It is not a simple matter to enter a series of codes in PowerShell or Diskpart.
Fortunately, AOMEI Partition Assistant Standard is such a great partition manager that can easily help you change drive letters easily and safely. The graphical user interface makes everything easy, and you can change the drive letter with a few clicks. In addition, It also helps you change labels, change partition type ID, and more. Please download the freeware to see how it works.
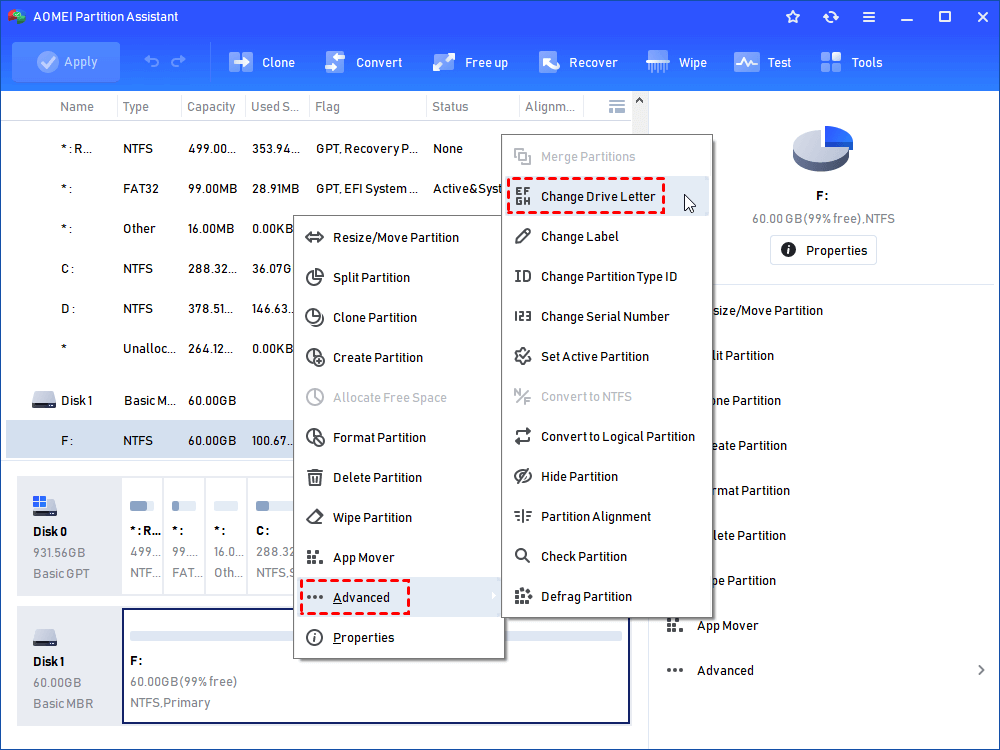
Step 1. In the main interface, you can see all disks on your PC. Right-click the partition that you need to change drive letter, in the pop-up menu, select Advanced -> Change Drive Letter.
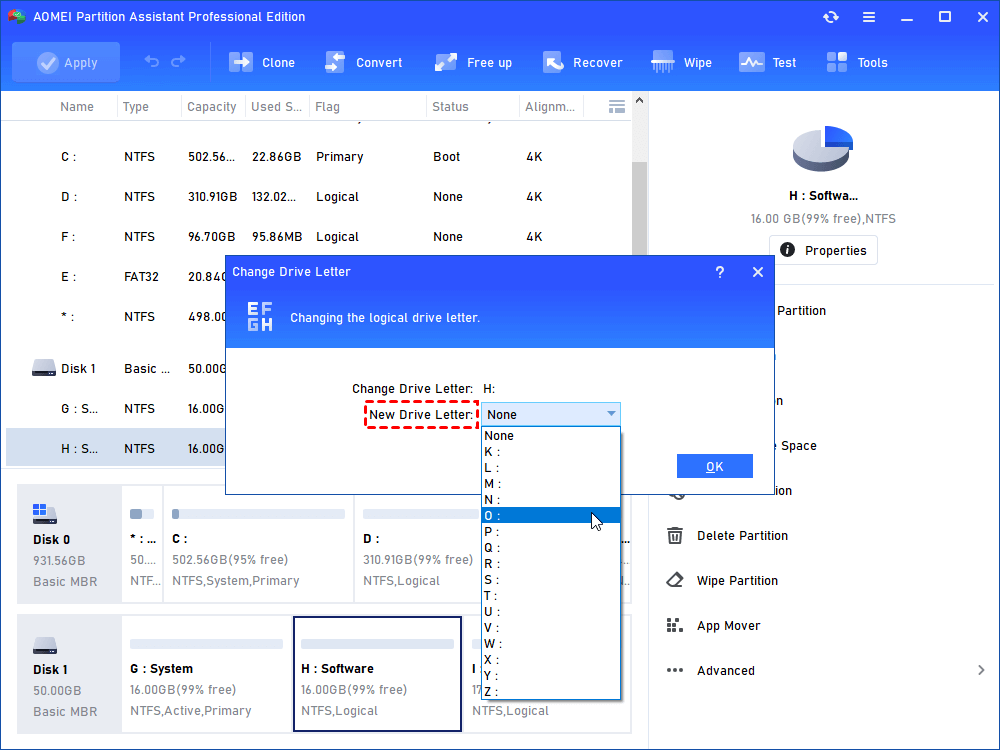
Step 2. It will pop up a small window where you can choose a new drive letter in the list of the drop-down menu. Choose one and click OK.
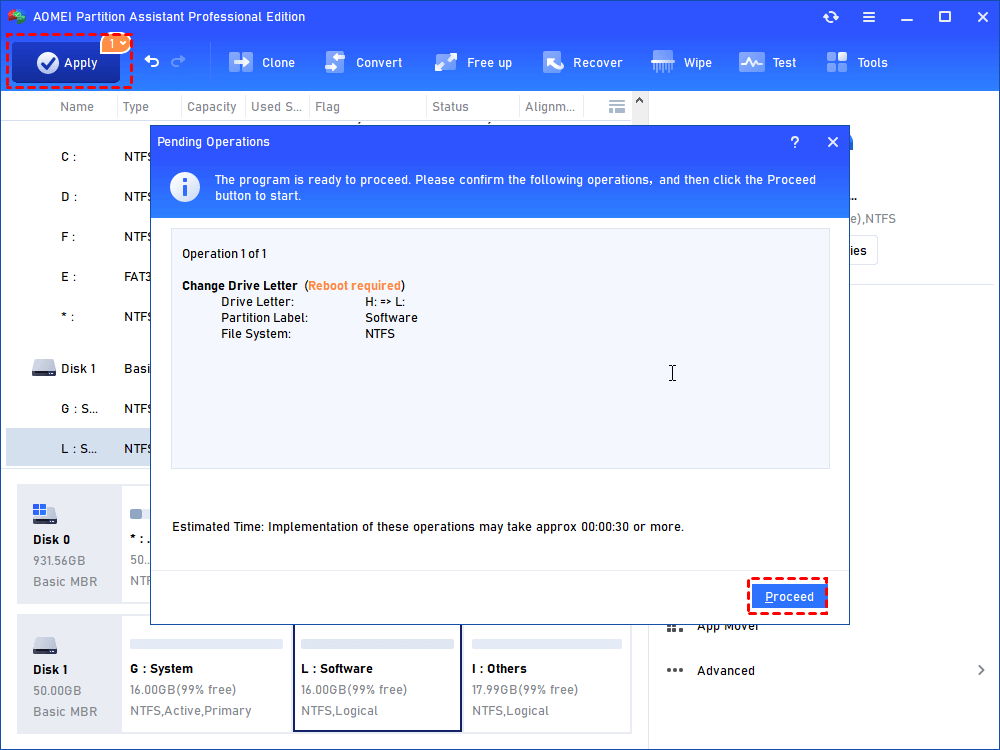
Step 3. When you are back to the main interface, click Apply > Proceed to execute the task.
- ★Warning:
- It is recommended that you generally do not change your drive letter arbitrarily, as some unknown failures may occur. For example: after changing the drive letter, the shortcut path of your application may be wrong and cannot be opened. Because we have modified the drive letter, but the shortcut address in the registry is not modified, so there will be path errors and incorrect parameters. If you must change your drive letter, it is recommended to save some important files on the drive letter to another disk when changing the drive letter to prevent errors and avoid data loss and regret.
Conclusion
After reading this article, I believe you have a clear understanding of how to use PowerShell change drive letter. In addition, Diskpart is worth to try. However, if you are looking for the easiest way, then AOMEI Partition Assistant Standard is yours best choice.

