How-to|Show Hidden Files Using Command Lines in Windows PC
Find files are hidden from your USB drive/HDD/SSD? Read this article carefully to learn how to show hidden files using command lines in Windows 11/10/8/7.
By AOMEI / Updated on November 17, 2023
Quick Navigation:
Scenario: Files not showing in USB
“I had files stored on a flash drive. They were in folders and some were out of folders. The contents of the folders are showing empty; although the size of the properties describes them as containing files of size consistent with their original content.
I have used chkdsk /f and it said that it found problems and fixed them. That did not restore the missing files. Why are things so complicated? I am using Windows 7 but I also have access to a Windows 10 computer. Please help!”
The problem of files not showing in external hard drive happens now and then. It could be caused by various reasons:
▶ File System Incompatibility
Different operating systems may use different file systems (e.g., NTFS, FAT32, exFAT). If the USB drive is formatted with a file system that is not supported by the device you are trying to access it on, the files may not be visible.
▶ Corrupted File System
If the file system on the USB drive is corrupted, it can prevent the proper reading of files. Corruption can occur due to the abrupt removal of the USB drive, power outages during data transfer, or other unexpected events.
▶ Hidden Files
The files may be marked as hidden. In some cases, the operating system might be configured to hide certain types of files by default. Adjusting the settings to show hidden files can resolve this issue.
▶ Virus or Malware
A virus or malware infection could be hiding or corrupting files on the USB drive. Running a thorough antivirus scan can help identify and resolve such issues.
This is not a rare error when you use computer, but when it happens, it's a bit annoying. So, how to show hidden files in Windows 11/10/8/7? Command Prompt, a built-in tool in Windows, can give you a hand. In this post, we'll show you how to use the Command line to show hidden files and how to conveniently fix this problem.
How to show hidden files using command lines
Actually, there are two ways to show hidden files using command: dir command and attrib command. You can refer to the following parts to learn how to show hidden files in CMD:
▶ Command 1: view hidden files with dir lines
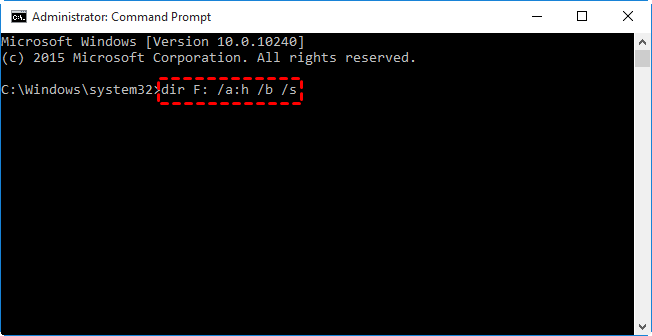
1. Hit Windows Key + X on your keyboard, and select Command Prompt (Admin) from the menu.
2. Type dir F: /a:h /b /s and press Enter to show hidden files in drive F. You should change the drive letter according to your situation.
Tips:
▪ /a:h—displays the names of the directories and files with the Hidden attribute; the colon between “a” and “h” is optional;
▪ /b—displays a bare list of directories and files, with no additional information;
▪ /s—lists every occurrence of the specified file name within the specified directory and all subdirectories.
3. Type exit and press Enter to exit Command Prompt.
You can only view hidden files in the Command Prompt window by using dir command. To unhide those files from specific drive, please learn how to show hidden files via command from Way 2.
▶ Command 2: show hidden files with attrib lines
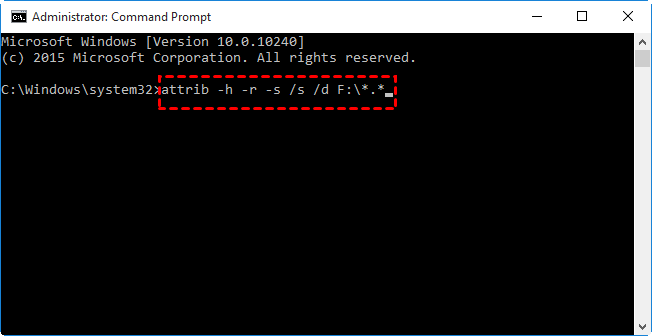
1. Open Command Prompt as you do in Way 1.
2. Type attrib -h -r -s /s /d F:\*.* and press Enter to unhide hidden files in drive F. Replace the drive letter with yours.
Tips:
▪ -h—clears the Hidden file attribute; -r—clears the Read-only file attribute; -s—clears the System file attribute;
▪ /s—applies attrib and any command-line options to matching files in the current directory and all of its subdirectories;
▪ /d—applies attrib and any command-line options to directories.
3. Type exit and press Enter to exit Command Prompt. You can then see the hidden files in the corresponding drive.
Extra tips for fixing hidden files on external hard drives
As mentioned in the first part, corrupted file system can lead to files not showing. If you fail to show hidden files using command line, you can check and fix disk errors with a handy freeware AOMEI Partition Assistant Standard. It supports all Windows PC operating systems like Windows 11/10/8.1/8/7/Vista/XP. Please follow the instructions below to fix a corrupted external hard drive:
Step 1. Connect the external drive to your computer and make sure it is detected. Download, install and launch AOMEI Partition Assistant.
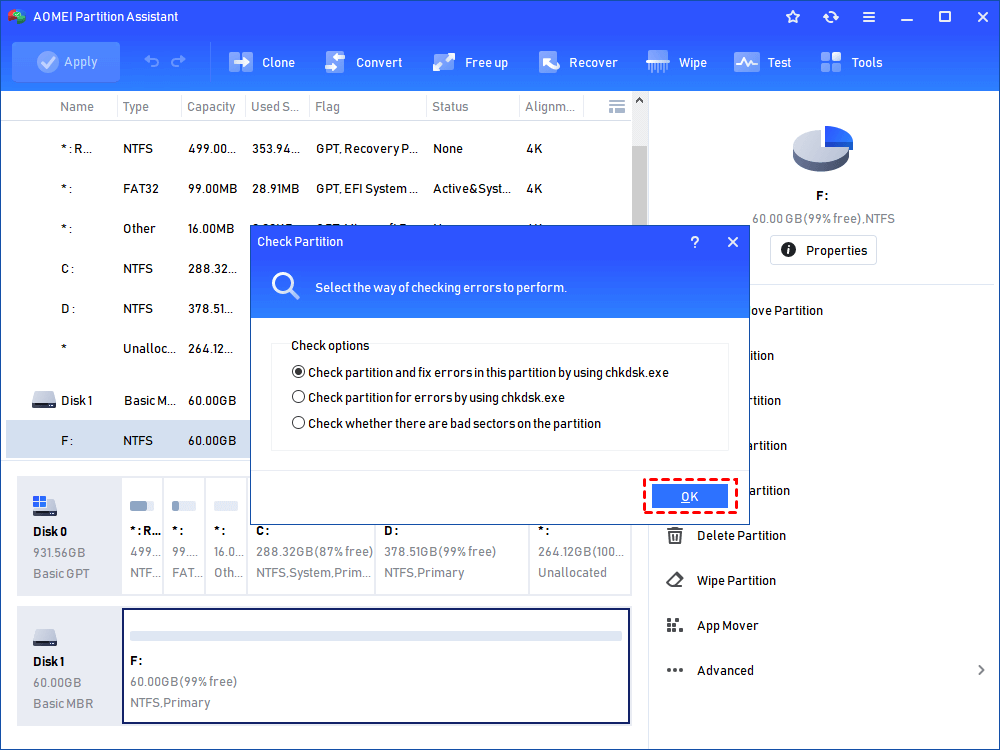
Step 2. Right-click on the partition of the drive, select “Advanced” and then “Check Partition”.

Step 3. You’ll see three check options. Choose the first one and click “OK”.
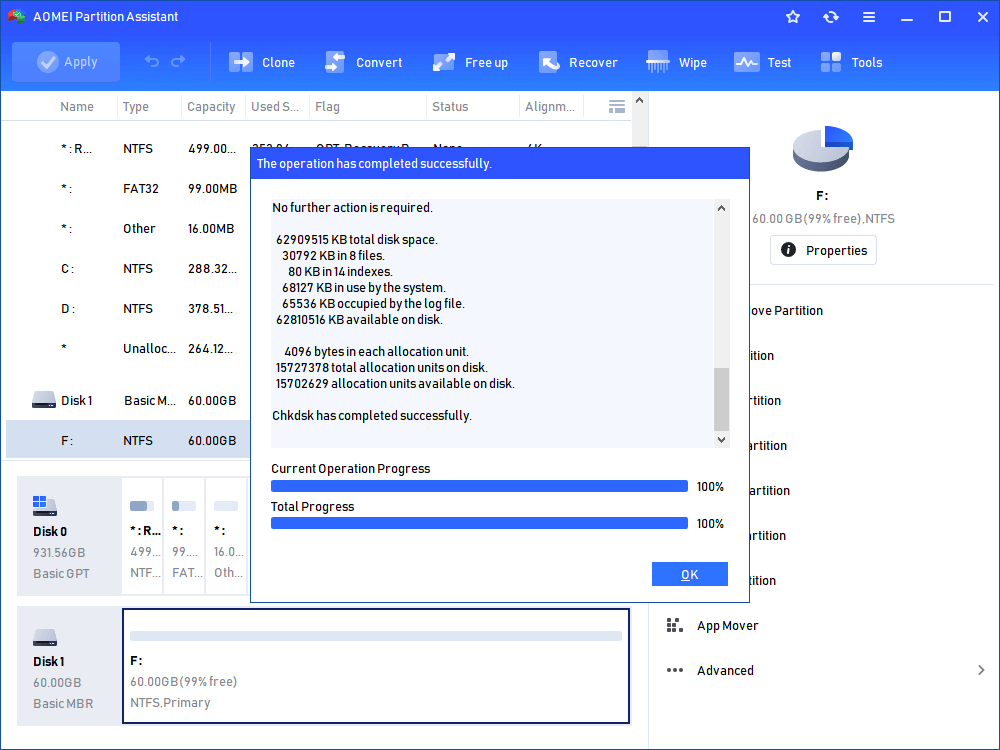
Step 4. Wait for the process to be completed. Click “OK” when it’s done. Corrupted file system can be fixed in this way, so you can see hidden files again from File Explorer.
Verdict
Now you know how to show hidden files using command lines in Windows 11/10/8/7. You can also use AOMEI Partition Assistant to fix the corrupted file system, thus retrieving hidden files. Apart from checking and fixing disk errors, AOMEI Partition Assistant allows you to test disk speed and fix unformatted hard drives. Why not give it a try at once?
FAQs about how to show hidden files with Command line
What command reveals hidden files in Windows Command Prompt?
To display hidden files in Windows Command Prompt, use the command: dir /a. This command lists all files, including hidden ones, in the current directory.
How do I list hidden files in a directory on Linux or macOS?
Use the command ls -a in the terminal. This command lists all files, including hidden ones, in the specified directory.
Can I show only hidden files in the command line?
Yes, you can. On Windows, you can use the command dir /a:h to display only hidden files. On Unix-based systems, you may use ls -a | grep '^\.' to show only hidden files.
Why are some files hidden by default?
Hidden files are often configuration files or files that are not meant to be directly manipulated by users. They are hidden to reduce clutter in file listings and to prevent accidental modification.
How do I hide files again after showing them?
To hide files on Windows, you can use the attrib +h command. For example, attrib +h filename.txt will hide the file. On Unix-based systems, use the mv command to rename the file, adding a dot before the filename (e.g., mv filename.txt .filename.txt).

