Windows 11/10/8/7 Upgrade: SSD not Booting [Solved]
Have you ever met the problem that Windows 10/8/7 won’t boot from SSD after upgrade or clone? Here you can know why SSD not booting and how to solve it effectively.
By Cherry / Updated on November 15, 2023
Case: Windows 10 won’t boot from SSD
“Recently, my Windows 10 computer ran slowly. I wanted to replace the system hard drive with a new SSD. I did not want to reinstall Windows so I decided to clone HDD to SSD, and then replace the HDD with the cloned SSD. However, the Windows 10 failed to boot from SSD.”
The scenario that was previously discussed is actual issues that SSD users on Windows 11, 10, 8, or 7 PCs encounter. The majority of them have no idea how this issue arises, and none of them have any ideas on how to resolve it. Don't worry if you are one of them. We can provide you with answers.
Why Windows won't boot from SSD?
If your SSD is a well-functioning disk, normally, this error wouldn't happen. Here, we find some possible reasons for this issue:
1. System disk upgrade: after switching from an HDD to an SSD, the machine won't boot from the new SSD.
2. Windows system malfunction or error: After the system upgrade, the computer won't boot up.
3. SSD internal disk fault.
4. The SSD is not booting up after it is copied.
You are able to resolve this problem once you have determined the causes. These are a few well-proven fixes for the SSD booting issue. To install or migrate Windows OS to SSD without boot issues, you can follow this page if you want to give it another go.
How to solve SSD not booting problem
SSD not booting after clone is a common phenomenon that many users have met before. How to solve it? Here you can find the answer.
1. SSD not booting because of incorrect boot order
If your Windows 10 won’t boot from SSD after upgrading or cloning system hard drive to SSD, it may be because of an incorrect boot order. Thus, you need to change the boot mode:
1. Make sure the SSD is connected to your computer.
2. Restart your PC. Press a specific key continuously to enter BIOS Setup (usually F2, F8, F12, Del key).
3. When you get into the BIOS Setup, use the arrow keys to select the SSD as the first boot order under Boot tab.
2. SSD not booting because of wrong boot mode
If the SSD is a GPT disk, then you need to make sure the EFI/UEFI boot mode is enabled. And you need to get into BIOS Setup to set it to EFI/UEFI boot mode. Otherwise, you cannot boot from the SSD unless it has been converted to MBR disk.
If the SSD is an MBR disk, then you need to set the boot mode to Legacy. Otherwise, you need to convert MBR to GPT disk so that it can boot from SSD successfully.
3. SSD not booting because of system file loss
If you cloned HDD to SSD but cannot boot from the SSD, that may be because of system file loss. Thus, you can take another way to clone system disk to SSD. AOMEI Partition Assistant Professional is a great tool that can help you copy system disk to SSD/HDD safely with a few simple steps.
1. Install AOMEI Partition Assistant to your PC based on Windows 11/10/8/7, connect the SSD to the PC and make sure it can be detected. Launch the progress. Click Clone-> Clone Disk.

2. Select disk copy type: Copy Disk Quickly (recommended) or Sector-by-Sector Copy.
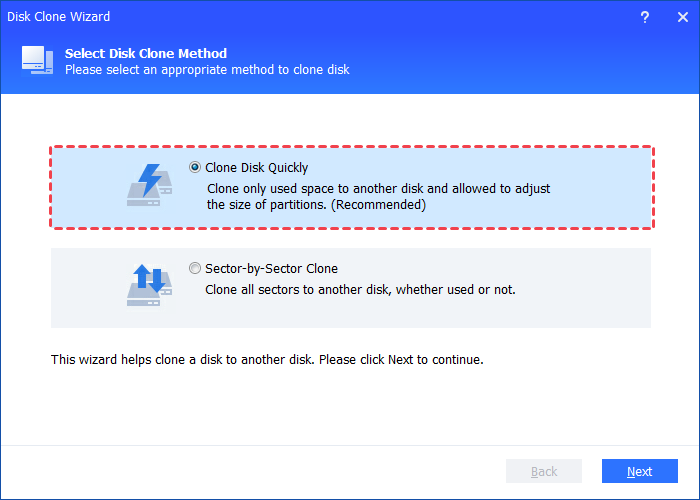
▶ Sectory-by-Sector Copy: Copy all sectors of the disk to a target disk no matter it is used or not.
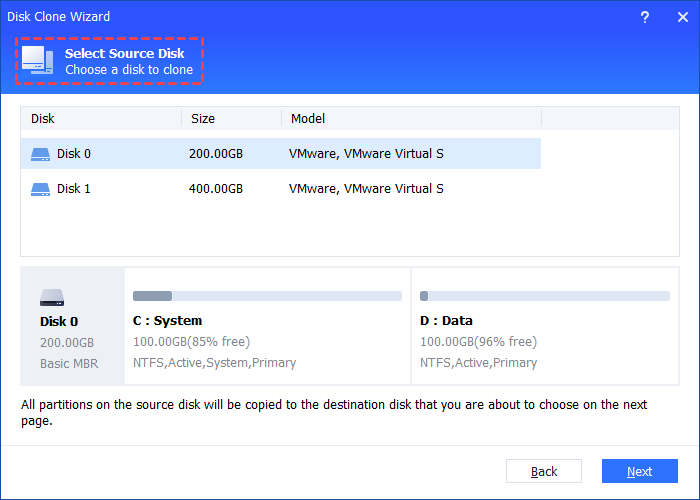
3. Choose the system disk as the source disk.
4. Choose the SSD as the destination disk. Here you need to check the option “Optimize the performance of SSD”.
By checking this option, the partitions of the SSD will be 4K aligned.
5. You can edit partitions on the destination disk. Or you can repartition hard drive later.
6. Here, a note on how to boot from the clone drive will be given. Read it and click Finish.
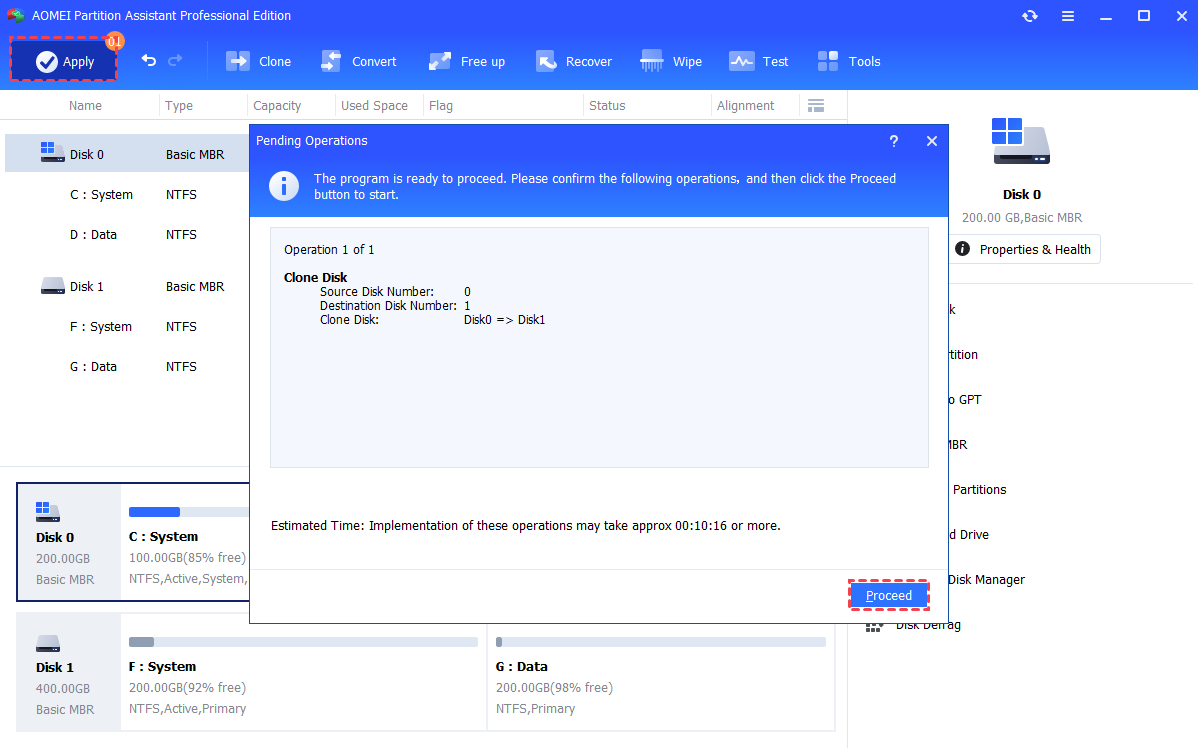
7. Finally, click Apply-> Proceed at the toolbar to execute the progress.
After that, you can try to boot from the SSD again.
4. SSD not booting because of MBR error
Another reason for SSD not booting could be the MBR error. And you can try Bootrec.exe to fix.
1. Boot from the repair disc, open Command Prompt.
2. Enter the following commands in order:
bootrec.exe
bootrec.exe /fixmbr
bootrec.exe /fixboot
bootrec.exe /scanos
bootrec.exe /rebuildbcd
If you do not have a repair disc, you can use AOMEI Partition Assistant to fix MBR error in a few simple steps.
Step 1. Using AOMEI Partition Assistant to create a bootable USB drive.
Step 2. Connect the bootable USB drive to your computer with the SSD installed and boot from the bootable USB drive.
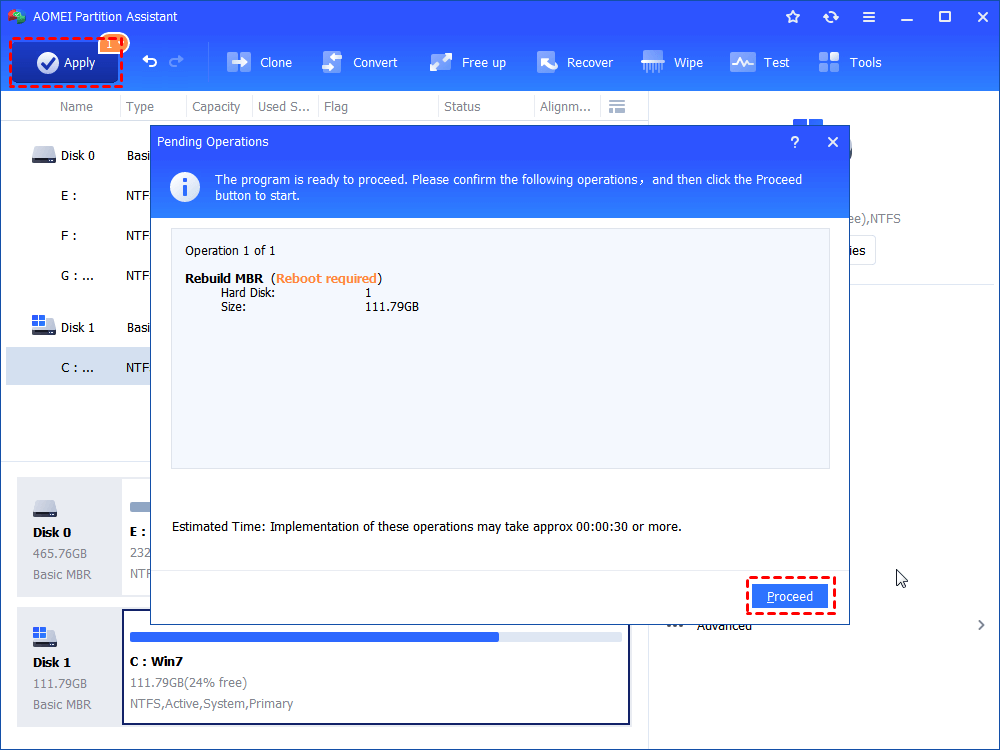
Step 3. It will show you the main interface of AOMEI Partition Assistant. Here, right-click the SSD, select Rebuild MBR.
Step 4. Set the type of MBR for the current OS. Click OK.
Step 5. Click Apply-> Proceed at the toolbar to start.
5. SSD not booting when you clone disk from one computer to another
Many users are planning to clone a disk from one computer to another computer instead of installing Windows. However, the SSD not booting problem may occur. For this situation, you need to check the connection mode. If the original computer uses IDE mode, the destination computer has to use IDE mode. If the original PC users AHCI, the target PC must use AHCI mode. Otherwise, you cannot boot from the SSD successfully.
for this situation, you’d better Back up the source HDD onto an external storage device using AOMEI Backupper. Then create an AOMEI bootable media to boot the target computer and restore the backup to the destination HDD with Universal Restore option enabled.
Hopefully, this article can help you solve your problem.
Conclusion
SSD not booting is a common problem among PC users. So, in the post above, I listed the reasons why SSD won’t boot and provided their corresponding solutions. As for me, I also once met this issue and later I found it was caused by system file loss in the course of disk clone. So, I tried AOMEI Partition Assistant Professional to clone the disk instead and it finally worked. Also interested in this software? Remember to try the Server edition if you want to use it on Server computers.
FAQs about SSD not booting
What BIOS/UEFI settings should I check if my SSD is not booting?
Verify that the boot order is set correctly, with the SSD selected as the primary boot device. Also, check for any specific settings related to AHCI or RAID mode, depending on your SSD.
How can I check if the SSD is faulty?
Use diagnostic tools provided by the SSD manufacturer to check the health and status of the SSD. Additionally, trying the SSD in another system can help determine if the issue is related to the SSD itself.
Can a Windows update cause the SSD not to boot?
While rare, Windows updates can sometimes cause compatibility issues. Boot into safe mode or use recovery options to uninstall recent updates and see if the issue persists.
My SSD is not detected in BIOS. What should I do?
Check connections, try a different cable or port, and ensure the SSD is properly seated. If the SSD is still not detected, there may be an issue with the SSD or the motherboard.

