[4 Ways] How to Fix SSD Not Showing Up in Windows 10 or 11?
This article will share 4 fixes on SSD not showing up in Windows 10, 11, 8, 7. No matter your SSD not showing up in Disk Management, Device Manager, or SSD not showing up in Windows 10 install, you can follow to troubleshoot.
By Irene / Updated on June 30, 2026
User case: Why is my ssd not showing up on Windows 10?
I have just built my brand new PC and installed 1 TB of a new Samsung EVO plus 970 SSD into my motherboard. It Is detected in BIOS and is activated in Windows 10. The secure boot is off by the way (I tried both sb on and off). I load in and it says it can't recognize a driver. My driver is fully updated too, and it's not a loose cable or anything. There are no pages. forums, or questions that have worked so far. This is super frustrating. I have one other ssd that I could plug into my motherboard but I wanna do it with this one since that one is only 550 GB. PLEASE HELP.
- Question from Microsoft Community
In work and daily life, an SSD drive will be a great choice if you want faster read-write speed, lower power consumption, etc., and you expect to upgrade your HDD to SSD. However, you may find that new SSD drive not showing up in your Windows PC when you install it on your computer.
Usually, the SSD drive is not showing up in Disk Management or Device Manager. Also, there is a possibility of SSD not showing up when installing Windows 10. When this issue happens to you, you cannot access data on the SSD drive. Besides, you may encounter similar issues, like external hard drive not showing up, USB device not showing up or hard drive not showing up on your computer.
Why does new SSD not showing up in Windows 10 or 11?
When you find the SSD not detected in Windows 10/11, you may want to know why and how to fix SSD not showing up in Windows 10/11 Disk Management, Device Manager, or other locations. Here, I‘ll list some reasons and possible measures in the following.
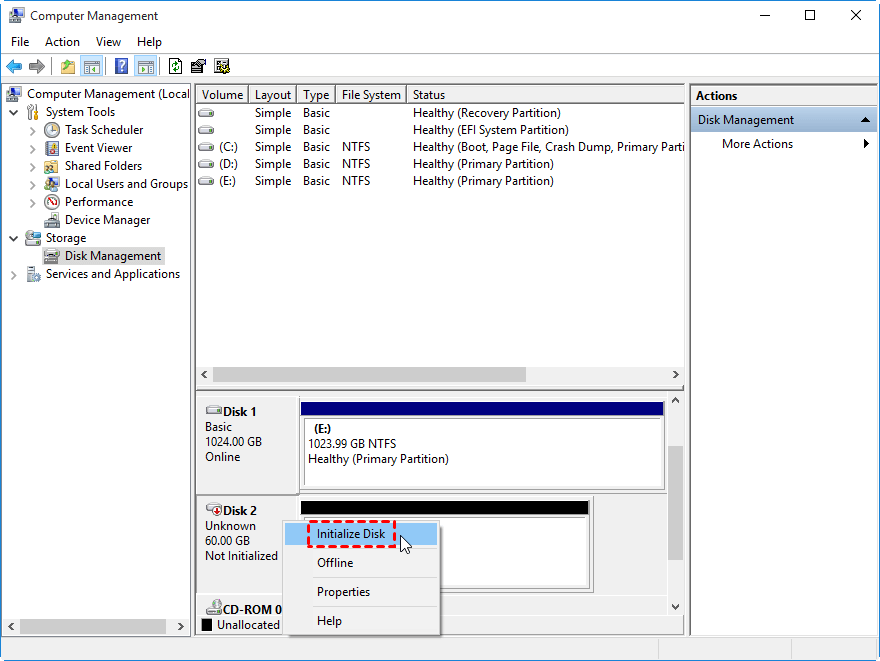
1. New SSD is not initialized
If it is a new SSD drive without being initialized to a partition style, then the new SSD will not show up in Windows 10. In this case, you can initialize it. To achieve that, the easiest way is to use the Windows built-in Disk Management.
Or, you can initialize the SSD drive via Command Line: type "diskpart > list disk > select disk n (n refers to the disk number of the new SSD) > attributes disk clear readonly> online disk > convert mbr " (or convert gpt)in the command prompt and hit Enter to run it.
2. SSD partitions are lost and become unallocated space
This situation often happens to the old drive and your disk may be marked as Not Initialized or Online. You need to recover lost partition in Windows 10 first and then see if your disk and data can be accessed.
3. The file system of SSD drive cannot be recognized
If your computer is Windows 10, you'd better use NTFS or FAT32 file system. If not, you’d better format the external hard drive to NTFS or FAT32, otherwise, you will find your SSD not detected in Windows 10.
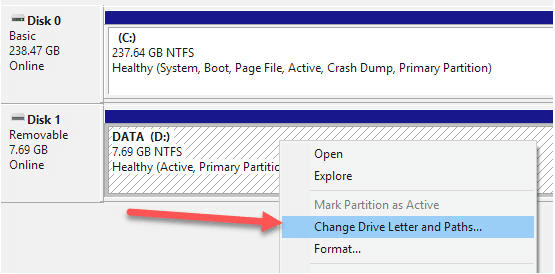
4. The drive letter of SSD partition is missing or conflicted
If you can see an SSD drive in Device Manager or Disk Management, but cannot see it in Windows File Explorer, the drive letter may get lost. You are supposed to assign drive letters in Windows 10.
5. SSD partitions are hidden
If you cannot see your partitions on SSD drive, they may be hidden by accident. You need to unhide partitions to make it appear on the disk.
How to fix SSD not showing up in Windows 10/11 effectively?
From above, you can get the common causes for SSD drive not showing up in the computer and related solutions. Thus, I just talk about some situations in the following content so that you can better solve the "new SSD not showing up in Windows 10/11/8/7" issue. Before you start any operation, you need to do the following things first.
>>Connect the SSD to your computer first.
>>Try to format the disk then. This operation will lead to data loss, so please back up important data beforehand.
Case 1. SSD not showing up in BIOS
If you cannot see SSD in the BIOS, the most common possibility is that the disk cannot be connected up correctly. You need to check it.
Besides, you can see the following suggestions.
♦ Drive not enabled in the BIOS. You need to open BIOS by a specific key and enable it.
♦ The Serial ATA motherboard drivers do not load properly. You need to update the storage controller for your computer.
♦ The data cable is faulty or unplugged. You are supposed to replace it.
Case 2. Incompatible or corrupted file system
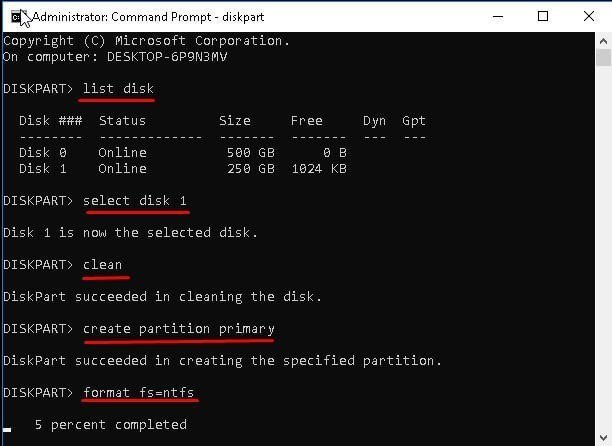
If the file system is the issue, you can try to format it to NTFS or FAT33 using Diskpart or a third-party tool. First of all, you can follow the steps to reformat it to a compatible file system via DiskPart.exe.
Step 1. Type "cmd" in the search box, right-click it, and select "Run as administrator". Type "diskpart" in the command prompt and hit "Enter".
Step 2. Type the following commands and press Enter.
• list disk
• select disk n (n refers to the number of the disk containing unsupported or corrupted file system)
• clean
• create partition primary
• format fs=ntfs (or format fs=fat32)
Step 4. Type "exit" to leave Diskpart and check if it works.
- ★Tip: This operation does not assign a drive letter for your SSD. If it can be detected, you can assign a drive letter using Disk Management or a third-party tool like AOMEI Partition Assistant.
If you are not familiar with the command prompt, you can use a multifunctional disk partition manager named AOMEI Partition Assistant. It can help you partition a hard drive, test disk speed, and fix some problems related to disk and partition. If you find you unfortunately encounter data loss due to the SSD not showing up problem, you can also use it to recover lost data.
The Best Windows Disk Partition Manager and PC Optimizer
Step 1. Download the disk and partition manager - AOMEI Partition Assistant, and install and launch it.
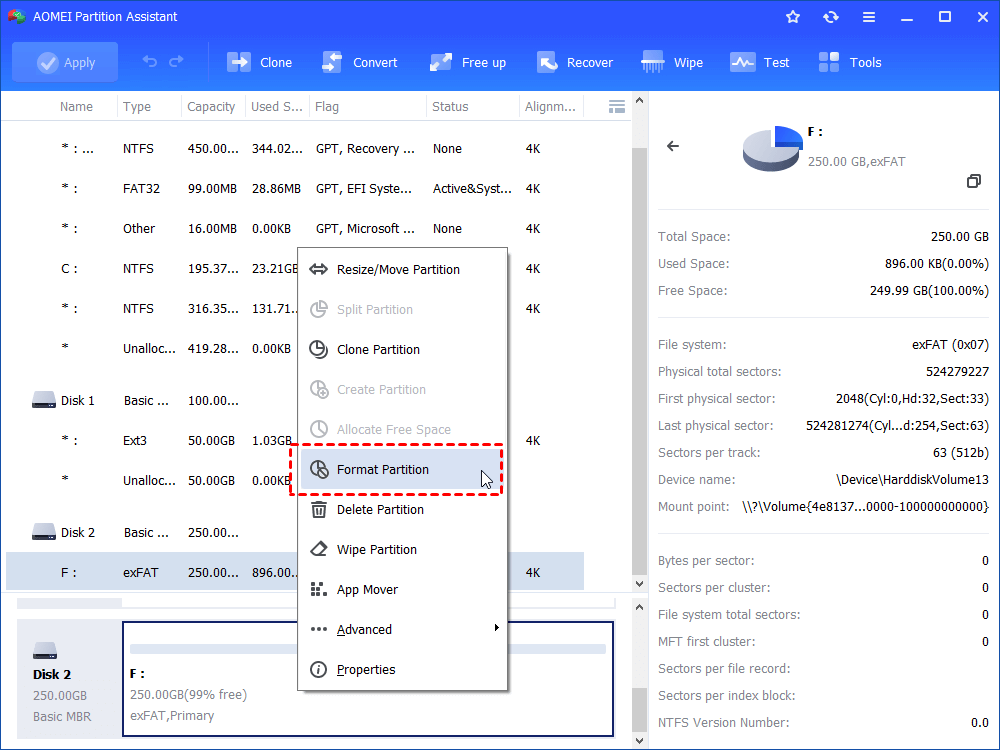
Step 2. Right-click the drive not recognized and then select "Format Partition" from the context menu.
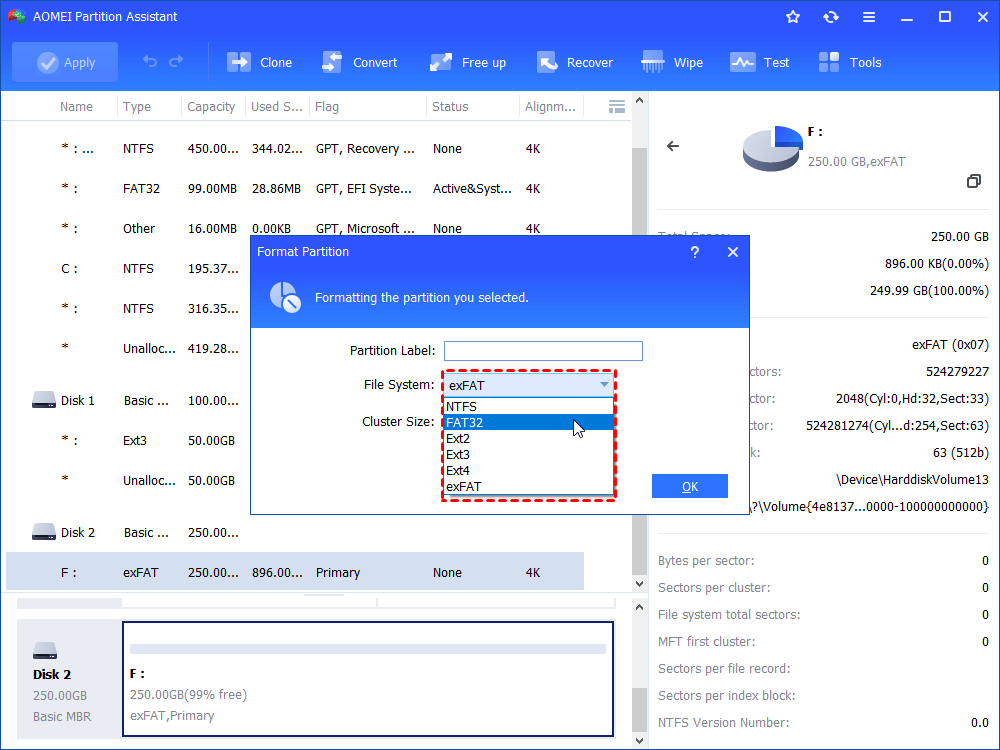
Step 3. Click the drop-down menu, select "NTFS or FAT32" file system, and click OK to move on.
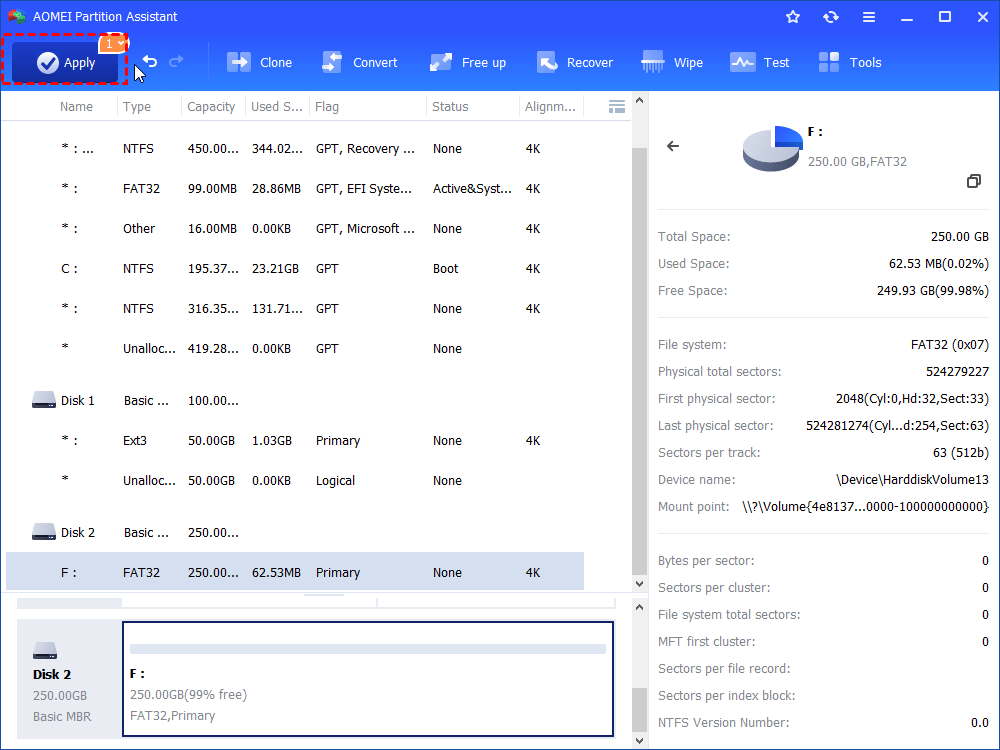
Step 4. Click "Apply" and then "Proceed" to start the formatting process.
Step 5. Open "Disk Management" or "This PC" and see if it’s there.
If this does not work, you still can delete the partition first and then create partition with NTFS or FAT32 file system.
Case 3. SSD drive not showing up because of disk driver issue
If your problem is caused by disk driver issue, you can use Hardware and Device Troubleshooter to fix driver issue.
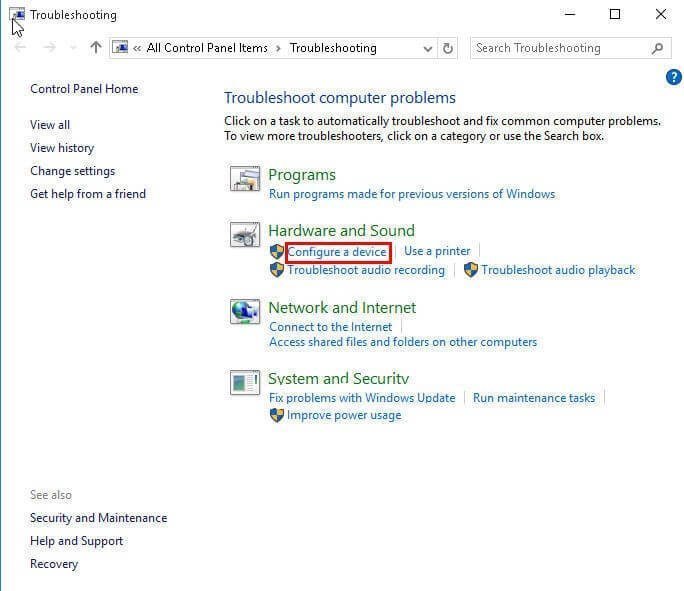
Step 1. Type "Troubleshooter" or "Troubleshooting" in the search box and select it from the list.
Step 2. Under the Hardware and Sound link, click "Configure a device".
Step 3. Click "Advanced" and tick "Apply" repair automatically in the new window. Click "Next" to start the pending operation and repair the issues it finds.
You can also directly uninstall it in Device Manager to fix the driver issue.
Step 1. Press "Win + R" to summon the Run window, type "devmgmt.msc" in the box, and hit "OK" to go to the device manager
Step 2. In Device Manager, go to Universal serial bus controllers, right-click the SSD, and then click "Uninstall".
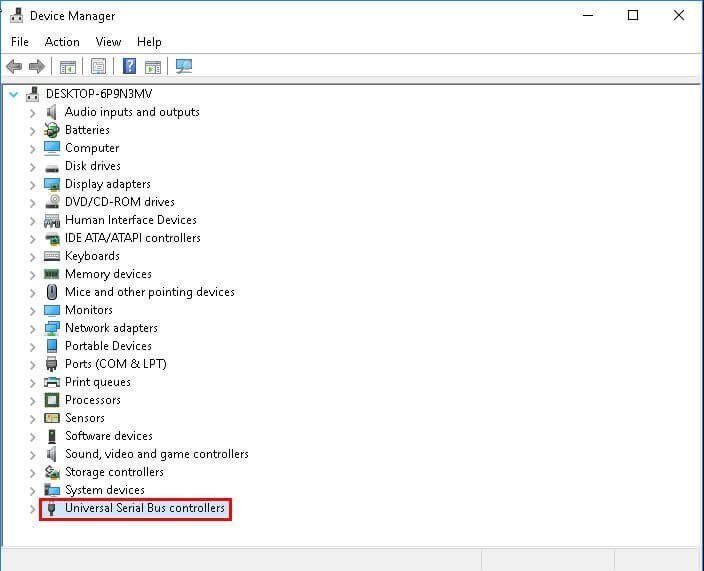
Step 3. Remove the SSD and restart your computer. Windows will automatically install the correct drivers. Then connect the SSD and see if you can see it on your computer.
Case 4. SSD not showing up in Windows 10 install process
If you connect the SSD drive and try to install Windows 10/11 on it, but cannot find it. The simplest reason is that the BIOS is outdated. You should update it to the latest version. Besides, you can try the command prompt on the Windows Setup screen.
Step 1. Press "Shift + F10" to open the command prompt in the Windows Setup window.
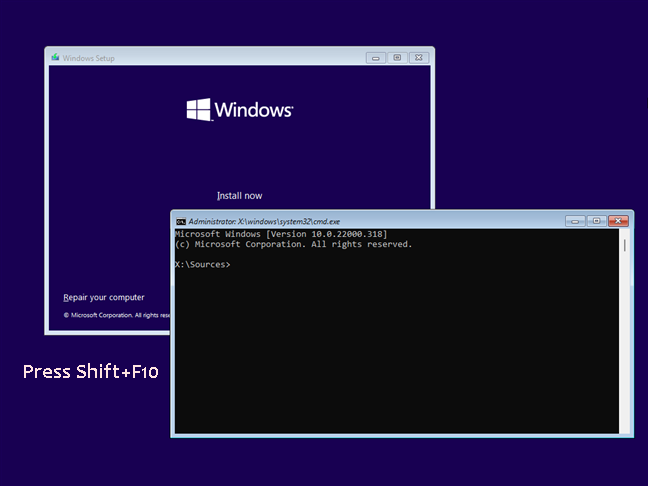
Step 2. Type "diskpart" in the pop-up window and hit "Enter".
Step 3. Type the following commands in order, and press "Enter".
♦ list disk
♦ select disk m(m is the disk number of the SSD disk.)
♦ clean
Step 4. Try to install Windows 10 /11 again.
Tip: Recover lost data caused by SSD not showing up issue
When fixing SSD not showing up in Windows 11/10/8/7, it is necessary to prepare for data recovery using AOMEI Partition Assistant. On the one hand, not all users have a backup habit, and solutions like formatting the disk will erase your data, causing data loss. On the other hand, if the above methods don't work, it suggests your SSD may be corrupted. If you're using an old disk, the data on it may be incomplete and potentially lost.
With AOMEI software, you can effectively recover more than 1000 types of data from various scenarios, including SSD formatting, system crashes, disk corruption, virus attacks, permanent deletion, and so on. Here's how to recover lost data when fixing an SSD not showing up in Windows 10:
The Best Windows Disk Partition Manager and PC Optimizer
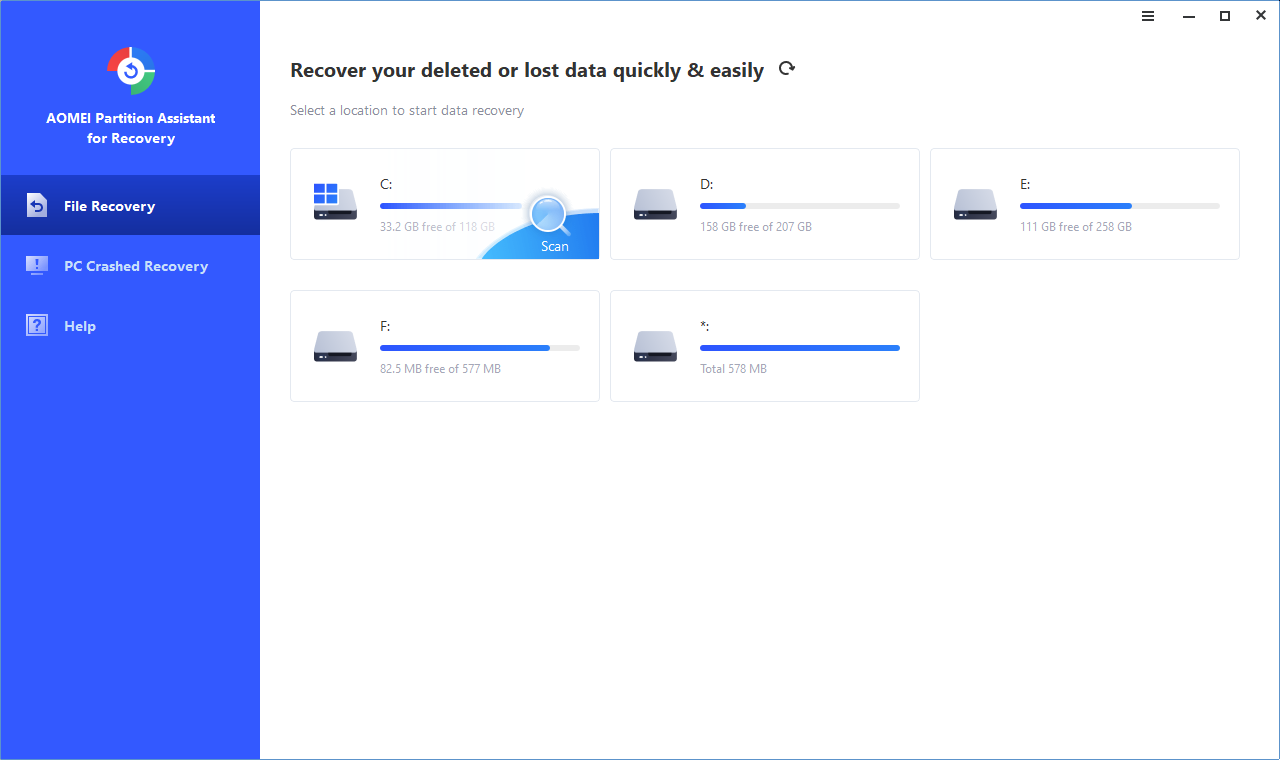
Step 1. In the main interface, click Recover > Recover Data from the top pane.

Step 2. Select the drive where the deleted data is stored and click Start Scan.
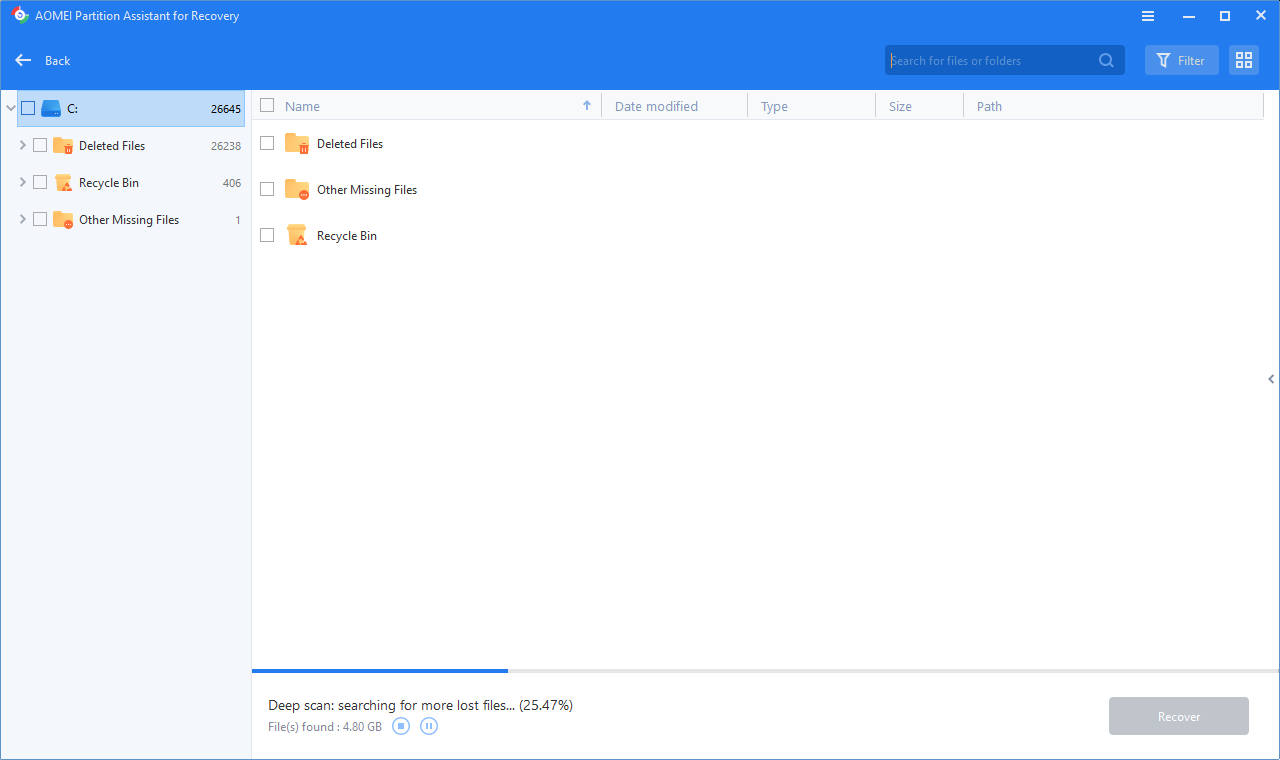
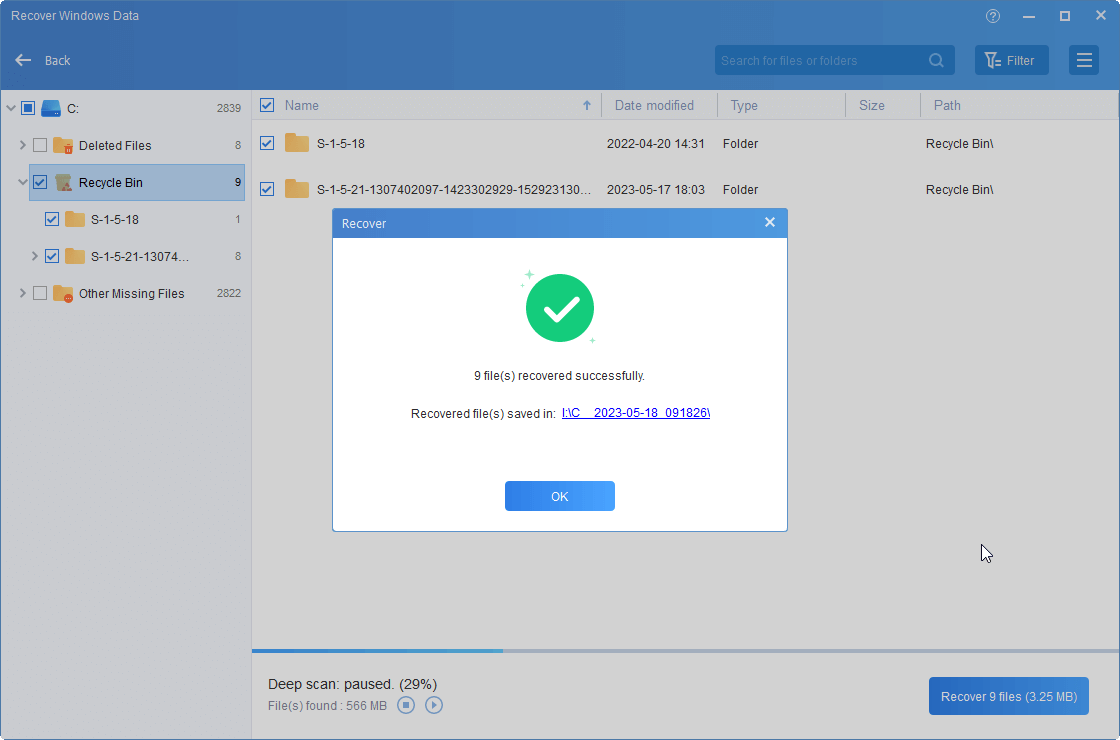
Step 3. When the scan finishes, all deleted files will be listed. Then, choose the target file you want to recover and click Recover.
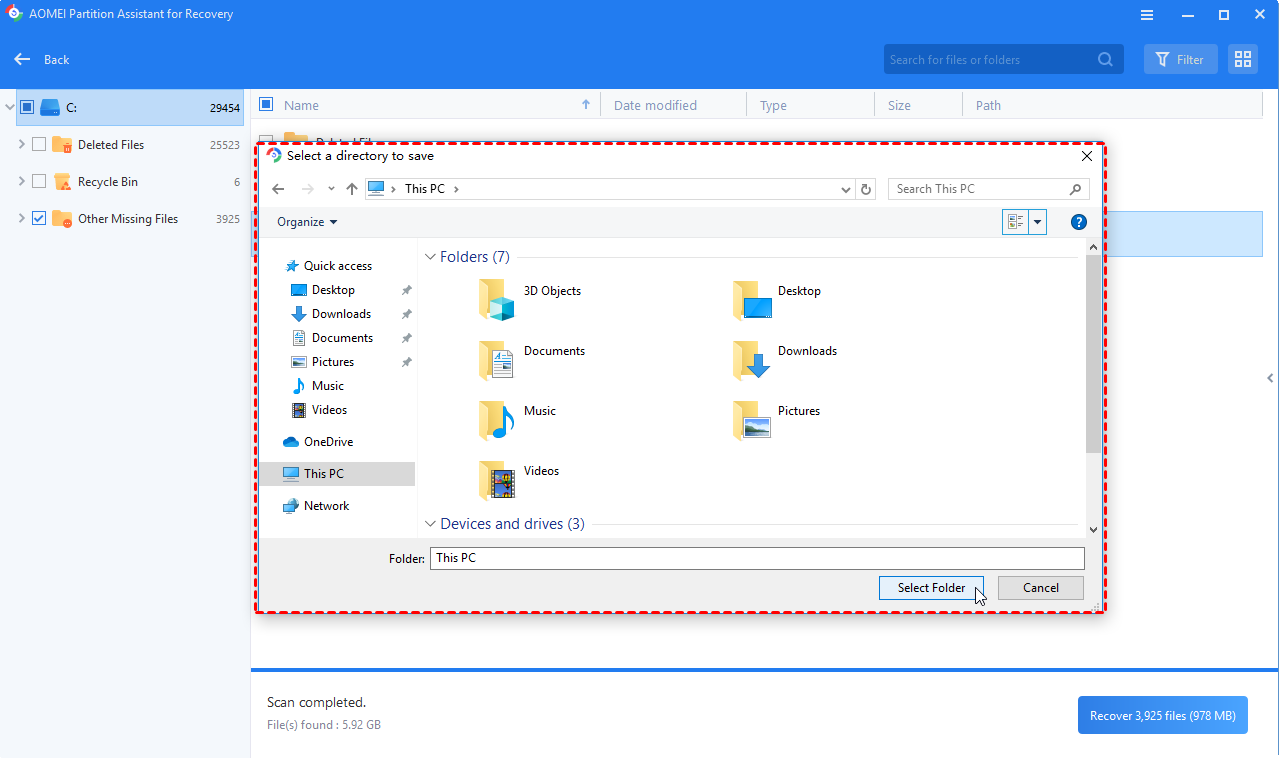
Step 4. Here, select a path to save the recovered file.
Step 5. When the recovery is over, click OK to exit it.
FAQs about SSD not showing up Windows 10
✍ Why is my SSD not being detected?
Various reasons like SSD cause this issue are not initialized, partitions are lost, or the drive letter is missing. All these factors have been discussed above. After knowing the causes of the SSD not showing up, you can better find the most suitable solution.
✍ How do I get my SSD to show up?
If your SSD is brand new, it won't appear in Windows Disk Management for certain. You have to initialize the disk in the first place so that the system can detect the drive. If the SSD has been used, you should analyze its specific reasons and utilize the corresponding methods.
✍ How to recover SSD not detected in BIOS?
To make sure the BIOS detects your SSD, restart your PC and press F2 at the startup screen to enter BIOS. Press Enter to access the configuration menu, go to Serial ATA, and select IDE compatibility mode. Save the changes and reboot your system. The SSD should now be recognized.
Wrapping things up
Reading here, you can get clearly that SSD not showing up on Windows 10 or 11 can be out of various causes. In this article, the possible causes and solutions are listed. You can try all the solutions one by one. One more thing, please try to format the disk at last if you do not want to lose data.
By the way, AOMEI Partition Assistant Standard is not only an SSD repair tool but also a powerful disk manager. You can use it to resize/move partitions, clone disks, extend C drive, etc. You can also use it to recover the formatted data even if you don't have a backup.

