7 Solutions to “There Was a Problem Mounting the File”
How to fix the “there was a problem mounting the file” issue? This post explains the most possible reasons and offers seven practical methods to address this annoying error.
By Hedy / Updated on January 14, 2026
Why there was a problem mounting the file?
The error “There was a problem mounting the file” usually appears when your system cannot properly access or read a disk image or virtual drive file, such as an ISO, IMG, or VHD. Common causes include:
► Corrupted file: The file you’re trying to mount might be damaged or incomplete.
► Unsupported file format: The system might not support the file type you’re trying to mount.
► Insufficient permissions: You may need administrative rights to mount the file.
► File in use: Another program might be using the file, preventing it from mounting.
► System errors: Problems with the virtual drive software or Windows Disk Image service can cause mounting failures.
How to fix “there was a problem mounting the file”message
Now that you understand the potential causes behind the “there was a problem mounting the file” error, the next step is resolving it. Several solutions are available, and it’s best to start with the first method and work your way through the others until the issue is fixed.
Fix 1. Restart the File Explorer
The quickest and most straightforward way to resolve the “sorry, there was a problem mounting the file” error is by restarting File Explorer. Follow these steps:
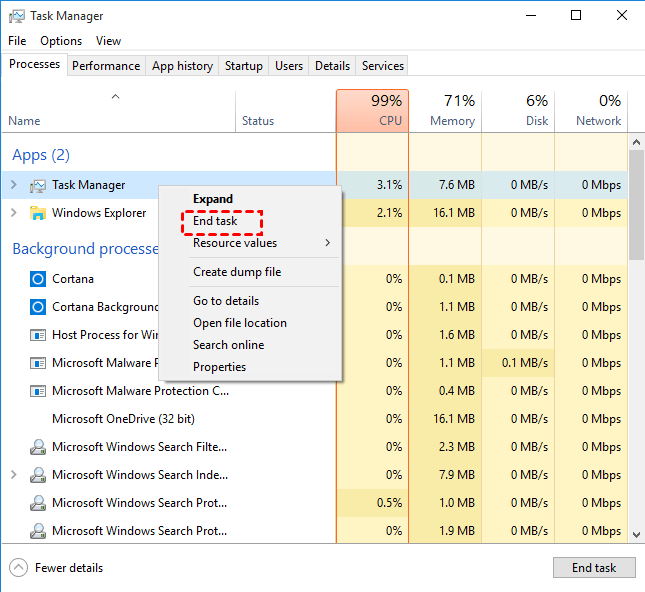
Step 1. Press “Ctrl + Shift + Esc” to open Task Manager. And right-click the “Windows Explorer” and select “End task”.
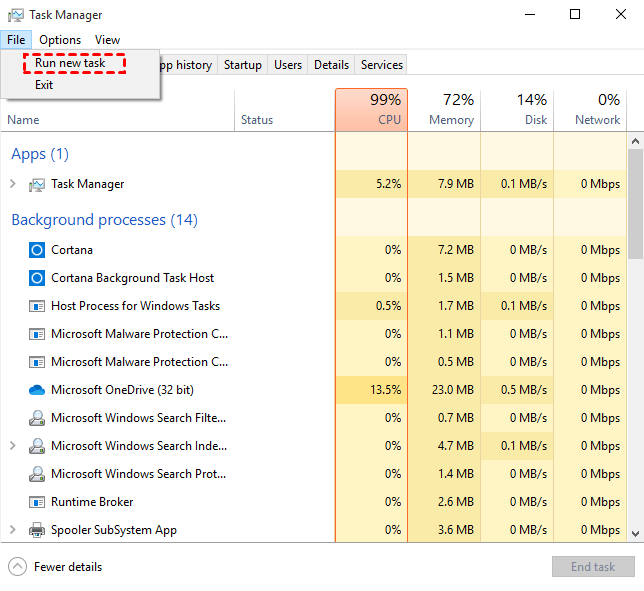
Step 2. Click “File” on the left top of the Task Manager interface, and select “Run new task”.
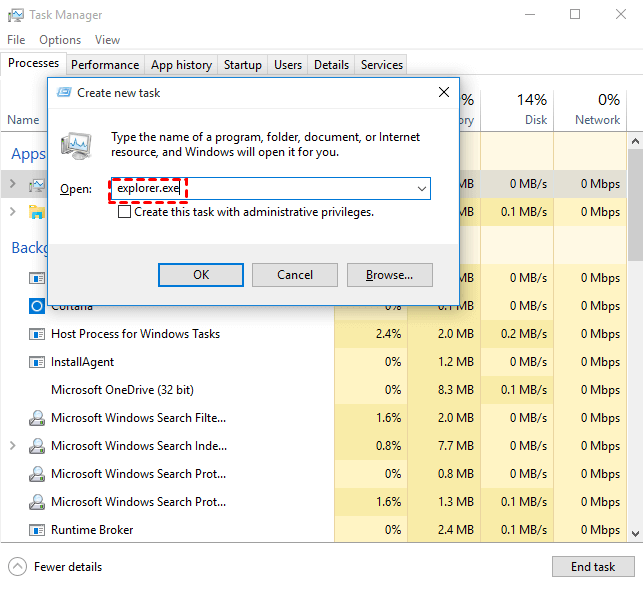
Step 3. In the pop-up window, input “Explorer. exe” and click “OK”.
Then, the File Explorer will be restarted, and see if the File Explorer would just hang again. And try other solutions.
Fix 2. Confirm if the ISO file is mounted
If the ISO file is already mounted, it can cause the “sorry, there was a problem mounting the file” error. The next step is to check whether the ISO file is currently mounted.
To do this, open File Explorer. If the ISO is already mounted, it will appear as a separate drive under This PC.
Fix 3. Set the ISO file to read-only
If the ISO file isn’t set to Read-only, it can trigger the “sorry, there was a problem mounting the file” error. Follow these steps to set the ISO file to Read-only:
Step 1. Locate the ISO file, right-click it, and select Properties. (Alternatively, select the ISO file and press Alt + Enter to open the same window.)
Step 2. In the Properties window, go to the General tab.
Step 3. Under Attributes, check the Read-only box, click Apply to save the changes, and then click OK.
After completing these steps, try mounting the ISO file again to see if the error has been resolved.
Fix 4. Check if the ISO file is blocked
Windows often blocks files downloaded from the Internet for security reasons. Even emails with attachments can trigger this block through Windows 10’s built-in Attachment Manager. To ensure your ISO file isn’t blocked, follow these steps:
Step 1. Open the ISO file’s Properties window by following Steps 1 and 2 from Method 4.
Step 2. On the General tab, look at the bottom of the window. If you see the message:
"This file came from another computer and might be blocked to help protect this computer"
It means the ISO file is currently blocked.
Step 3. Check the Unblock box, apply the changes, and then try mounting the ISO file again.
If the “sorry, there was a problem mounting the file” error still appears, proceed to the next method.
Fix 5. Remove the sparse attribute
Sometimes, Windows may fail to mount an ISO file because the file is marked as sparse. In this case, you need to remove the sparse attribute. There are two effective ways to do this:
1. Remove the sparse attribute using Command Prompt
Step 1. Press Win + S, type cmd in the search box, and press Enter to open Command Prompt.
Step 2. In the Command Prompt window, enter the following commands one by one, pressing Enter after each:
fsutil sparse queryflag PathToYourISO – This checks whether the ISO file is marked as sparse.
fsutil sparse setflag PathToYourISO 0 – This removes the sparse attribute if it’s set.
2. Remove the sparse attribute by copying the ISO file
Simply copying the ISO file often removes the sparse attribute automatically. If you prefer a simpler approach instead of using commands, copy the ISO file to a new location and try mounting the copied file. This can often resolve the “sorry, there was a problem mounting the file” error.
Fix 6. Change drive letter
If the ISO file mounts successfully, it will appear as a new drive in File Explorer. If not, you may encounter the error message: “Sorry, there was a problem mounting the file.” One common cause is a drive letter conflict, which can prevent the ISO from mounting properly.
To fix this, you can change the drive letter using one of the two methods below. (In this example, we’ll use drive F.)
1. Change the drive letter in Disk Management
Step 1. Press Win + R to open the Run dialog.
Step 2. Type diskmgmt.msc and press Enter or click OK to launch Disk Management.
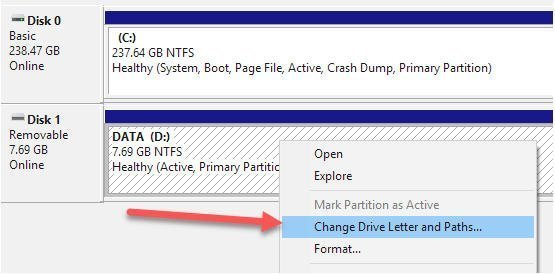
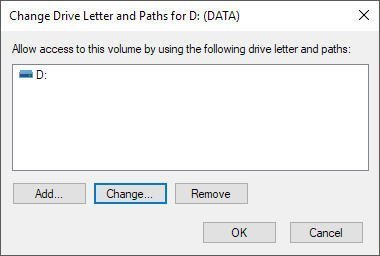
Step 3. Locate the drive you want to change, right-click it, and select Change Drive Letter and Paths.
Step 4. Click Change, choose a new drive letter from the drop-down menu, and click OK. Confirm by clicking Yes in the pop-up window.
Once the drive letter is updated, try mounting the ISO file again to see if the error has been resolved.
2. Change the drive letter using AOMEI Partition Assistant
Alternatively, you can use AOMEI Partition Assistant to change the drive letter. This software offers additional features such as migrating the OS to SSD, resizing or formatting partitions, converting MBR to GPT without data loss, checking the file system, copying disks, performing surface tests, wiping drives, and more.
To use this method, download and install AOMEI Partition Assistant, then follow the on-screen instructions to change the drive letter. Afterward, attempt to mount the ISO file again.
Step 1. Install and launch AOMEI Partition Assistant. Right-click the drive to which you want to assign a drive letter, select “Advanced” and then “Change Drive Letter”.
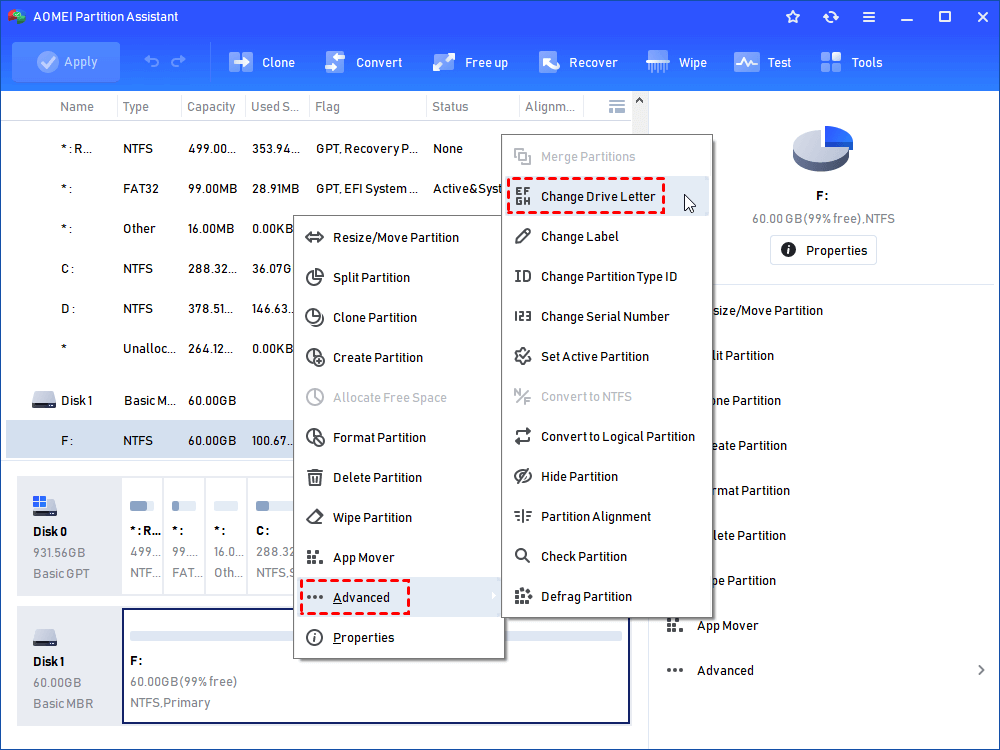
Step 2. Select the released drive letter in the pop-up window.

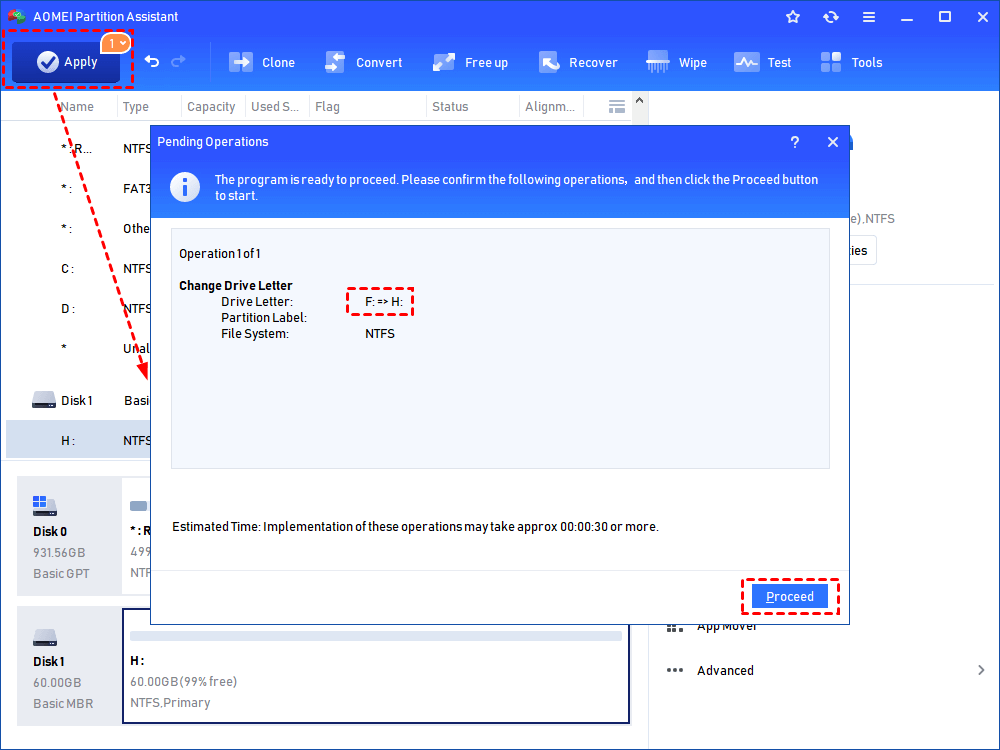
Step 3. Click “Apply” to view pending operation and then “Proceed” to commit the operation.
Fix 7. Repair the diskimage driver
If the disk image driver is corrupted, it can cause the error “sorry, there was a problem mounting the file.” You can repair the driver using Registry Editor by following these steps:
Step 1. Press Win + R, type regedit, and press Enter to open Registry Editor.

Step 2. Before making any changes, create a registry backup. Click the File tab and select Export.
Step 3. Give the backup a name and save it to a secure location on your computer. Make sure the Export range is set to All.
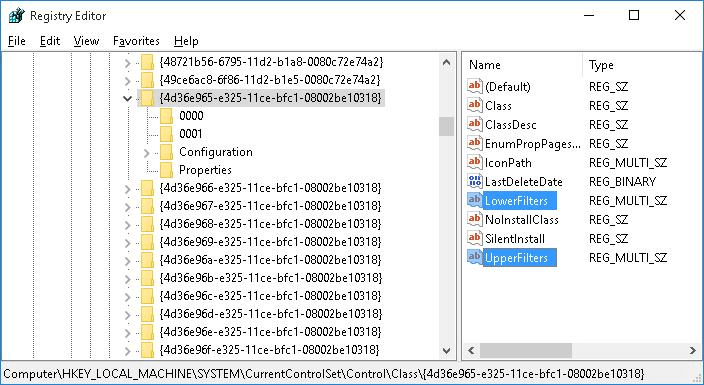
Step 4. Navigate to the following registry key:
HKEY_LOCAL_MACHINE\SYSTEM\CurrentControlSet\Control\Class\{4D36E965-E325-11CE-BFC1-08002BE10318}
Step 5. In the right-hand panel, right-click UpperFilters and select Delete.
Step 6. Similarly, right-click LowerFilters and select Delete.
After completing these steps, close Registry Editor and restart your computer. Try mounting the ISO file again to check if the issue has been resolved.
Conclusion
In summary, the “There was a problem mounting the file” error typically arises from corrupted files, unsupported formats, insufficient permissions, file conflicts, or system issues. To fix it, try restarting File Explorer, checking if the ISO is already mounted, setting the file to read-only, unblocking it, removing sparse attributes, changing the drive letter, or repairing the disk image driver. Following these steps should help you mount your file successfully.

