Use UEFI Bootable Partition Manager to Manage PC
If you need a reliable UEFI bootable partition manager, this post will offer you some ideas and you can learn to create a UEFI bootable USB with detailed guide.
By Lucas / Updated on May 12, 2023
About UEFI boot mode
UEFI (Unified Extensible Firmware Interface) is a computer motherboard firmware interface. It acts as an intermediary between the firmware of a computer machine and the operating system. UEFI boot mode allows your computer to initialize the hardware components and boot the operating system installed on the disk.
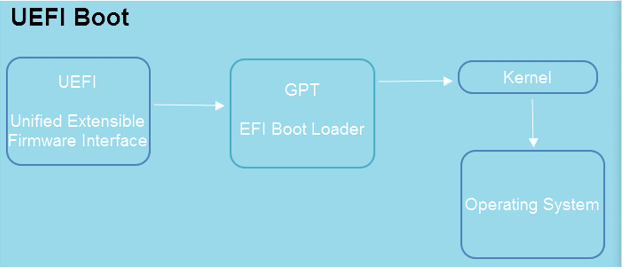
Now, UEFI boot mode appears to be the BIOS's heir. Users much prefer to choose UEFI mode because UEFI mode eliminates many of the limits of BIOS mode, such as HDD capacity, booting procedure, number of partitions, security, etc.
Create UEFI bootable USB for PC management
If your PC supports UEFI (not all devices support it, you can check on the Web), you can enjoy all conveniences this new mode brings.
However, glitches or some PC issues might be inevitable. You may need to prepare a UEFI bootable USB in case your PC cannot boot normally when something wrong happens on your machine.
So here, we have 2 ways for you to create UEFI bootable USB for Windows PC management.
1. Use CMD to make UEFI bootable USB
The first method is via CMD to make a UEFI boot manager for Windows 10.
• A USB with at least 8GB. (All data on the USB drive will be erased, you can backup files at first)
• Windows installation CD/DVD.
Step 1. Insert your USB into the computer and ensure that it can be detected.
Step 2. Press “Windows” + “R” at the same time, input “diskpart” and hit the “Enter” key.
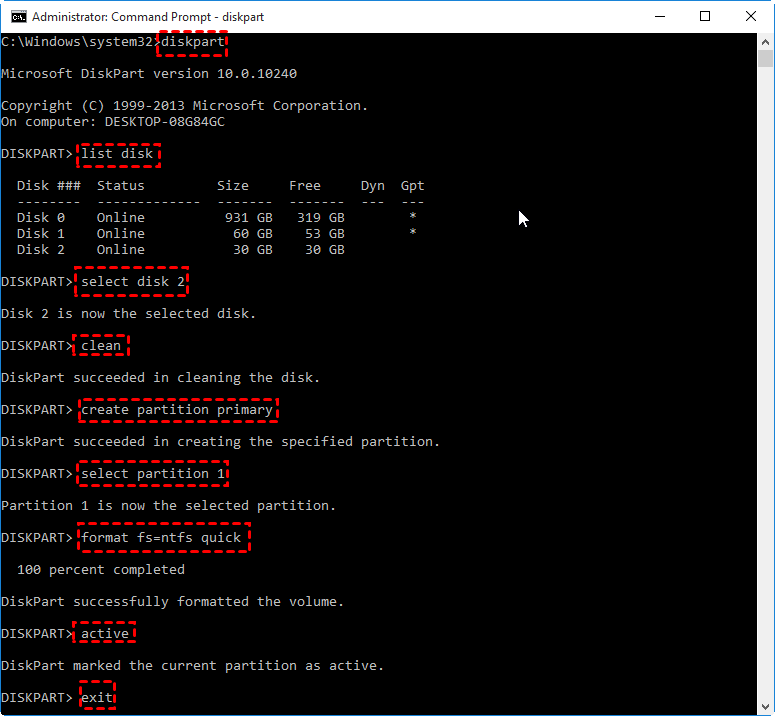
Step 3. In Diskpart, please run commands as follows:
· list disk
· select disk n ( n refers to the disk number of your USB drive)
· clean
· create partition primary
· format fs=ntfs quick
· assign letter =x ( x is one of the available drive letters that can be assigned to the partition)
· active
· exit
Step 4. Insert the Windows 10 installation CD/DVD into the PC and open File Explorer to locate the drive letter of the Windows CD/DVD drive and the USB drive.
Step 5. Go to the boot folder of the Windows 10 ISO files by running the commands listed below:
·g: (g is the drive letter of your mount drive as it appears in File Explorer.)
·cd boot
Step 6. Then, run the following commands and wait for the process to complete.
· bootsect /nt60 N:
· xcopy G:\*.* N:\ /E /F /H (Replace G with the drive letter of your DVD and N with the drive letter of your USB drive)
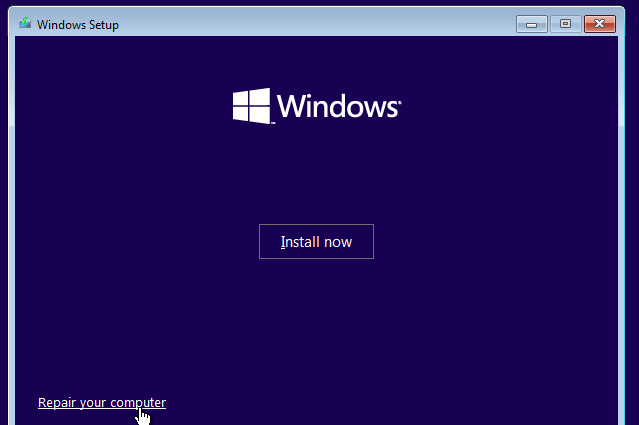
After the task is over, you can boot your PC when it can’t boot successfully to do a fresh installation or use “Repair your computer” to fix the glitches.
2. Create a UEFI bootable partition manager on your USB
CMD requires users should be familiar with the commands and what those commands do in every step. And after you go in “Repair your computer”, you might need to type more commands to solve the problem. These may not be very friendly for users who don’t know much about CMD.
So, to avoid the irreversible consequences of wrong commands and other manually incorrect operations, we suggest you turn to use AOMEI Partition Assistant Professional. It’s a powerful Windows PC disk and partition manager that supports Windows 11/10/8/8.1/7/XP. Users can use it to make a UEFI bootable partition manager on the USB and boot their PC into this software to repair the problems.
Here’s the step-by-step guide.
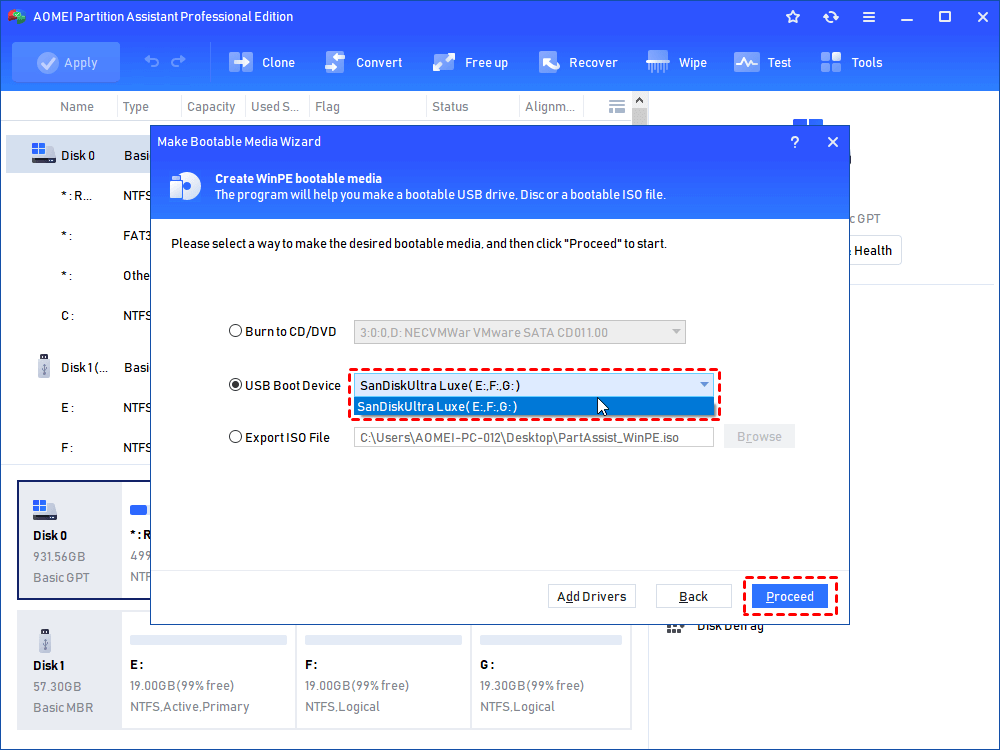
Step 1. Install and run this tool. Click “Make Bootable Media” under “Tools” and click “Next”.

Step 2. On this page, choose “USB Boot Device” and select your USB drive. Then, click “Proceed”.
Step 3. Click “Yes” to continue. When the process completes, click “Finish”.
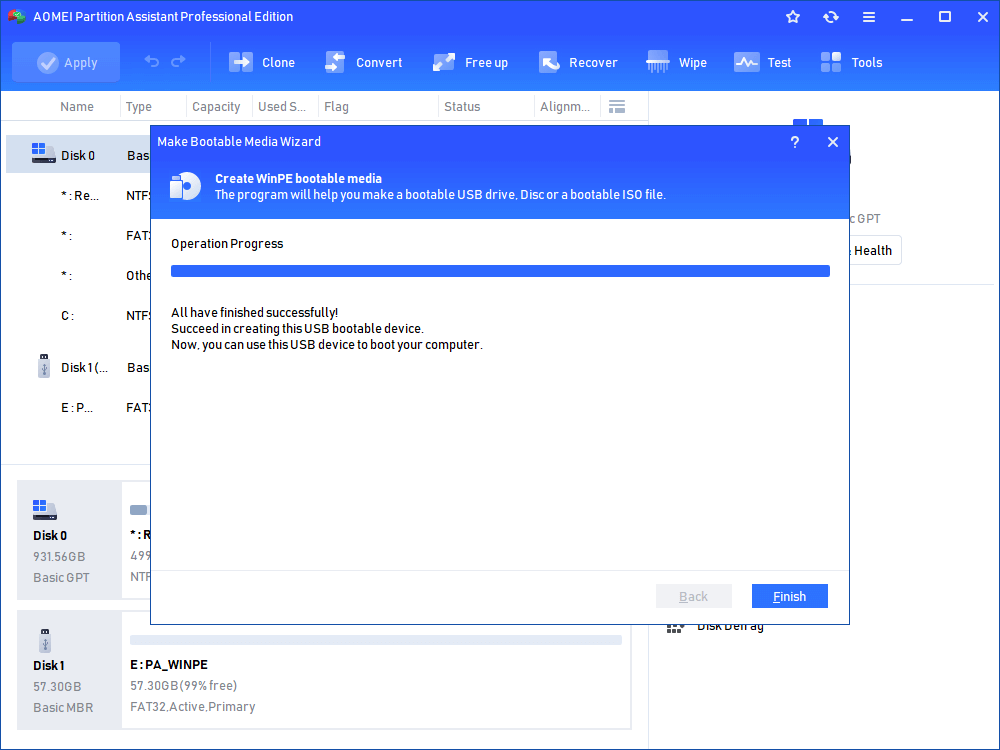
After you create a UEFI partition manager on your USB, you can repair your machine with this USB.
Now, we’ll give you an example. The error like “Operating System Not Found”, “Missing Operating System”, “No Bootable Device”, and “Invalid Partition Table” might be caused by corrupted MBR. In this situation, your PC will boot in failure, but with the UEFI bootable USB, you can fix the issue.
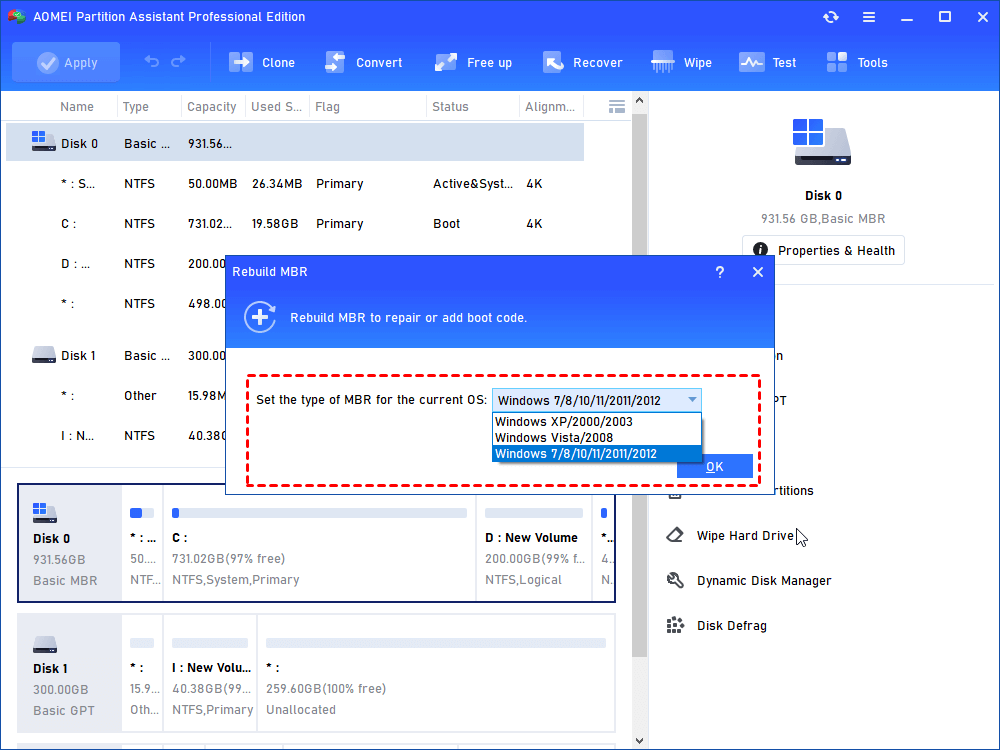
Step 1. Connect this USB to your PC, boot, and enter BIOS to boot from this USB. And you will see the interface of this disk manager. In the main console, right-click the disk that you need to fix and choose “Rebuild MBR”.

Step 2. Select the type of MBR for the current operating system.
Step 3. Click “Apply” and then “Proceed” to execute the pending operations.
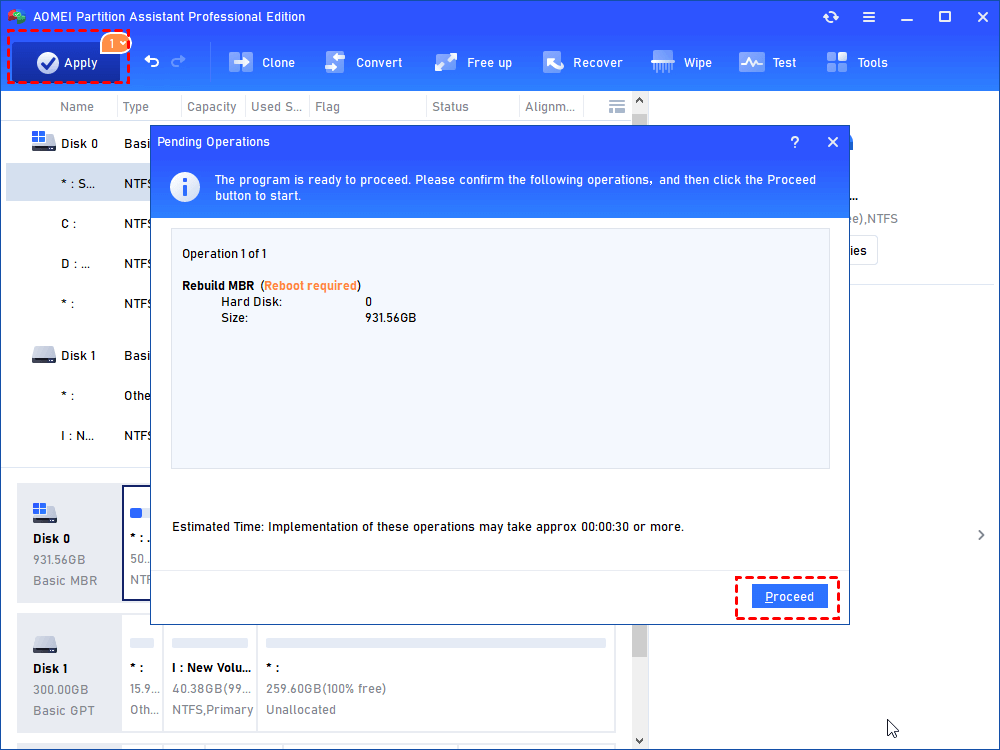
Then you wait for the task and after that, you can remove the USB to boot your PC.
1. If you want to create a portable Windows OS, please choose the “Windows to Go” feature.
2. And this tool also has "Check Disk" and "Surface Test" features for you to monitor the health status of your disks.
To sum up
A UEFI bootable partition manager is quite helpful when your PC can’t boot normally. With the USB you create via AOMEI Partition Assistant, you can do many works like “Convert to GPT” and “Disk Clone” etc. You can allocate free space to extend the C drive, move installed programs without reinstalling, and more.

