How to Fix WD My Passport Access Denied in Windows 10/11
If you have encountered WD my passport access denied in Windows 10/11, this guide is here to help. A data recovery tool is also covered.
By Hedy / Updated on June 30, 2025
Error: WD my passport access denied in Windows 10
WD My Passport, a trusted and compact external drive from Western Digital, offers exceptional performance and portability. Built with robust hardware encryption, password protection, and dependable durability, it remains a top choice in the portable storage market.
Yet, users occasionally encounter a frustrating issue: “Access Denied” when trying to use the device. When this error appears, the drive becomes inaccessible, preventing any file interaction or modification.
This problem can stem from several underlying causes, including:
◉ Unstable connection or temporary malfunction: Loose cables, faulty ports, or a minor system glitch can disrupt communication between your PC and the drive, resulting in denied access.
◉ Incorrect drive permissions: If the drive’s permission settings restrict user access, it may block any attempts to open or edit files.
◉ Corrupted file system: A damaged or corrupted file system can render the drive unreadable, locking you out of your data.
◉ Physical damage: Mechanical or hardware issues with the drive itself may lead to complete data inaccessibility.
Understanding these potential triggers is the first step toward resolving the access error and recovering your data safely.
How to fix WD my passport access denied in Windows 10/11
After identifying the root causes behind the “Access Denied” message on your WD My Passport, it’s time to move forward with solutions designed to restore access and functionality. Try the following methods to resolve the issue and regain control of your files.
Fix 1. Check the disk connection
In many cases, a simple reconnection is all it takes to fix the issue. Disconnect the WD My Passport from your computer, wait a few seconds, then plug it back in. This can clear up any temporary communication glitches between the drive and the system.
If the problem persists, try connecting the external drive to a different USB port or another computer entirely. If it works on another device, the problem may lie with your original system’s configuration or hardware.
If this quick fix doesn’t help, proceed to the next solution.
Fix 2. Change the disk permission
Windows allows you to assign specific access rights to drives and files, helping manage user control and protect against unauthorized changes or data breaches. If your WD My Passport is showing “Access Denied”, incorrect permission settings could be the reason. Here's how to modify the drive permissions:
Step 1. Ensure your WD My Passport is securely connected to the computer.
Step 2. Press Windows + E to open File Explorer. Locate the drive under This PC, right-click it, and select Properties.
Step 3. Switch to the Security tab and click Edit.
Step 4. In the new window, select Add, then enter Authenticated Users in the text field. Click OK.
Step 5. Under the Permissions section, check the Allow box next to Full control, then click Apply and OK to confirm.
Step 6. After adjusting the permissions, try reopening your WD My Passport to see if the issue has been resolved.
Fix 3. Run the CHKDSK command line
If permission settings aren’t the culprit, the issue may lie within the drive’s file system. A corrupted or damaged file structure can prevent access to your WD My Passport. To fix this, run the built-in CHKDSK utility, which scans the drive for errors and repairs them automatically.
Step 1. Type cmd into the Windows search bar. Right-click on Command Prompt and choose Run as administrator.
Step 2. When prompted by User Account Control, click Yes.
Step 3. In the command window, type the following command and press Enter:
chkdsk C: /f /r

Note: Replace C with the actual drive letter assigned to your WD My Passport.
Step 4. Wait for the process to complete. Once finished, check if the drive is accessible.
If CHKDSK fails or doesn’t resolve the issue, try a third-party utility like AOMEI Partition Assistant. This tool includes a Check File System feature, designed to detect and fix file system errors without requiring advanced technical knowledge.
Download the software, launch it, select your WD My Passport, and run Check Partition to diagnose and repair problems efficiently.
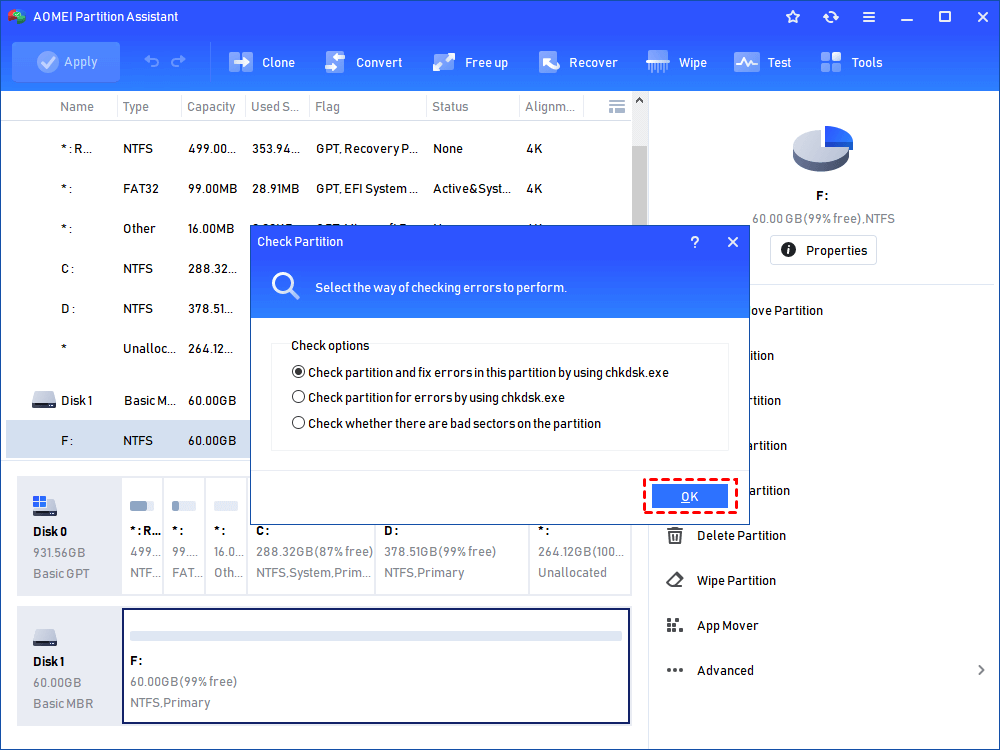
Step 1. In the main interface, right-click the target drive and then click "Check Partition".

Step 2. Choose the "Check partition and fix errors in this partition by using chkdsk.exe" option, then click "OK".
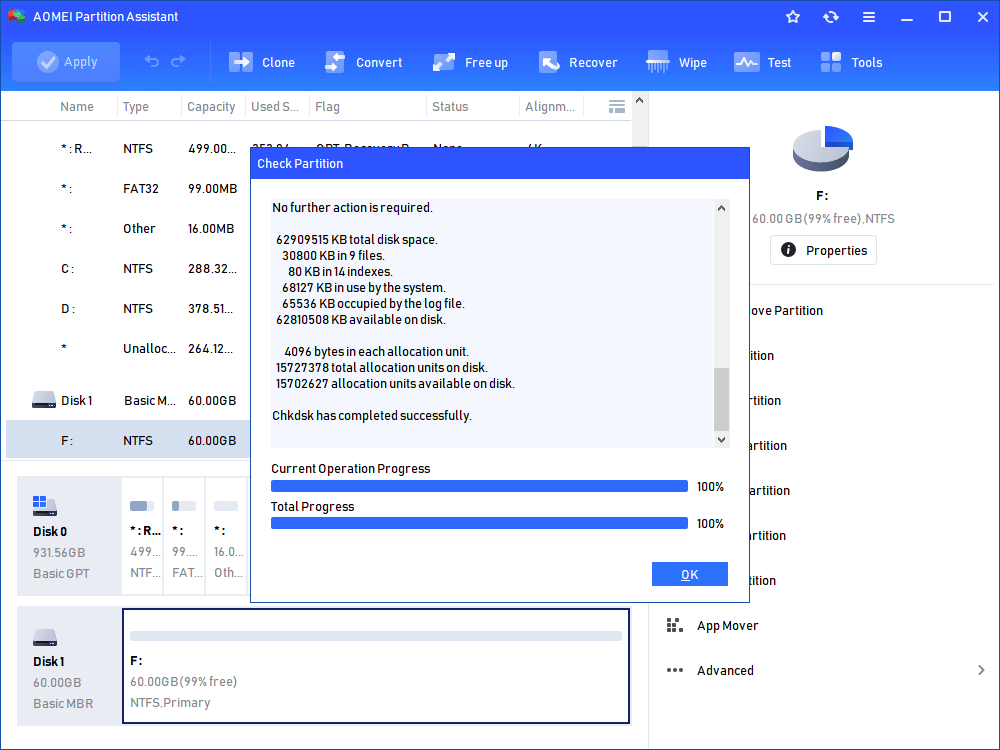
Step 3. Wait for a while and click "OK" when it's finished.
Bonus tip: How to recover data from WD my passport access denied issue
If you’re seeing the frustrating “Access Denied” error when trying to open your WD My Passport external hard drive, don’t panic. This issue often stems from corrupted file systems, changed permissions, or accidental damage. Fortunately, PartitionAssistant Recovery offers a powerful and user-friendly solution to regain access and recover your important data.
It can scan lost or inaccessible partitions and help you restore them without data loss. Whether your drive has become RAW, lost due to formatting, or simply unreadable, this tool can often rescue your data efficiently.
Step 1. Install and launch PartitionAssistant Recovery. Choose the exact partition or disk where your data is lost and click Scan.

Step 2. Then, the recovery tool starts to scan and search. It will execute the “Quickly Scan" first for finding your deleted data fast, and then execute the “Deep Scan" for searchingfor other lost data.

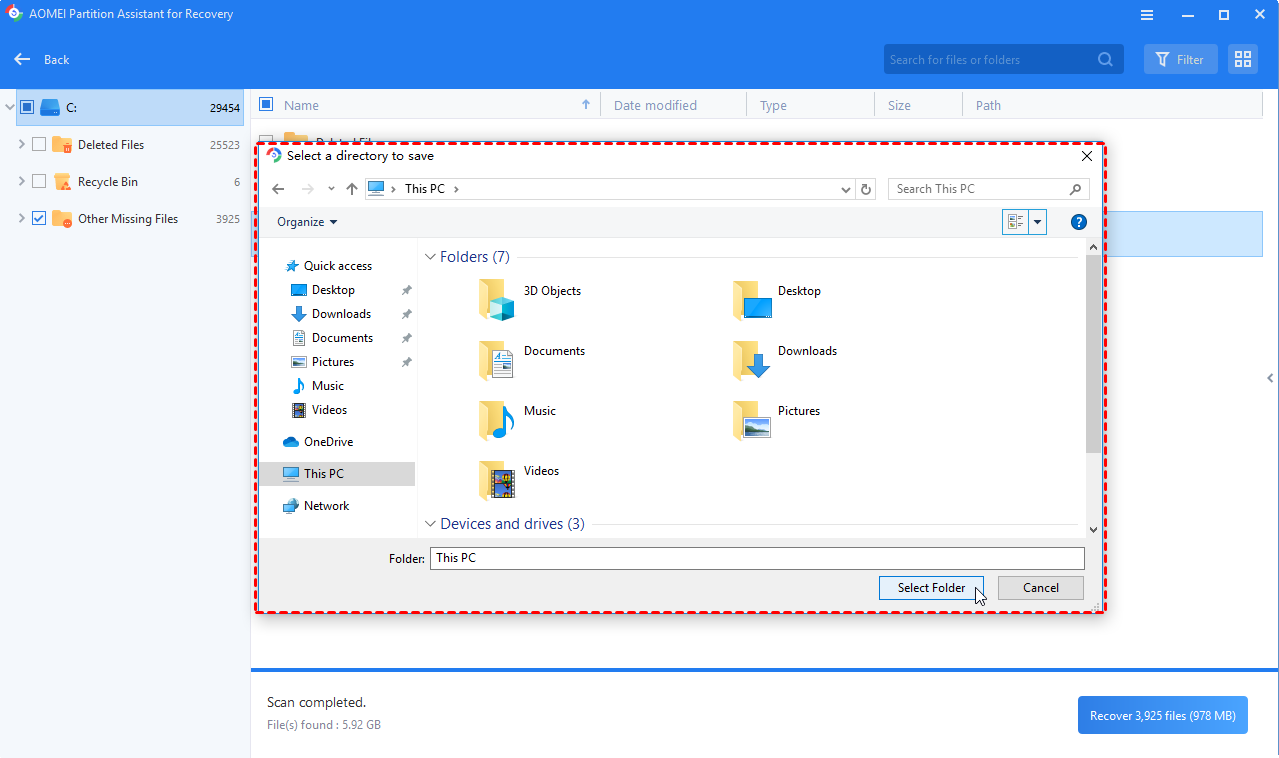
Step 3. Once the scan is completed, all deleted files, recycle bins, and other missing files will be displayed. Please select the file you would like to recover and then click "Recover".

Step 4. Then, select a folder path to save your recovered files.
Step 5. Wait patiently for this process of recovering ends.
Conclusion
The WD My Passport “access denied” error can stem from multiple causes, but it's typically manageable with the right approach. Before trying any fixes that might risk data loss, make sure to recover your important files first. Once your data is safe, proceed with the recommended solutions to restore full access to your external drive.

