Error: Windows 11 Don Not Have Permission to Delete This File
If you’ve ever encountered the frustrating error message "Windows 11 do not have permission to delete this file", you’re not alone. Read this guide to easily solve the problem now.
By Lucas / Updated on February 14, 2025
If you’ve ever encountered the frustrating error message "Windows 11 do not have permission to delete this file", you’re not alone. This issue is common among Windows users and often occurs when the system restricts access to certain files or folders. The error message may also include phrases like "you'll need to provide administrator permission to delete this file" or "you'll need administrator permission to delete this file", which can further complicate the process. In this article, we’ll explore the causes of this issue and provide four effective methods to resolve it
Why does the " Windows 11 do not have permission to delete this file " error occur?
Before diving into the solutions, it’s important to understand why this error happens. Windows 11 is designed with robust security features to protect system files and user data. When you encounter the "Windows 11 do not have permission to delete this file" error, it’s usually due to one of the following reasons:
✘ Insufficient User Permissions: The file or folder you’re trying to delete is owned by another user or requires administrator privileges.
✘ File in Use: The file might be in use by another program or process, preventing deletion.
✘ Corrupted File System: A corrupted file system or disk errors can restrict access to certain files.
✘ Malware or Virus: Malicious software can lock files and prevent them from being deleted.
How to solve [Windows 11 Do Not Have Permission to Delete This File]
If you’re stuck with the "Windows 11 do not have permission to delete this file" error, don’t worry. Below are four proven methods to help you regain control and delete the file.
Method 1. Take ownership of the file
One of the most common reasons for the "you'll need to provide administrator permission to delete this file" error is that you don’t own the file. Taking ownership can resolve this issue.
Step 1. Right-click the file or folder and select Properties.
Step 2. Go to the Security tab and click Advanced.
Step 3. Next to the owner’s name, click Change.

Step 4. Enter your username and click Check Names to verify.
Step 5. Click OK, then check the box for Replace owner on subcontainers and objects.
Step 6. Click Apply and OK to save changes.
After taking ownership, try deleting the file again.
Method 2. Use Command Prompt to force delete
If the file is stubborn and still shows the "you'll need administrator permission to delete this file" error, you can use Command Prompt to force delete it.
Step 1. Open Command Prompt as an administrator.
Step 2. Type the following command and press Enter:
del C:\Users\user\folder-name\filename.extension
If your target file is in a folder, use the rmdir command to delete the folder:
rmdir /s /q "path\to\folder"
This method bypasses permission restrictions and deletes the file directly.
Method 3. Boot into Safe Mode
If the above solutions can’t solve the issue, you can consider using Safe Mode to delete the folder or file.
Step 1. Go to Start > Settings > Update & Security > Recovery.
Step 2. Click the Restart Now button under the Advanced startup section.
Step 3. You will enter Windows RE.
Step 4. Go to Troubleshoot > Advanced options > Startup Settings > Restart.
Step 5. Press the F4 key to enter Windows Safe Mode.
In Safe Mode, you can try to delete the target folder or file.
Method 4. Try file shred tool to completely delete files
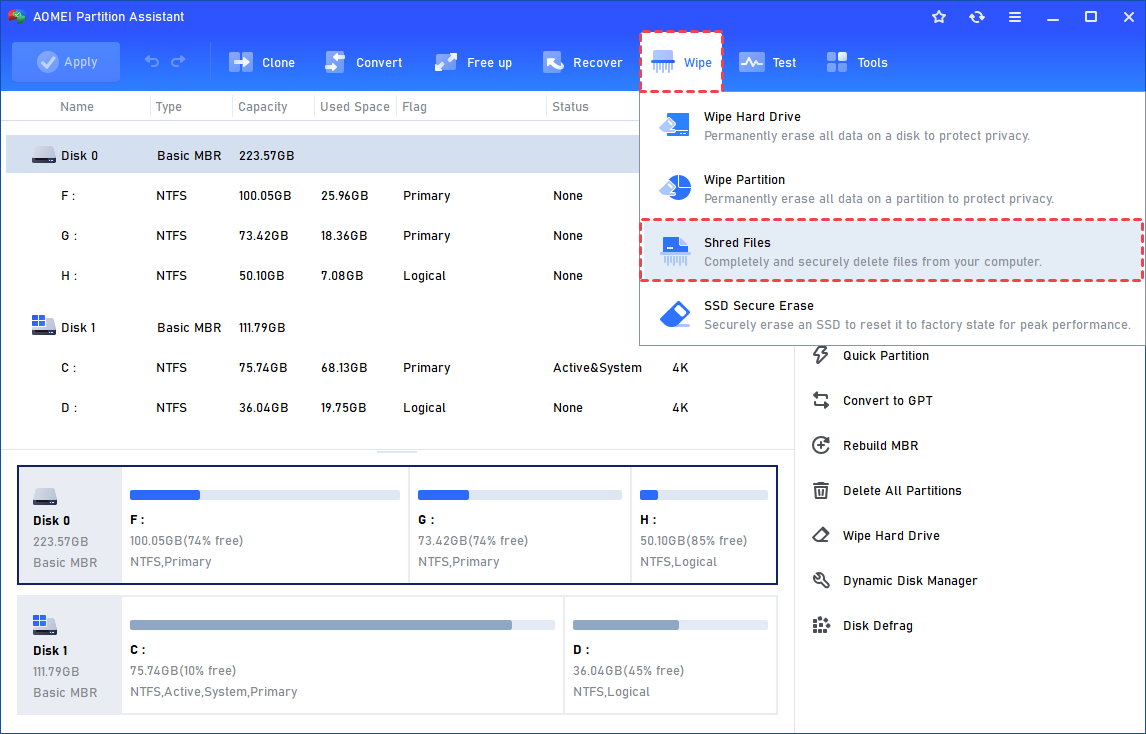
If the above methods don’t work, you can use a professional tool like AOMEI Partition Assistant to force overwrite the target files in Windows. It provides with 4 different overwriting standard: write zero, pseudo random data, DoD standard, gutmann. What's more, this tool also can help you wipe and erase a hard disk/SD card/USB...you can safely clean data on your storage devices.
The Best Windows Disk Partition Manager and PC Optimizer
Step 1. Install and launch AOMEI Partition Assistant. Click the "Wipe" main tab and select "Shred Files" tool.
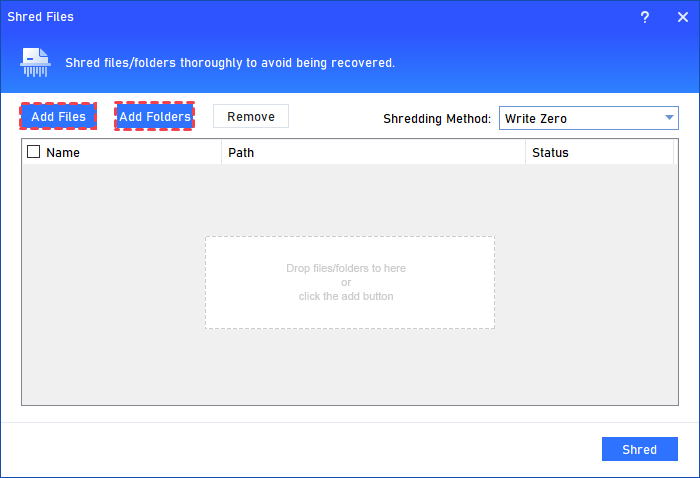
Step 2. In the pop-up window, click "Add Files" to add the files you want to shred or "Add Folders" to add the folders you want to shred. Or you can drag files or folders to the window directly.
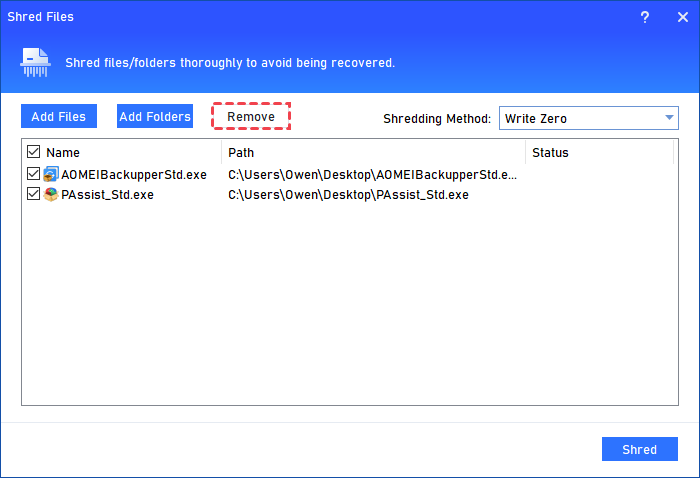
If you choose the wrong file or folder, you can click "Remove" to delete it. (Clicking the "Remove" button will remove all added files/folders for once.)
Step 4. Select a shredding method.
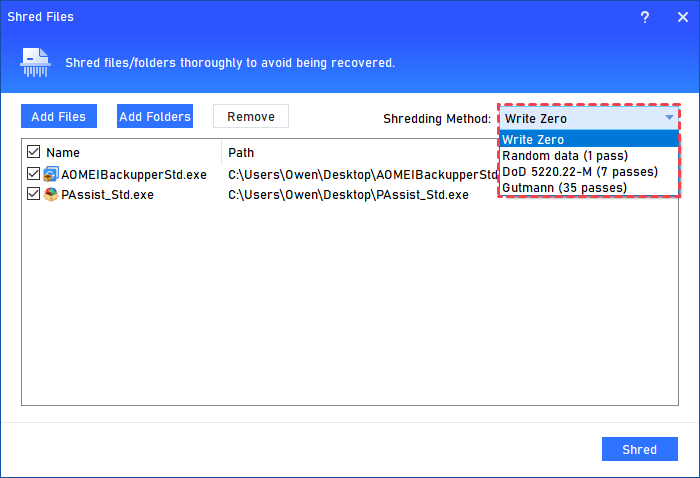
There are 4 methods available:
• Write Zero: Overwrite all sectors with zeros. It is safe and fast.
• Random data (1 pass): Overwrite the hard drive with random data. It is more secure than the first one.
• DoD 5220.22-M (7 passes): DoD Standard is first published in the Department of Defense of the U.S. It is much more secure than "zero-filling" and "random data filling" and faster than Guttman. Thus it is often adopted by companies and organizations.
• Gutmann (35 passes): It overwrites a hard drive with 35 passes. It is the safest way here, but it also takes the longest time.
Step 5. Click "Shred" to start the process.
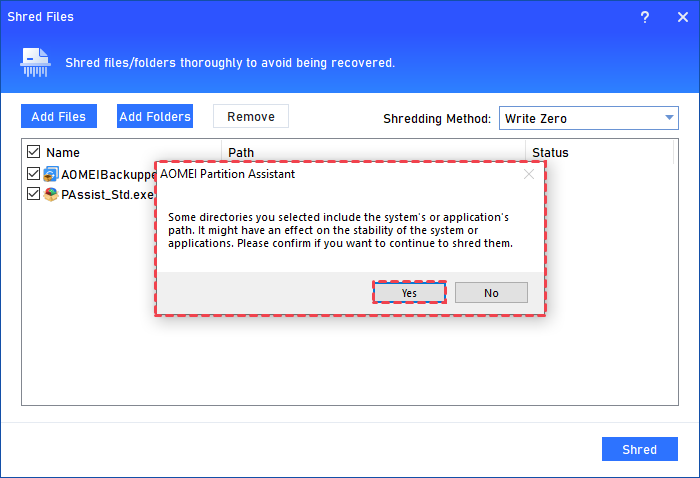
Step 6. There will be a confirmation window pop-up if you are trying to move some system program files. Click "Yes" to continue.
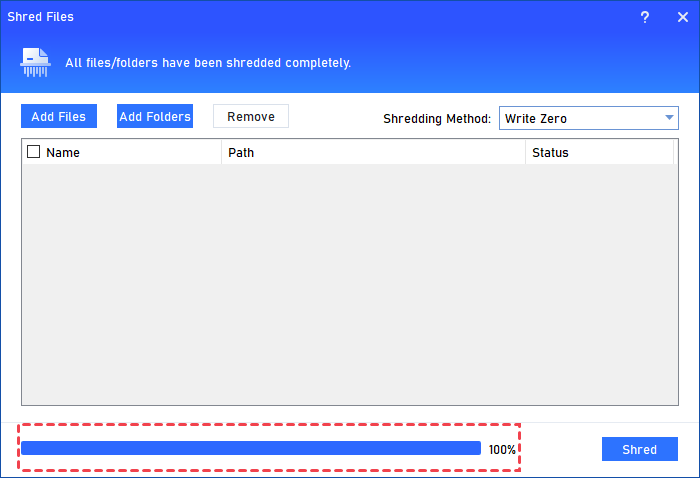
Step 7. Then, the shredding process will start and you can check the shredding process. After it is finished, the process will be 100% and the added files/folders will be erased from your computer.
-
If you need to shred all data on a partition, we suggest that you can try the "Wipe Partition" feature.
-
System directories and critical directories of C: drive can't be added to shred directly under Windows. You can create WinPE bootable media of AOMEI Partition Assistant, and then boot from WinPE media to shred.
-
After files are shredded, some data recovery tools might recover some items. But these recovered files are renamed randomly and show 0 bytes, can't be opened.
To sum up
By following the methods and tips outlined in this article, you can effectively resolve the "Windows 11 do not have permission to delete this file" error and regain control over your files. Whether you choose to take ownership, use Command Prompt, or rely on professional software like AOMEI Partition Assistant, these solutions will help you overcome this frustrating issue.

