Files Missing After Windows 11 Update? Recover Them Easily!
Upgrade to Windows 11 is a great thing, but sometimes files missing after Windows 11 update. In this article, we’ll discuss why this occur and show you five effective ways to recover the missing files easily.
By Hedy / Updated on March 12, 2025
The motivation behind upgrading to Windows 11 often revolves around gaining access to security updates that safeguard your PC from potential threats and benefiting from new features. The transition from Windows 10, Windows 8.1, or Windows 7 to Windows 11 is typically seamless, with most data and files being preserved.
However, there are instances where certain documents may become inaccessible following the upgrade. In such cases, the pursuit of recovering files post-Windows 11 update becomes crucial.
Allow me to explain the reasons for files missing after Windows 11 update and guide you through the process of file recovery.
Common reasons for file missing after Windows 11 update
Various factors can contribute to the disappearance or hidden status of documents following a Windows 11 upgrade. However, there's no need for undue concern, as the process to recover missing files after a Windows 11 upgrade is quite manageable. Here are a few potential reasons for data loss during a Windows upgrade:
◤ Temporary Windows account: There's a possibility that you've been assigned a temporary Windows account, which might be causing the issue with your documents.
◤ Account issues: If the account you used before the upgrade is not functioning properly in Windows 11, it could lead to missing files.
◤ Altered file locations: Documents might have been inadvertently moved to different locations during or after the upgrade.
◤ Accidental deletion: In certain instances, files can be unintentionally deleted while undergoing the transition to Windows 11.
How to recover lost files after Windows 11 update?
There are effective methods to recover your missing files in your upgraded Windows 11 system.
Method 1. Remove the temporary account
You may find you are troubled in finding your old documents after upgrading your PC to Windows 11. This is most likely because you have logged an old or temporary credential as your user account. So, please follow the steps below to check whether you are backed with a temporary account:
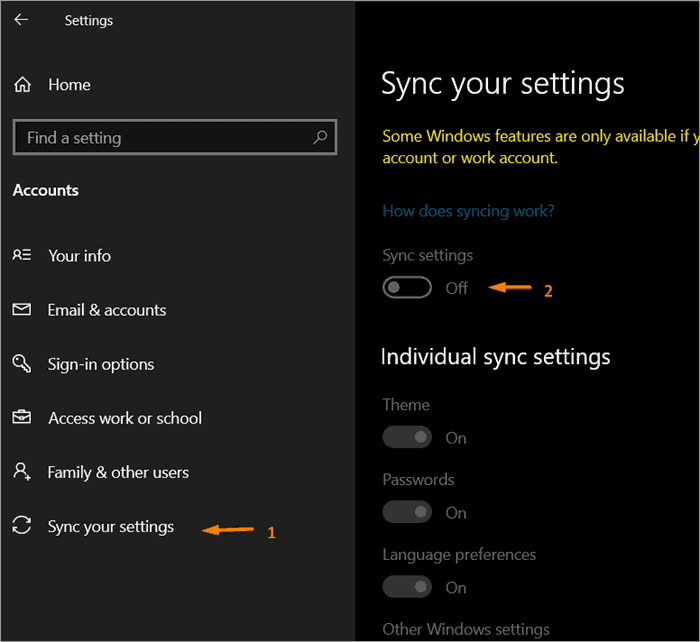
Step 1. Select Start > Settings > Accounts and then Sync your settings. If you see a message at the top that states, "You are signed in with a temporary profile. Roaming options are presently unavailable", restart your PC and sign in once more. This should eliminate the account, and your documents ought to be accessible once more.
Step 2. Repeat the above step and keep your Sync Settings on.
Step 3. Restart your PC and log in again. If you see the message written, “We can’t sign in to your account”, try signing out and sign in again inputting the credentials.
Method 2. Look for the missing files using Search Bar
If you're not encountering any sign-in issues, you can simply proceed by directly attempting to locate the files through the available search functionalities.
To accomplish this, you have two options. Firstly, you can initiate your search within the search feature of File Explorer, located in the upper-right corner of the interface. Alternatively, you can leverage the search bar situated in the taskbar for the same purpose.
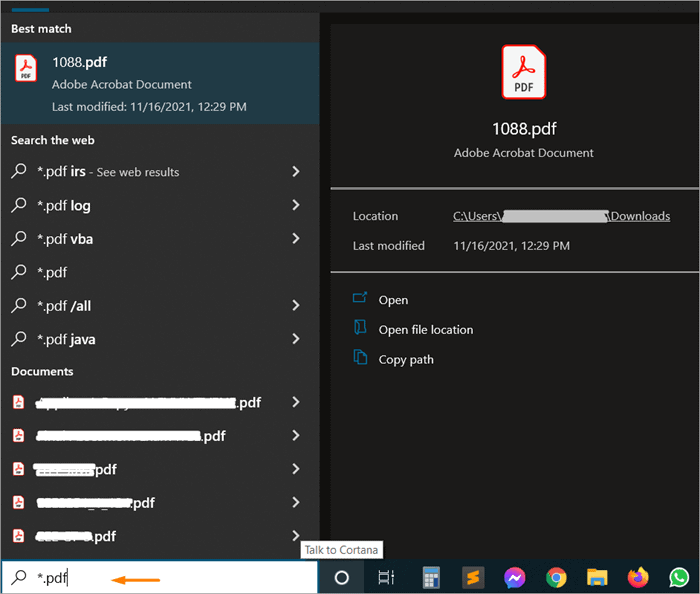
For example, if you need to find a PDF file, you have the choice to either input the exact name of the document or simply utilize the *.pdf format to display a comprehensive list of all available PDF files. This approach allows you to conveniently identify the PDF file of your preference.
Method 3. Restore lost files after Windows Update with Backup
If you've created a backup on an external storage device, you can use it to restore your files when you are encountering the " all my files are gone Windows 10 after update" issue.
Step 1. In the search box on the taskbar, type Control Panel. Select it from the list of results, then select Backup and restore (Windows 7).

Step 2. Within the ambit of the Backup and Restore feature, proceed to select "Restore my files".

Step 3. By selecting "Browse for files", you are allowed to look through the files to be recovered. Go ahead by clicking "Next".

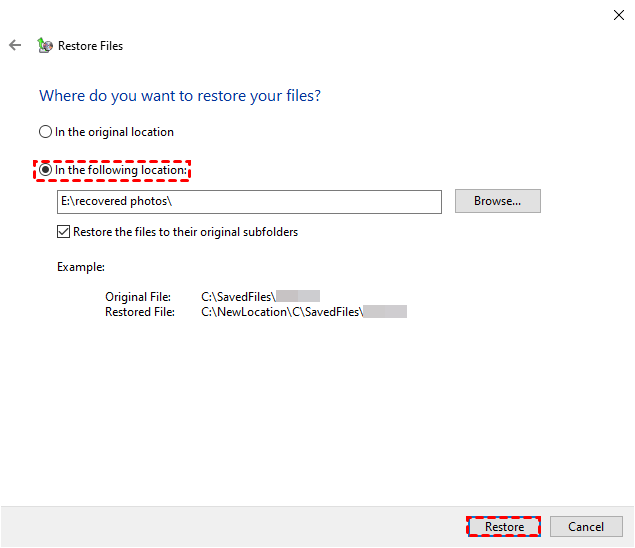
Step 4. Select a destination to save the missing file and click the "Restore" button to begin the restoration process.
Method 4. Enable a Windows administrator account
In the event that you established a fresh Microsoft account during your transition from a previous Windows version, your files might be situated within a deactivated administrator account. To access these files, you will need to reactivate this account and perform a sign-in.
Step 1. Commence the process by typing "computer management" into the search box, and subsequently choosing the Computer Management application from the displayed results.
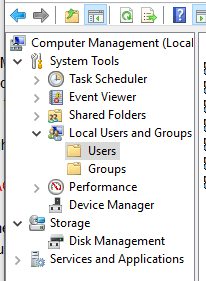
Step 2. Within the left-hand panel, opt for Local Users and Groups, followed by Users. If the user named Administrator bears a downward-pointing arrow, indicative of it being a disabled account, follow these steps to enable it:
Step 3. Double-click on the Administrator icon (with the Disabled account indicator) to initiate the Properties dialog box.
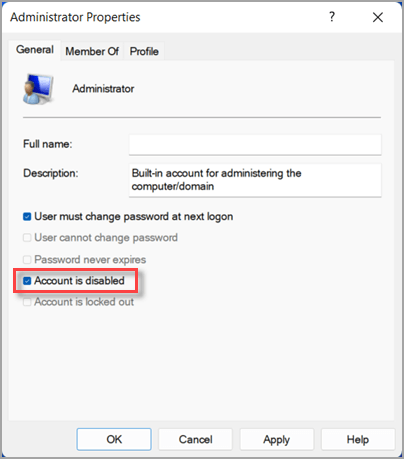
Step 4. Proceed by unticking the checkbox labeled "Account is disabled".
Step 5. Confirm your adjustments by selecting Apply, thus facilitating the activation of the account.
Step 6. Consequently, perform a sign-out and subsequently sign back in, utilizing the Administrator account for access to your files.
Method 5. Use PartitionAssistant Recovery file recovery software
If you find yourself still unable to find the missing files, it signifies that these records may have inadvertently vanished during the transition to Windows 11. To restore these missing files, consider employing the PartitionAssistant Recovery—a powerful tool adept at efficiently retrieving deleted files from various locations on your device.
Here is a full guide on how to recover files missing after Windows 11:
Step 1. Install and launch PartitionAssistant Recovery. Choose the exact partition or disk where your data lost and click Scan.

Step 2. Then, the recovery tool start to scan and search. lt will execute the “Quickly Scan" first for finding your deleted data fast, and then execute the “Deep Scan" for searching other lost data.

Step 3. Once the scan is completed, all deleted files, recycle bins and other missing files will be displayed. Please select the file you would like to recover and then click "Recover".

Step 4. Then, select a folder path to save your recovered files.
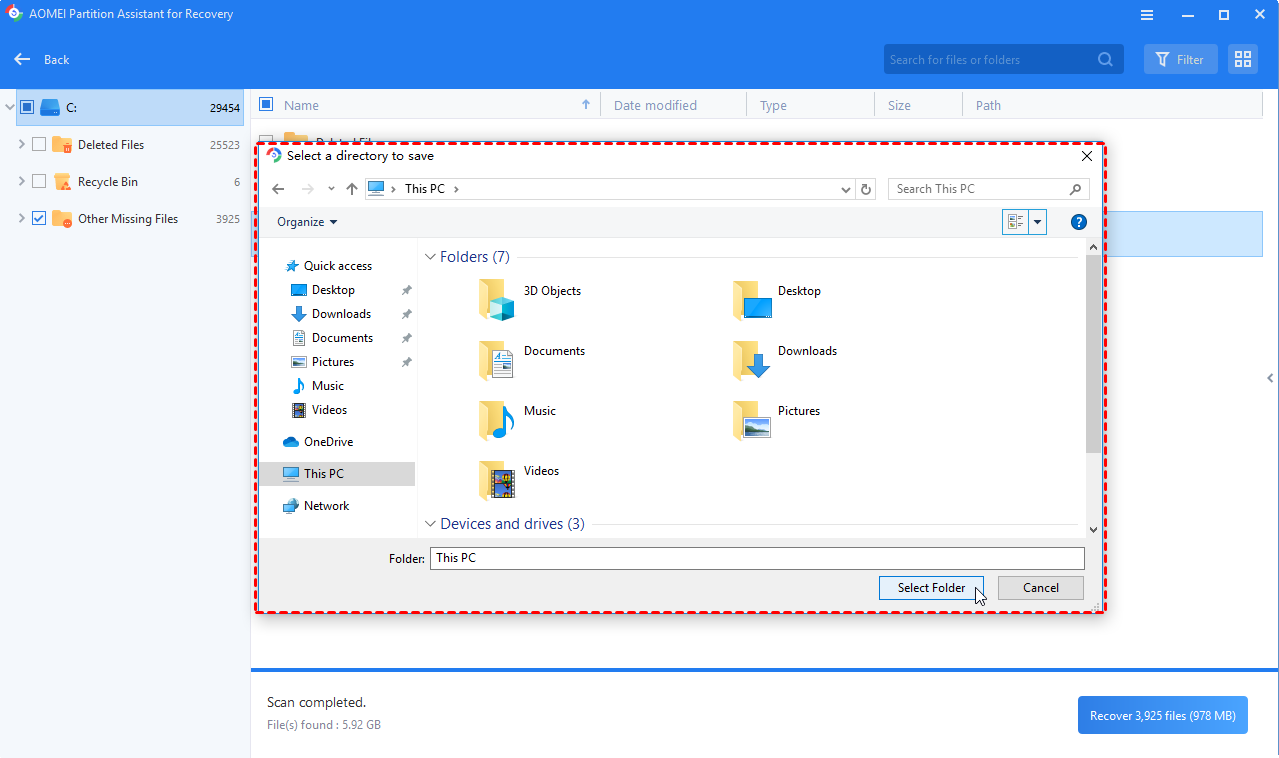
Step 5. Wait patiently for this process of recovering ends.
Conclusion
Chances are that files missing after Windows 11. This can be attributed to the Windows 11 update potentially relocating your data to an alternate location within your PC or even resulting in the inadvertent deletion of files. This passage comprehensively outlines user-friendly methods to effectively recover files following a Windows update. Among all the methods, the PartitionAssistant Recovery emerges as a highly dependable solution for data retrieval from Windows hard drives.

