DiskPart: Format Disk Partition in Windows 11, 10, 8, 7
DiskPart format command enables you to quick format a disk or partition to NTFS or FAT32 in Windows 11, 10, 8, 7. The DiskPart free alternative - AOMEI Partition Assistant can format disk partition with CMD and GUI.
By Cherry / Updated on March 7, 2025
Formatting disk is necessary before using
Formatting disk is necessary before using. No matter what operating system you are using, it has a certain way to manage disks, and only the formatted disk structure can be recognized. After formatting the disk, you can use it to install OS and store the data. So, when people create a new partition, they always need to format this partition with a file system.
How to format disk partition with DiskPart?
To format disk partition, you can use the Disk Management tool, or right-click on a drive in Windows Explorer and select the "Format...". If you would rather use a command line to format the drive, DiskPart would be the first choice, and it does have many advantages. For example, if you would like to reformat a drive which had an operating system on the drive, you can find it cannot be formatted by Disk Management and cannot be seen in Windows Explorer. But, how to format disk using DiskPart?
Diskpart is an amazing tool that can manage disks by typing the relative syntax. You can format a local drive or an external hard drive for the use of file storage in your Windows OS environment. And here, you can see how to format hard disk using CMD step by step.
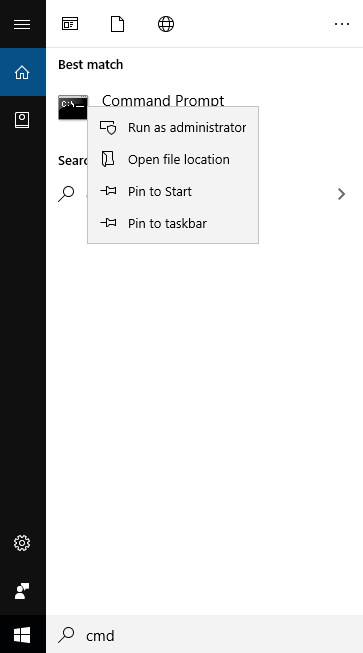
1. To use the command line to format a hard drive, you need to open the command prompt first. Here you can click Start, type "cmd", right click it and select "Run as Administrator", or you can press "WIN+X" and select Command Prompt (Admin)to open the command prompt.
2. Type diskpart to open the diskpart command prompt.
3. Type list volume, press Enter, all the volume will be list.
4. Type select volume n, press Enter, the volume you want to format will be selected.
5. Then, type "format fs=fat32 quick label=test" and press Enter. Then, the DiskPart format quick, like the screenshot shows.
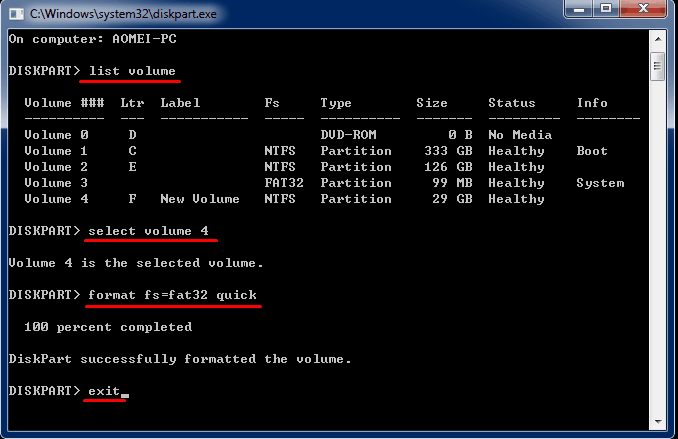
Finally, you can type "exit" and press Enter to close the command prompt after the process is done. Till now, you can see the newly formatted drive in My Computer and make use of it.
Other ways to format disk partition
DiskPart should be the best way to format disk partition, and it is widely used in Windows Vista/7/8/8.1/10/11, however, it doesn't support Windows XP. If you are using XP, how do you manage disks with command line? Besides, if you use DiskPart to format partition installed with system files, you may be failed and receive a Windows error code 0x80070057, what would you do?
Fortunately, there are many other ways to instead of DiskPart format disk partition.
▌Format disk partition with AOMEI Partition Assistant command line
AOMEI Partition Assistant Professional is a great tool that can help you format partition with command line in a quick way. First, you need to open the command prompt by clicking Start->type cmd, right click the program->select Run as Administrator. If you work with Windows 10/11, pressWin+X, select Command Prompt (Admin). Then, you can follow the next content to format a drive with AOMEI Partition Assistant.
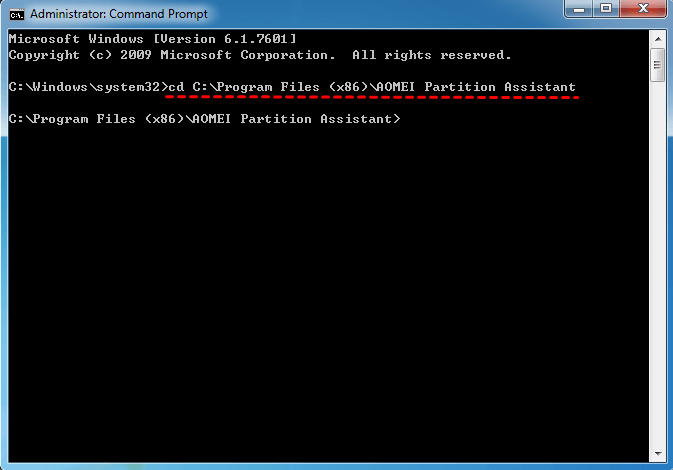
Step 1. Type cd C:\Program Files (x86)\AOMEI Partition Assistant , press Enter. The path is your AOMEI Partition Assistant installation directory.
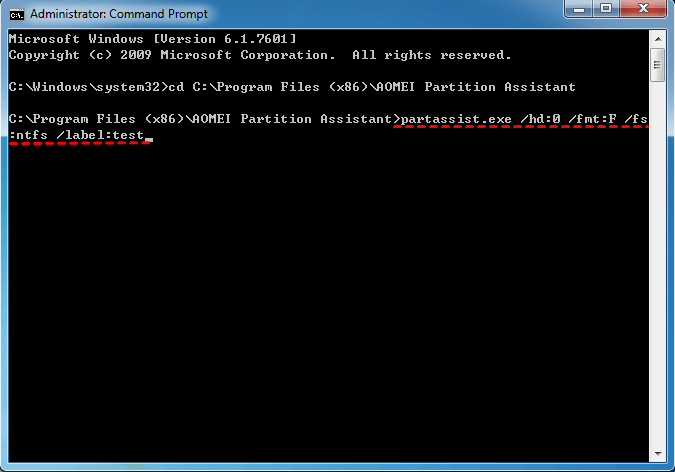
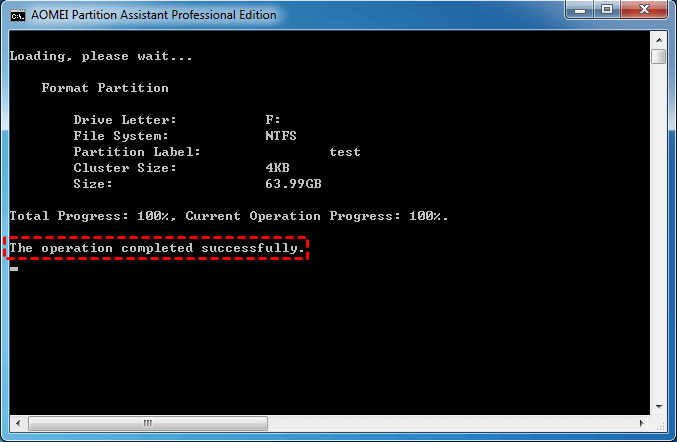
Step 2. Then, type partassist.exe /hd:0 /fmt:F /fs:ntfs /label:test to format the selected drive to NTFS. Press Enter.
Step 3. Wait for it to be completed.
- ★Tips:
- "/fmt" followed by partition number or drive letter, and the partition number starts with 0. If the specified value is drive letter, disk number can be ignored.
- "/fs" means file system, whose value can be fat16, fat32 or ntfs.
- "/label" means you can add any name of the partition.
▌Format disk partition with GUI
The truth is that not everybody likes to use command prompt to format disk partition. For those people, format partition with GUI instead of DiskPart format is a greater choice. The AOMEI Partition Assistant Professional also provides the easiest UI to format the partition free. With it, you can format disk partition with only a few clicks. Here you can do as following steps:
Step1. Install and launch the software, and you can see the main interface of your disk(s). Select the partition you want to format, right-click on it, select "Format Partition" in the pop-up menu.

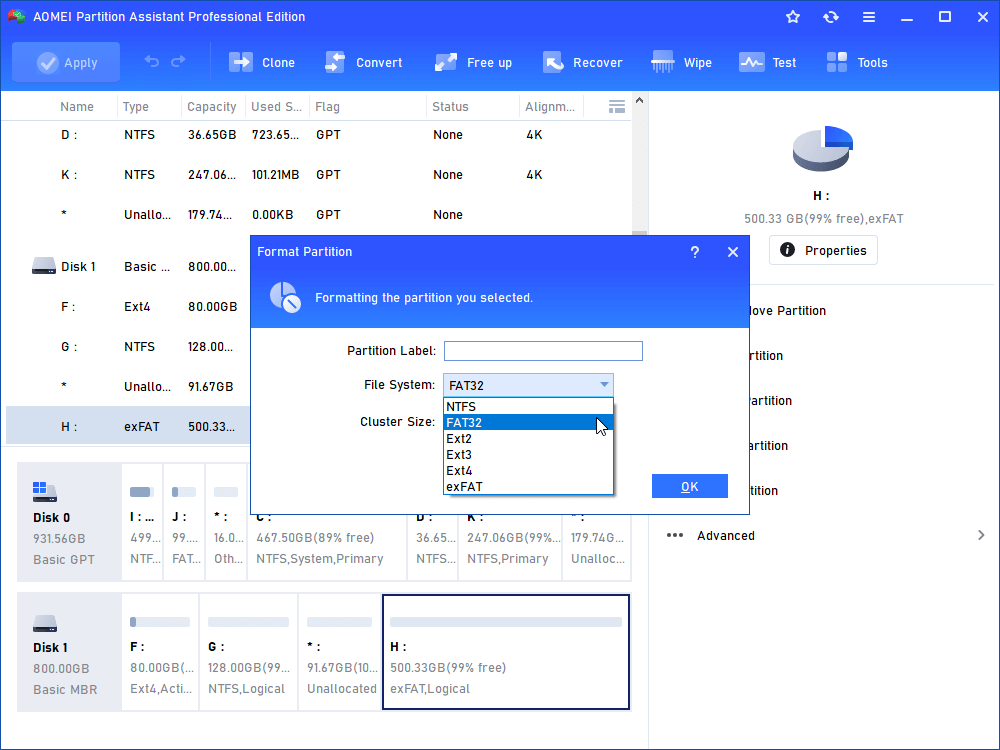
Step2. Here you can give a partition label and format the partition to what kind of file systems. Click OK.
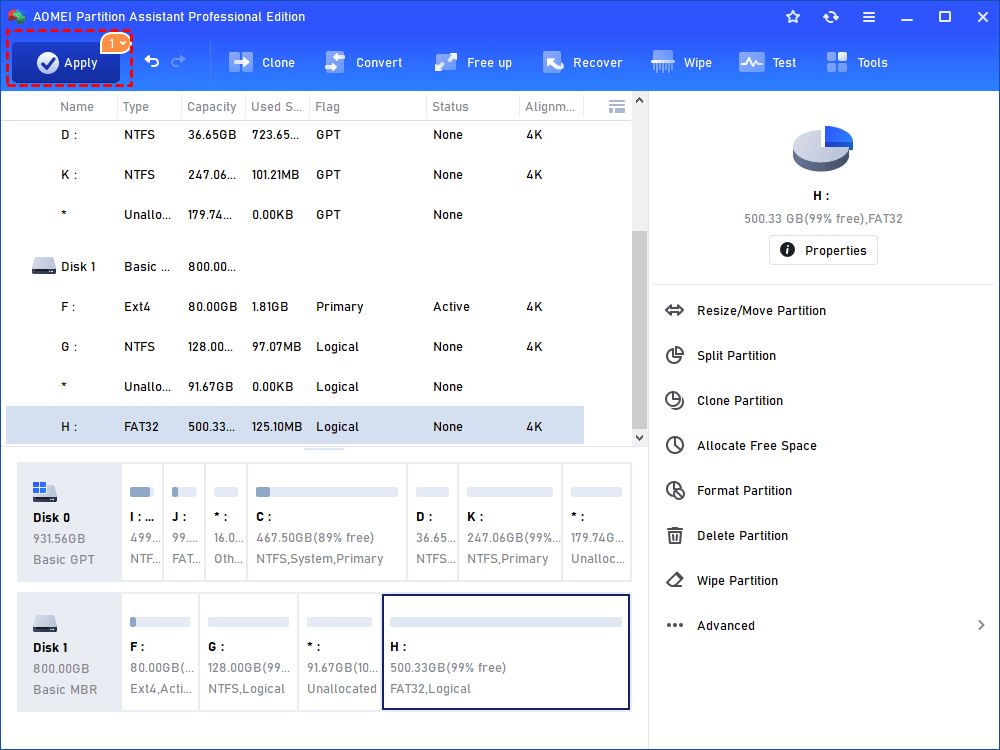
Step3. Finally, click Apply at the toolbar to execute all operations.
You can format every partition on your hard drive. Or you can initialize disk directly. Both of them will delete the data on the hard drive, so if there are some important data stored on your hard drive, please backup them first. You also can create a WinPE bootable usb to format system partition with AOMEI Partition Assistant. It should be the best way to replace DiskPart format disk partition.
Conclusion
For home and office usage, it is good to use DiskPart to format disk partition. And AOMEI Partition Assistant also is a really good DiskPart alternative, for it has simpler syntax to manage the disks, partitions, and its GUI mode is very acclaimed by users. Plus, it can format 32GB+ drive to FAT32 successfully, which cannot be done via DiskPart Command.
If you try to find a reliable partition software to optimize the performance of your servers for small and medium sized business, AOMEI Partition Assistant Server is your best choice. It works on Windows Server 2012 (R2), 2016, 2019, 2022 and SBS 2003, 2008, 2011 as well as Windows 7, 8/8.1, 10/11. Experience the excellent server partition manager.

