

How to Run CMD Clean Up C Drive Windows 10 [Full Guide]
How to use CMD clean up C drive Windows 10? In this post, you will learn three commands to clean C drive as well as useless files on it. A third-party disk cleanup tool is also covered.
By Hedy / Updated on July 21, 2025
Is it necessary to clean up C drive?
Yes, it is necessary to clean up your C drive regularly. The C drive is typically your system drive where Windows and most programs are installed. Over time, temporary files, system cache, old updates, and unnecessary programs accumulate, consuming valuable space and slowing down your computer.
Here's why:
1. Improves system performance: Over time, your C drive accumulates junk files, temporary files, and old system updates that slow down your computer. Cleaning it helps your system run faster and more smoothly.
2. Frees up disk space: Removing unnecessary files, old downloads, and large unused programs creates more free space, preventing low disk space warnings.
3. Prevents system errors: A cluttered C drive can lead to system errors, failed updates, and crashes. Cleanup reduces the risk of these issues.
4. Speeds up Windows Updates: Windows needs sufficient free space to install updates. Regular cleanup ensures smoother, faster updates.
5. Extends hard drive lifespan: By reducing unnecessary read/write operations caused by excess files, cleanup can help prolong your hard drive’s lifespan.
How to use CMD clean up C drive Windows 10
If your C drive is running low on space, you can use Command Prompt (CMD) to clean up unnecessary files. Below are simple methods to help you free up disk space using CMD:
Method 1. Clean unwanted files via the Cleanmgr command
Cleanmgr is a built-in tool designed to free up space by removing unnecessary files from your system. It scans your computer to identify files that are no longer needed and safely deletes them to help optimize disk space.
Step 1. Open Command Prompt as Administrator.
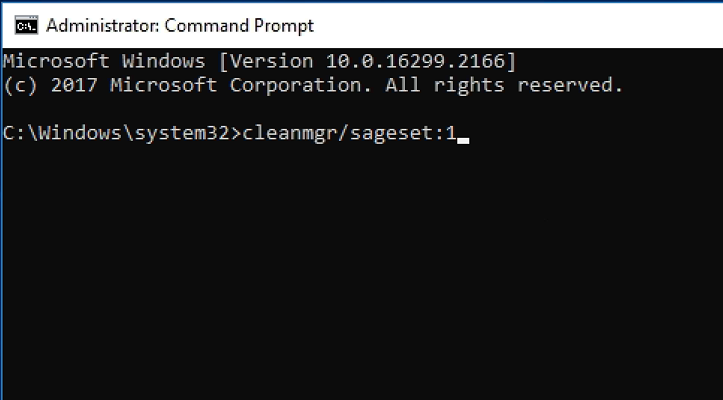
Step 2. Type the command below to create a custom cleanup setup:
cleanmgr /sageset:1
Step 3. In the Disk Cleanup Settings window, select the items you want to delete and click OK.
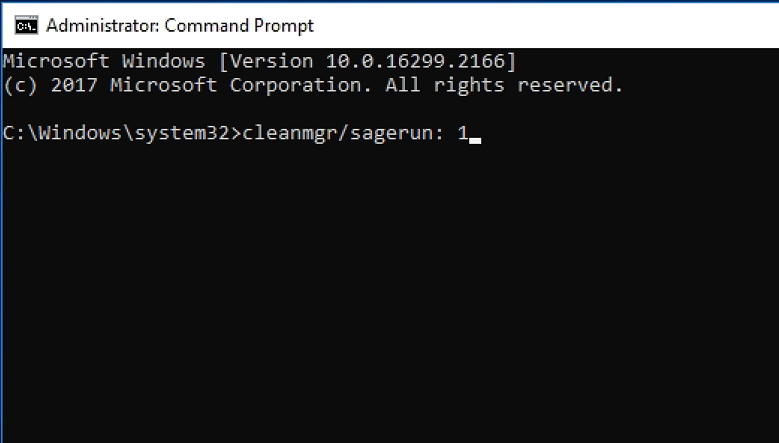
Step 4. Next, execute the saved cleanup with:
cleanmgr /sagerun:1
Method 2. Clean temporary files via Orders
Temporary files are created to store data temporarily, often for backup or to support program operations. They serve as short-term storage, helping programs save, transfer, and recover data as needed.
Deleting these files is generally safe, as long as no active applications are using them. Windows typically prevents their removal during use to avoid disrupting running tasks.
System-generated temporary files are stored in %system%/windows/temp, while those created by users are located at C:\Users\username\AppData\Local\Temp.
To view temporary files:
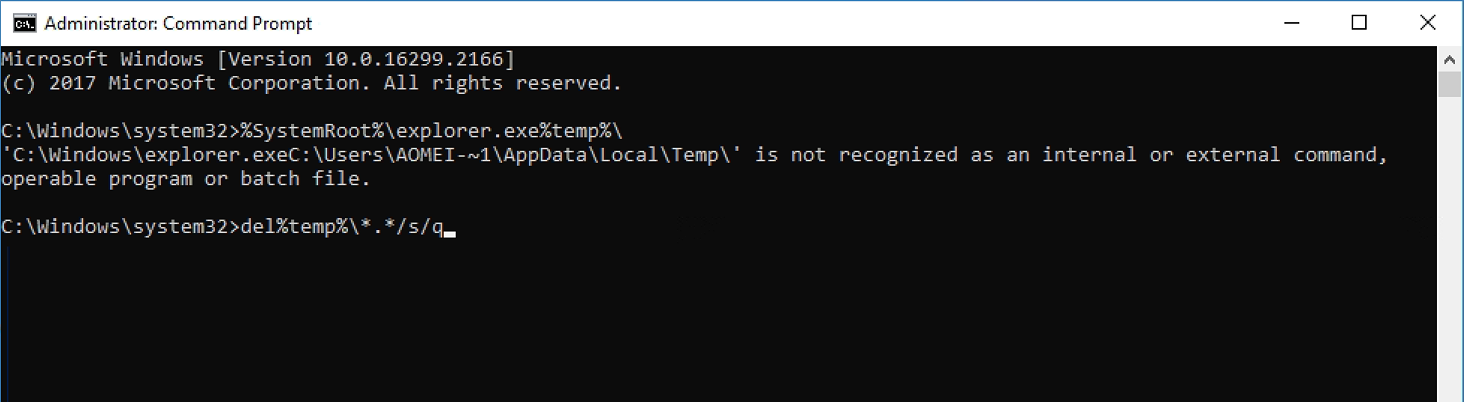
%SystemRoot%\explorer.exe %temp%\
To delete temporary files:
del %temp%\*.* /s /q
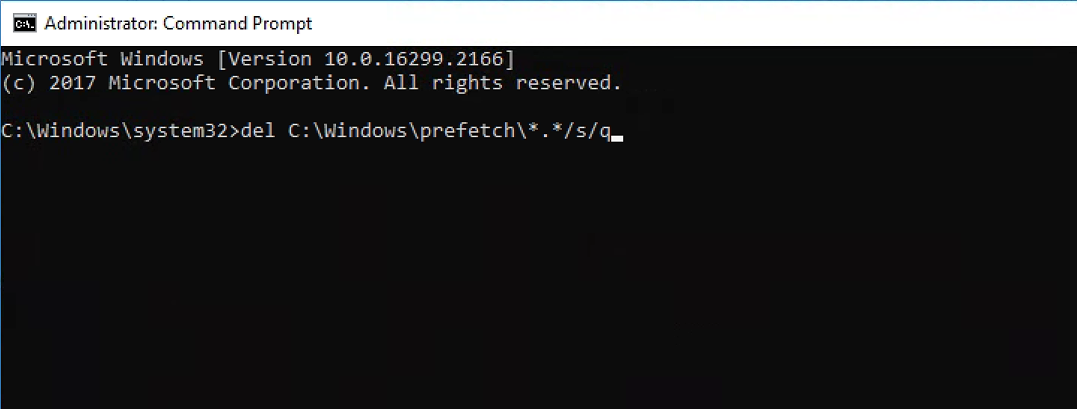
Method 3. Clean Prefetch files with CMD
Prefetch files are generated by the operating system when a program runs for the first time. These files act as a cache to help applications load faster during future use. Over time, however, they can accumulate and occupy significant storage space, depending on how the program interacts with its cache.
While prefetch files are primarily designed to enhance program performance, deleting them can help resolve application slowdowns or errors.
To view prefetch files:
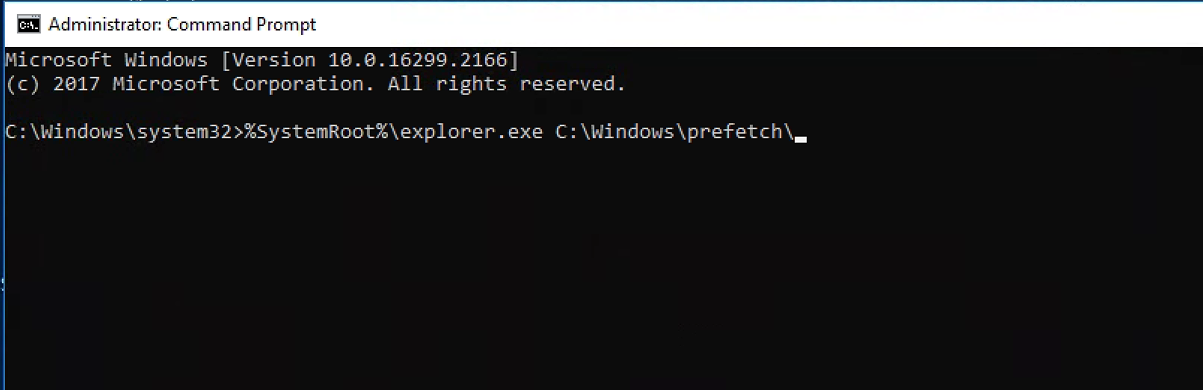
%SystemRoot%\explorer.exe C:\Windows\prefetch\
To delete prefetch files:
del C:\Windows\prefetch\*.* /s /q
Method 4. Clear Store Cache Memory in CMD
Cache files are designed to boost program performance, but when they become corrupted or outdated, they can lead to errors, slow data loading, or even crashes. Once a cache file serves its purpose, it often turns into useless clutter. That’s why regularly clearing cache memory is a common troubleshooting step.
It’s safe to clear both the DNS cache and the Windows Store cache. If Windows encounters any issues during this process, it will notify you.
Type the following command: ipconfig /flushdns
After running the command, you’ll see a confirmation message indicating the DNS cache has been successfully cleared.
To reset the Windows Store cache: wsreset.exe

A black window will appear temporarily. Once it closes, the Windows Store cache will be cleared.
One-click way to clean up C drive Windows 10
If your C drive is running out of space and slowing down your PC, PartitionAssistant Cleanup can help. This professional disk management tool offers a comprehensive Cleanup feature designed to clear out junk files, temporary files, and system cache from your C drive, freeing up valuable space and improving system performance.
✍ Key cleanup features of PartitionAssistant Cleanup:
⭐ Clean Junk Files: Quickly scans your C drive to detect and remove unnecessary files that accumulate over time like system cache, browser cache, temporary files, and other junk data.
⭐ Delete Large Files: The tool scans your C drive and finds large files based on customizable size filters, making it easy to review and delete unwanted videos, installers, backups, and other space-hogging files in just a few clicks.
⭐ Find Duplicate Files: This feature is designed to help you detect and delete duplicate files scattered across your hard drive. You can preview duplicates before deleting them, ensuring that only unnecessary copies are removed.
Free Up Disk Space To Keep Your PC Running Smoothly and Efficiently
Step 1. Install and launch PartitionAssistant Cleanup. Click the "Clean Junk Files" tab.

Step 2. Click the "Scan Now" button to start the process of scanning junk files.

Step 3. After the scan process is finished. All system junk files (including recycle bin files, temporary files, log files, invalid shortcuts, and so on) and registry junk files (including DLL registry, system registry, and program registry) will be displayed.

You can also click the button behind to view the junk files details.

Step 4. And, you can click the button behind to locate the file.

By default, the program will select some junk files to clean up, for example, temporary files, log files, and so on. You can also manually check to select more or uncheck to deselect fewer listed junk files. Or, click "Select All" to select all junk files to clean up if you need to clean up all.
Step 5. After selecting junk files that are not needed anymore, you can click the "Clean Now"button to start the cleanup.

The process of the cleanup might take time, and the selected files will be cleaned up. After the process is finished, you will get a cleanup completed window displaying how many files you have cleaned and not yet cleaned.

Conclusion
Regularly cleaning up your C drive is essential to keep your computer running smoothly. Removing junk files, temporary data, and system cache improves performance, prevents errors, and frees up valuable space. You can use built-in CMD methods like Cleanmgr, deleting temp and prefetch files, clearing cache, or choose professional disk cleaning tools like PartitionAssistant Cleanup for a one-click cleanup solution.

