

How to Remove Duplicate Folders In Left Pane in File Explorer?
If you find duplicate folders in left pane in File Explorer, you can follow this guide to remove it. For any data loss, you can also follow this guide to recover it.
By Irene / Updated on May 8, 2025
File Explorer helps you manage your files, folders, and drives. On the left pane, you may sometimes see the same folder listed more than once. This usually caused by things like Quick Access showing recent folders, OneDrive syncing the same folders, or a system bug after a Windows update. These duplicate entries can make the interface messy and harder to use. Luckily, there are simple ways to fix the problem.
How to fix duplicate folders in left pane in File Explorer in Windows PCs?
If you find duplicate folders in left pane in File Explorer, you can follow the 3 fixes to resolve it.
Fix 1. Adjust Navigation Pane Settings
You can fix duplicate folders by changing some options in File Explorer. This can also help to fix desktop icon not showing properly problem.
Steps 1. Click the folder icon on the taskbar to open File Explorer. Go to the View tab and click Options on the right side.
Steps 2. In the Folder Options window, switch to the View tab. Scroll down under Advanced settings to find the Navigation pane section.
Step 3. Uncheck all boxes under Navigation pane. Click Apply and then OK to save the changes.

Now, close the window and check File Explorer to see if the duplicate folders are gone.
Fix 2. Reset Folder Options to Default
If folder settings were changed accidentally, resetting them might help remove duplicates.
Step 1. Press Win + E to open File Explorer.
Step 2. Go to the View tab and click Options.
Step 3. In the Folder Options window, click Restore Defaults at the bottom.
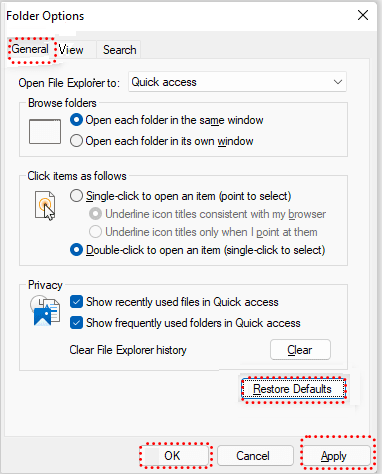
Step 4. Click Apply and then OK to confirm.
Fix 3. Use SFC and DISM to Repair System Files
Duplicate folders might also appear due to corrupted system files. You can use built-in tools to scan and repair them.
Step 1. Press Win + S, type "Command Prompt", and choose Run as administrator.
Step 2. Type this command and press Enter: sfc /scannow After the scan, run these three commands one by one:
DISM /Online /Cleanup-Image /ScanHealth
DISM /Online /Cleanup-Image /RestoreHealth

Step 3. Once the repair is done, check File Explorer again to see if the issue is resolved.
How to remove duplicate files and folders in Windows computers?
Normally, to find and remove duplicate files on a Windows PC, you have to manually search and delete them using command lines, File Explorer, or Windows Search. However, these methods are time-consuming and often miss many duplicates.
Duplicate file finders help you locate and clean up unnecessary copies of files on your computer. However, many of these tools can be hard to use, with too many settings and confusing steps.
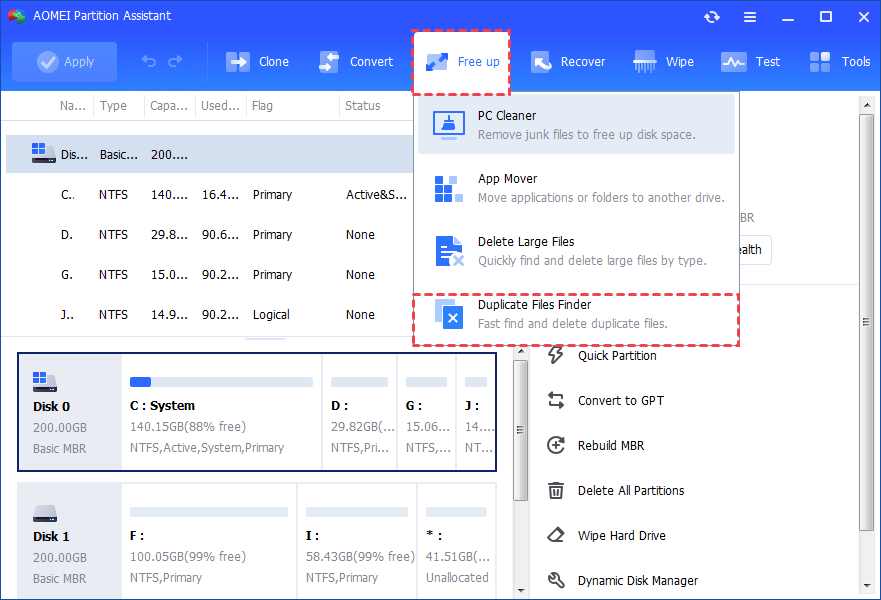
The Delete Duplicate Files feature in AOMEI Partition Assistant offers a simpler solution. It’s user-friendly and guides you through the process step by step. With just one click, it scans and lists all duplicate files. You can then decide which files to keep or delete based on your needs. To protect your data, the software also includes a Recover Data function, so if you delete something important by mistake, you can easily restore it.
The Best Windows Disk Partition Manager and PC Optimizer
Step 1. Click the "Free up" on the main tab and select "Duplicate Files Finder".
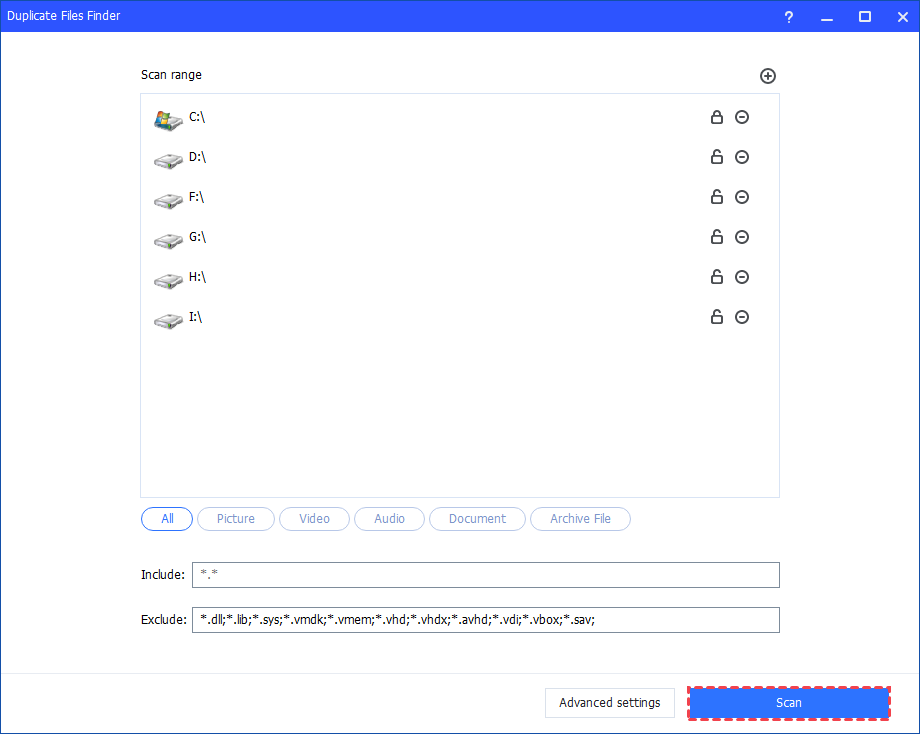
Step 2. Here, all partitions on your computer will be displayed. You can personalize it and click "Scan".
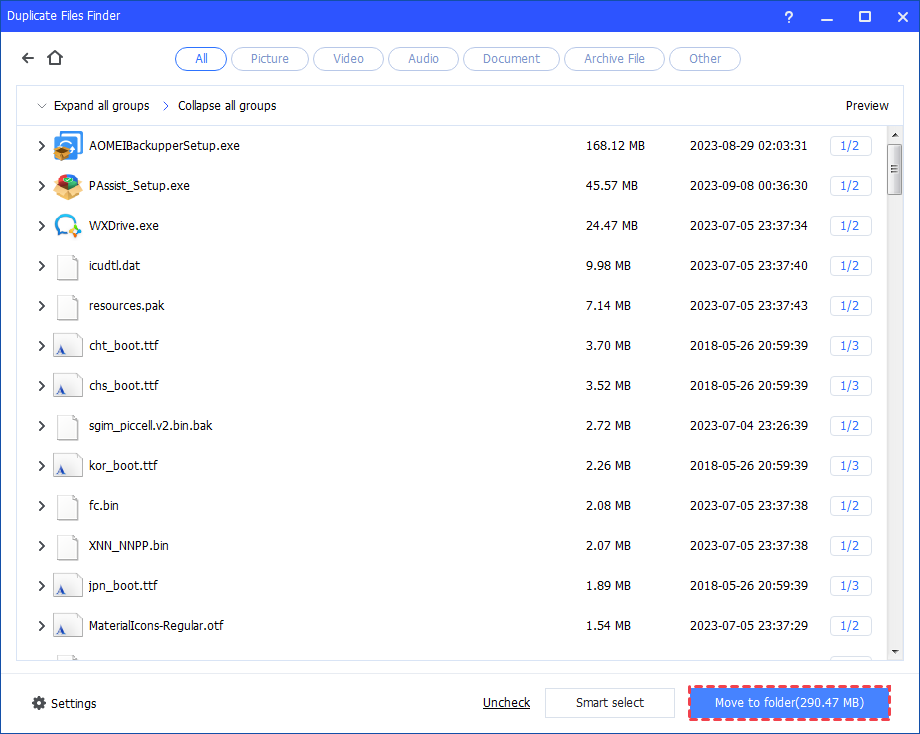
Step 3. After the process is finished, all duplicate files that meet the conditions you set will be displayed. You can click the "Preview" button to see the duplicate files.
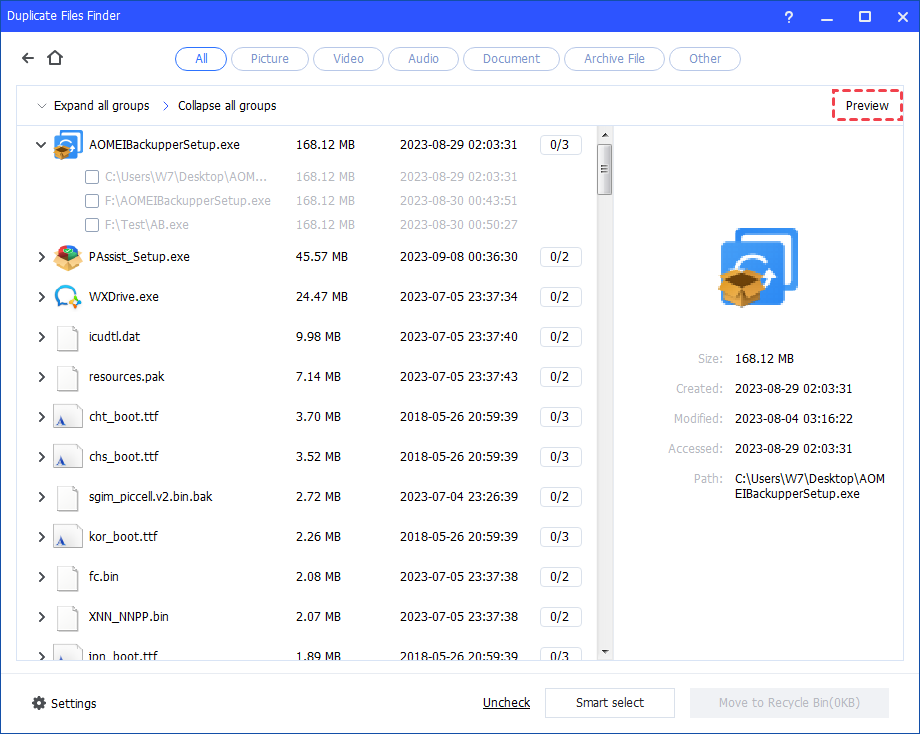
Step 4. You can select the duplicate files you want to delete. Or, click "Smart select" to automatically select duplicate files. Then, click "Move to folder".
Further reading: How to recover accidentally deleted data?
As we mentioned earlier, if you accidentally remove the files that you need, you can also use AOMEI Partition Assistant to recover it. Thanks to its powerful Recover Data feature, you can effortlessly restore over 1,000 types of files from various storage devices—including HDDs, SSDs, USB flash drives, and SD cards. Whether your data was lost due to accidental formatting, a system crash, or a virus attack, this tool has you covered with reliable and fast recovery.
The Best Windows Disk Partition Manager and PC Optimizer
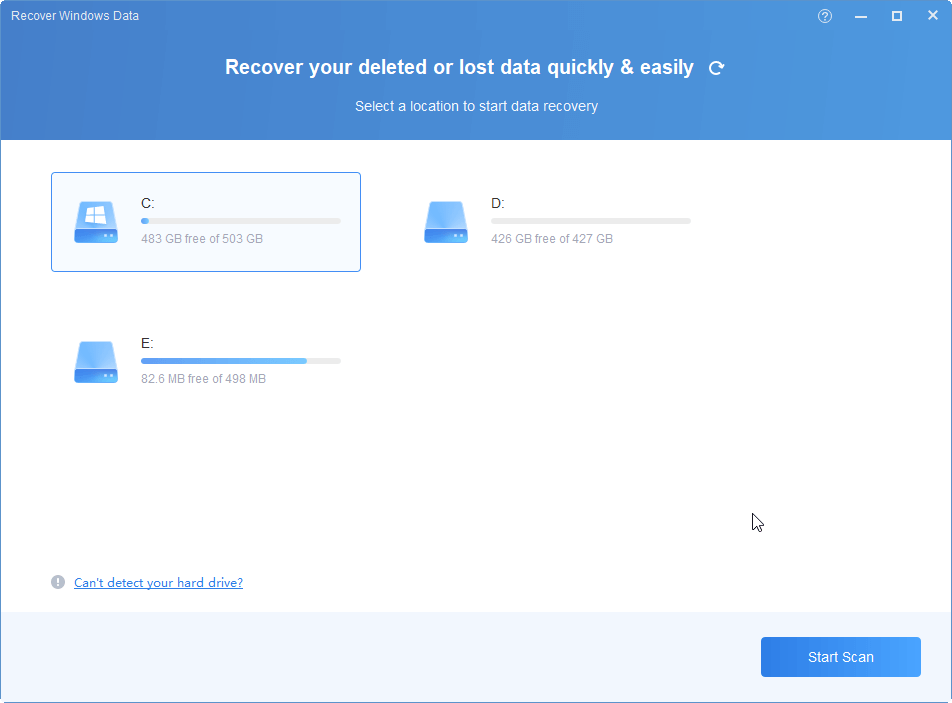
Step 1. In AOMEI Partition Assistant, click Recover > Recover Data.

Step 2. Select the source drive where the Word document was saved > Start Scanning.
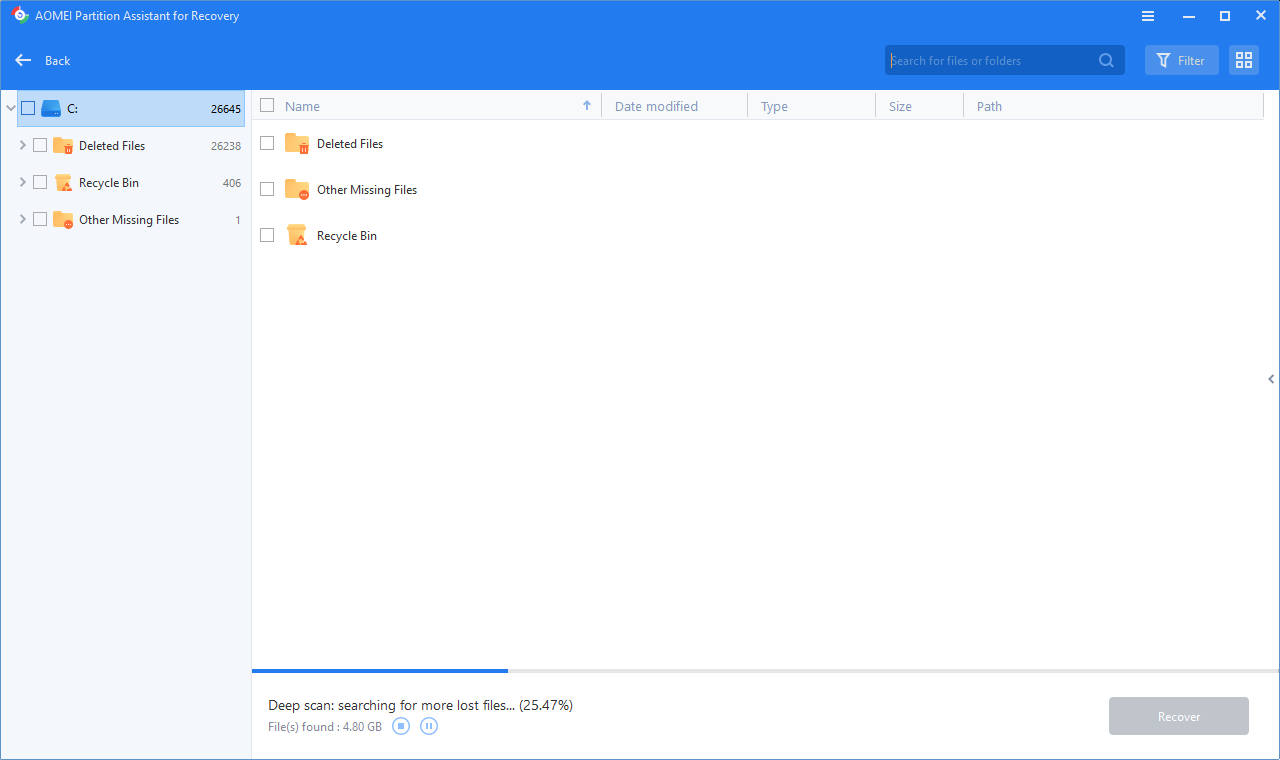
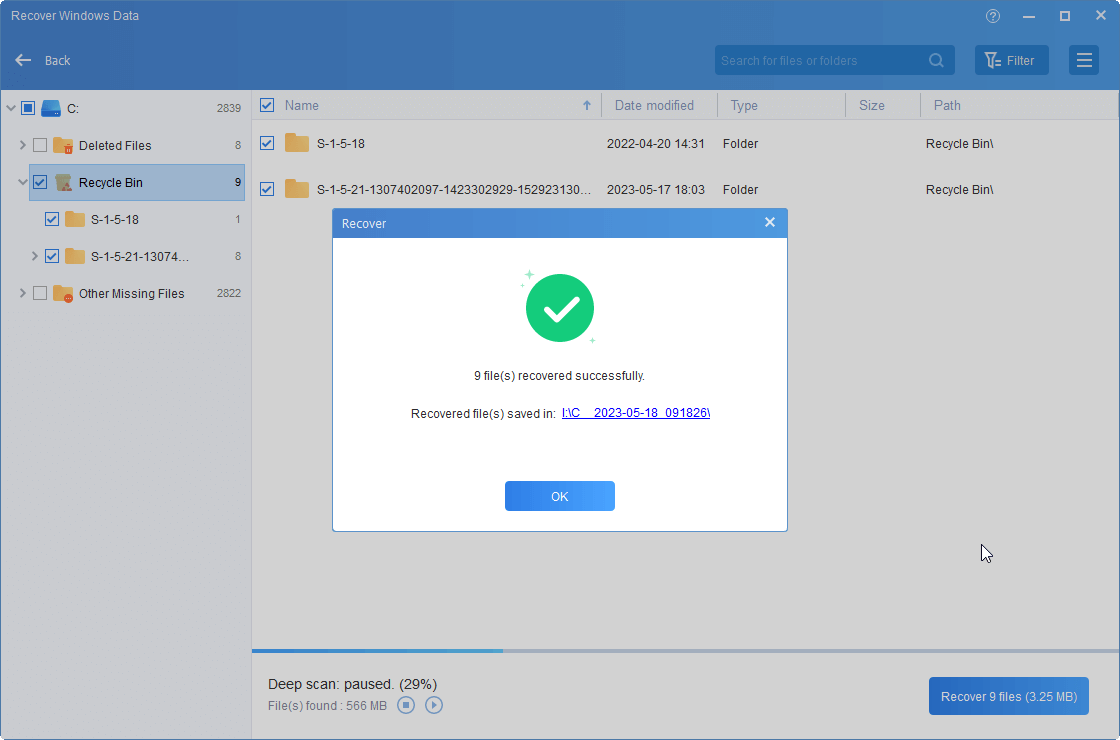
Step 3. When the scan is over, all deleted files, Recycle Bin, and other lost files will be listed. Please select the data you want to recover and click Recover.
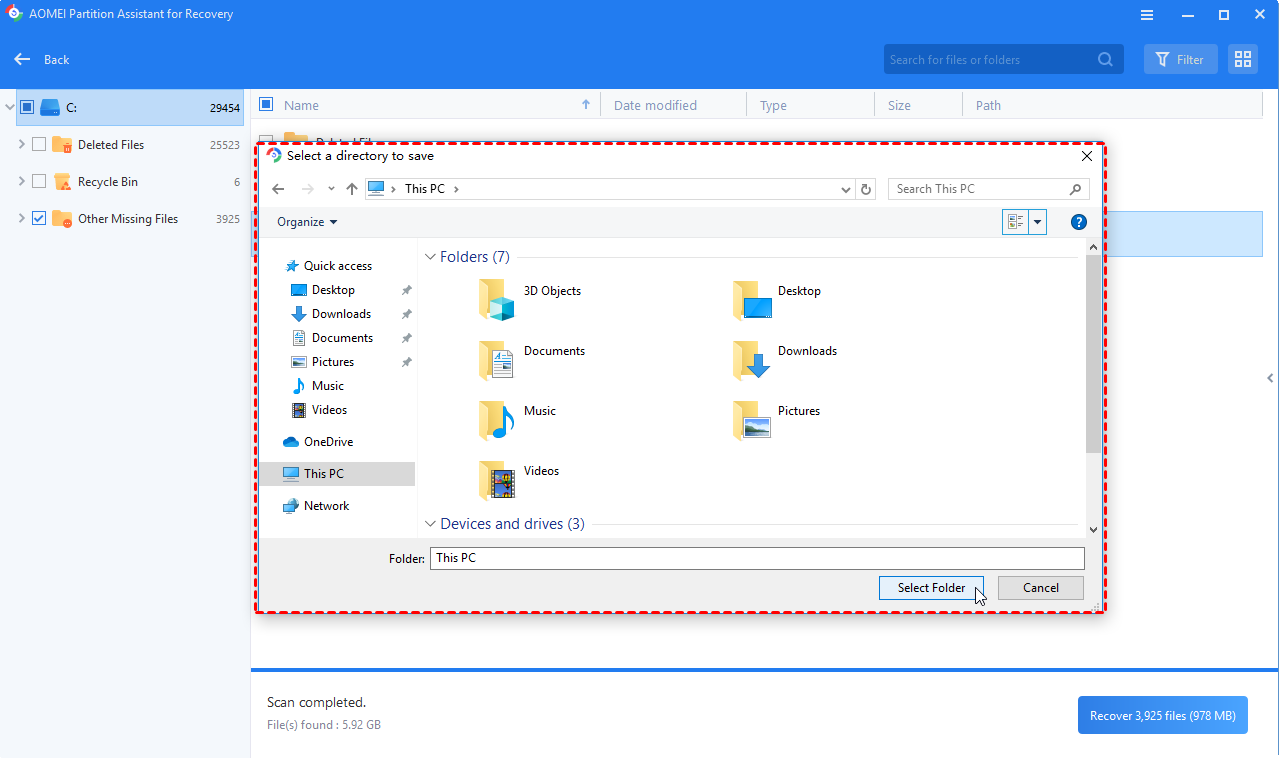
Step 4. Please select a path to save recovered documents.
Step 5. The recovery progress will start and data will be saved to the path if it is successful.
Conclusion
Seeing duplicate folders in the left pane of File Explorer can be annoying, but it’s usually easy to fix. With a few setting changes or system repairs, you can clean up the view and make navigation simpler again. With AOMEI Partition Assistant, you can clean up your folders, free up space, and recover lost data with ease. It is also a good idea to use it to move installed apps to another drive, clone disks, allocate free space, or perform boot repair to fix the blue screen of death error.
The Best Windows Disk Partition Manager and PC Optimizer

