How to Fix Computer Keeps Blue Screening [6 Ways]
Why is your computer keeps blue screening and how to fix it? This article gives full explanation to it and provides six effective methods to help your computer return to normal.
By Hedy / Updated on January 15, 2025
My computer keeps going back to blue screen
“When I opened up my computer it didn’t load up to turn on and the blue error screen came up and do all the troubleshooting things and nothing worked and kept going back to blue screen, I even tried to reset but it still sent me to blue screen. How do I fix this problem?” – Sunny Bonnell
Why does my computer keep blue screening Windows 11?
A blue screen, also known as the "Blue Screen of Death" (BSOD), typically indicates a critical error in Windows 11 that the operating system cannot recover from. There are several reasons why your computer might experience frequent blue screens.
✬ Hardware issues: Faulty or failing hardware components, such as RAM, hard drives, or overheating CPUs, can lead to system crashes.
✬ Driver problems: Outdated, corrupted, or incompatible drivers, especially for critical components like graphics cards or network adapters, can cause instability.
✬ Software conflicts: Recently installed or updated software that is incompatible with your system can trigger BSOD errors.
✬ Malware infections: Malicious software can corrupt system files or interfere with system operations, leading to crashes.
✬ System file corruption: Corrupted or missing system files can disrupt the operating system's stability.
Identifying the specific cause is crucial for resolving the issue effectively. Monitoring recent changes to your system, such as hardware installations, driver updates, or software installations, can provide insights into the root cause of the BSOD occurrences.
How to fix computer keeps blue screening Windows 11/10
Blue Screen of Death (BSOD) errors in Windows 11/10 can be both frustrating and alarming. Luckily, there are several solutions to address this issue. Below are detailed steps to fix your computer if it keeps showing the blue screen error.
Fix 1. Reboot the system in Safe Mode with Networking
Safe Mode allows you to troubleshoot issues by loading only essential drivers and services. Here’s how to boot into Safe Mode with Networking:
Step 1. Restart your PC and press F8 (or a similar key like Shift + F8 for newer systems) repeatedly until the boot menu appears.
Step 2. Navigate to Advanced Options > Startup Settings > Restart.
Step 3. Select Enable Safe Mode with Networking from the menu.
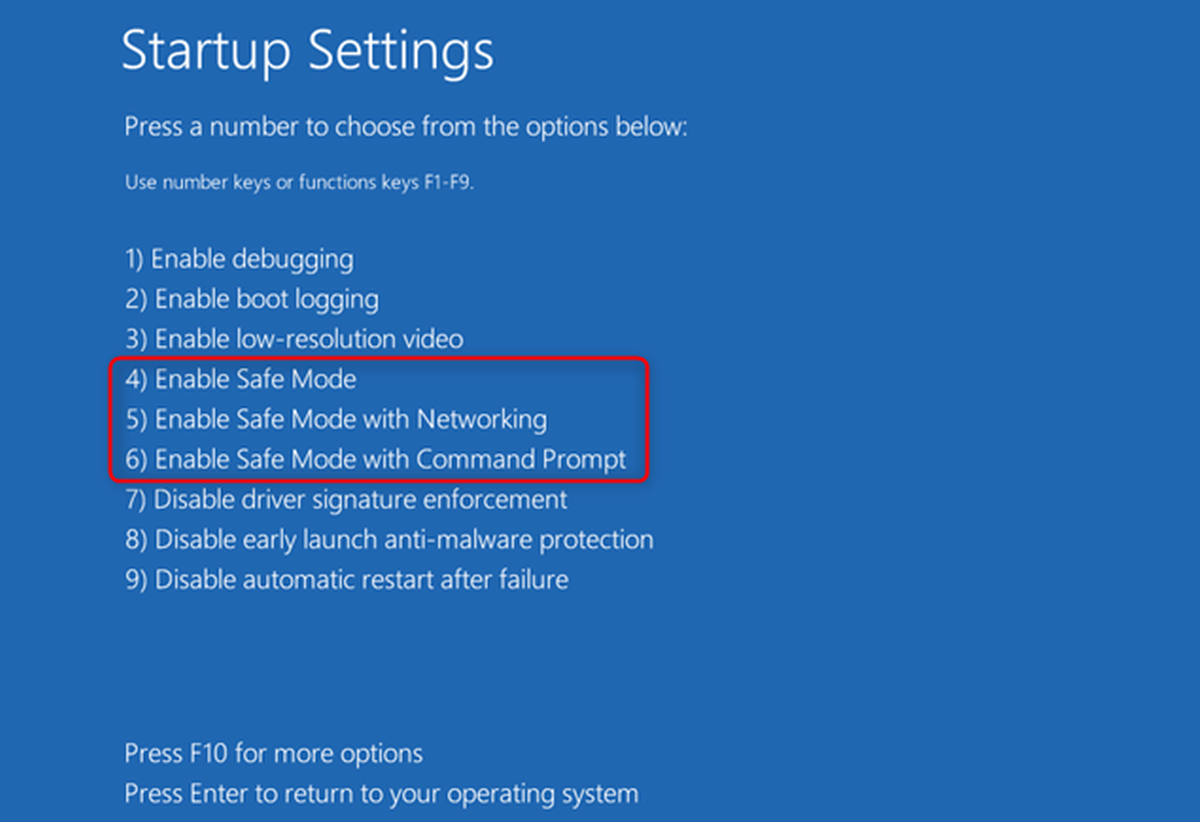
Step 4. Once in Safe Mode, check if the blue screen persists. If not, this mode can help you troubleshoot without interference from unnecessary programs.
Fix 2. Uninstall recently installed software
Recently installed or updated software could conflict with system processes and trigger a BSOD. Follow these steps to uninstall problematic programs:
Step 1. Press Windows + I to open Settings.
Step 2. Click Apps & features on the left, select the software you suspect is causing the blue screen of death and click Uninstall.
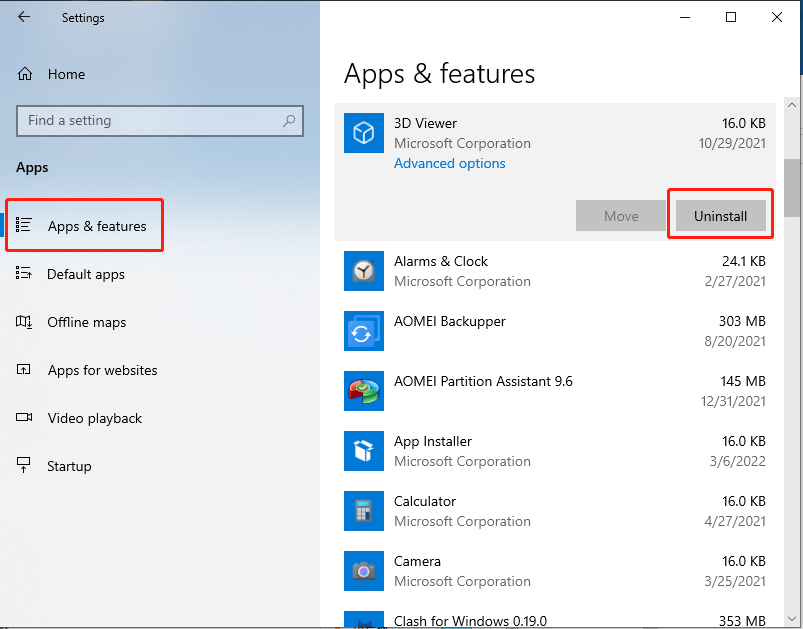
Step 3. Restart your computer to see if the issue is resolved.
Fix 3. Rollback or disable drivers
Outdated, incompatible, or corrupted drivers are common causes of BSOD errors. Rolling back or disabling problematic drivers can help:
Step 1. Press Win + X and select Device Manager.
Step 2. Look for devices with a yellow exclamation mark.
Step 3. Right-click the device, choose Properties, and go to the Driver tab.
Step 4. Select Rollback Driver (if available).
If rolling back isn’t an option, try disabling the device to test its impact.
Fix 4. Scan for malware
Malware infections can corrupt system files and lead to BSOD errors. Windows 10 and 11 include built-in Windows Security, offering real-time antivirus protection as soon as your PC is powered on. Here's how you can manually scan your computer using this feature.
Step 1. Press "Windows + I" at the same time to open Settings window and click "Update & Security".
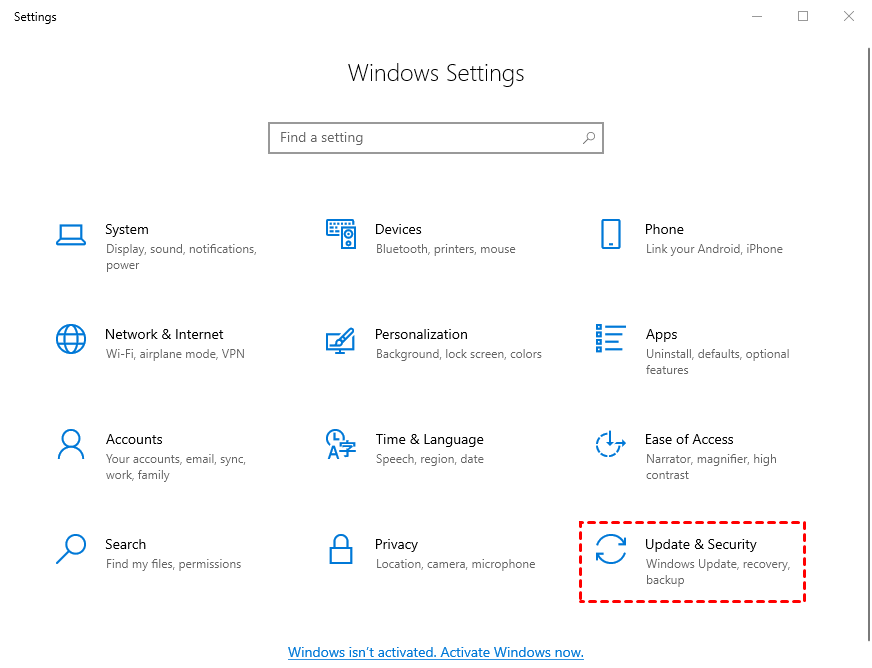
Step 2. Select "Windows Security" on the left panel and choose "Open Windows Security".

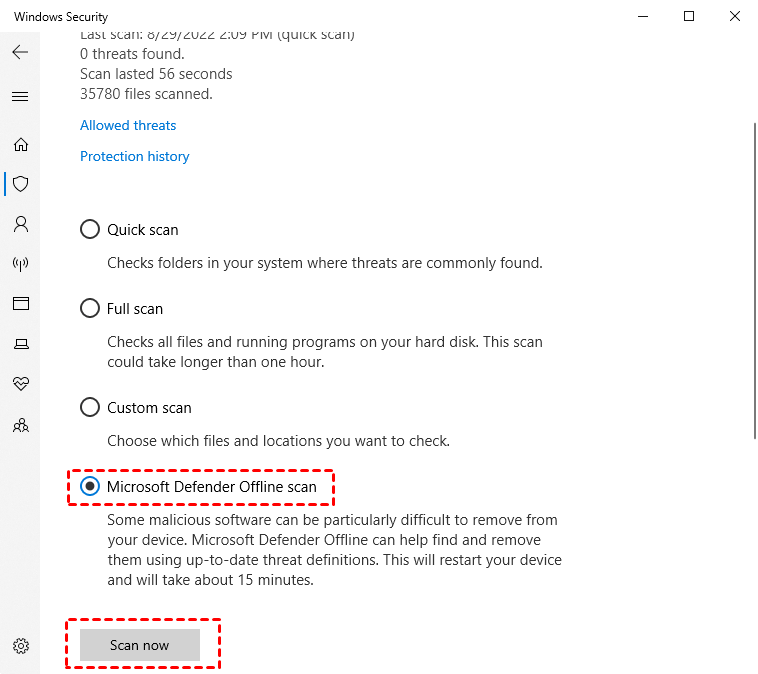
Step 3. In Windows Security window, go to "Virus & threat protection" > "Scan options".
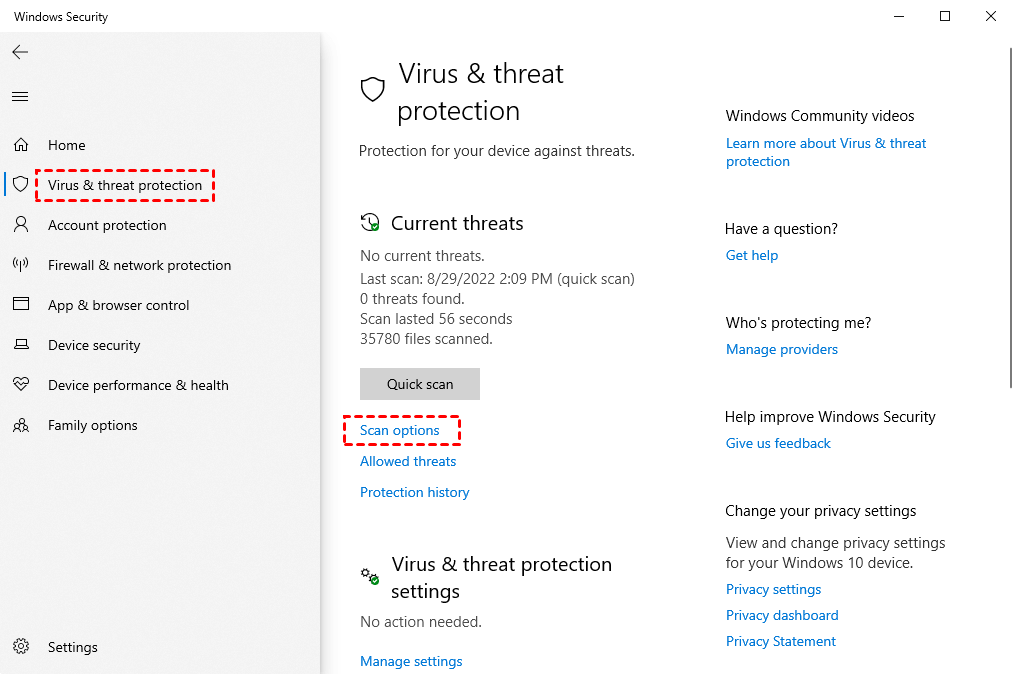
Step 4. Select "Microsoft Defender Offline scan", and then click "Scan now".
Fix 5. Run an SFC scan
The System File Checker (SFC) utility identifies and repairs corrupted system files that may be causing the blue screen:
Step 1. Press Win + S, type cmd, and choose Run as administrator.
Step 2. In the Command Prompt, type:
sfc /scannow
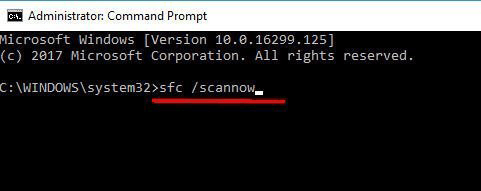
Step 3. Press Enter and wait for the scan to complete.
Step 4. If any issues are found, SFC will attempt to repair them. Restart your computer afterward.
Fix 6. Run a boot repair tool
If your computer frequently displays the dreaded "Blue Screen of Death" (BSOD), you know how frustrating and disruptive it can be. Often, these errors stem from corrupted boot files, a damaged Master Boot Record (MBR), or issues within the Boot Configuration Data (BCD). Fortunately, there’s a reliable and user-friendly tool to help you resolve these problems - AOMEI Partition Assistant.
The “Boot Repair” feature in AOMEI Partition Assistant is specifically designed to fix critical boot issues. Whether your PC is stuck in a boot loop, refuses to start properly, or keeps displaying BSOD errors, this tool can quickly repair boot files and restore normal functionality. Here are some common problems it addresses:
◆ Corrupted boot sector: Over time, your system’s boot sector can become corrupted due to malware, sudden shutdowns, or hard drive failures. AOMEI’s tool can rebuild the MBR to resolve these issues.
◆ Damaged BCD: If the Boot Configuration Data is missing or invalid, the software can recreate it to ensure smooth system startup.
◆ Startup file errors: Missing or broken startup files often trigger blue screens. The Boot Repair Tool diagnoses and fixes these errors efficiently.
Step 1. Install and launch AOMEI Partition Assistant on a working PC, click "Recovr"-"Boot Repair" and then click the "create a bootable disk" option to create a WinPE "Boot Repair" disk.

Step 2. Boot the PC that cannot boot into WinPE. It will automatically load the Boot Repair tool and start the boot entries scan process. All boot entries will be displayed.

✍ Advanced Settings(Select a location to store the repaired boot entry):
1. Repair to the current disk: The system will boot from the current disk and ensure the boot files are complete and functioning properly. (By default)
2. Repair to another disk: This operation will repair the boot entry or create a new system boot entry to ensure the system can boot from the disk you select.

You can either repair to the current disk or repair to another disk. Repair to the current disk is recommended for common users.
Step 3. Select one/multiple repairable boot entries you want to repair and click the "Repair" button to start the boot repair.

Step 4. Wait for the repair process to finish. Once it is finished, you can check the repair result. If it succeeds, you will get a "Repair Successfully" result.

Conclusion
Frequent blue screens in Windows 11 often stem from hardware issues, outdated drivers, software conflicts, or corrupted system files. Resolving these errors involves steps like Safe Mode troubleshooting, uninstalling problematic software, running SFC or malware scans, and rolling back drivers. For persistent boot-related issues, tools like AOMEI Partition Assistant offer a reliable feature to fix damaged boot files and restore system functionality. Addressing these problems promptly ensures a smoother, more stable Windows experience.

