

Best Duplicate Photo Remover for Windows Computer
Are you looking for a duplicate photo remover for Windows? If you don't clear duplicate images, they will take up a lot of space on your disk, thus this post is a tutorial to help you solve this problem.
By Lucas / Updated on July 11, 2025
| 📄 Page includes | |
| 💡 Question | How do duplicate photos appear in Windows? |
| 🛠 Quick solution | How to employ the best duplicate photo remover for Windows |
| 🔨 Common solves | 1.Use CMD commands 2. Use File Explorer |
| 📌 Conclusion | |
As our digital photo collections continue to grow, it's no surprise that duplicate photos can easily take up valuable storage space on our Windows PCs. Removing these duplicates not only helps free up space but also keeps your photo library well-organized. So, in this post, we’ll explore how duplicate photos appear and how can we deal with these photos.
How do duplicate photos appear in Windows?
Duplicate photos can appear on Windows for various reasons, and understanding how they occur is essential to effectively manage and prevent them. Here are some common ways duplicate photos can accumulate on your Windows system.
Cause 1. Manual copying or saving mistakes
One of the most straightforward ways duplicates can be created is when you manually copy or save the same photo in different locations or with different names. This can happen accidentally, especially when you're organizing or backing up your photo collection.
Cause 2. Importing photos from different devices
When you import photos from different devices like cameras, smartphones, or external hard drives, Windows might create duplicates. This can occur if the import settings are not configured to prevent duplicates.
Cause 3. Syncing or backup software
If you use synchronization or backup software that is not correctly configured, it can result in duplicate photos. These tools may create multiple copies of the same photos during the backup or sync process.
Cause 4. Restoring from backup
Restoring photos from a backup can lead to duplicates, especially if you're not careful when selecting which files to restore. Overlapping backups or multiple versions of the same file can cause this issue.
Cause 5. Photo editing software
When you edit photos using software like Adobe Photoshop, GIMP, or Lightroom, you might save multiple versions of the same image. This can lead to duplicates with slight variations.
Cause 6. Incomplete file transfers
If you interrupt a file transfer process or encounter errors during the transfer, it can result in partial copies or duplicates of photos.
How to employ the best duplicate photo remover for Windows
The reason that we don’t suggest you manually search and delete duplicate files is that it’s not 100% safe. And duplicate files and photos can be separately stored in different folders, it’s difficult to view folders each by each.
So, when it comes to finding duplicate pictures on Windows, a third-party tool is your best choice. In all of these tools, PartitionAssistant Cleanup stands out as the ideal choice. It guarantees a secure experience by avoiding any hidden malware, adware, or annoying pop-ups.
This tool conducts a thorough search for duplicate photos on your system, offering customizable search criteria. It empowers you to decide the fate of identified duplicates and allows you to preview them before removal.
Free Up Disk Space To Keep Your PC Running Smoothly and Efficiently
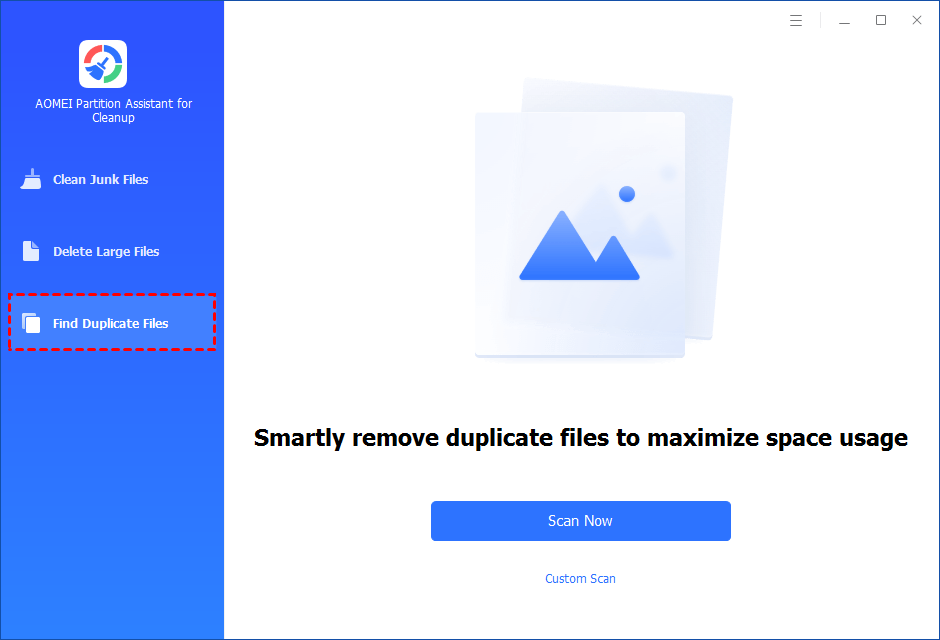
Step 1. Initiate Find Duplicate Files. Install and launch PartitionAssistant Cleanup. Click the "Find Duplicate Files" tab.
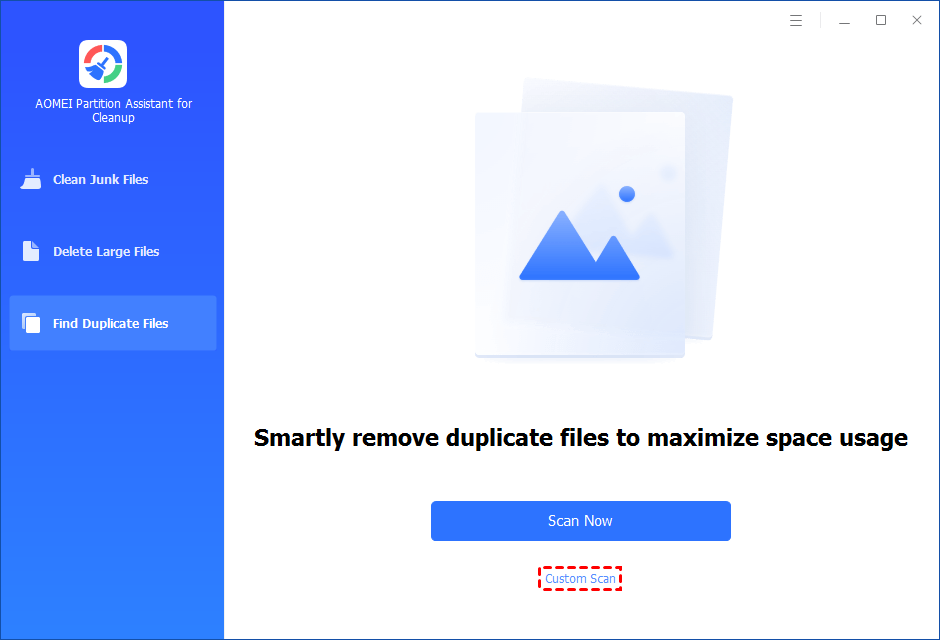
Step 2. Select a path to scan duplicate files. You can either click "Scan Now" to start the scan of your system C: drive. Or, click "Custom Scan" to manually select paths to be scanned. (Here, we take the "Custom Scan" as an example.)
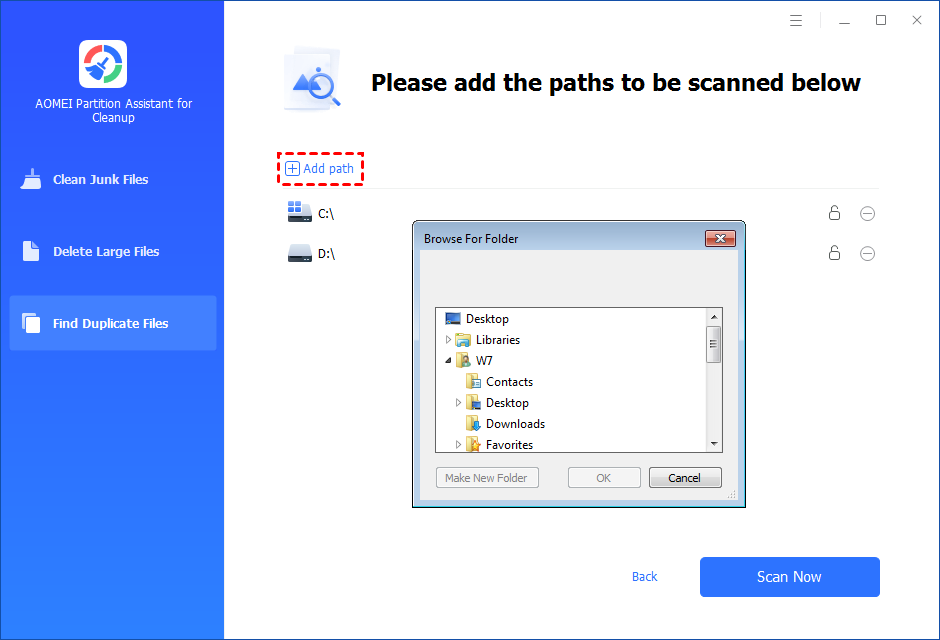
Step 3. After clicking "Custom Scan", all local and external drives on your PC will be displayed. You can also click the "Add Path" button, and then a browse folder window will pop up. So you can add more paths on this PC, like Desktop, Downloads, and other folder paths.
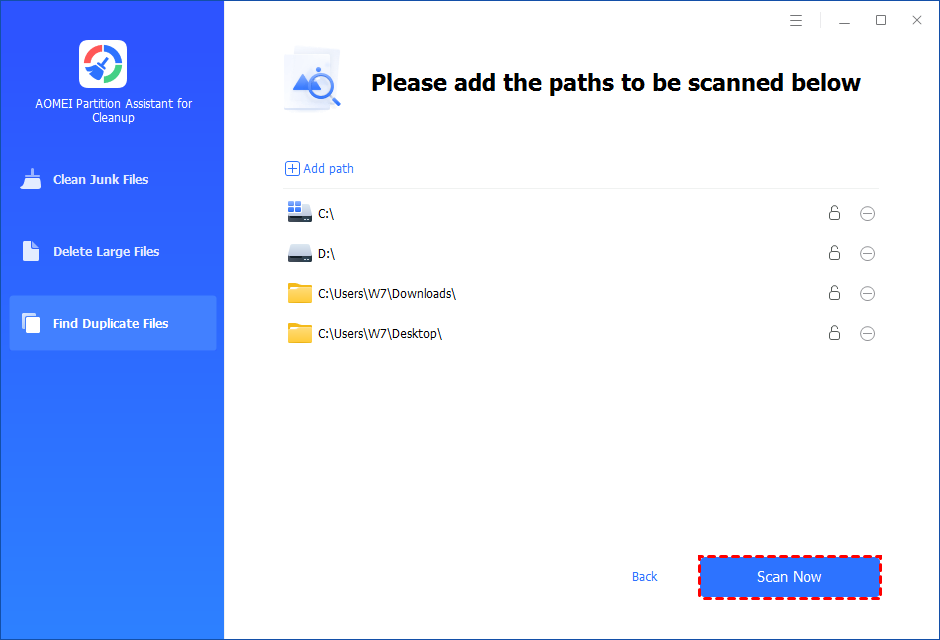
Step 4. Once necessary paths are added, you can click the "Scan Now" button to start the scan process.
Step 5. The scan process might take time. After the scan is complete, all duplicate files will be listed. You can click the button behind to locate them.
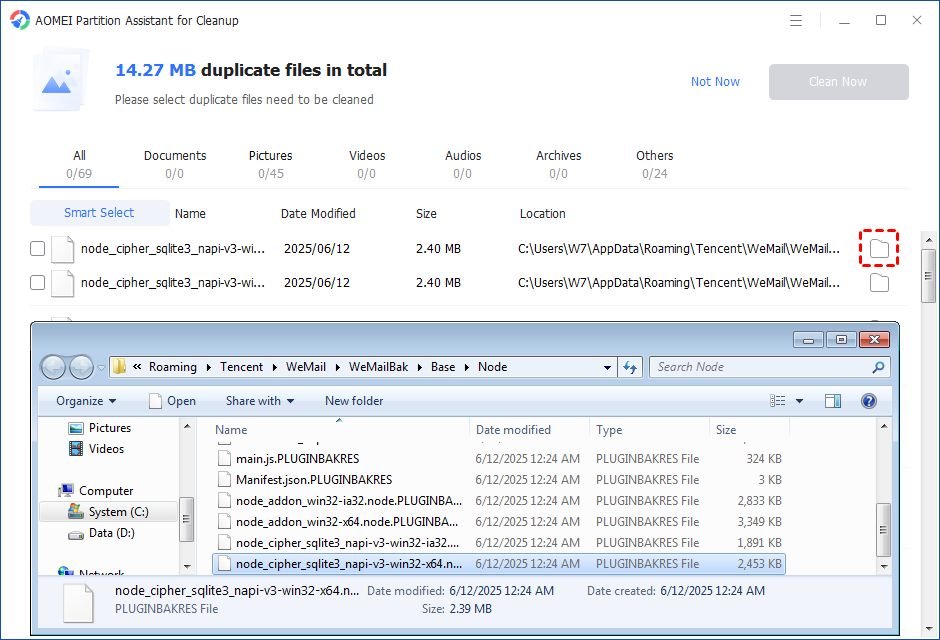
Step 6. Select duplicate files to start deletion. You can either manually select duplicate files, or click the "Smart Select" button to select unnecessary duplicate files to delete automatically.
Tips: If the "Smart Select" is ticked, only the oldest duplicate file will be unticked. It means that all duplicate files except the oldest one will be ticked to delete. (The oldest file means the file that was created first. This file will not be deleted. All other duplicate files are considered copies of the oldest file. )
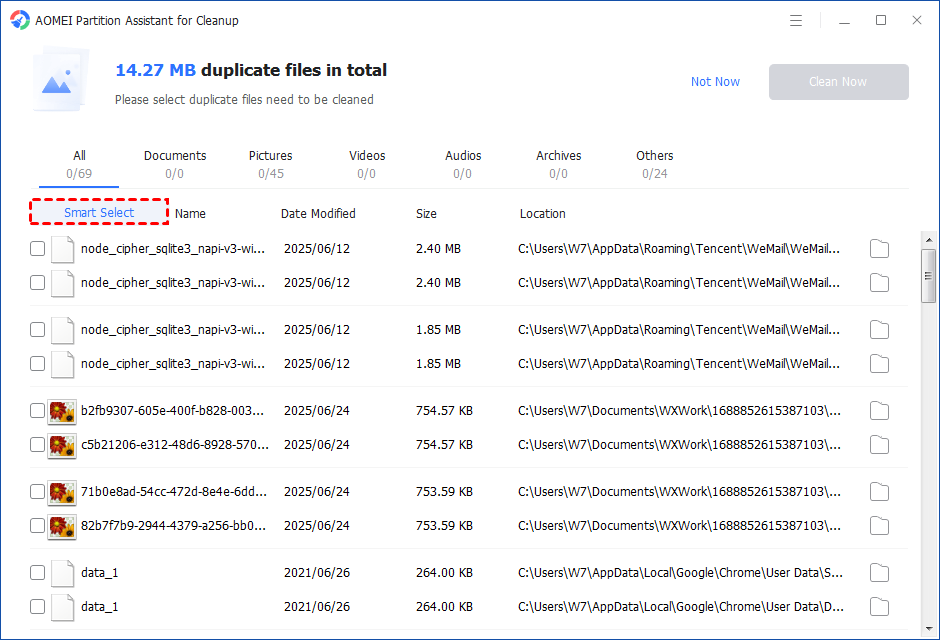
If you manually select all copies of duplicate files, you will get a pop-up warning window to keep at least one copy of the duplicate files. If you indeed want to delete all copies of duplicate files, you can click "OK" so all copies of duplicate files will be selected to delete.

After unnecessary duplicate files are selected, please click the "Clean Now" button to start the deletion.

Step 7. Delete successfully. The deletion might take time. After the process is finished, the selected files will be deleted, and you will get a cleaning completed window displaying how much data you deleted in total.

After you clean the duplicate photos, you can also use this versatile disk management and partitioning tool designed to optimize your computer's storage resources via other useful options:
♦ Delete large files – Quickly filter all large files for you to manage them flexibly.
Other 2 ways to manually delete duplicate photos
Using a third-party tool is definitely the most efficient way to remove duplicate photos but of course not the only choice. Now, in this section, we’ll show you how to use CMD and Windows File Explorer to search and delete duplicate photos manually. The operation might be a little complex, so please follow the steps closely.
1. Delete duplicate photos for Windows via CMD
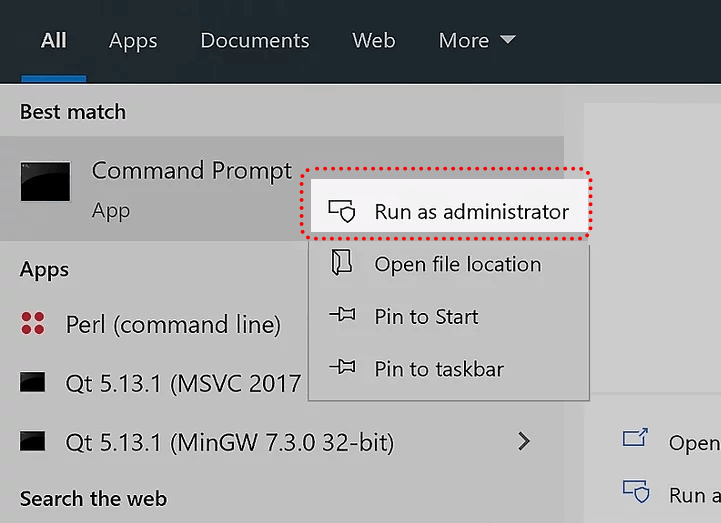
Step 1. Open CMD as an administrator. To do this, click on Start, then type "cmd" into the search bar, and choose “Run as administrator”.
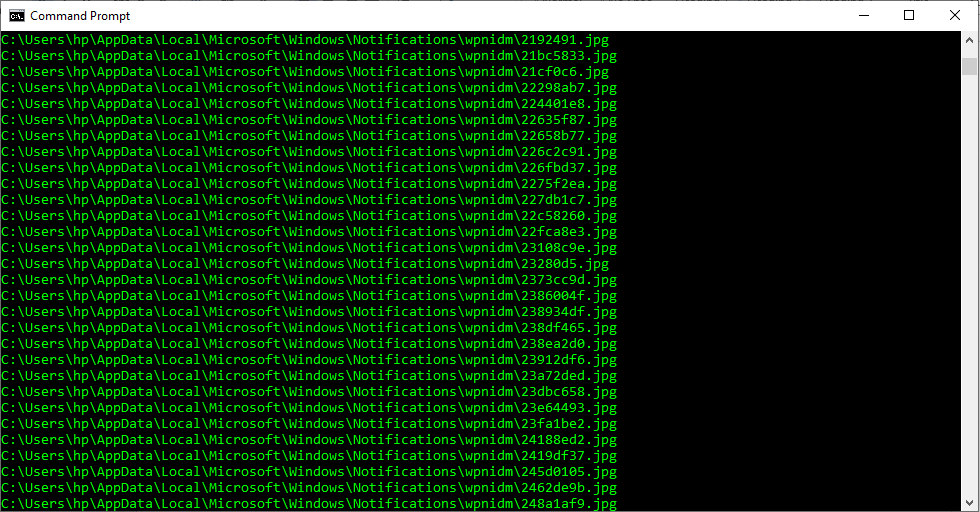
Step 2. Type this command into CMD: "dir /s /b *.extension". Replace ".extension" with the type of files you want to find duplicates of. For example, if you're looking for duplicate JPG files, type "dir /s /b *.jpg".
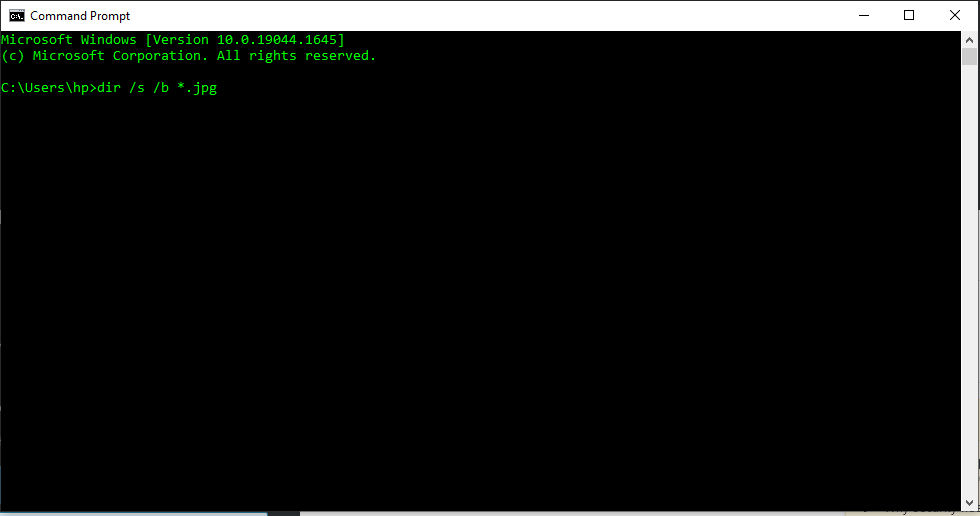
Step 3. Press Enter. CMD will begin scanning for duplicate files, and it will display the results with duplicated files in a list.
1. Open CMD and type "FINDSTR /?" to see all options for the "FINDSTR" command.
2. Type "FINDSTR /I /C:WINDOWS *.jpg" to search for all JPEG images in the WINDOWS folder.
3. The results will show all the JPEG images in the WINDOWS folder, with duplicates highlighted in red.
To remove duplicate files in a specific folder, follow these steps:
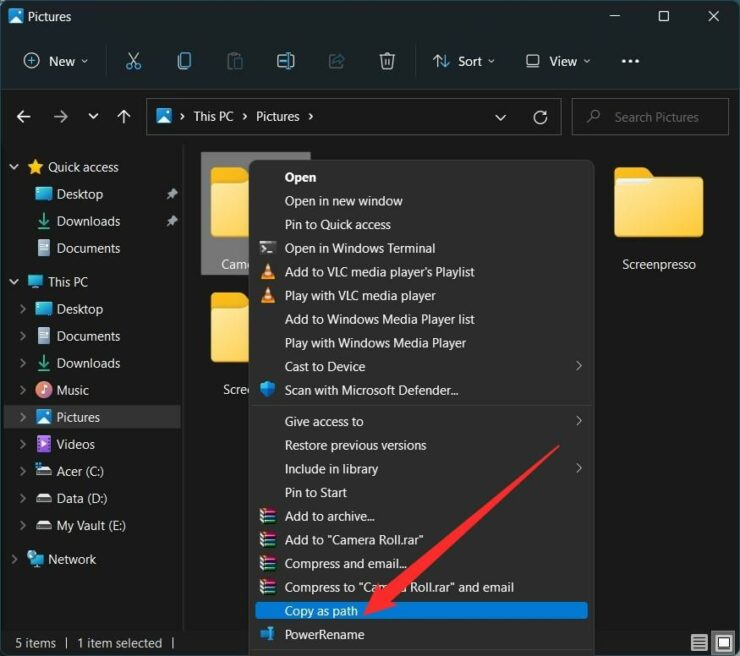
Step 1. Open the folder using File Explorer.
Step 2. Right-click on the folder you want and select "Copy as path".
Step 3. Open Command Prompt. Type "del /s /f *.duplicate" and hit Enter. This command will remove all duplicate files in the current folder and its subfolders.
For a more advanced file deletion, you can use wildcard characters with this command. Just type "rmdir /s /q DirName", and it will delete all folders in "DirName" and its subfolders.
2. Use File Explorer to delete duplicate photos
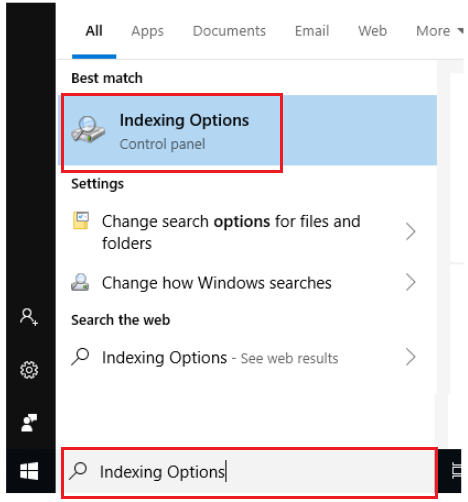
Step 1. Go to the lower-left corner next to the Windows icon. Type "Indexing Options" into the search bar and then click on "Indexing Options".
Step 2. Click on "Modify" and select "Show all locations". A pop-up will appear, asking for your login details. Make sure you're using an administrator account when making changes here.

Step 3. Check if all the boxes are ticked under the "Changed selected locations" section. If they are, click "OK", then hit the "Close" button. If not, make sure to check all the boxes.

Step 4. Press the Windows key and E key on your keyboard at the same time to open File Explorer. It's easier to locate your files under your user account. To access your user account, go to Windows (C:), and then select the Users folder.
Step 5. Click on "Search" in the upper-right corner, and enter the following extensions based on their format. The common picture file extensions include .jpg, .jpeg, .png, .gif, .bmp, .tiff, .psd, .raw, .svg, .ico, and .webp.
Step 6. Organize the search results by Name.
Step 7. Examine the files to find duplicates saved in different locations. Check the "Date modified" column to identify the latest version of each file.

Step 8. After reviewing the files, select the one you want to delete, and then press the DELETE key on your keyboard.
Conclusion
Organizing your photo library and reclaiming valuable storage space on your Windows PC is essential. While using Windows File Explorer and Command Prompt can be effective for some users, PartitionAssistant Cleanup offers a more efficient and user-friendly solution.
Free Up Disk Space To Keep Your PC Running Smoothly and Efficiently

