

How to Eliminate Duplicate Files in Windows 10 Computer
Some users are troubled about how to eliminate duplicate files in Windows 10 when they discover that there are many redundant files that are causing a shortage of disk space. Follow the page, let’s solve it quickly!
By Lucas / Updated on March 5, 2026
Duplicate files are duplicates of files that already exist on your device, thus, you may have numerous duplicate files of different needed data files. The easiest approach to dealing with such files is to locate and delete them from your computer. But, how to eliminate duplicate files? How can you find all duplicate files among all files stored on your disk?
3 solutions to solve how to eliminate duplicate files in Windows 10
To answer the above questions, Windows 10 offers 2 solutions. In Windows 10, there are File Explorer and PowerShell to help you eliminate duplicate files. After cleaning, you can free up space for greater data storage and, in the long run, improve your computer performance.
Method 1. File Explorer deleting duplicate files
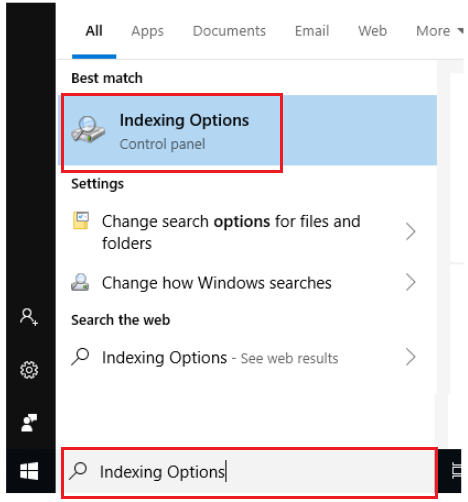
Step 1. Open "Indexing Options".
Go to the lower-left corner next to the Windows icon. Type "Indexing Options" into the search bar and then click on "Indexing Options".
Step 2. Search file locations.
Click on "Modify" and select "Show all locations". A pop-up will appear, asking for your login details. Make sure you're using an administrator account when making changes here.

Step 3. Check selected locations of duplicate files.
Check if all the boxes are ticked under the "Changed selected locations" section. If they are, click "OK," then hit the "Close" button. If not, make sure to check all the boxes.

Step 4. Open File Explorer and locate the files.
Press the Windows key and E key on your keyboard at the same time to open File Explorer. It's easier to locate your files under your user account. To access your user account, go to Windows (C:), and then select the Users folder.
Step 5. Search the extensions of the target files.
Click on "Search" in the upper-right corner, and enter the following extensions based on their format.

Step 6. Organize the search results by Name.
• Under the "Panes" section, choose "Preview pane".
• Under the "Layout" section, select "Details".
• In the "Current view" section, click "Group by," and then pick "Name".
• To arrange the files in ascending order, click "Group by," and select "Ascending".
Step 7. Examine the files to find duplicates saved in different locations.
Check the "Date modified" column to identify the latest version of each file.

After going through the files, choose the one you wish to remove and hit the remove key on your keyboard.
Method 2. PowerShell commands to remove duplicate files
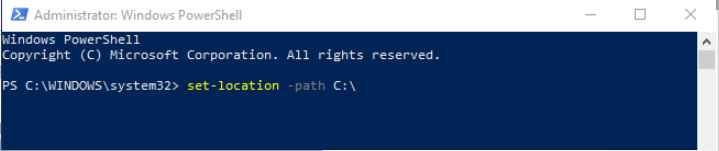
Step 1. Run PowerShell as admin.
On the lower-left corner, right-click on the Windows icon, and then select Windows PowerShell (Admin). A pop-up confirmation window will appear. Click Yes to proceed.
Step 2. Set searching location.
Enter this script: set-location –path C:\ in the Windows PowerShell window.
Step 3. Using commands to list duplicate files.
Enter the script for the list of all duplicates and their location:
ls "(directory you want to search)" -recurse | get-filehash | group -property hash | where { $_.count -gt 1 } | % { $_.group } | Out-File -FilePath "(location where you want to export the result)"

In (directory you want to search), enter the folder location of your User Account.
In (location where you want to export the result), enter the folder location you want the result to be exported or saved (e.g. Documents or Desktop).

Step 4. Open the folder location you have exported or saved.
Step 5. Delete duplicate files.
Check for each location in the text file, and then delete the duplicate files.
Method 3. Duplicate detective expert to safely and easily remove files
If you want a quicker, safer, and more efficient way to eliminate duplicate files, consider PartitionAssistant Cleanup as a great choice. This tool employs a sophisticated scanning algorithm to identify duplicate files quickly. It can detect even hidden duplicates and provides detailed reports for your review. In addition, this tool not only supports Windows 11/10/8/8.1/7, but also Windows Server 2025/2022/2019/2016/2012(R2).
Before removing any duplicate files, you can preview them to ensure that you are not deleting something important.
Free Up Disk Space To Keep Your PC Running Smoothly and Efficiently
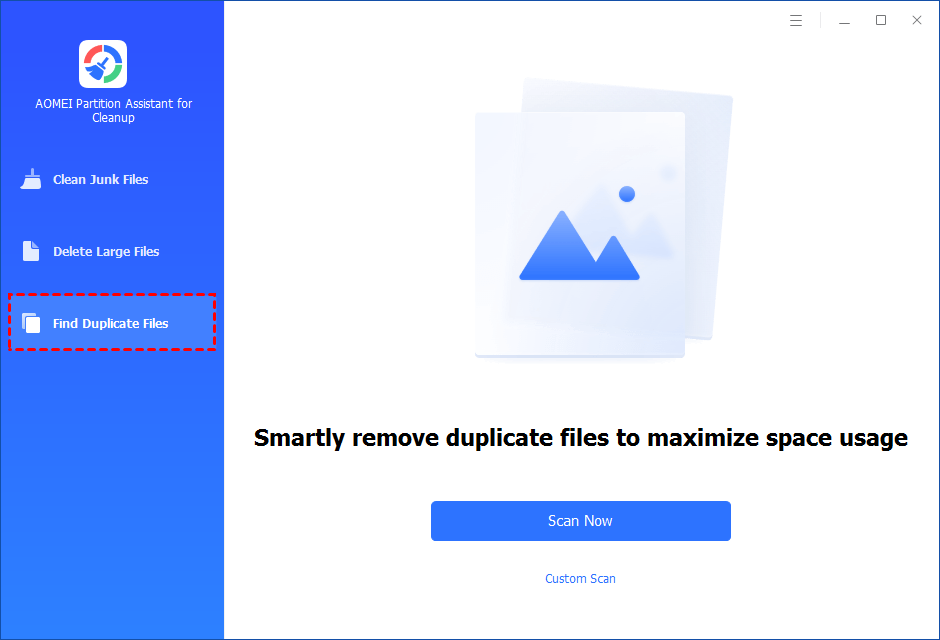
Step 1. Initiate Find Duplicate Files. Install and launch PartitionAssistant Cleanup. Click the "Find Duplicate Files" tab.
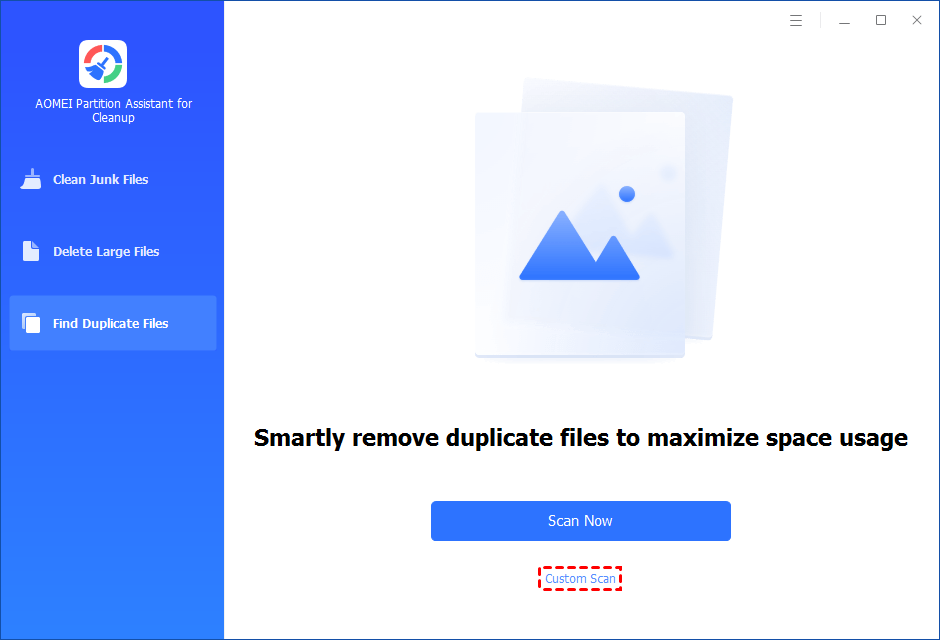
Step 2. Select a path to scan duplicate files. You can either click "Scan Now" to start the scan of your system C: drive. Or, click "Custom Scan" to manually select paths to be scanned. (Here, we take the "Custom Scan" as an example.)
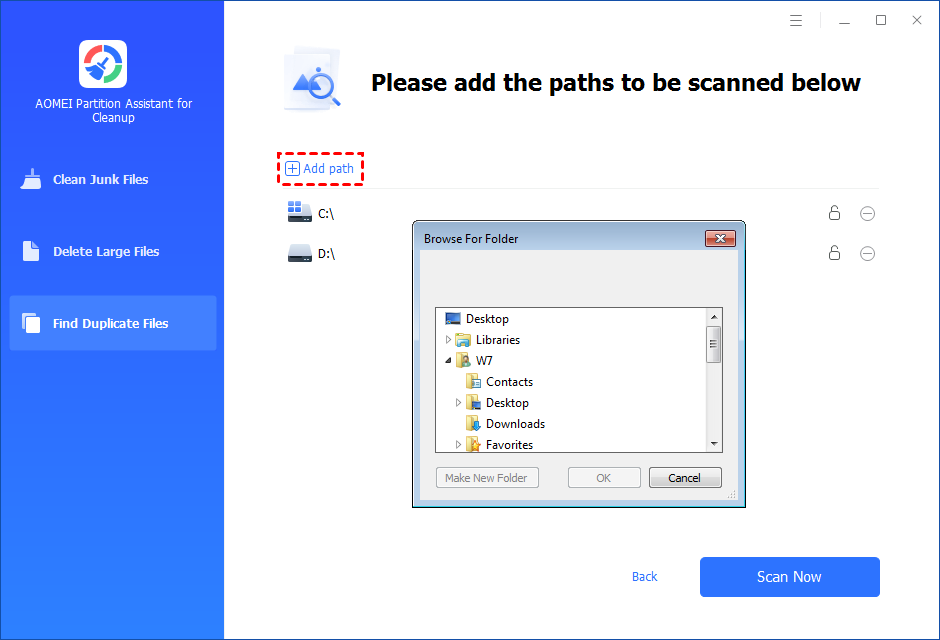
Step 3. After clicking "Custom Scan", all local and external drives on your PC will be displayed. You can also click the "Add Path" button, and then a browse folder window will pop up. So you can add more paths on this PC, like Desktop, Downloads, and other folder paths.
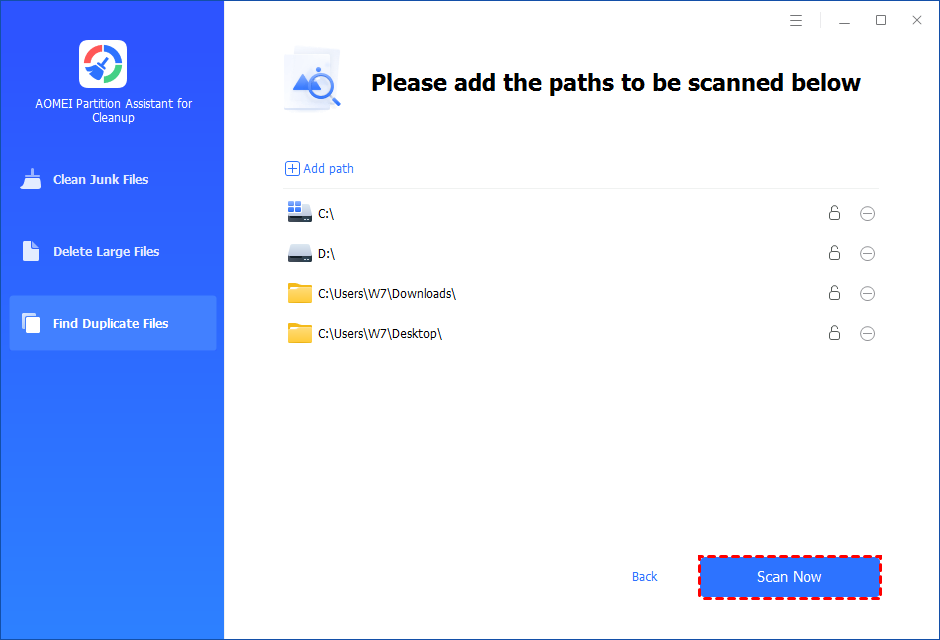
Step 4. Once necessary paths are added, you can click the "Scan Now" button to start the scan process.
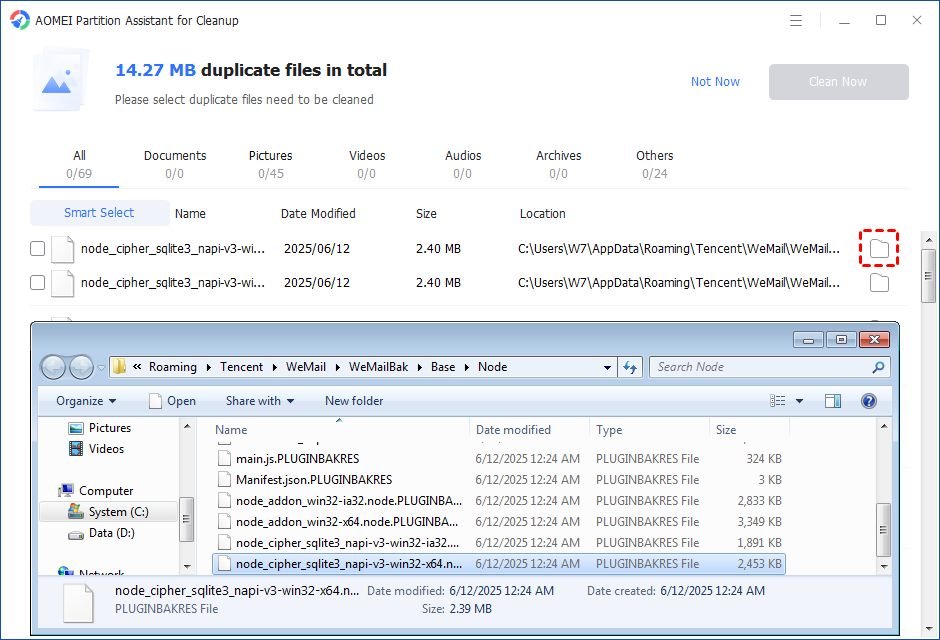
Step 5. The scan process might take time. After the scan is complete, all duplicate files will be listed. You can click the button behind to locate them.
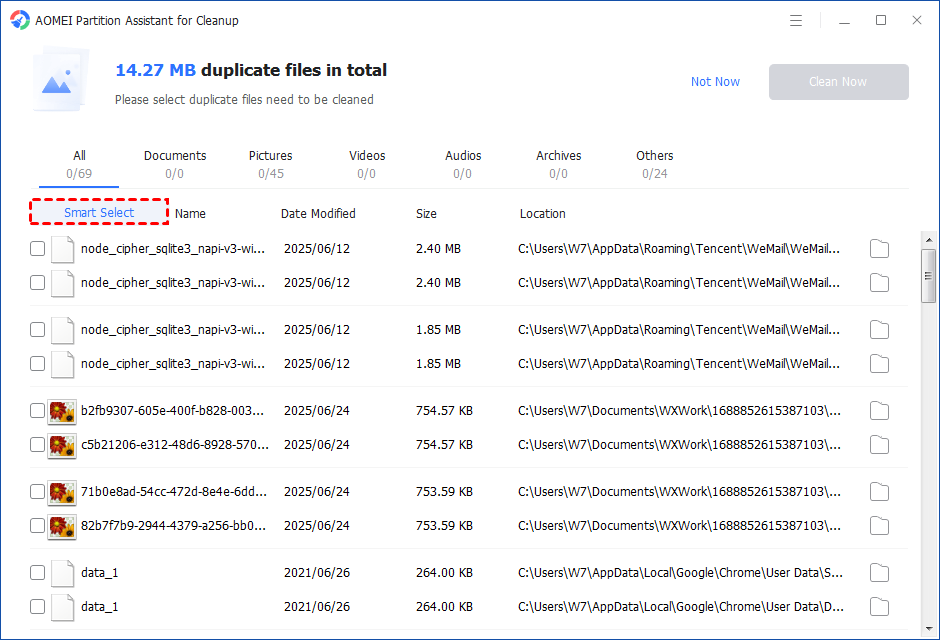
Step 6. Select duplicate files to start deletion. You can either manually select duplicate files, or click the "Smart Select" button to automatically select unnecessary duplicate files to delete.
Tips: If the "Smart Select" is ticked, only the oldest duplicate file will be unticked. It means that all duplicate files except the oldest one will be ticked to delete. (The oldest file means the file that was created first. This file will not be deleted. All other duplicate files are considered copies of the oldest file. )
If you manually select all copies of duplicate files, you will get a pop-up warning window to keep at least one copy of the duplicate files. If you indeed want to delete all copies of duplicate files, you can click "OK" so all copies of duplicate files will be selected to delete.

After unnecessary duplicate files are selected, please click the "Clean Now" button to start the deletion.

Step 7. Delete successfully. The deletion might take time. After the process is finished, the selected files will be deleted, and you will get a cleaning completed window displaying how much data you deleted in total.

To sum up
Eliminating duplicate files in Windows 10 is essential for maintaining a well-organized and efficient system. While Windows File Explorer and PowerShell are viable options, they come with limitations. PartitionAssistant Cleanup offers a more efficient and user-friendly solution, making the process of removing duplicate files quick and reliable.

