

How to Clear Your PC with A Temp File Remover on Windows 10
Want to find out a temp files remover on Windows 10? From this tutorial, you not only can download it, but also know how to totally clear your PC with it.
By AOMEI / Updated on July 9, 2025
How do you remove temporary files in Windows 10?
" My computer is slow, so I want to clean and speed it up. I heard that there are a lot of temporary files in the computer, can I delete all the temporary files to free up space on the computer? How do you remove temporary files in Windows 10? Looking forward to your help."
What are temp files on Windows 10?
Temp files include program installation files, upgrade logs, error reports, etc. They are stored in the Windows Temp folder. When a program or system is running on the PC, some temp files will be generated in it to improve the efficiency of the job. However, once the task is completed, these temp files sit idle on the computer.
Generally speaking, temp files do not cause much impact on the PC. However, when temp files are not cleared for a long time, they can accumulate in the pc and take up its space. Not only will slow down the PC, but also cause serious problems such as blue screen and computer freezes.
Therefore, in order to speed up your PC and prolong its life, you need to remove temp files on Windows 10. In the following content, we’ll share some methods and a free temp file remover on Windows 10 for you.
How to erase temporary files on Windows 10
To maintain your computer, cleaning up temporary files cannot be ignored. Is it safe to remove temp files? Yes. Next, we will share 5 ways to effectively clear temporary files from your PC.
● Method 1. Manually remove temp files
To delete temp files, the basic way is manually clearing them on the Temp folder, you need the help of the Run program.
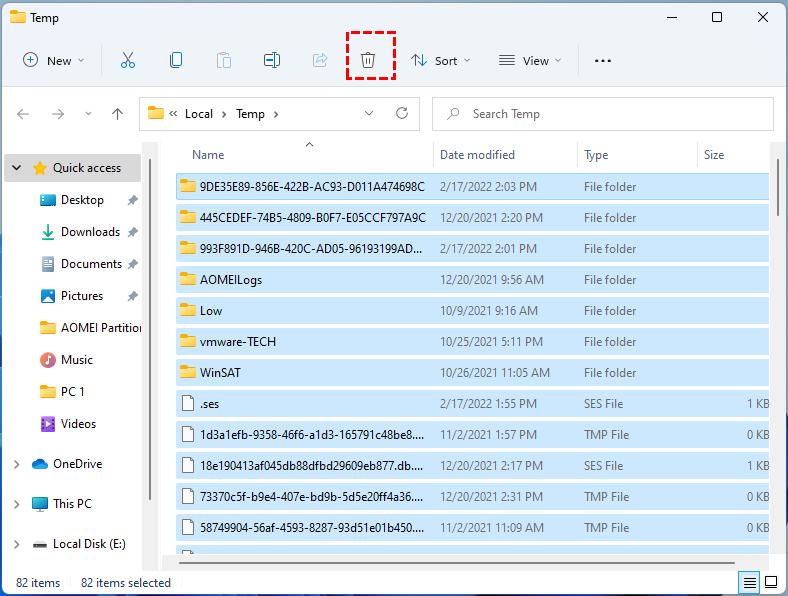
Step 1. Press "Windows + R" to start the Run program, then type "%temp%" and press "Enter" to open the Temp folder.
Step 2. In the new window, choose the target temp files to delete.
● Method 2. Automatically delete temp files with Storage Sense
Storage Sense is a Windows-specific PC cleaning tool, you force delete temp files on Windows 10 PC with it. Additionally, you can also set a fixed time and frequency for running Storage Sense.
Step 1. Start the "Windows Settings", select the "System" option.
.png)
Step 2. In the new interface, Click "Storage" and turn on "Storage Sense". If you want to set more, please click the "Configure Storage Sense or run it now" button.
.png)
Step 3. In the "Configure Storage Sense or run it now" window, you can set the right time to run this function.
.png)
● Method 3. Run Disk Cleanup
Disk Cleanup is another Windows computer cleaning tool, it can clean up some unnecessary files, including thumbnails, temporary files, Delivery Optimization files, recycle bin files, etc.
Step 1. Press "Windows", then type "disk cleanup" in the task bar and hit "Enter".
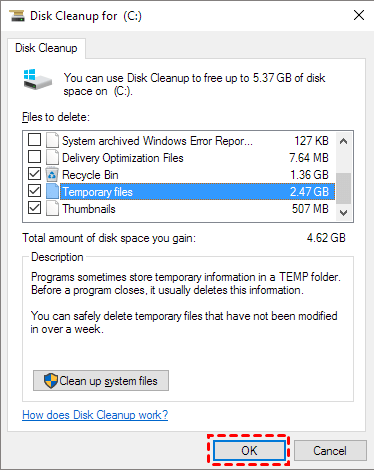
Step 2. In the new popped window, choose the target drive to clear. We take C drive as an example and click "OK".
Step 3. In the following window, tick the wanted files and click "OK" to release C drive space.
● Method 4. Delete temp files with CMD
CMD is a Windows built-in command line tool. Through different commands, it can resize partition, format hard drive, change drive letter, etc. for users. Surprisingly, it can also clean up temporary files in the computer, the detailed steps are as follows:
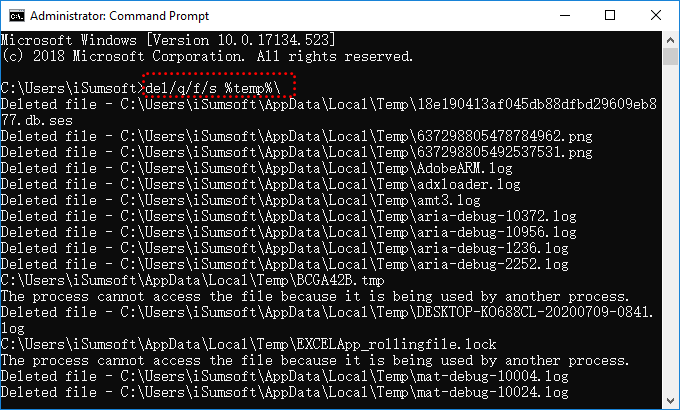
Step 1. Press the "Windows", then type "cmd" and click "Run as Administrator".
Step 2. Type "del /q/f/s %TEMP%\*" and press "Enter" to delete temp files.
۰ /q will perform the task without the confirmation
۰ /f will force delete the target files
۰ /s will delete all data from the subfolders
Run the best temp files remover on Windows 10 to totally clear your PC
In the PC, in addition to temporary files, there're many other junk files, such as cache files, program residual files, junk files in the recycle bin, etc. If you want to completely clean up all junk files from your PC, you can try PartitionAssistant Cleanup.
It is not only a temp file remover on Windows 10, but also a PC cleaner. With it, you can fully scan your PC, finding all the junk files on it, including tricky registry and system junk files. After clicking "Delete", all the selected junk files will completely disappear from the computer.
Besides, you can also enjoy many PC disk management functions provided by AOMEI Partition Assistant, including wipe PC hard drive, create partition, rebuild MBR, etc. Let's see how it works on releasing PC storage.
The Best Windows Disk Partition Manager and PC Optimizer
Step 1. Install and launch PartitionAssistant Cleanup. Click the "Clean Junk Files" tab.

Step 2. Click the "Scan Now" button to start the process of scanning junk files.

Step 3. After the scan process is finished. All system junk files (including recycle bin files, temporary files, log files, invalid shortcuts, and so on) and registry junk files (including DLL registry, system registry, and program registry) will be displayed.

Step 4. You can also click the button behind to view the junk files details.

Step 5. And, you can click the button behind to locate the file.

Step 6. By default, the program will select some junk files to clean up, for example, temporary files, log files, and so on. You can also manually check to select more or uncheck to deselect fewer listed junk files. Or, click "Select All" to select all junk files to clean up if you need to clean up all.
After selecting junk files that are not needed anymore, you can click the "Clean Now"button to start the cleanup.

Step 7. The process of the cleanup might take time, and the selected files will be cleaned up. After the process is finished, you will get a cleanup completed window displaying how many files you have cleaned and not yet cleaned.

Verdict
In this article, we have provided you with a powerful temp files remover on Windows 10 and some methods to remove temp files. If you want to totally clean up your PC, you can try the recommended PartitionAssistant Cleanup.
By the way, the full edition AOMEI Partition Assistant can allocate free space, migrate OS to SSD, move programs to another drive, clone hard drive, etc. More advanced functions are waiting for you.

