How to Enable UEFI Mode in Windows 11 or 10?
In this post, you will learn how to enable UEFI mode in Windows system for better performance of your PC via CMD and a tool that won’t cause data loss.
By Lucas / Updated on February 25, 2025
Why need to enable UEFI mode?
Because of the release of Windows 11, users once again switch the focus of concern to UEFI and BIOS. Since UEFI 2.0 appeared, UEFI has gradually replaced the BIOS as a better choice for people who use later devices. UEFI (Unified Extensible Firmware Interface) is a standard between operating system and platform firmware published by UEFI Forum.
Compared with Legacy BIOS, UEFI mode has various advantages:
1. Excellent performance
UEFI runs directly in protected mode, which can make full use of CPU and memory to reduce waiting time.
2. Easy to use
As can be seen from the UEFI interface, it is a simplified operating system. Because it supports a high-resolution color display, users can run GUI (Graphical User Interface) and use a mouse to adjust various parameters more easily and conveniently.
3. High security
UEFI has a specific Secure Boot feature. When the secure boot function is turned on, UEFI will check the certificates of the applications and driver before the execution. The UEFI security mechanism improves the security of the operating system startup process and can effectively prevent malware.
4. Malleability
UEFI can parse the file system and turn a certain area of the hard disk into its own storage space. Therefore, it breaks through the capacity limitation and can adapt the design concepts of modern operating systems, and continuously add various new functions to meet the development of future computers.
There are many other points we might not mention here, but it’s incontrovertible that UEFI beats BIOS in numerous areas.
How to enable UEFI mode in Windows PCs
It’s easy to enable UEFI mode if you’re sure your devices support it. You can check your boot mode in the System information (Press “Win”+ “R” simultaneously, type "msinfo32", and hit “ENTER”.).
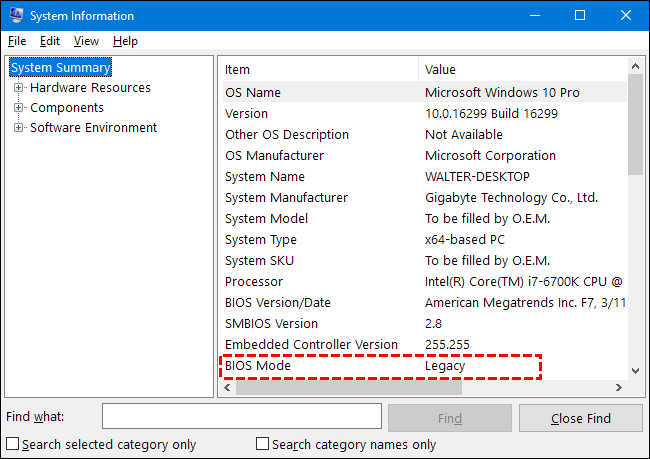
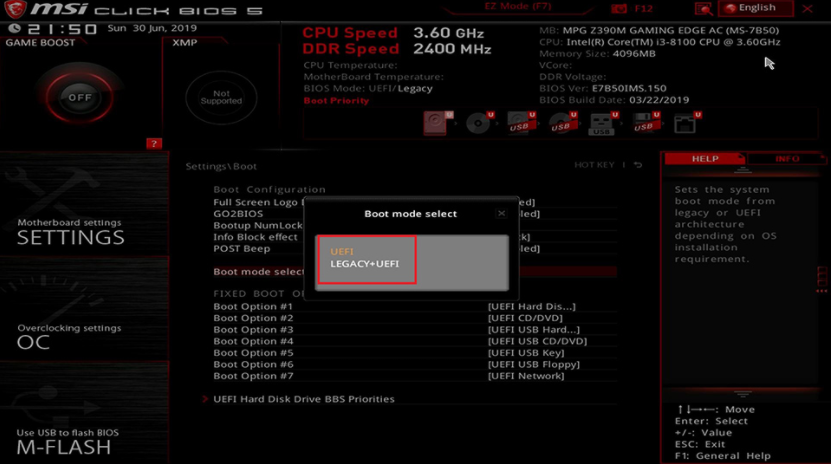
Don’t hurry to change the boot mode if you see the mode showing as Legacy, you need to search your motherboard on the Internet to check if it supports UEFI mode or not. After you’re sure your device allows you to use UEFI mode, you can restart the PC and press a specific key (usually it’s DEL or F2) to enter BIOS to change it, and then press “F10” to save your settings and exit.
Enabling UEFI mode is simple, however, there’s a prerequisite -- GPT disk as the system disk.
In Legacy BIOS mode, Windows needs to boot from an MBR disk, which only offers 2TB capacity and 4 primary partitions for use. But, UEFI mode requires a GPT disk, which can proffer 18TB space at last and 128 partitions (the current limit of Microsoft is 128 partitions).
Thus, if you prefer to boot to UEFI mode, you need to convert an MBR disk to a GPT disk and use it as a system disk.
▌Method 1: Convert to GPT using Command Prompt (data loss)
Generally, you can use Command Prompt to convert the disk. When you reinstall Windows, you can open CMD to execute the conversion.
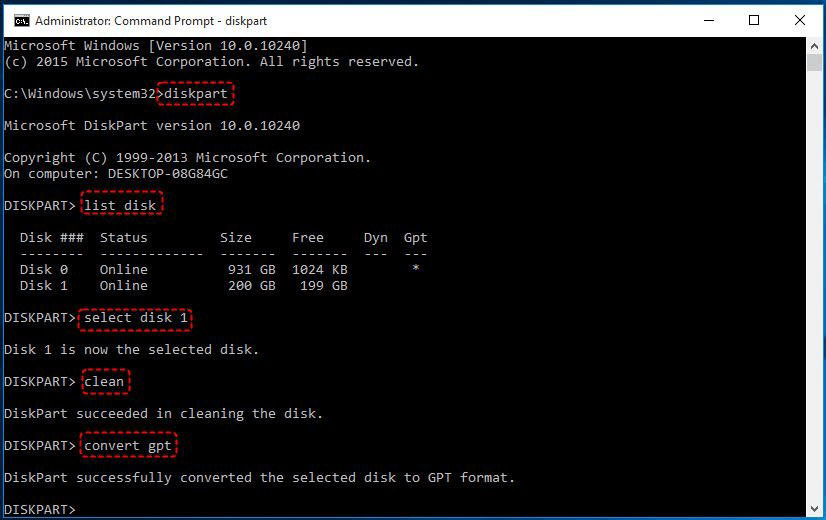
Step 1. Press “Shift” + “F10” to open CMD.
Step 2. Type “diskpart” and input the following commands and hit “Enter” after each.
• list disk
• select disk X (X is the number of the disk you wish to convert)
• clean (This step will delete all data on the disk, make sure you’ve made a backup of all important files)
• convert gpt
This process is necessary, otherwise, you’ll receive a message: “Windows cannot be installed on this disk. The selected disk has an MBR partition table.”
▌Method 2: Convert to GPT via AOMEI Partition Assistant (data safe)
The operation of converting the disk could be easier and faster. AOMEI Partition Assistant Professional can let you convert a disk (data disk or system disk) from MBR to GPT without cleaning data to allow you to change legacy to UEFI without reinstalling OS. Users who’re using Windows 11/10/8/8.1/7/XP/Vista OS or Windows Server 2022/2019/2016/2012(R2)/2008(R2)/2003(R2) can select this powerful utility to organize their devices, it’s quite user-friendly software.
Now, you can download the demo version to have d free trial:
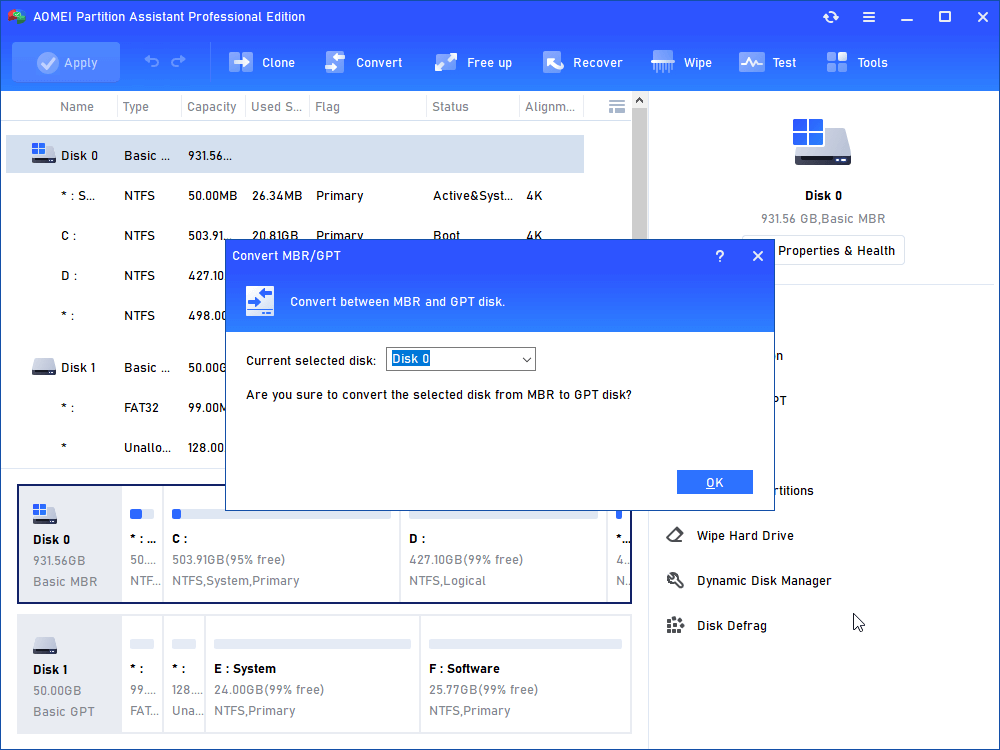
Step 1. After you install and launch Partition Assistant, right-click the MBR disk you want to change, and then choose “Convert to GPT” or click the disk and choose "Convert to GPT" from the right column.
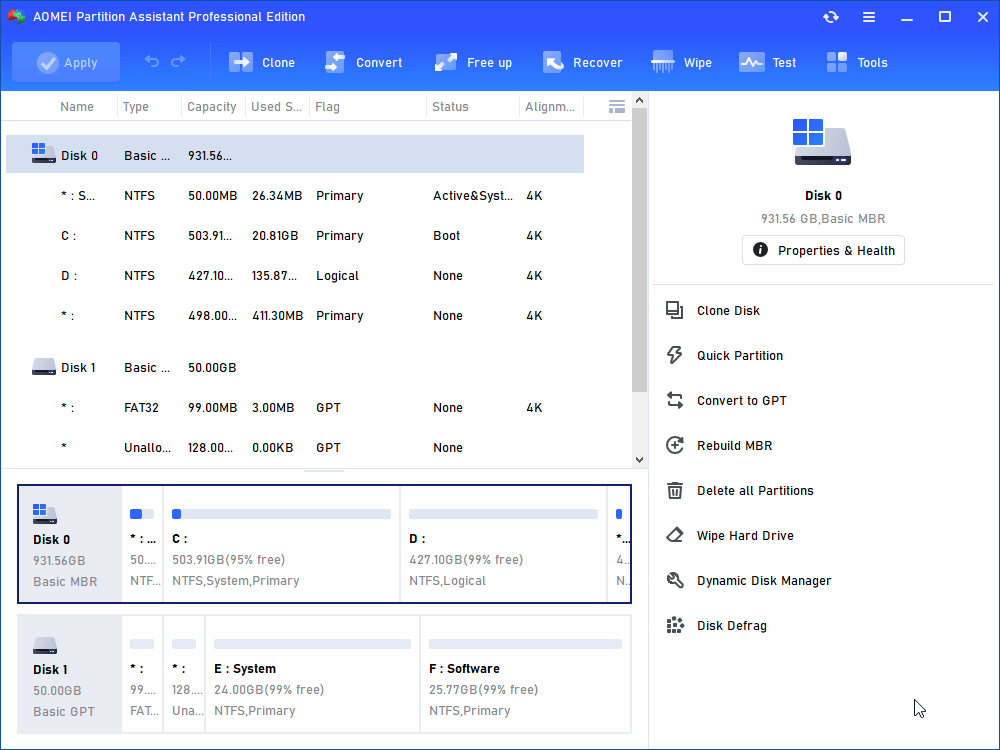
Step 2. In the pop-up windows, click “Yes” to continue.
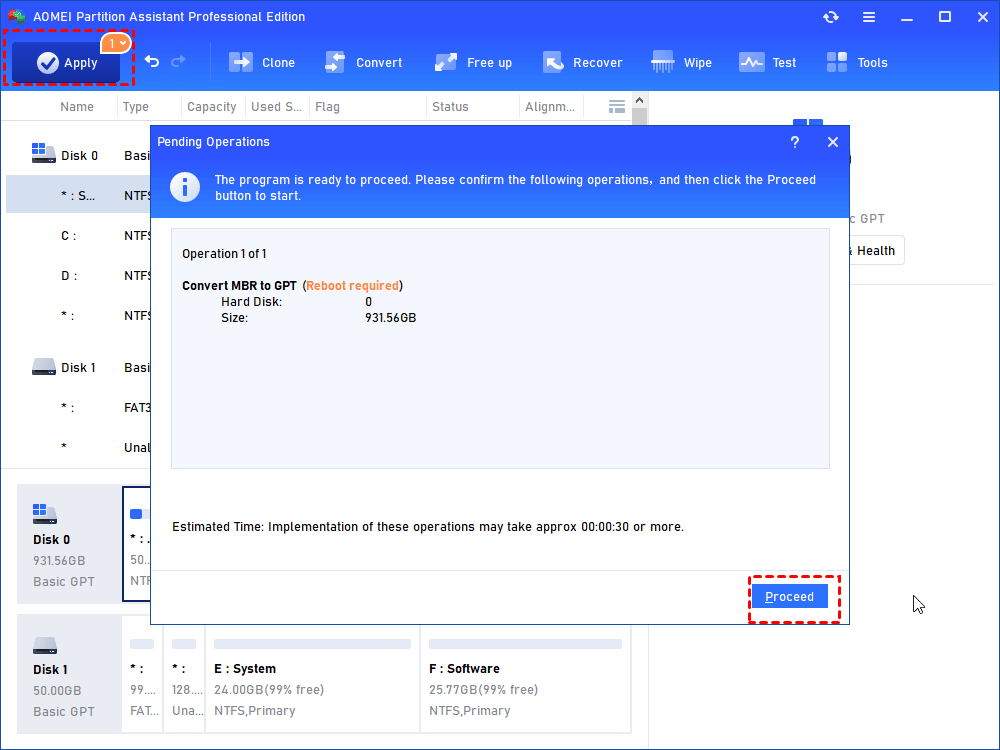
Step 3. Click “Apply” to operate and then your disk will be changed into a GPT disk.
After you apply the operations, you can restart your computer to enable UEFI boot mode as we have shown before.
Further reading: How to disable UEFI mode?
If you no longer need UEFI boot mode, you can follow the steps below to disable UEFI mode:
Step 1. Restart your Windows PC
Step 2. Press the F2 key until you see the BIOS Setup screen.
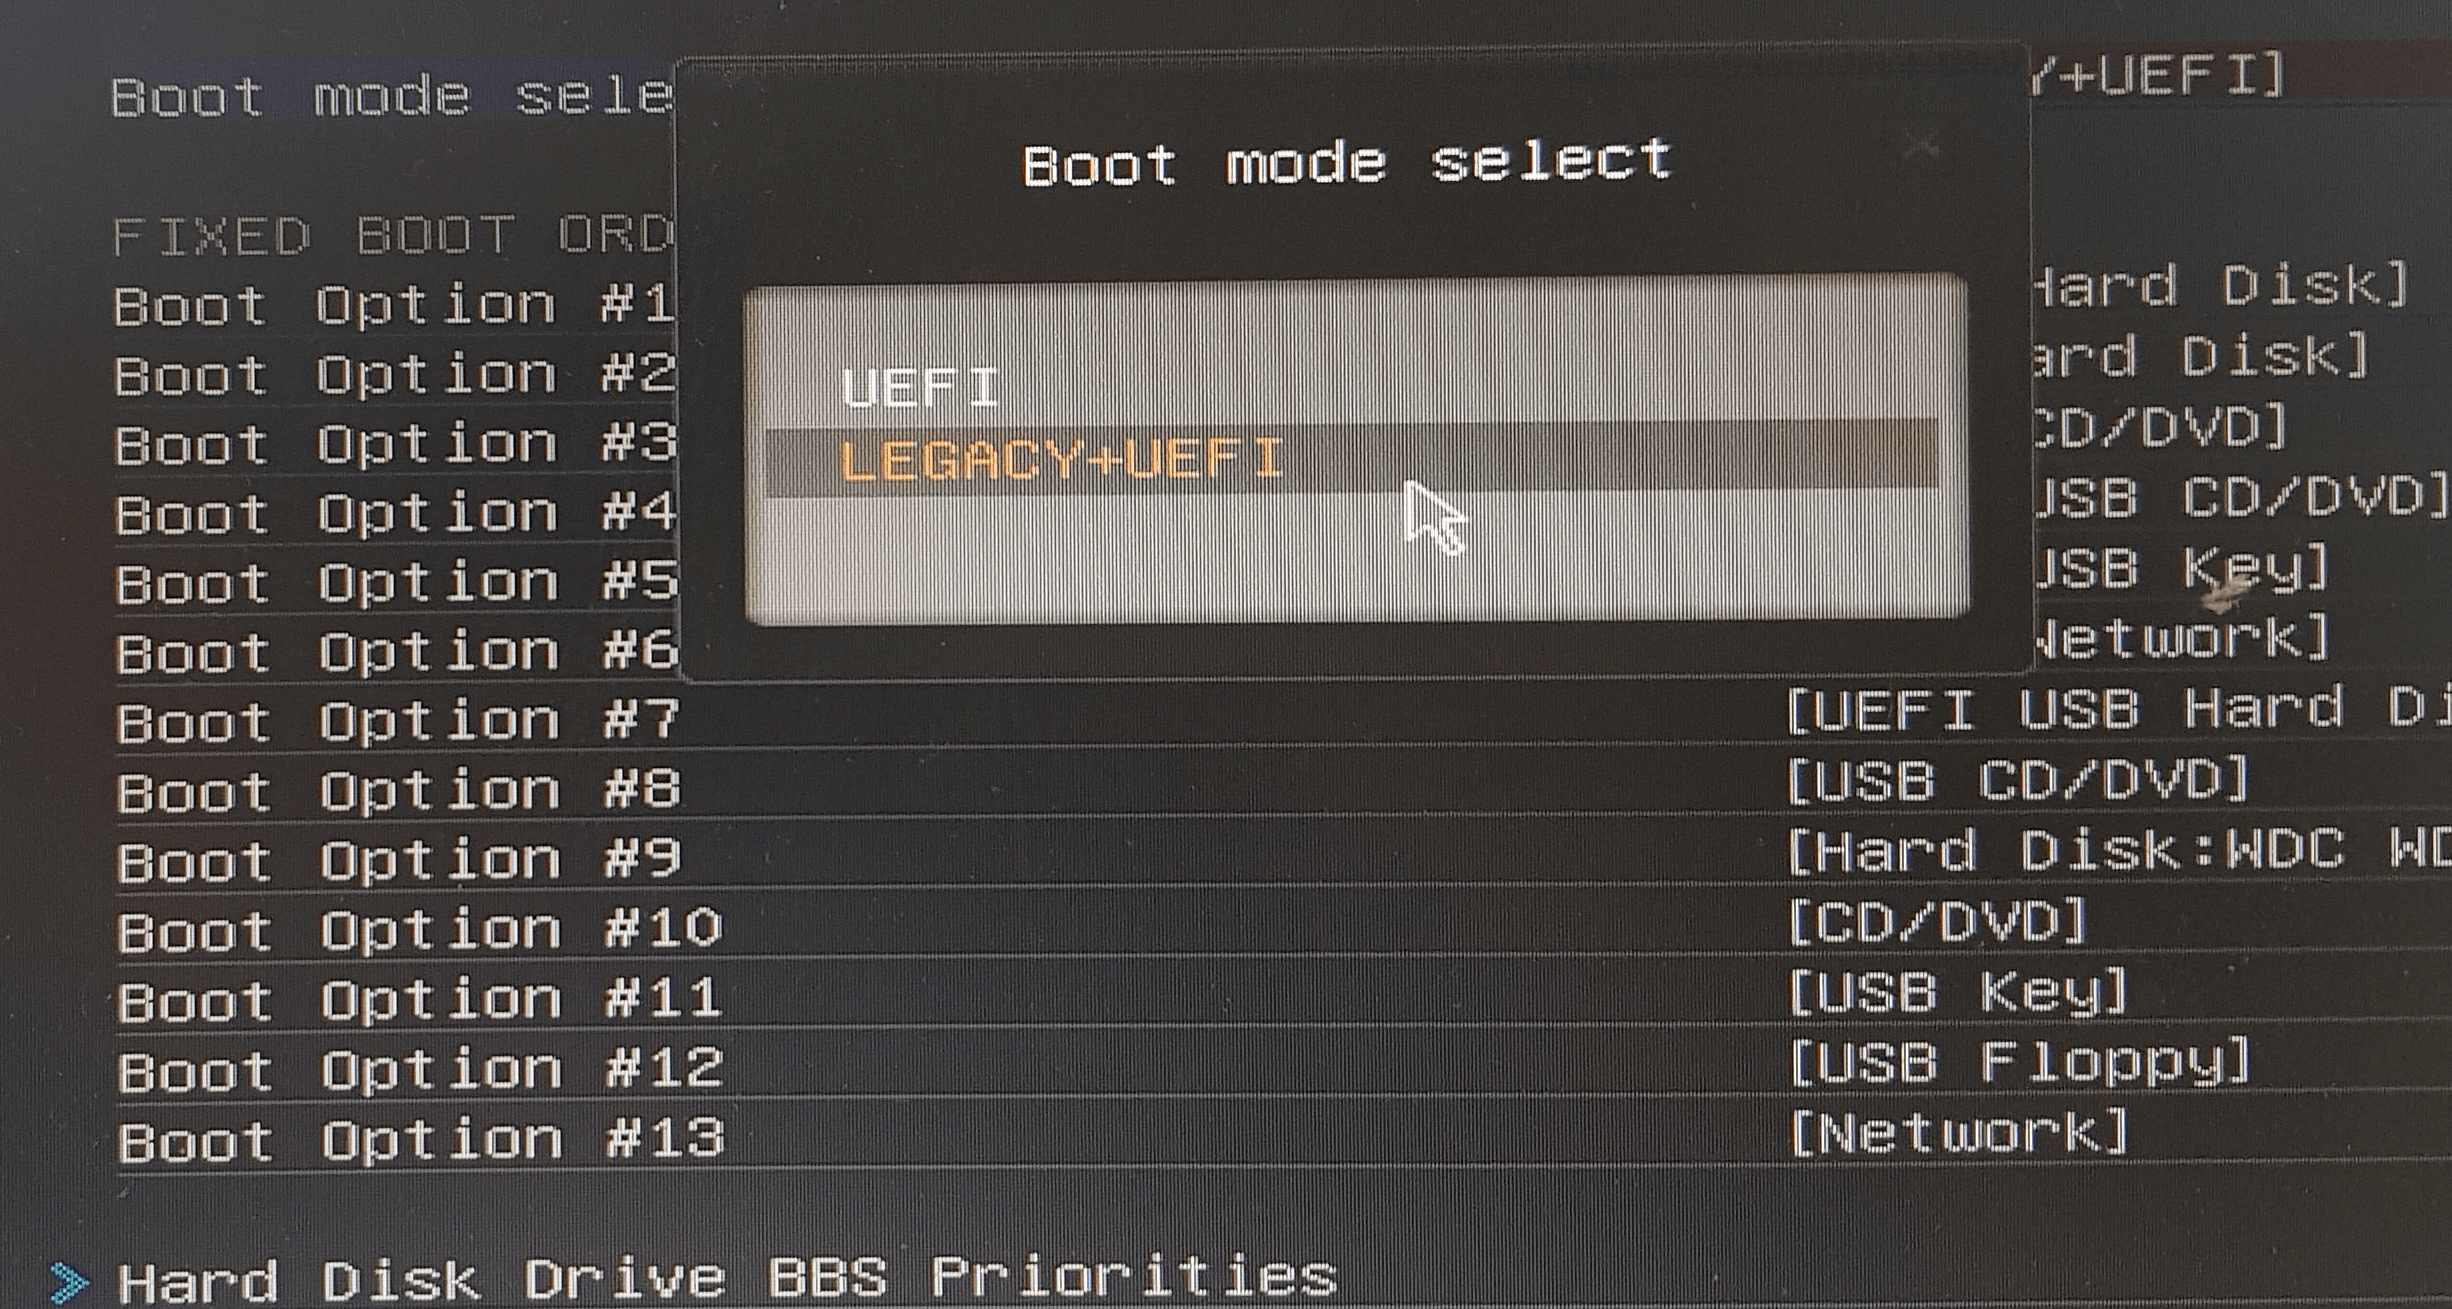
Step 3. Under Boot, click on UEFI/BIOS Boot Mode and press Enter.
Step 4. Now, Choose Legacy and press enter.
Step 5. Select "Legacy" and Press "Enter".
Step 6 Press F10 to save the changes and exit the BIOS screen.
Final words
In the post, we show you how to enable UEFI mode and why people prefer to select it. If your devices are qualified to change BIOS from Legacy to UEFI mode, we advise you to enable UEFI to enjoy better computer performance.
Via AOMEI Partition Assistant, you can manage your disk and partitions easier. It has various features such as converting between FAT32 and NTFS, cloning disk, resizing/merging/formatting/creating a partition, migrating OS to another disk without reinstalling, moving applications…

