GDisk: Convert MBR to GPT without data loss in Windows
This article displays how to use GDisk to convert MBR to GPT without data loss as well as better replacement of GDisk for Windows OS.
By Lucas / Updated on May 12, 2023
About GDisk in Windows
What is GDisk? GDisk is an interactive text-mode program similar to FDisk. However, GDisk includes all features of FDisk as well as its additional features. It is a command-line utility that runs only in DOS, so you cannot access it in a Windows environment. Thus, a bootable USB drive or Windows installation disc is necessary. It can be downloaded and extracted to Notepad.
GDisk Command can be used to do many disk management, basic and advanced, such as changing a partition’s name, deleting a partition, creating a new empty GUID partition table, and so on. Converting MBR to GPT and converting GPT to MBR features are two of them. You can run these features by the different codes.
Why need GDisk convert MBR to GPT Windows?
There are many differences between MBR and GPT, which becomes the reason why users choose to convert MBR to GPT:
• Convert partition style from MBR to GPT when he owns a spacious drive that builds with more than 2TB capacity,
• Need to create more than 4 primary partitions on his drive.
• Install an advanced system like Windows 11 that requires a GPT partition scheme. If users don't convert their disk at first, they'll meet "The Selected disk has an MBR partition table" warning to pause the installation.
...
Then, why choose GDisk to convert MBR to GPT? GDisk is designed for advanced users or user who is familiar with command-line operations. Command/Character User Interface (CUI) has the advantage of not much personal interference being asked during the process. You input the codes and the task will be done automatically, time-saving and effective.
How to convert MBR to GPT in Windows?
▌1. Using GDisk in Windows
As covered, you’ll need a WinPE bootable USB or Windows installation disc to run GDisk without a Windows environment. Next, download the gdisk.exe and uncompress the package to another USB drive. Before you start, you might want to edit the Registry Keys for AHCI in the UEFI firmware and change SATA mode to AHCI from IDE in BIOS.
Step 1. Boot your computer with the bootable media or Windows disc. Press "Windows" + "F10" to bring out Command Prompt after the loading.
Step 2. Navigate to the USB drive you stored your GDisk files to and run “gdisk64.exe”, or “gdisk32.exe” if your computer is 32 bit.
Step 3. Type "\\.\physicaldrive#”. Usually, # is 0 which points to the first disk on the computer. Now, you’ll see a message about invalid GPT and valid MBR. Enter “y” to confirm the prompt.
Step 4. Type "t” to bring up the Code change menu.
Step 5. Type "1” or the sequence number of your system partition, usually always 1.
Step 6. Type "EF00” to tell the command to change the type code to EFI.
Step 7. Type "w” to write the changes to the table and exit. You can type "q” and Enter to cancel the changes if there is something wrong with previous operations. To cancel all operations made by GDisk and exit GDisk, you need to type “q” again.
Step 8. Rebuild the Boot Configuration Data (BCD) and reboot your PC.
For sure, GDisk is quite easy and simple for the user who has a lot of command-line operating experiences. However, for normal users, GDisk is quite a complicated and error-prone program. Most users love Graphical User Interface (GUI) software instead. What’s more, as a command-line utility, most operations are irreversible, even though there is a confirmation for you to quit what you’ve input, yet for common users, that is risky.
▌Better than GDisk to convert MBR to GPT without data loss
Fortunately, there is an outstanding alternative to GDisk that assists you to complete the task in a user-friendly interface and a few clicks. You can use GDisk to convert MBR to GPT without data loss, so does this software. AOMEI Partition Assistant Professional has a reputation in the disk partition managing field. Except for basic disk and partition operations, this manager is good at converting MBR to GPT and vice versa without losing data. It works great on both system disk and non-system disk in Windows 11/10/8/7/Vista/XP.
No bootable media or Windows installation disc is required, and no complex command-line inputs are involved. Several clicks and a reboot will take care of the entire process. Now, you may want to learn the specific steps.
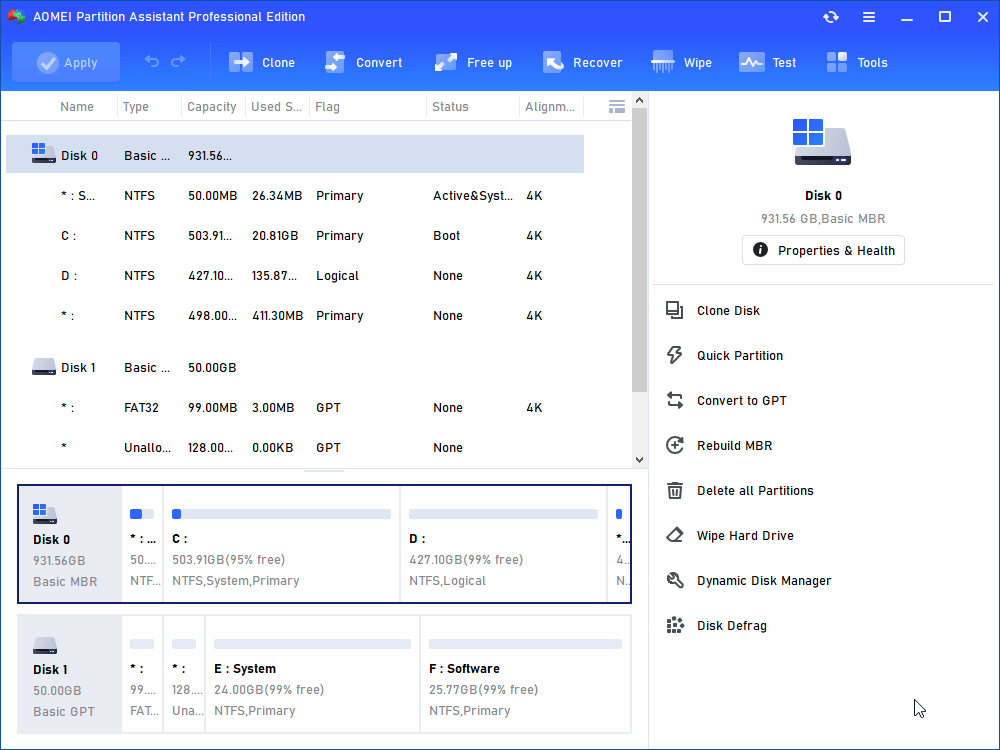
Step 1. Install and run this manager. To convert MBR to GPT, right-click the disk you want to convert and select “Convert to GPT” at the main interface or click the disk and choose "Convert to GPT" from the right column.
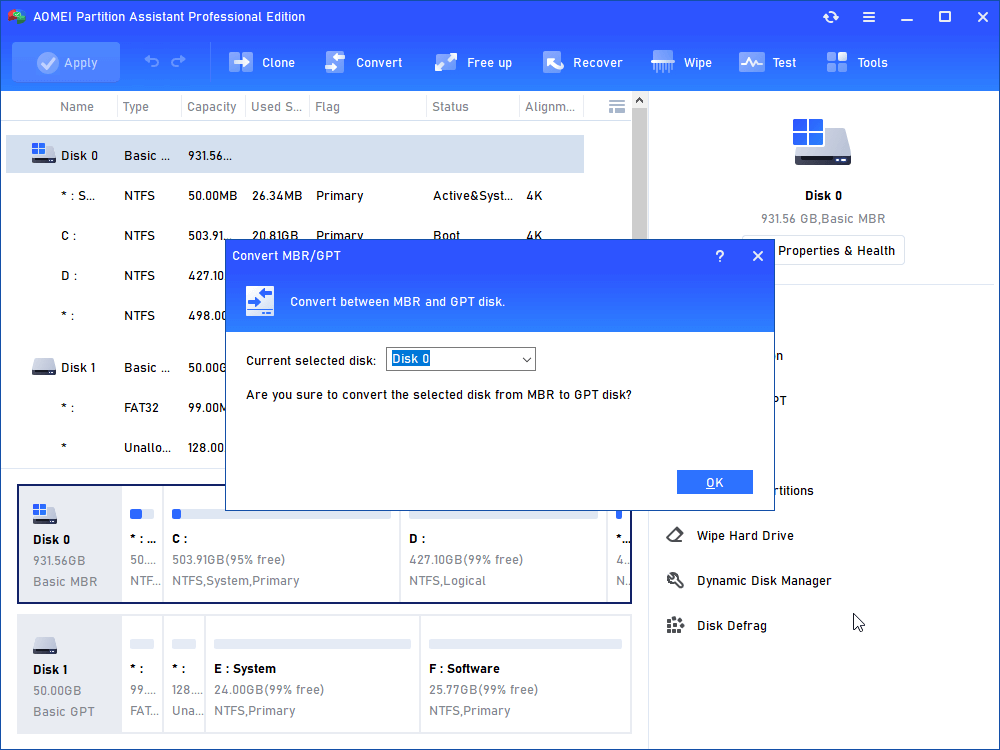
Step 2. Click “OK” and “Yes” to confirm your operation at the pop-up window.
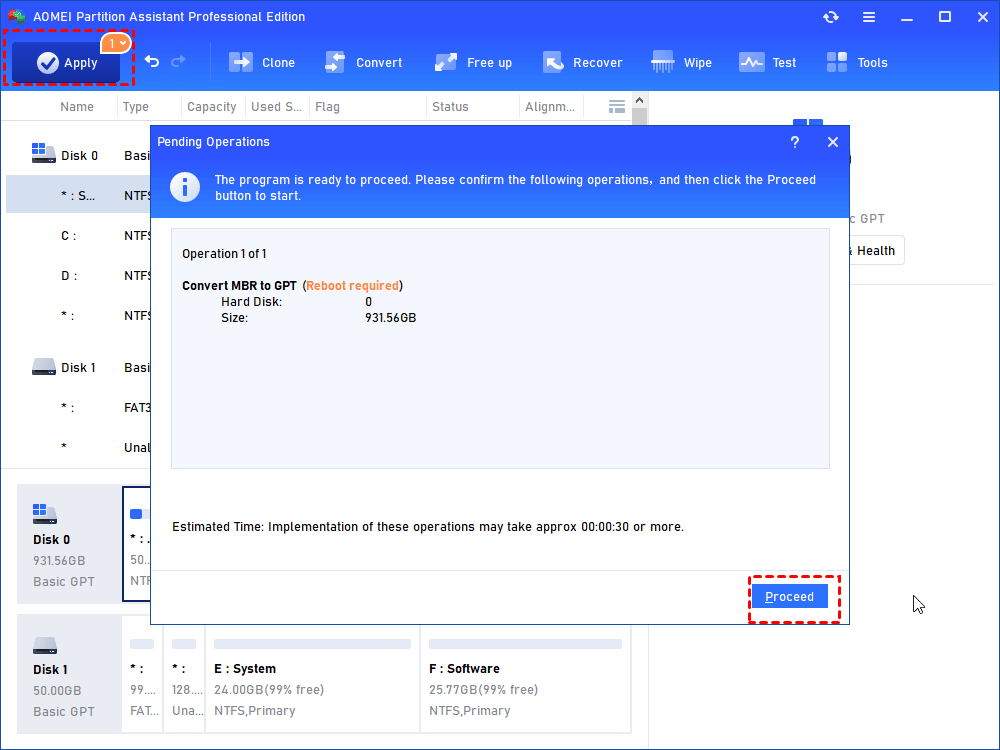
Step 3. That is the virtual result that has come into your sight. Click “Apply” and then “Proceed” to execute the pending operation. As stated, it will ask for a reboot.
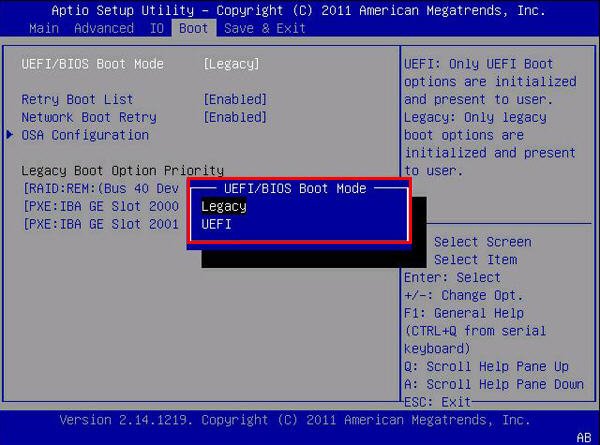
Step 4. Change Legacy to UEFI in BIOS and boot your computer normally.
- ★Tips:
- It is suggested to backup your disk before converting because data loss can be caused by inappropriate operations.
- As mentioned, you have to run a computer whose motherboard supports UEFI boot mode.
- The “Convert to GPT Disk” will be changed to “Convert to MBR Disk” if you’re selecting a GPT one.
Verdict
GDisk to convert MBR to GPT in Windows is more complicated than AOMEI Partition Assistant, but both of them are good utilities. All you need to do is to choose the most suitable tool for yourself. AOMEI Partition Assistant also has lots of other features like moving programs, migrating OS, clone disk/partition, etc. It also has Server edition which allows you to convert MBR GPT to Windows Server.

