Windows Must Be Installed to a Partition Formatted as NTFS – Fix It without Data Loss
What to do when you encounter the warning “Windows must be installed to a partition formatted as NTFS”? This time, you’ll learn the best way to resolve this issue without any data loss.
By AOMEI / Updated on July 17, 2025
Overview of the error “Windows must be installed to a NTFS partition”
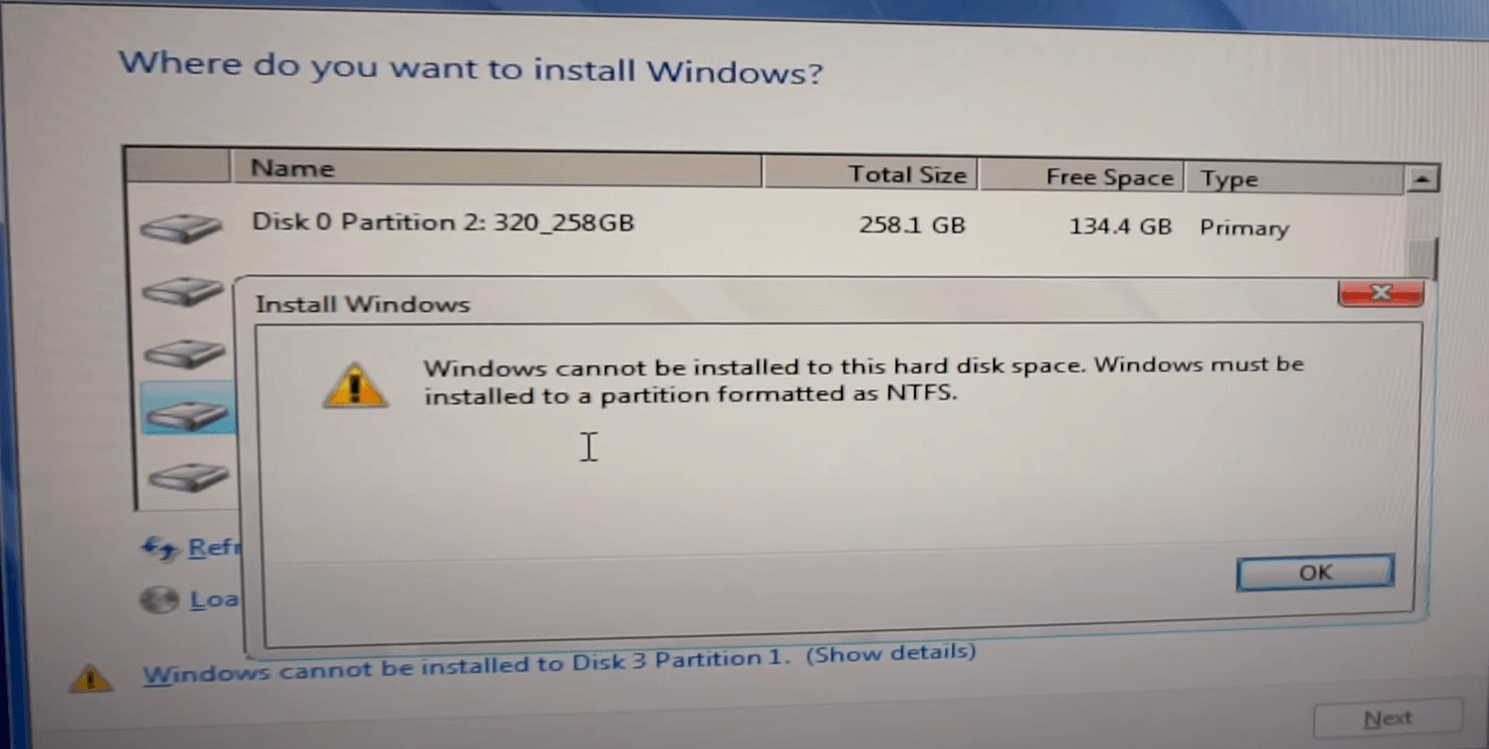
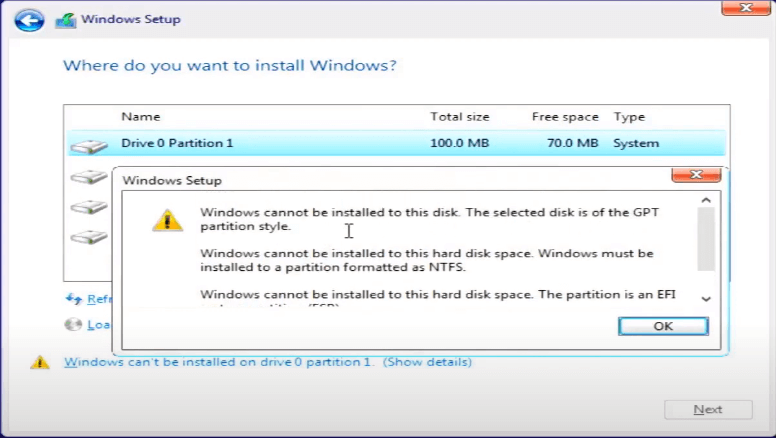
When installing Windows operating system, you could encounter many problems. One of them is the error prompt "Windows must be installed to a NTFS partition” when you come to the step where you should choose location to store the OS. The cause of the issue is that your boot partition was not correctly set as NTFS but FAT32 or exFAT. FAT32 and exFAT are older file systems and you can’t install an OS on them. Since Windows Vista, you can only install an OS to NTFS drives. If your current partition is in FAT32, then, to finish the Windows installation, you must reformat it to NTFS beforehand.
How to convert the boot partition to NTFS?
When it comes to FAT32 to NTFS conversion, many people will first think of Disk Management and DiskPart Windows built-in utilities. With them, you can change the files system by reformatting the partition. However, this time, we’re handling a system partition that contains critical boot files which means you cannot use Disk Management anymore under the Windows environment and we can only use DiskPart by booting into Command Prompt instead of going to the desktop.
Way 1. Use DiskPart
DiskPart is a Windows built-in program utility as mentioned above for hard disk and partition management. Every operation in DiskPart is performed via different command lines. Thus, the users of DiskPart should be professional enough. If you’re a novice, don’t worry, just follow the steps below and you can still finish the job.
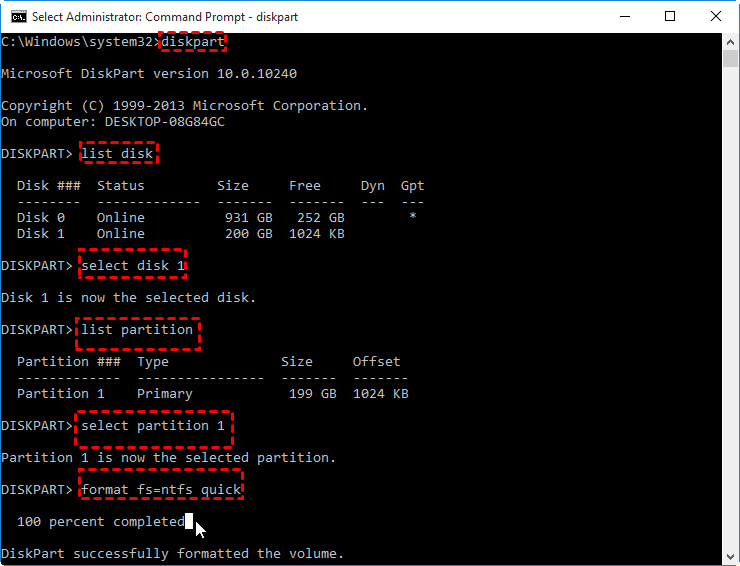
1. Boot into Command Prompt, type “diskpart”, and hit “ENTER” to launch the DiskPart utility.
2. Type “list disk” and hit “ENTER” to let all hard disks on your PC appear on the screen.
3. Type “select disk #” and hit “ENTER” to select the target disk: “#” represents the sequence number of the disk.
4. Type “list partition” and hit “ENTER” to list all partitions on the target disk.
5. Type “select partition #” and hit “ENTER” to select the partition that needs to be converted: “#” represents the sequence number of the partition.
6. Type “format fs=ntfs quick” and hit “ENTER” to start the NTFS conversion.
Since reformatting the partition will remove all existing files, to ensure data security, you’d better back up important files first.
Way 2. Try a third-party tool for NTFS conversion without data loss
DiskPart helps deal with many things in disk management including formatting exFAT/FAT32 to NTFS. However, in the course of the formatting process, all existing data on the target partition will be removed. Thus, users will suffer from severe data loss. Meanwhile, DiskPart is not an ideal choice for computing novices since it asks for complex command line input. In this case, it’s imperative to find another more user-friendly alternative.
Here, I recommend AOMEI Partition Assistant Professional, a powerful and easy-to-use disk manager program, that’s able to convert exFAT/FAT32 to NTFS or NTFS to exFAT/FAT32 without the need to delete any files. Besides partition conversion, this AOMEI product also supports primary to logical drive conversion and hard disk initialization.
What to do when prompted that “Windows must be installed to a partition formatted as NTFS” in Windows 10 installation? Don’t worry, try the best NTFS converter to change your current partition style to NTFS without any data loss. Now, download the demo and give it a shot!
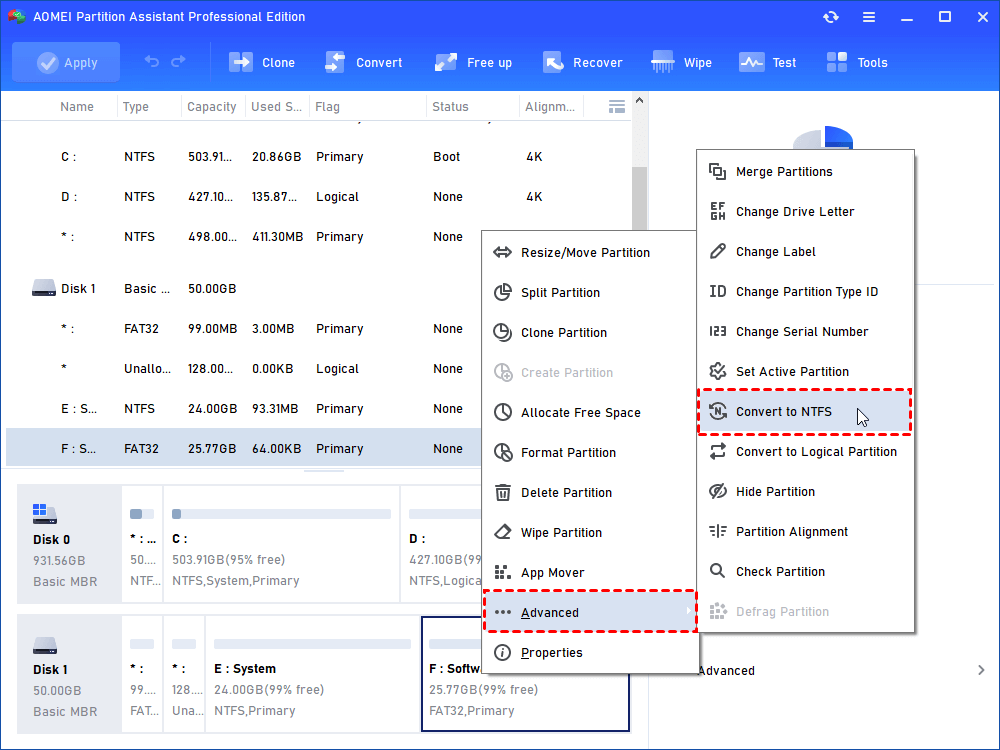
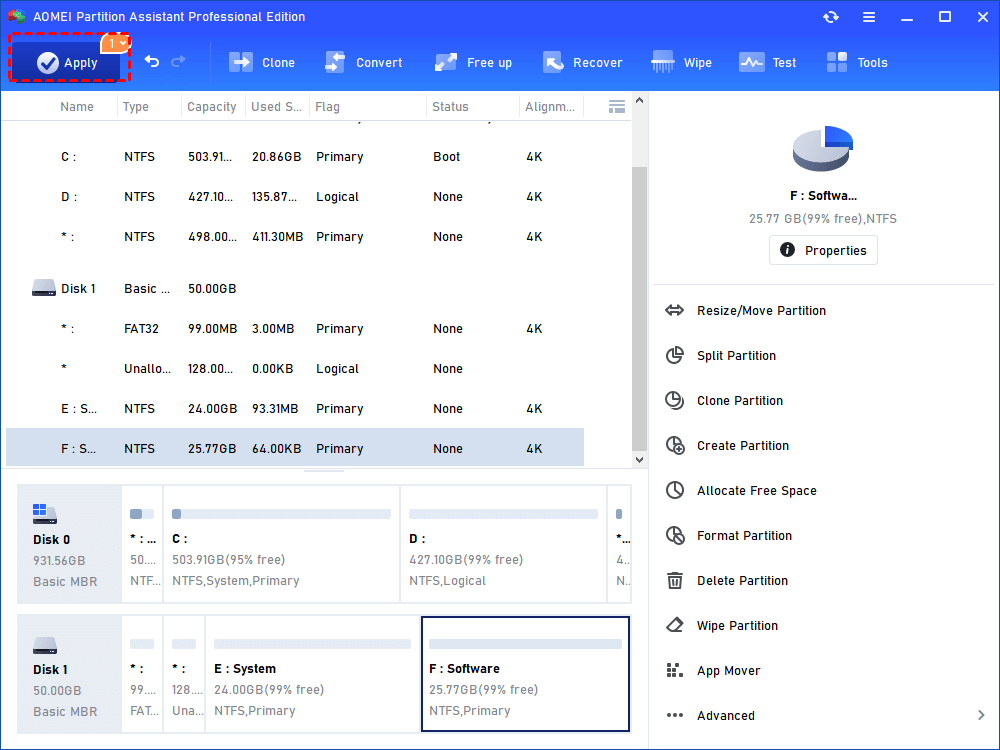
Step 1. Install and launch AOMEI Partition Assistant Professional. Right-click on the target partition and select “Advanced > Convert to NTFS”.
Step 2. Confirm the file system and hit “OK” to proceed.
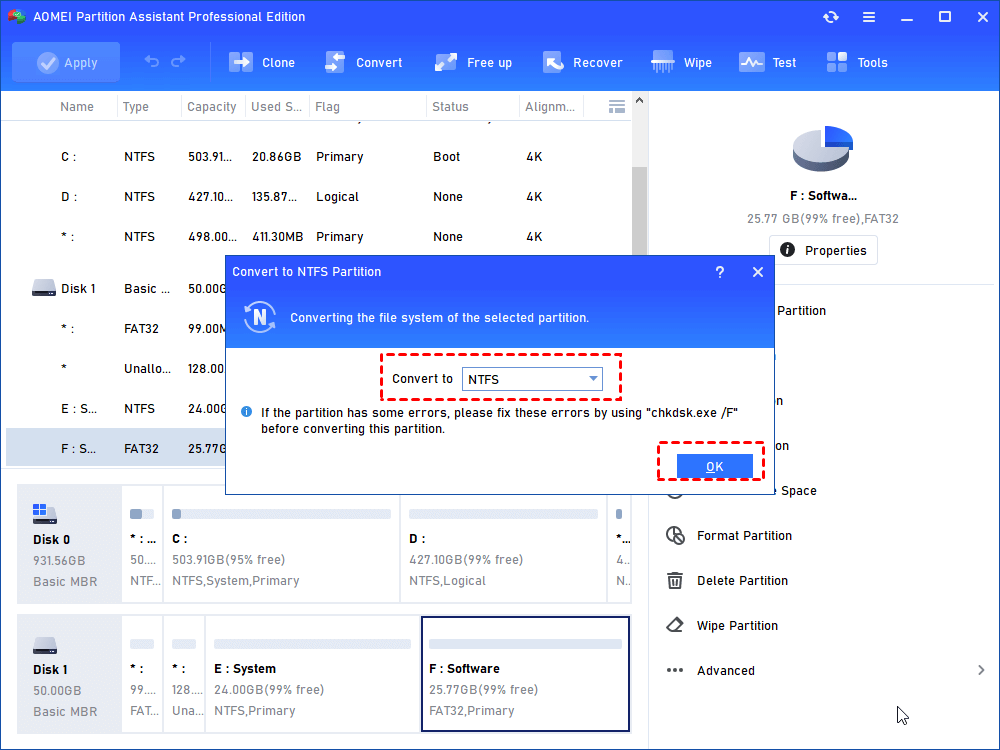
Step 3. Click on “Apply” to start the NTFS conversion.
Further reading: The best solution to “The selected disk is of the GPT partition style”
Sometimes, the error prompt “Windows cannot be installed to this disk. The selected disk is of the GPT partition style” may come along with the error that asks for an NTFS partition.
The cause of it is that the partition style of the boot disk is GPT while the boot mode on the motherboard is Legacy. They don’t match each other. In this case, the best way is still to resort to AOMEI Partition Assistant Professional that’s able to convert a hard disk from GPT to MBR without data loss which is compatible with Legacy.

Conclusion
What to do when the prompt “Windows must be installed a partition formatted as NTFS” appears during Windows installation? After going through the entire post, you’ve got the very answer in mind. Both DiskPart and third-party AOMEI Partition Assistant Professional can help deal with the issue. However, DiskPart changes exFAT/FAT32 to NTFS by reformatting while the AOMEI product changes the file system by conversion. By comparison, the latter one doesn’t cause data loss and is much easier for computing newbies. If you want to use AOMEI Partition Assistant on Servers, remember to try the Server edition.

