FIFA 23 Secure Boot Error: How to Fix It
Troubleshoot the Secure Boot issue preventing you from playing FIFA 23 on your PC.
By Irene / Updated on May 24, 2024
Some people that they encountered a "Secure Boot is not enabled on this machine FIFA 23" problem. This problem will prevent them from playing the FIFA 23 game. Why does this problem occur on Windows 11 PCs? It is well known that Windows 11 must have a UEFI and secure startup. How to run Windows 11 and show this error if you do not enable secure boot. I also searched many forums where users who encountered this problem did not say that they were using a custom version of Windows 11 that could avoid a secure startup.
How to fix FIFA 23 Secure Boot is not enabled on this PC?
To solve the “FIFA 23 Secure Boot is not enabled” issue, you can try the following methods.
Related: 3 Ways to Fix Secure Boot Enabled But Not Active in Windows 11/10
Way 1. Disable and Enable Secure Boot in BIOS
Windows 11 won't let you turn on Secure Boot if you just enabled it in the BIOS and don't have a brand-new motherboard model. This is true even if Secure Boot is enabled in the BIOS. This problem was reported by a user. If this sounds like you, you might run into the "FIFA 23 Secure Boot is not enabled" problem. Then, turning Secure Boot off and on again will fix the problem. This is the guide:
Related: How to Open BIOS in Windows 11/10 in 5 Ways
- Hold down the Shift key and from the Power icon image select Restart to boot your system into Windows Recovery Environment (WinRE).
- Then select Troubleshoot > Advanced options > UEFI Firmware Settings and select Restart to enter the firmware.
- Find the Secure Boot to disable and enable it. In most PCs, it should be under the Security or Boot tab.
- Save and exit from BIOS Settings.
Way 2. Run as Administrator
Running an app as an administrator can fix many small glitches. If the first solution doesn’t work, you can try way. You just need to right-click the FIFA23 executable file > choose Properties > click Compatibility > Check Run this program as an administrator > click OK.
Way 3. Reinstall the Game’s Anti-Cheat
- Right-click on the FIFA application and choose Open file location.
- Click on the installer folder.
- Click on EA anti-cheat.
- Click on the Exe file located here.
- Say yes to the pop-up window.
- Click on the icon and select FIFA 23.
- Click Uninstall.
- Once it is uninstalled close the window.
- Open the game and the anti-cheat will be installed again
You can also reinstall the FIFA 23 game and then check if the issue is removed.
Way 4. Go Back to Windows 10
Windows 11 is the only one that has the "FIFA 23 Secure Boot is not enabled" problem. There is one more thing you can try: going back to Windows 10.
How to go back to Windows 10 from Windows 11?
In order to go back to Windows 10, you'll need to do a "clean install" of the operating system, which means deleting everything on your PC and starting over. Make sure you have a copy of your files before you start.
On your Windows 11 PC, go to Microsoft's Windows 10 download page and look for the "Create Windows 10 Installation Media" option. Then, follow the steps to reinstall Windows 10.
Note: If you have a Windows 10 installation CD/DVD, you can directly install OS.
Step 1. Insert a USB drive into your computer. Download the Windows Media Creation Tool from Microsoft and run it.
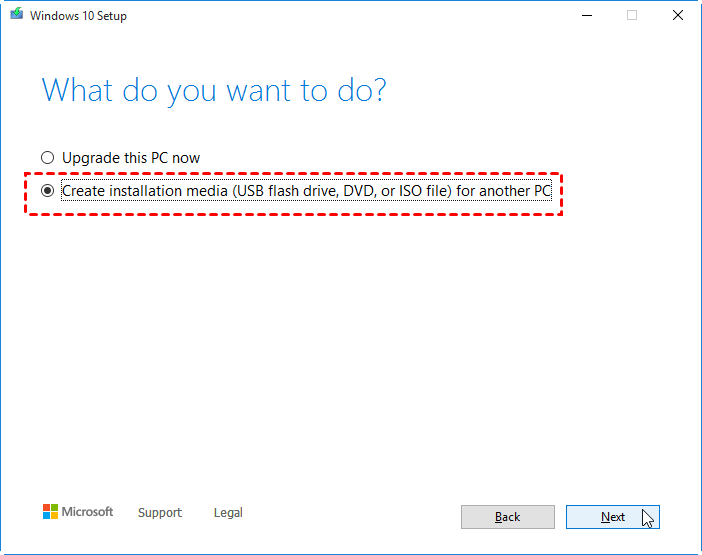
Step 2. Choose “Create installation media” and click “Next”.
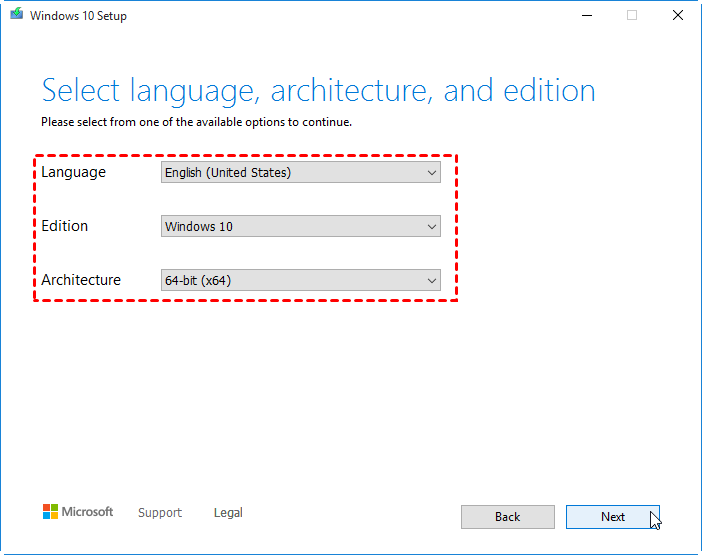
Step 3. Select language, architecture, and edition and click on “Next”.
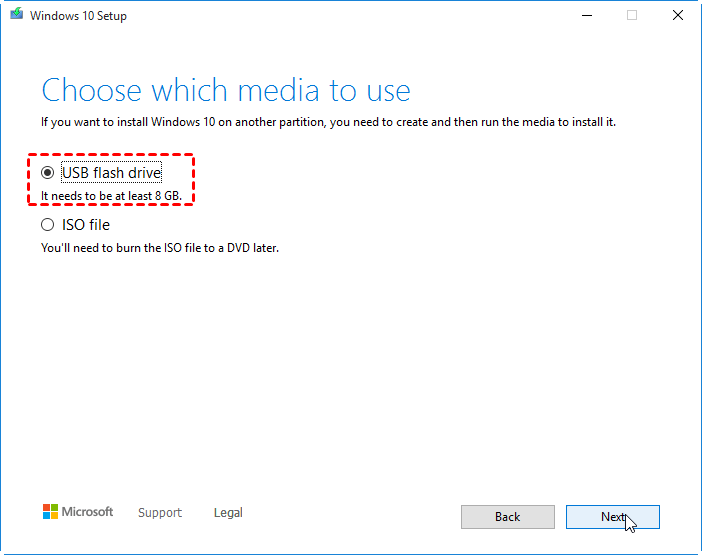
Step 4. Choose “USB flash drive” under “Choose which media to use” and then click “Next”.
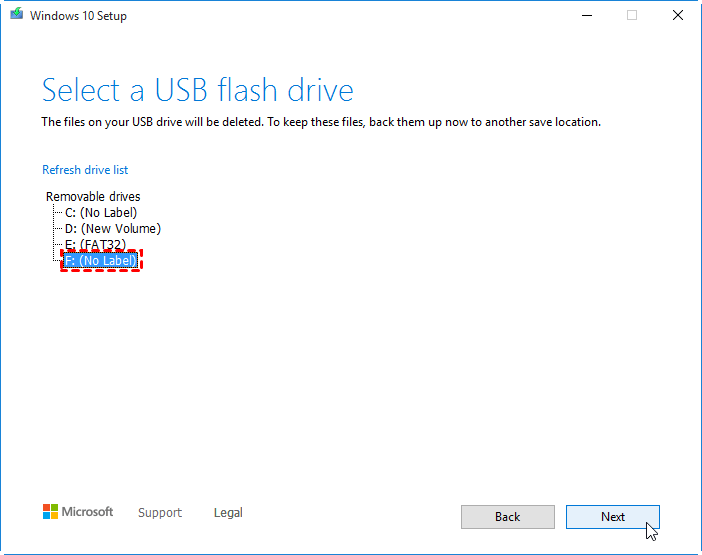
Step 5. Choose the USB drive from “Removable drives” and then click “Next”. Then, wait for the process to complete.
Now the media is ready for you to reinstall.
Step 1. Reboot your computer and press the functional key (typically, the F1, F2, ESC, or DEL key) while restarting the computer to enter the BIOS Setup utility.
Step 2. Go to the Boot menu and set the installation USB or CD/DVD as the first boot device.
Step 3. Save and exit from BIOS. Then, the computer will boot from the USB or CD/DVD.
Once your computer starts again, press any key to start and then click “Install Now” to start Windows Setup.
Step 4. Enter your Windows product key. This is the product that came with the Windows CD. Or you have it in your email when you registered for your Microsoft account.
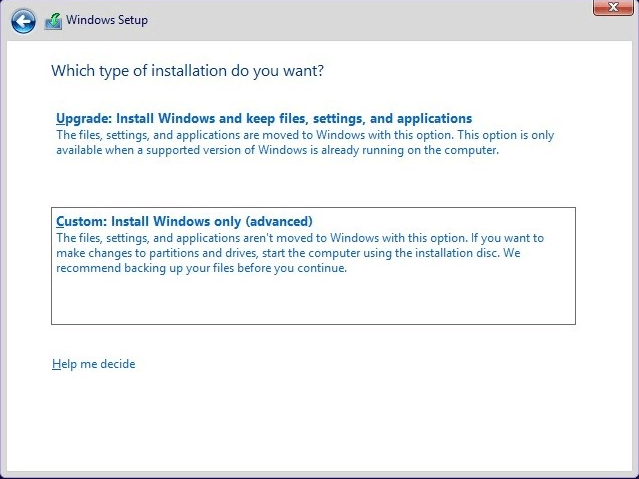
Step 5. Agree to the license terms, click “Next” and choose “Install Windows only”.
Step 6. Then choose a primary drive where you need to install Windows 10 and click “Next”. Wait for Windows 10 to install. Once it’s completed, your PC will reboot again.
Enter BIOS to choose the computer hard drive as the first boot device set your Windows 10 and log in to your computer account. Wait until Windows 10 get settings and start screen ready. Then, you can use Windows 10 on your computer.
An easier way to back to Windows 10 without reinstallation
You can go back to Windows 10 without reinstalling if you don't want to. There is a way to move an OS from one Windows 10 disc to another Windows 10 PC or any other Windows 10 OS that you want to run on your Windows 11 PC. This is called "OS migration."
AOMEI Partition Assistant Professional has the feature called “Migrate OS” which allows users to move one OS from the source disk to another disk to avoid cumbersome steps of reinstallation.
The Best Windows Disk Partition Manager and PC Optimizer
Note: Take out the disk installed on Windows 11, and connect it to a Windows 10 PC. Make sure the connection is steady.
Step 1. Install and launch AOMEI Partition Assistant.
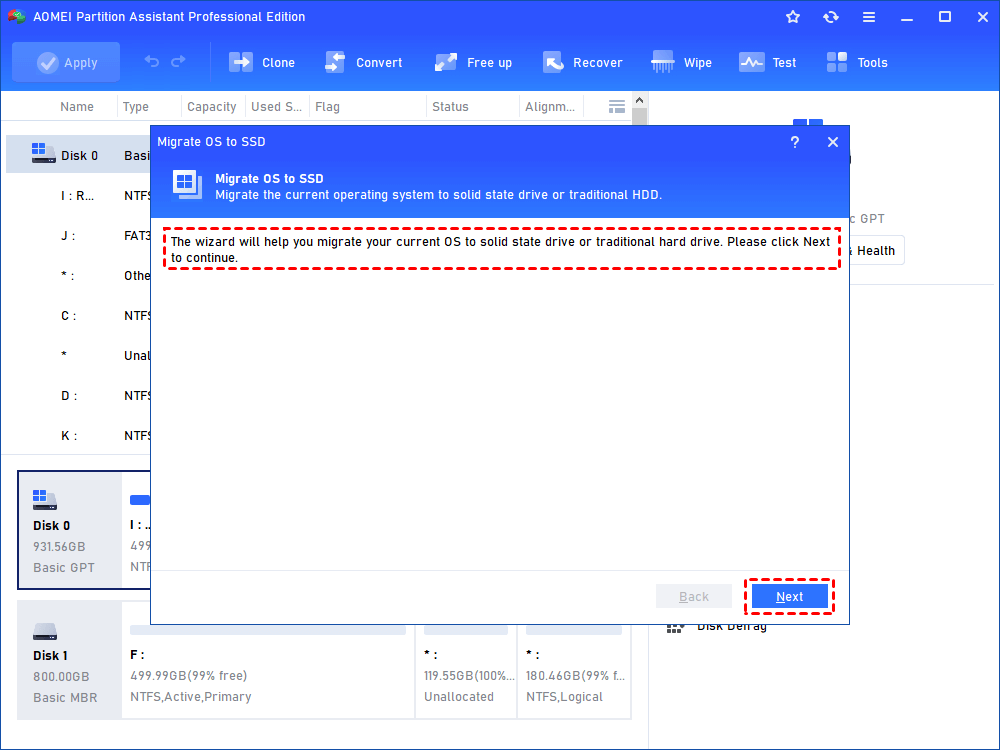
Step 2. In the top menu, select "Clone" and the "Migrate OS" function.
Step 3. In the new pop-up window, please click” Next”
Step 4. Choose an unallocated space on your disk or tick “I want to delete all partitions…”.

Step 5. Now you need to resize the size of the partition, and click” Finish”.

Step 6. Click “Finish” and “Apply” to finish the task.

Then, please turn off your PC, connect the target back to your PC, and boot from it, your Windows 11 PC will be a Windows 10 PC now.
Conclusion
When Windows 11 PCs get the "Secure Boot is not enabled on this machine FIFA 23" error, it can be annoying, especially for gamers who want to play their favourite games. This problem happens because Windows 11 needs UEFI and secure startup to be turned on in order to run some programmes, like FIFA 23. There are, however, a number of ways to fix this issue and get you back to gaming.
Users can get past the Secure Boot error and enjoy playing FIFA 23 on their Windows 11 PC by following the steps in this guide. These steps include turning Secure Boot on and off in the BIOS, running the game as an administrator, reinstalling the anti-cheat software, or even going back to Windows 10.
Using tools like AOMEI Partition Assistant can also make it easier to switch back to Windows 10 without having to reinstall everything. This is a convenient option for people who want to switch operating systems without any problems.
FAQs
-
Why does the "Secure Boot is not enabled on this machine FIFA 23" error occur on Windows 11 PCs?
- This error occurs on Windows 11 PCs because the operating system requires UEFI and secure startup to run certain applications like FIFA 23. Failure to enable Secure Boot can result in compatibility issues with such software.
-
How can I fix the "Secure Boot is not enabled on this PC" error for FIFA 23?
- You can try several methods to fix this error, including disabling and enabling Secure Boot in BIOS, running the game as an administrator, reinstalling the game's anti-cheat software, or reverting back to Windows 10 if necessary.
-
Can I disable and enable Secure Boot in BIOS to resolve the issue?
- Yes, disabling and then enabling Secure Boot in BIOS can often resolve the issue. This process can be done by accessing the BIOS settings, navigating to the Security or Boot tab, and toggling the Secure Boot option.
-
Is there a way to revert back to Windows 10 from Windows 11 without reinstalling?
- Yes, you can use the "Migrate OS" feature in AOMEI Partition Assistant Professional to move Windows 11 from one disk to another, effectively reverting back to Windows 10 without the need for a complete reinstallation.
-
How do I use AOMEI Partition Assistant to migrate back to Windows 10?
- Simply install and launch AOMEI Partition Assistant, select the "Migrate OS" function, choose the target disk or unallocated space, resize the partition if necessary, and apply the changes. Then, boot from the target disk, and your Windows 11 PC will become a Windows 10 PC.

