How to Open BIOS in Windows 11/10 in 5 Ways?
How to open BIOS on Windows 11? The 5 shared methods will guide you easily get to BIOS in Windows 11 with easy tips to effectively manage BIOS settings for Windows 11.
By Irene / Updated on May 6, 2024
The Basic Input/Output System (BIOS) is an important part of any Windows computer. It controls hardware working, like the hard drive, memory, processor, and more. The BIOS is also in charge of loading the operating system files when you turn on your device.
If you want to change important system settings like the date and time, boot device priorities, and security features like passwords and secure boot, you need to open Windows 11 BIOS first. Want to know how to get into Windows 11 BIOS? Most times, you can press specific keys. If it not works, you can use one of the other methods in this passage
Most modern computers use UEFI nowadays instead of BIOS. However, BIOS is still what many people used to name it, so that's what we'll use here. If you want to know how to check if it’s UEFI or BIOS on your PC, you can click it to learn the details.
5 methods to enter BIOS on Windows 11/10
There are 5 easy methods that allow you to access BIOS in Windows 11. You can choose one based on your specific needs.
Way 1. Open BIOS on Windows 11 by pressing specific keys
The easiest and most common method to open BIOS in Windows 11 is to press a certain key on your keyboard when starting your computer. You can also use this method even if the OS doesn't load.

However, you may find the key to enter BIOS on Windows 11 various from manufacturers. Generally, the first screen after booting (with the facturer's logo ) will tell you which BIOS key to press. If not, you can see the other common keys we compile here below:
- Keys of different brands for accessing BIOS Windows 11
- Dell: F2/F12
- HP (Hewlett-Packard): Esc or F10
- Lenovo: F1/ F2, Fn + F2, or Enter followed by F1
- Acer: Del/F2
- Asus: Del/F2/F10
- Microsoft Surface: Press and hold the Volume Up button on the device while pressing the Power button.
- Toshiba/Samsung/Intel/ASRock/Origin PC: Esc, F1, F2, or F12
- MSI/Gigabyte/EVGA/Zotac/BIOStar: Del
Also, you can visit the official website of your computer brand to double-check and get detailed guidance on entering BIOS in Windows 11.
Way 2. Enter BIOS on Windows 11 by Settings
If your Windows 11 is opening, you can use Settings to get to BIOS on Windows 11 without having to restart. This method is also applicable to Windows 10.
Step 1. In Windows 11, on the left side of Settings, click "System". If you are using Windows 10, just enter Settings.
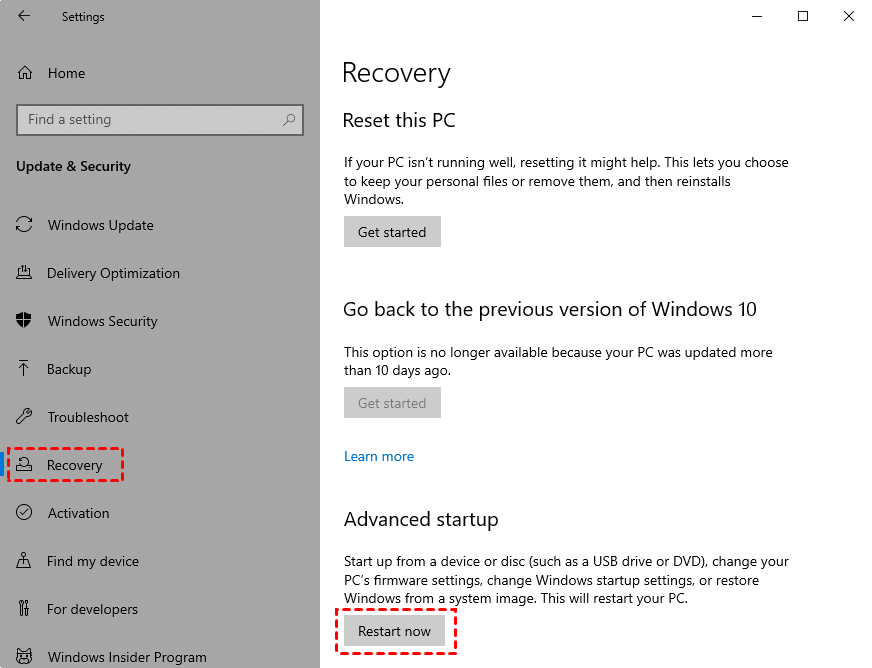
Step 2. In the Settings main window in Windows 11, find "System" page and click "Recovery". In Windows 10, please go to "Update & security".
Step 3. Click on "Recovery" in the left panel, locate "Advanced startup", and click "Restart now".
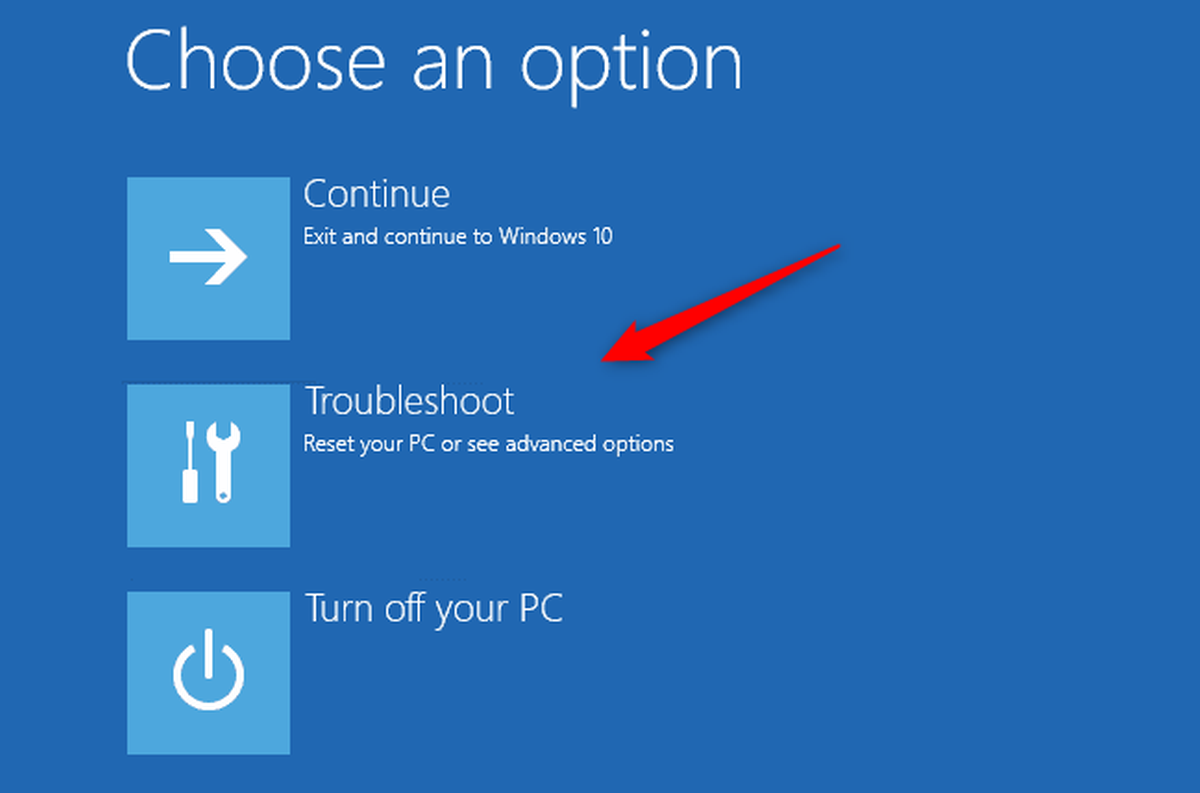
Step 4. Once the boot options window appears, click "Troubleshoot".
Step 5. Choose "Advanced" options.
.png)
Step 6. Click on "UEFI Firmware Settings" from the list.
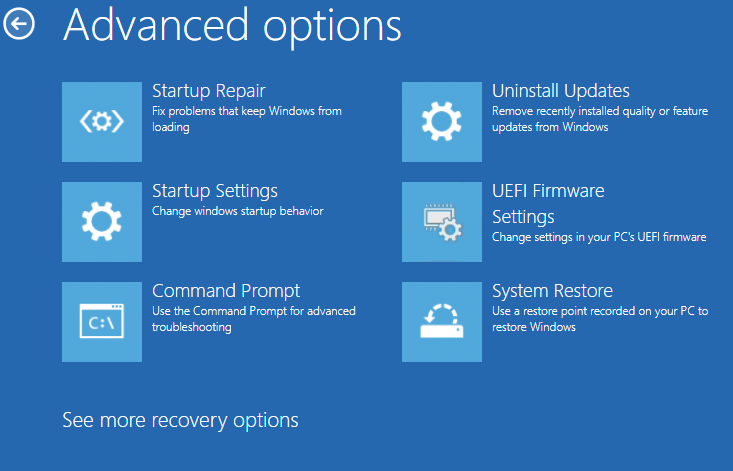
Step 7. Lastly, Opt for "Restart" to access UEFI BIOS. This will present the BIOS setup utility interface, allowing you to modify the BIOS settings.
Way 3. Get to BIOS in Windows 11 by Restart
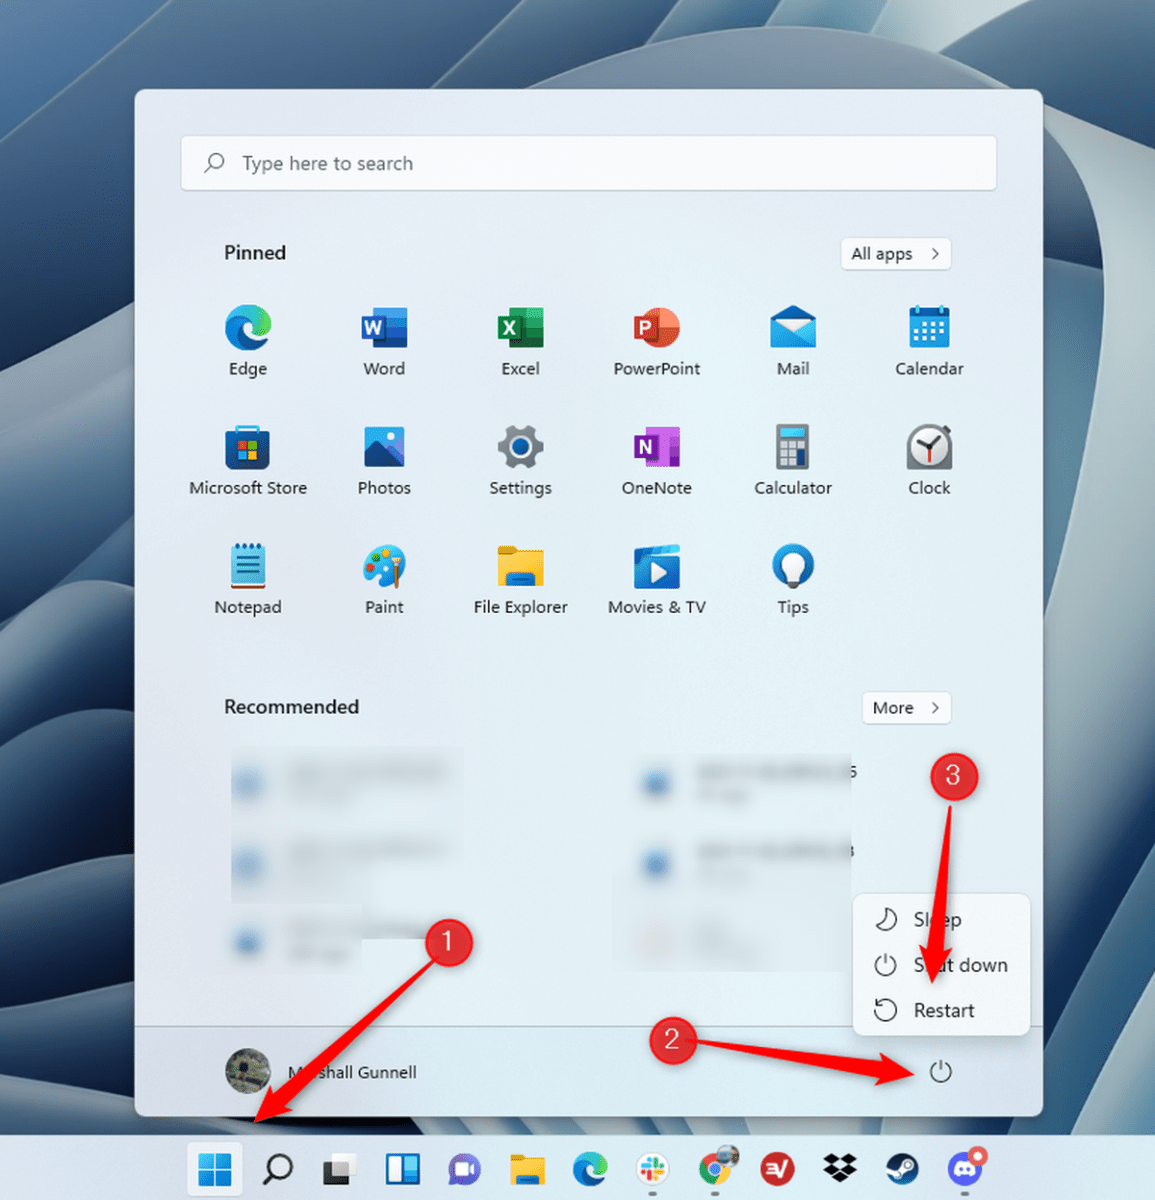
To boot into BIOS in Windows 11, you can get to the Advanced Boot Menu from inside Windows 11, just like you could in Windows 10. Move your mouse over the power icon and click the Start button. Then, hold down Shift and left-click "Restart."
Similar to the above methods, go to Troubleshoot > Advanced Options > UEFI Firmware Settings in the Advanced Boot Menu. Then, click "Restart" once more. The BIOS will load on your PC. After you finish making all the changes you want, your PC will restart normally.
Way 4. Open BIOS on Windows 11 in Windows Terminal
By inputting specific commands by PowerShell or Command Prompt utility, you can access BIOS in Windows 11.
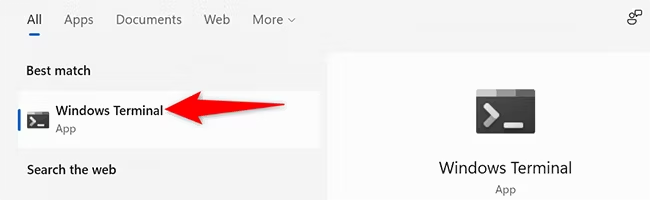
Step 1. Access the "Start" menu and search for "Windows Terminal". then click the app in the search results.
Step 2. In Windows Terminal, input the following command and press Enter; this command functions in both PowerShell and Command Prompt shells.
shutdown /r /o /f /t 00
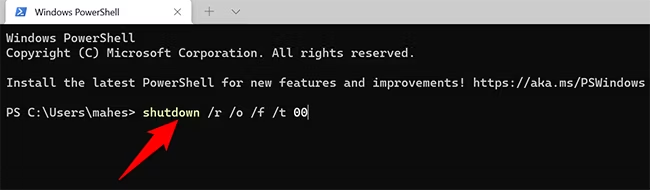
This command is also suitable for create a shortcut on your desktop that allows yout to directly enter BIOS settings in Windows 11.
Step 3. Upon reaching the "Choose an Option" screen, navigate to Troubleshoot > Advanced Options > UEFI Firmware Settings, and click "Restart". Your PC will then enter the BIOS mode.
Way 5. Easily enter BIOS on Windows 11 with AOMEI Partition Assistant
AOMEI Partition Assistant Professional can offer you more advanced and complete solution. Firstly, it doesn't limit brands. no matter what brand of computer you have, like Dell, HP, Lenovo, ASUS, etc., it makes it easy to open BIOS in Windows 11/10/8/7 or manage your boot device.
In addition, it has seven other powerful features that you can use to manage hard drive partitions and fix the Windows Boot Manager error under WinPE. This includes partitions and boot settings. Even if you encounter Windows Boot Manager missing from BIOS, it can help you easily troubleshoot.
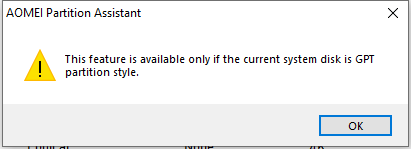
Step 1. Install AOMEI Partition Assistant, click “Tools” in the top menu, and choose the "UEFI BIOS Boot Options Manager” function.

If your system drive is an MBR one, after you click the tool you will get a message that the feature is available only if the current system disk is GPT partition type. At this time, you can also use AOMEI to convert MBR to GPT without data loss.
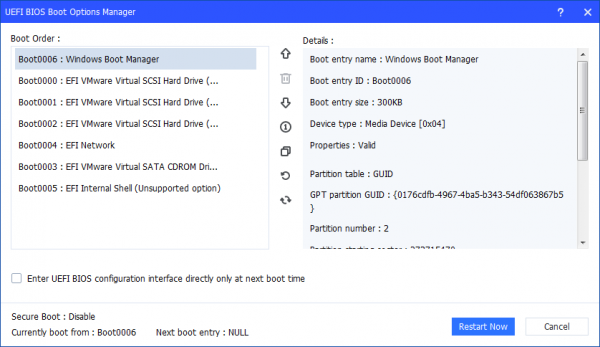
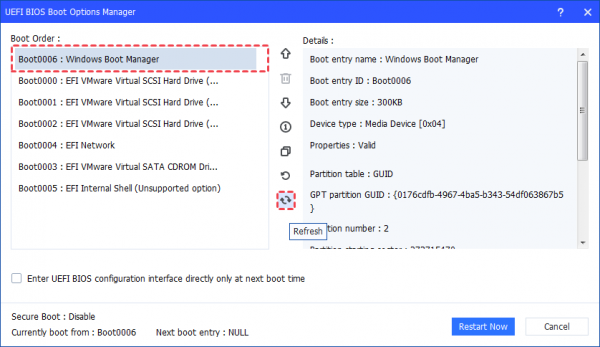
On a GPT drive, the UEFI Boot Options Manager will pop up. In this interface, all UEFI boot orders on your computer will be displayed and you can manage them.
Further reading: How to use AOMEI software to effectively manage BIOS Settings for Windows 11
You can quickly and easily delete, back up, restore, and refresh your EFI/UEFI BIOS Boot Options, as well as change the boot order, without having to go into the BIOS and change startup entries one by one. It will save you a lot of time and data by making it easy to change the boot options. You can also fix error like "Can’t open BIOS Windows Boot Manager Windows failed to start", "Windows 10 only boot if I select Windows Boot Manager from BIOS Boot options", and so on.
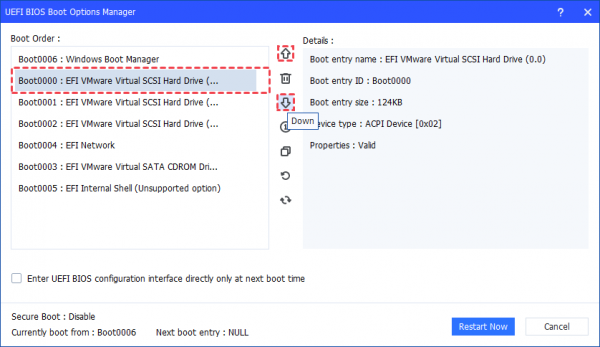
1. How to change boot options
Click a boot option and click the button up and down to change the boot sequence of your computers.
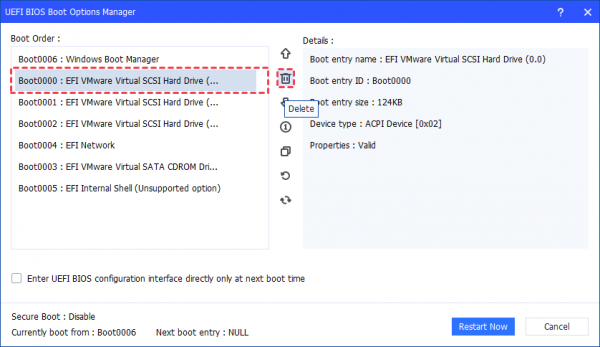
2. How to delete boot options
Click a boot option that is not available or unnecessary to delete the boot option. Please be cautious before you delete a boot option. For system boot and security, it will be unable to delete the current boot option.
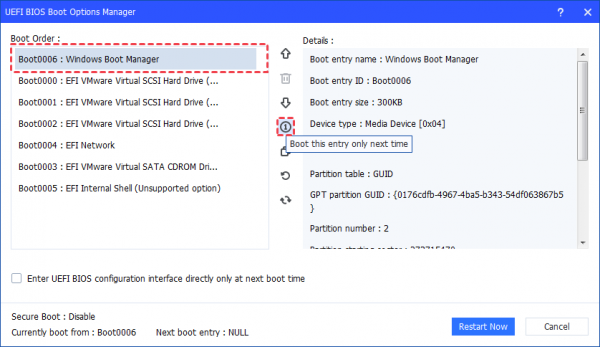
3. How to enable one-time boot entry
Click a boot option and click the button to enable a one-time boot entry. Once you click the option, the computer will boot from this entry only the next time the system startup. After the PC boots from the entry once, the PC will boot from the defaulted first entry.
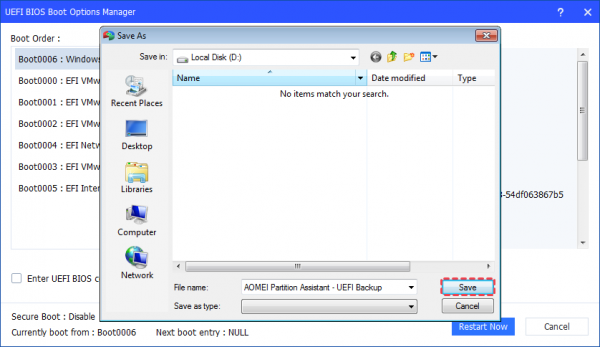
4. How to backup boot options
Click the boot option you want to backup to make a backup so that you can recover if necessary.
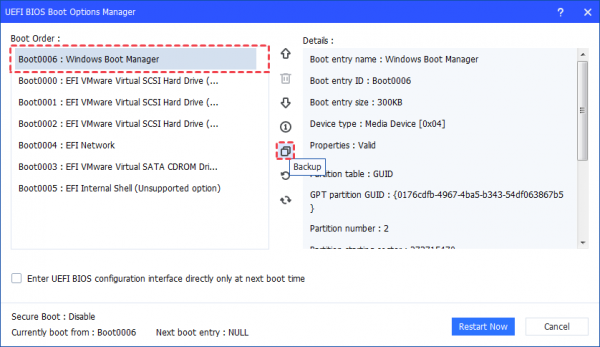
Select a location on your PC and click "Save" to save the backup.
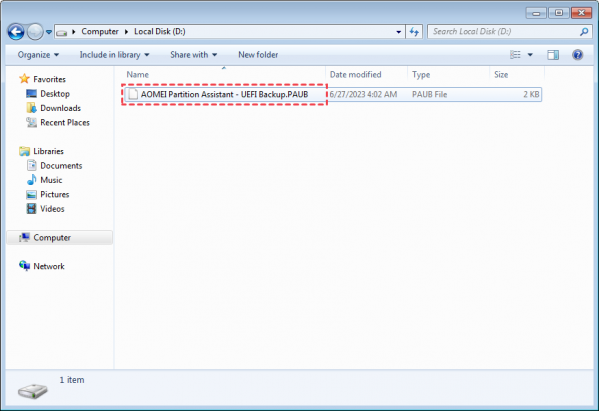
Then the backup will create a .PAUB file.
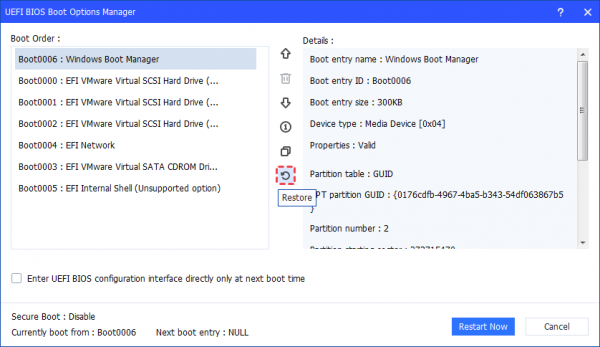
5. How to Restore Boot Options
Click to restore the boot option you just backed up if the partition or boot files get lost or corrupted.
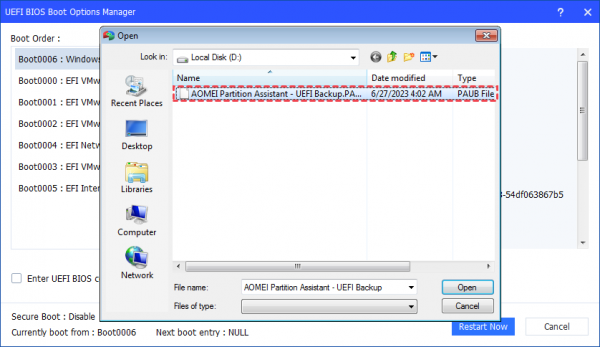
Locate the .PAUB FILE you backed up and select it to restore.
If you have a backup of your boot entries with Partition Assistant and your system cannot boot, you can also create a bootable media with Partition Assistant and restore the boot entries under WinPE.
6. How to refresh boot options
Click the button to refresh the boot options. The "Refresh" button does not mean reset. If you have modified the boot options, the button does not help to reset the boot options.
7. How to boot into UEFI BIOS Boot Options one-time
Please just click the option "Enter UEFI BIOS configuration interface directly only at next boot time".

If you tick this option, the computer will directly boot into the UEFI BIOS configuration interface at the next boot time. After the option is executed once, your computer will still boot from the defaulted first entry.
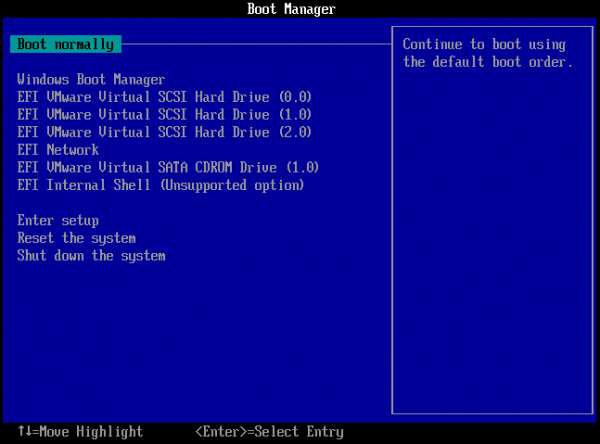
There is no need to press any hotkey during the next system boot, for example, DEL or F12. In this way, the UEFI BIOS Boot Manager will be launched so that you can easily change boot sequence or configure other BIOS settings.
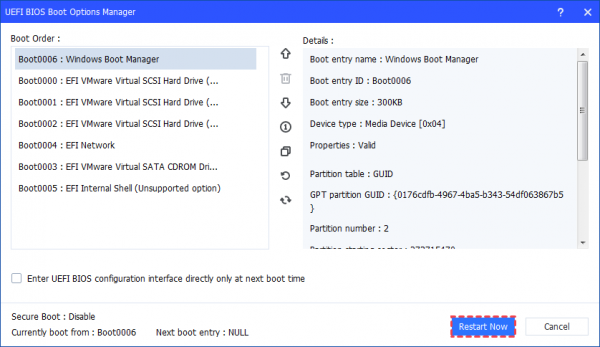
After you manage the boot options, you can click the "Restart Now" button to restart your computer immediately if needed.
Conclusion
The 5 methods tell you how to open BIOS in Windows 11. With AOMEI Partition Assistant, you can even know how to effectively manage BIOS settings for Windows 11/10/8/7. About this powerful tool, it is recommended to use it for disk expansion, partition management, or upgrade disk with OS migration or disk clone. For Windows Server users, it offers the Server edition.

