How to Make GPT Hard Drive Bootable
If you want to make GPT hard drive bootable, you can use CMD via complex commands or try a user-friendly disk manager do a fast job.
By Lucas / Updated on May 12, 2025
It’s quite thrilling when you have a new hard disk with sufficient capacity to store all your files, working programs, and large video games. Once it gets set, it might improve your computer to a new level. As the newest OS on Windows PC, Windows 11 has been updated several times since it's been released. In the requirement list, GPT partitioned disk is a necessary point.
GPT partition style can support big storage space disk which makes it preferred by lots of tech enthusiasts. What’s more, when an SSD with the combination of UEFI boot mode, the GPT partition style might bring faster speed and better performance to the computer, so, many users would like to choose the GPT disk as the bootable disk.
In this post we’ll show you how to make a GPT hard drive bootable, let’s take a look.
How to make GPT hard drive bootable
We’ll introduce 2 ways to make GPT disk bootable. The first method is to use CMD-Diskpart set boot partition GPT, and the second way is a convenient tool to conveniently and quickly set your disk up.
Method 1: Make a hard drive bootable via CMD
Connect your brand-new disk or an old disk without the necessary data you need, because CMD will erase all things on the disk including partitions. You can make a backup if there are files and data you wish to keep.
Step 1. Connect the target disk to your computer and make sure it can be detected.
Step 2. Type “cmd” in the search box and choose “Run as administrator”.
Step 3. Now you need to type the following orders one by one and press “Enter” after each:
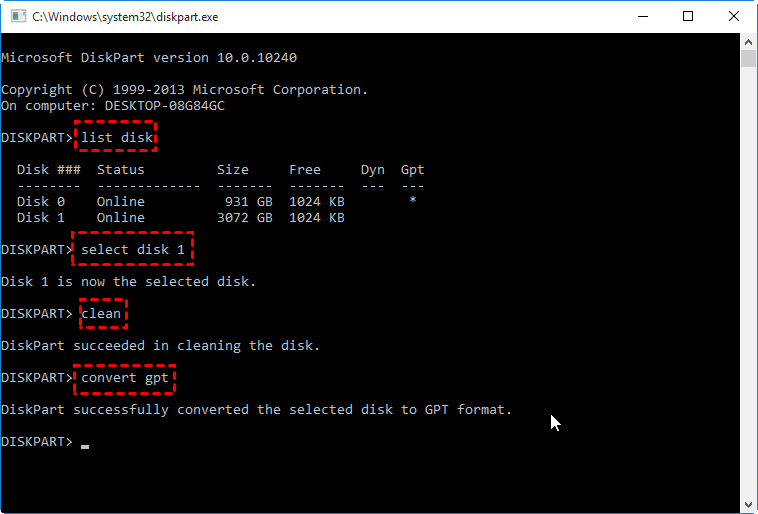
• diskpart
• list disk
• select disk x
• clean
• convert gpt (After this order is executed, your disk will become a GPT disk)
Next, we need to create an EFI partition and primary partition:
• create partition efi size= xxx (set a size)
• format quick fs=fat32
• create partition primary
• format quick fs=ntfs
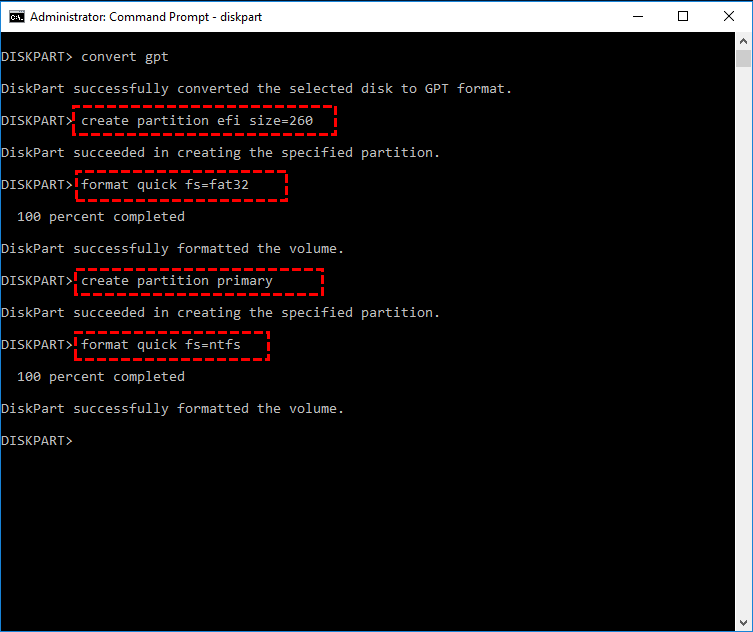
Then this disk is ready to install a new system.
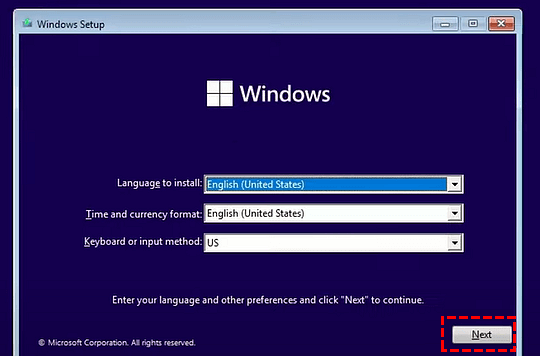
Step 1. Insert a Windows installation media, and boot your computer from this media.
Step 2. Then you can see Windows Set up window. Select the language, location, and others.
Step 3. Click “I don’t have a product key”.
Step 4. Choose “Custom: Install Windows only (advanced).” In the “Where do you want to install Windows” screen, choose the drive we created before and click “Next” to start the Windows installation process.

Then restart your PC. Press F2/F12/DEL to enter BIOS change the boot order and set it to boot from the target disk.
Method 2: Make GPT disk bootable via A handy disk tool
Our second method is using a reliable disk manager called AOMEI Partition Assistant Professional. Why do we recommend this tool? You must find out that the first method asks you to create an EFI partition manually and format it. During this process, there might be errors to stop the operation. And you need to install the system on the bootable disk, you might meet new problems in this procedure. AOMEI Partition Assistant will arrange everything you’re worried about.
If your current system disk is an MBR, you can directly migrate the OS to a GPT disk to make a GPT OS disk, the software can automatically create an EFI partition and MSR partition to ensure the target disk could be bootable. And the migration won’t damage any data, so it’s data safe.
• The target GPT disk is empty with no partitions and data on it, otherwise, you need to delete all partitions on it
• Because the target disk is a GPT disk, make sure your motherboard supports EFI or UEFI boot.
Now, let’s try this handy tool to make GPT disk bootable.
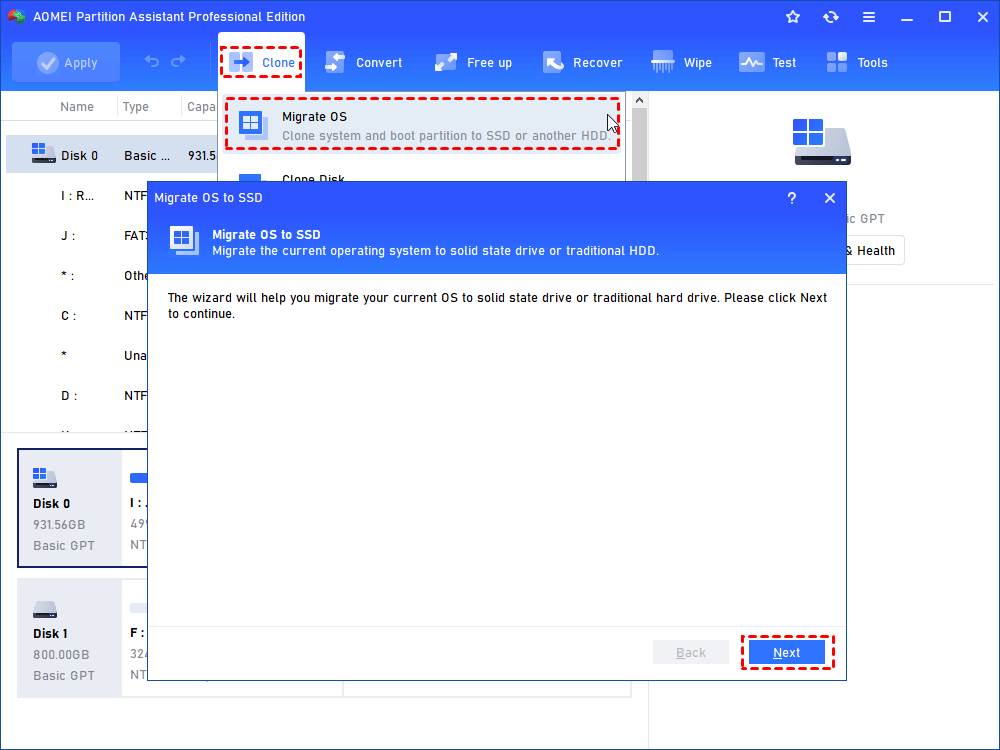
Step 1. Connect the disk to your computer. Install and run AOMEI Partition Assistant Professional. Click "Clone" > “Migrate OS” in the toolbar and click “Next”.
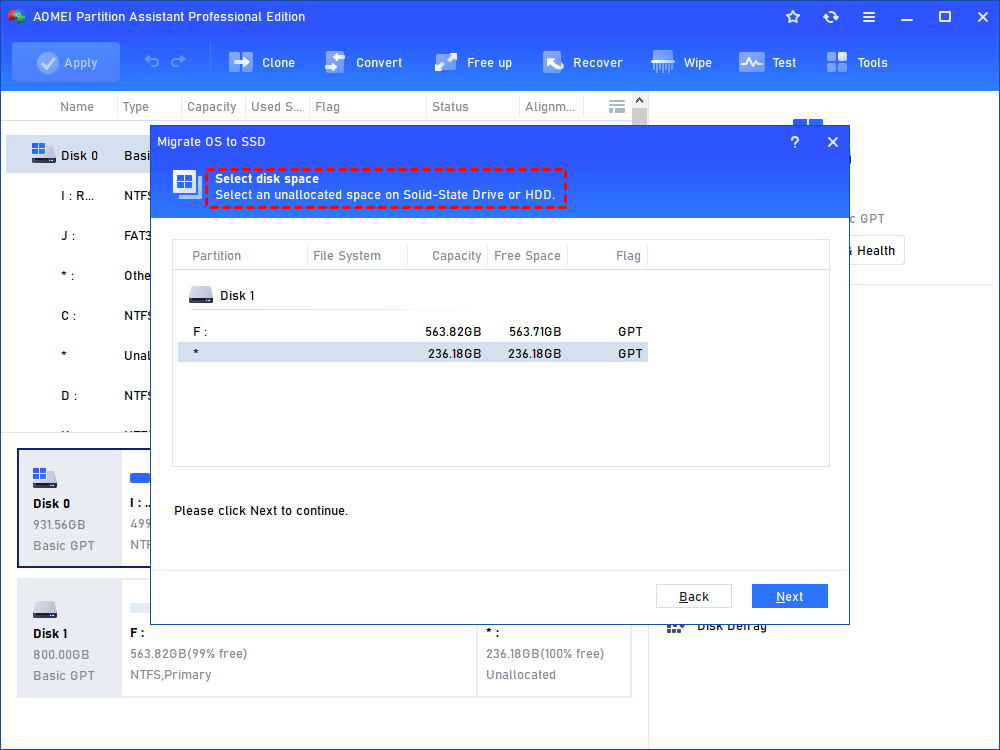
Step 2. Then, you need to select an unallocated space on the destination disk. Here is the GPT disk you connected to your computer before. Click “Next”.
Step 3. Now you can modify the size, location, and drive letter of the partition on the new disk. Click “Next”.

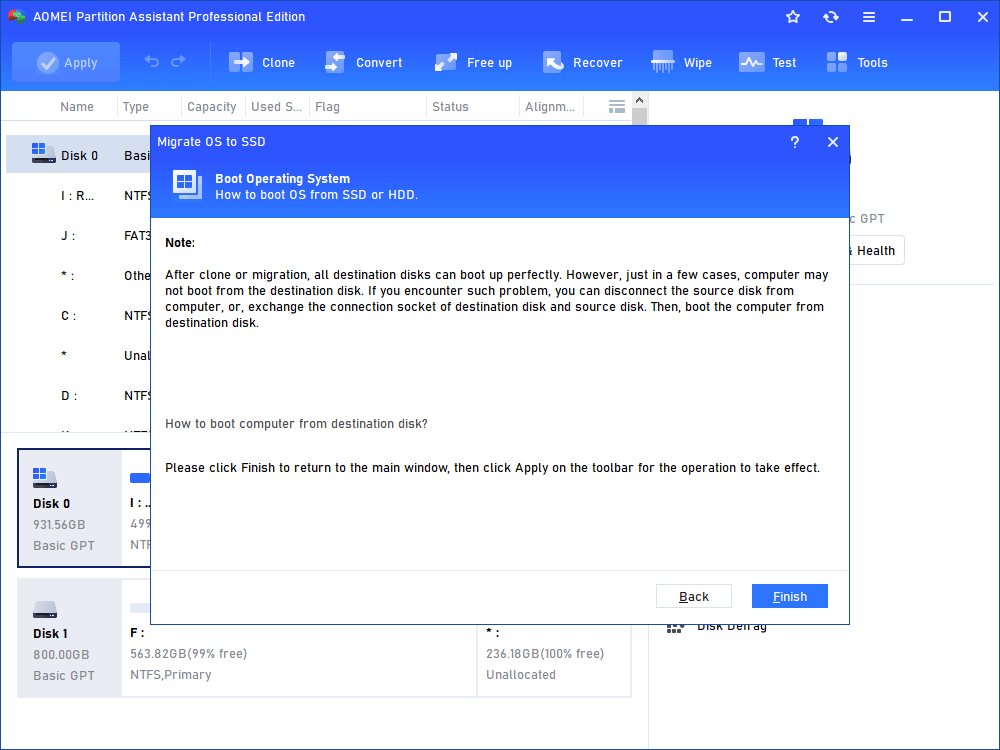
Step 4. You will move to windows which gives you a note on how to boot OS from the target disk. Read it and remember it, click “Finish”.
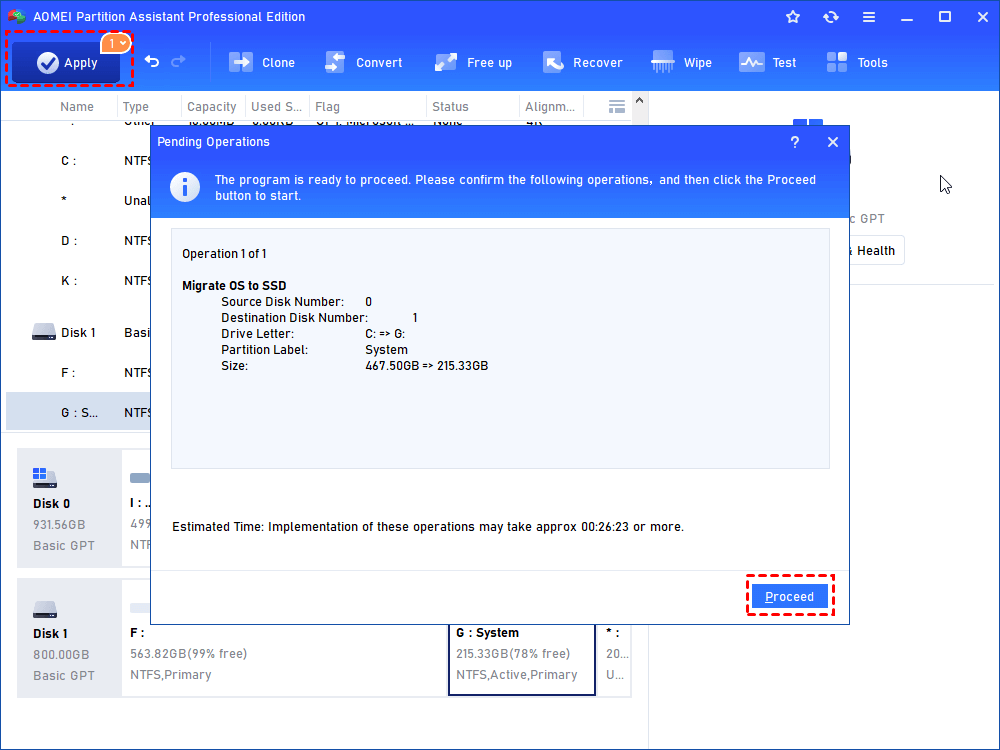
Step 5. When you back to the main interface of AOMEI Partition Assistant, you can preview the operations in “Pending Operations”. If there is no problem, click “Apply” to submit all.
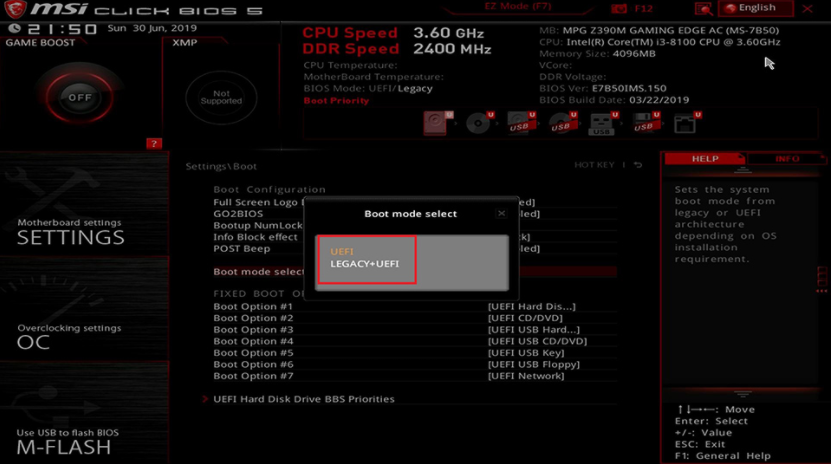
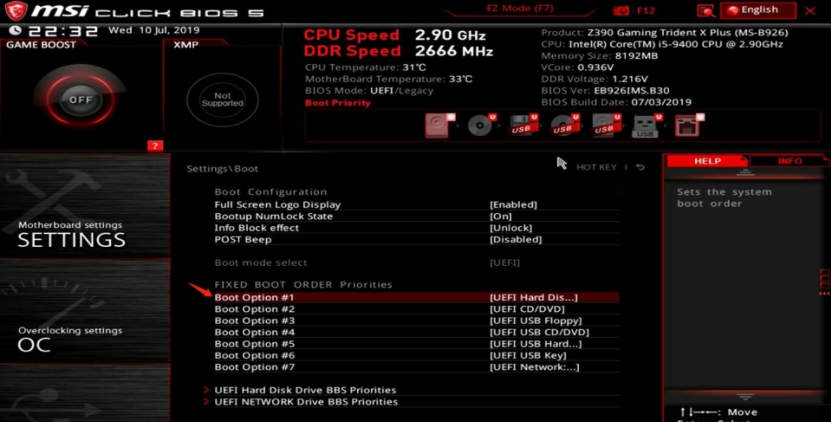
Step 6. Now you can go to BIOS to set the boot settings to boot your PC from this GPT hard drive:
If the original boot disk is an MBR disk, you need to change the boot mode to UEFI and set the GPT disk as the first boot disk.
If the original disk is a GPT disk, you just need to change the boot order.
After all is settled down, you can use your GPT disk to boot your computer.
Bonus tips
These are all details you need to know about how to make a GPT hard drive bootable. If you wish to avoid the complex operation of CMD, then AOMEI Partition Assistant will be a wonderful alternative to make internal hard drives bootable. In addition, if you want to make an external disk bootable, you can also trust this tool, or you might need a bootable USB to run your Windows on any PC.
With AOMEI Partition Assistant, you can do these all in simple ways. By the way, there are many practical features in AOMEI Partition Assistant such as “Convert to GPT/MBR”, “Allocate free space”, and “Convert to NTFS/FAT32”… You can find many useful small tools in this convenient program.

