Fixed: Cannot Extend Volume Blocked by a Recovery Partition on Windows 10
You try to extend a volume but get blocked by a recovery partition on Windows 10? How to fix the problem and successfully enlarge a volume? In this post, you’ll learn several practical tools and methods to get it done.
By Lucas / Updated on July 26, 2024
How to extend the Windows 10 partition when the recovery one is in the way?
“I’d like to extend the C drive with unallocated space but the 946MB recovery partition is in the way. Is there a way to swap the recovery partition with the unallocated space so that the unallocated space and the boot drive get contiguous? Or can I just delete the recovery partition once and for all?”
Overview of partition extension blocked by a recovery partition on Windows 10
When we first initialize a hard disk and partition it on Windows 10, there should be pretty enough space on every partition. However, over time, the storage space on each partition will definitely shrink. Thus, extending the volumes with unallocated space with the help of the Windows 10 built-in program Disk Management is a pretty good idea since it provides the feature of volume extension. However, sometimes, people complain that the option “Extend Volume” is greyed out because a recovery partition is in the way of the volume and the unallocated space.
A recovery partition is a partition on a hard disk that helps to restore the factory settings of the operating system in case of any system failure. A system recovery partition has no drive letter either. The recovery partition has 2 varieties:
1) The first one is the most well-known and widespread which is installed with the OS on a GPT disk and occupies a negligible amount of storage space.
2) The second one is set by the PC manufacturer which occupies a significant amount of disk space and this sort of recovery partition is also called the OEM section.
Because recovery partition can provide repair when PC cannot boot normally, it normally is near to C drive. But, in Disk Management, a volume can be extended only when there’s a piece of unallocated space to its right. Thus, if any other partitions are standing in the way, then, the volume extension cannot be performed.

How to extend a volume with unallocated space when a recovery partition is in the way?
Volume extension might be blocked by a recovery partition on Windows 10. So, how to resolve this issue? Here are 2 recommended ways that can help you out.
Method 1. Delete the recovery partition to extend volume with new space
The recovery partition can be deleted without affecting the normal work of Windows if it’s in the way of the volume you want to extend and unallocated space. But in case of any system glitches in the future that may ask for a factory reset, you’d better make a backup of it first.
Disk Management doesn’t help delete a recovery partition but another Windows built-in tool – DiskPart – does.
Step 1. In the search box on the lower left of the desktop, type “cmd”.
Step 2. Select “Run as administrator”.
Step 3. In the Command Prompt window, type “diskpart” and hit “ENTER” to launch DiskPart.4
Step 4. Input the following commands and hit “ENTER” after each of them one by one:
list disk
select disk *
list partition
select partition *
delete partition override
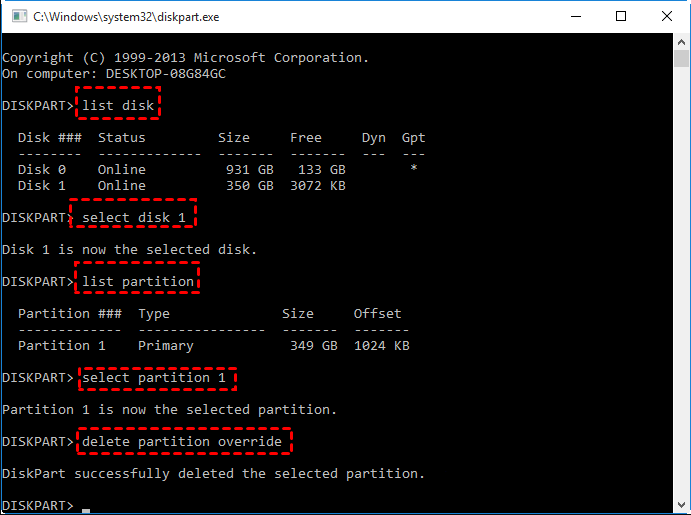
Wait several seconds before the recovery partition gets deleted.
Method 2. Fix 'cannot extend volume because of recovery partition' via third-party tool
If you don’t want to delete the recovery partition or you’re not used to command lines, then, here, you can choose an alternative – AOMEI Partition Assistant Standard – to help move the recovery partition to make it contiguous to the unallocated space or directly merge the volume with the unallocated space. More than these 2 features, the AOMEI product supports partition format, partition deletion, and partition clone as well.
Part 1. Move the recovery partition to extend system partition
Before proceeding, you should download AOMEI Partition Assistant Standard first.
Step 1. Install, launch AOMEI Partition Assistant Standard, and wait until all disks and partitions appear.
Step 2. Select, right-click on the recovery partition, and select “Resize/Move Partition”.
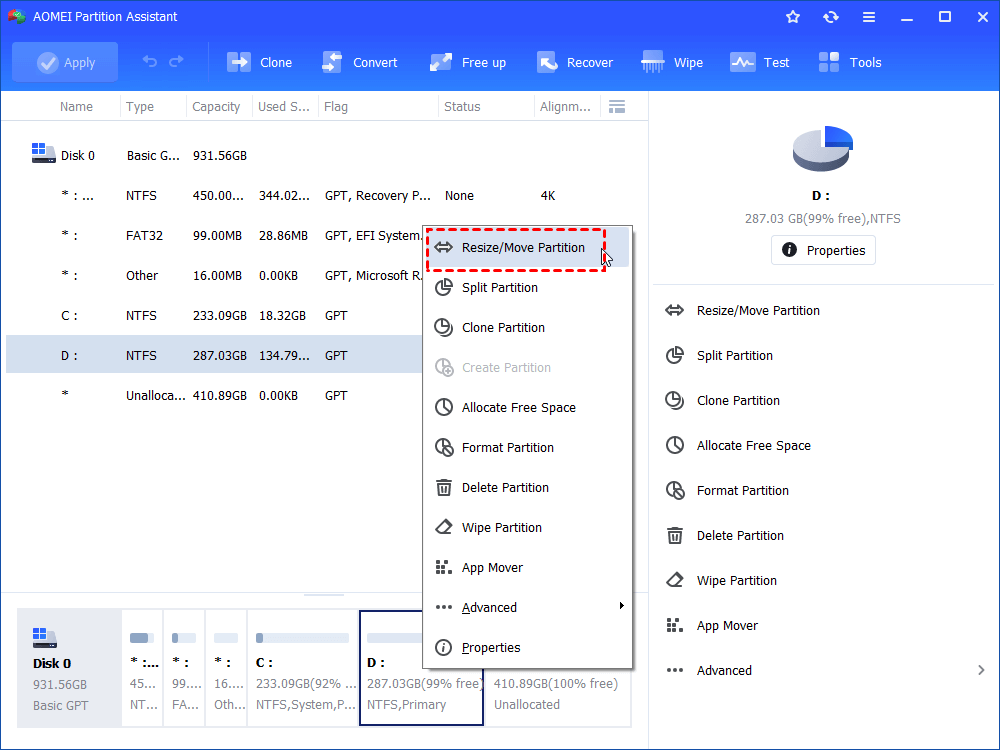
Step 3. Select the partition and drag it rightwards until the end. Then, hit “OK”.

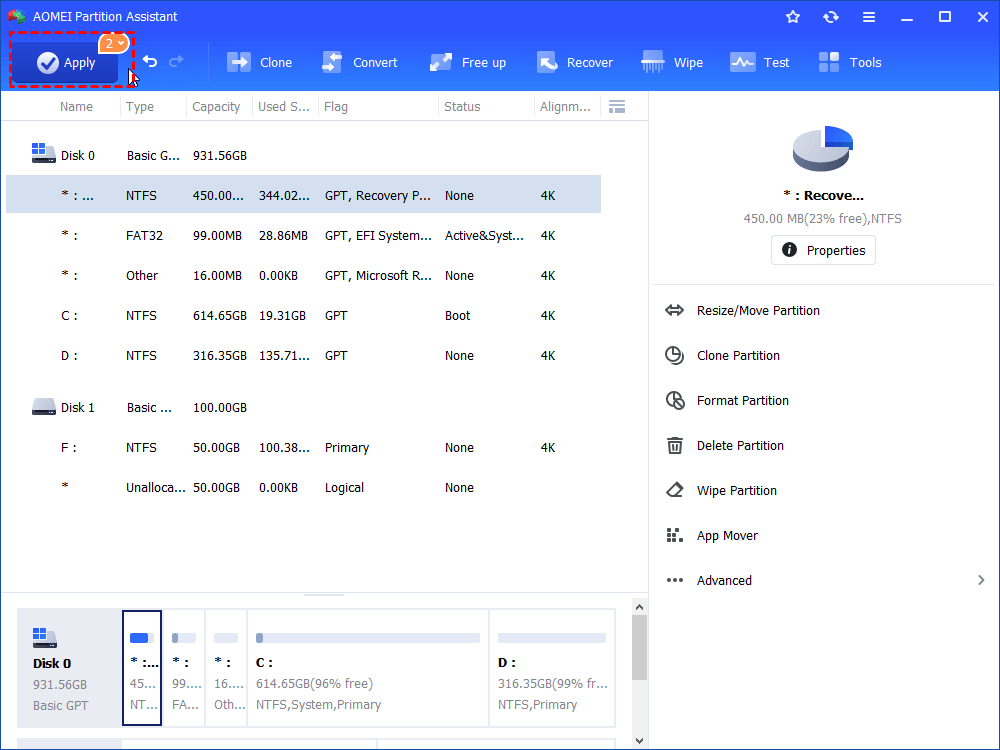
Step 4. Hit “Apply” on the upper left of the home interface to commit the operation.
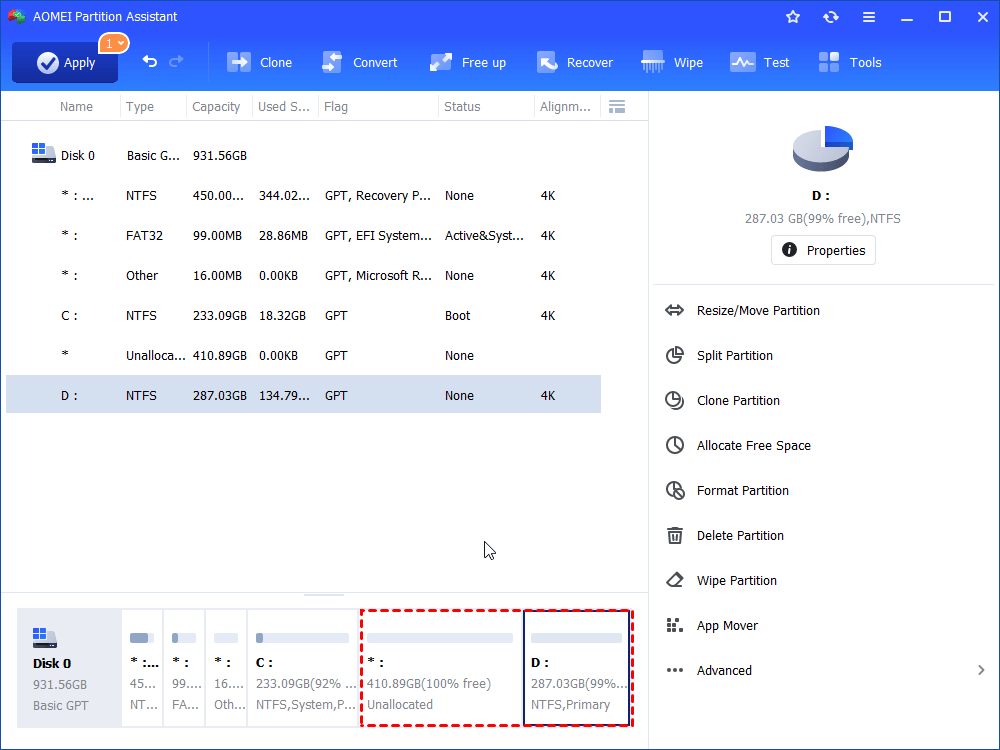
Step 5. After it’s done, you can open Disk Management and extend the volume with the unallocated space.
Part 2. Merge the volume with the unallocated space
In Part 1, after making the target volume and the unallocated space contiguous, you have to apply Disk Management again. If you think it’s still complex, you might as well try another feature – “Merge Partitions” – to combine the source volume with unallocated space regardless of their positions.
Step 1. Still, install and launch AOMEI Partition Assistant Standard.
Step 2. Select and right-click on the source volume, choose “Advanced” and select“Merge Partitions”.

Step 3. Tick both the volume and the unallocated space and hit “OK”.
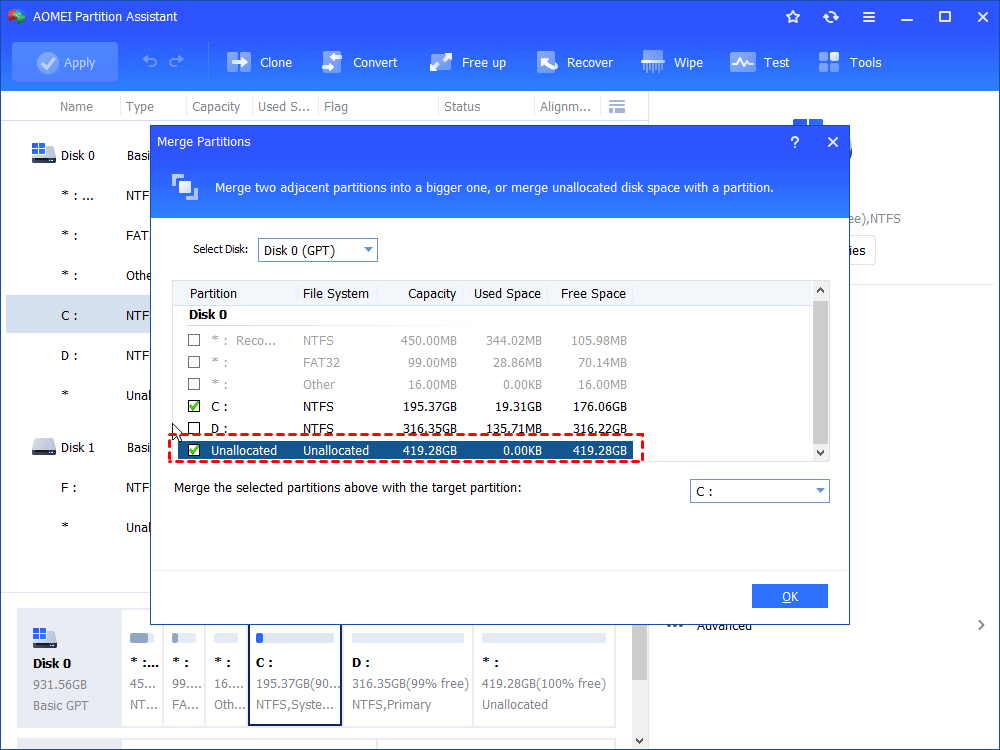
Step 4. Hit “Apply” to commit the operation.
To extend a volume, you can also upgrade AOMEI Partition Assistant Standard to the Pro edition and try the feature of “free space allocation” to allocate free space from other partitions to the source volume.

Conclusion
If you can’t extend a volume because you’re blocked by a recovery partition on Windows 10, then, in this post, several practical methods are provided. You can delete the recovery partition by using Disk Management. If it’s not satisfactory enough, try another more powerful tool AOMEI Partition Assistant Standard to move the recovery partition and put the source volume and the unallocated space together or merge them with each other; or you can apply free space allocation to directly allocate free space to the source drive from other partitions. Moreover, AOMEI software allows you to resize encrypted partitions. To use this feature on Servers, you can try the Server edition.

