How to Migrate Windows Server 2003 to SSD?
Here is a guide on migrating Windows Server 2003 to SSD with Server partition manager. Share the knowledge of how to migrate Windows Server 2003 to SSD without loss data.
By Lucas / Updated on December 4, 2024
Why migrate Windows Server 2003 to SSD?
SSD is the abbreviation of a solid-state drive. It can also be called an electronic disk, which uses flash memory as a storage medium. Compared with the traditional disk, the speed of reading and writing for SSD is faster. The data can also be stored in SSD even if it’s powered off. Because of its small size, it is portable and less vulnerable to external shock.
Besides, it makes no noise while working and can run under a wide range of temperatures. It’s suitable for containing the operating system.
And in a Server environment, this can contribute to lower energy costs and a smaller environmental footprint. What's more, modern SSDs can outlast traditional HDDs, especially when used in Server environments.
As is known to all, OS cannot be moved directly by copy or paste, So cloning OS is extremely complicated. For many Server users, it may lead to data loss. Here comes a question: Is it possible to migrate Windows Server 2003 to SSD with safety?
How to migrate Windows 2003 to SSD without data loss
Of course, you may undertake a fresh Windows Server installation to relocate it on the SSD. But isn't it tedious and time-consuming? As a result, it would be preferable if you could transfer the operating system and apps from the present HDD to the new SSD without reloading everything from scratch. If you are a computer user with sufficient understanding, you may be able to migrate to Windows 2003 with Disk Management.
Server partition manager- AOMEI Partition Assistant Server can be a good choice. Migrating Windows Server 2003 to SSD is its update. This tool utilizes the hot clone method which allows you to run your OS when the migration is working, so you don't need to halt your work during the procedure.
Besides, you can conveniently adjust your disks via various handy functions, such as, resize/ move/ split partition, move installed apps to a second disk, test disk speed, etc. It works on Windows Server 2012 (R2), 2016, 2019, 2022, and the newest Server 2025.
▶Make sure your destination SSD or HDD has an unallocated space that is equal to or larger than the used space of the current OS partition.
▶If there is no unallocated space on the destination disk, you can delete a useless partition or shrink a large partition to generate some unallocated space.
▶If you would like to migrate OS from MBR disk to GPT disk, make sure your motherboard supports EFI or UEFI boot. If not, you can convert the SSD to MBR (same as the source disk) in advance.
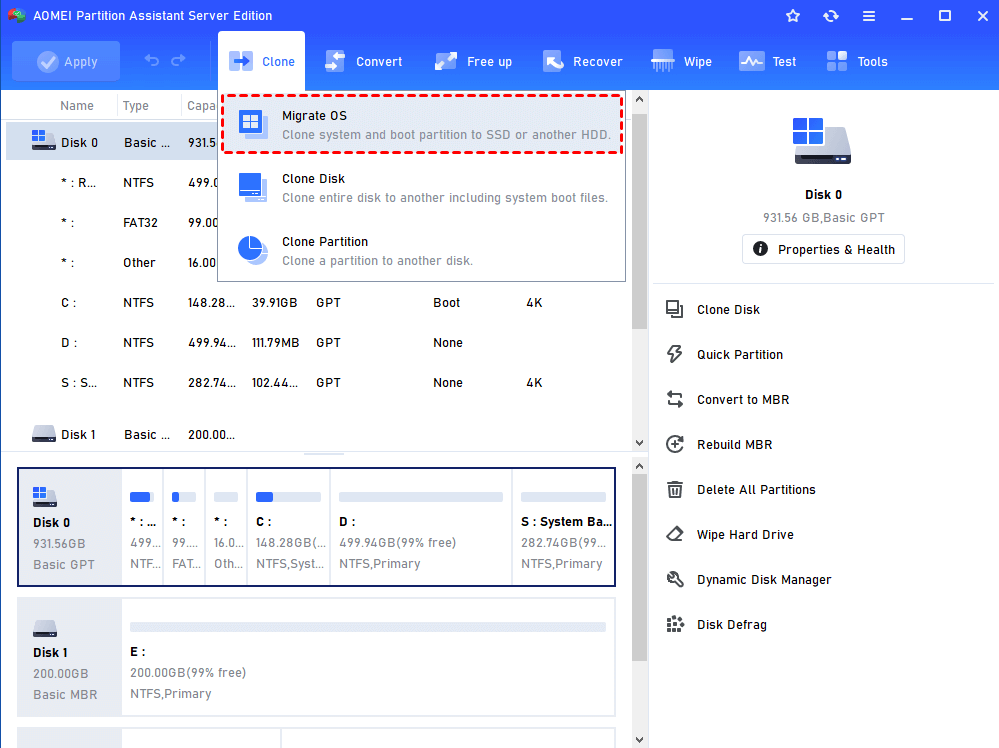
Step 1. Install and launch AOMEI Partition Assistant Server. It will display your disk partition information on the main interface. Then, click “Clone” in the top toolbar, and choose “Migrate OS”. and click Next in the pop-up window to continue.
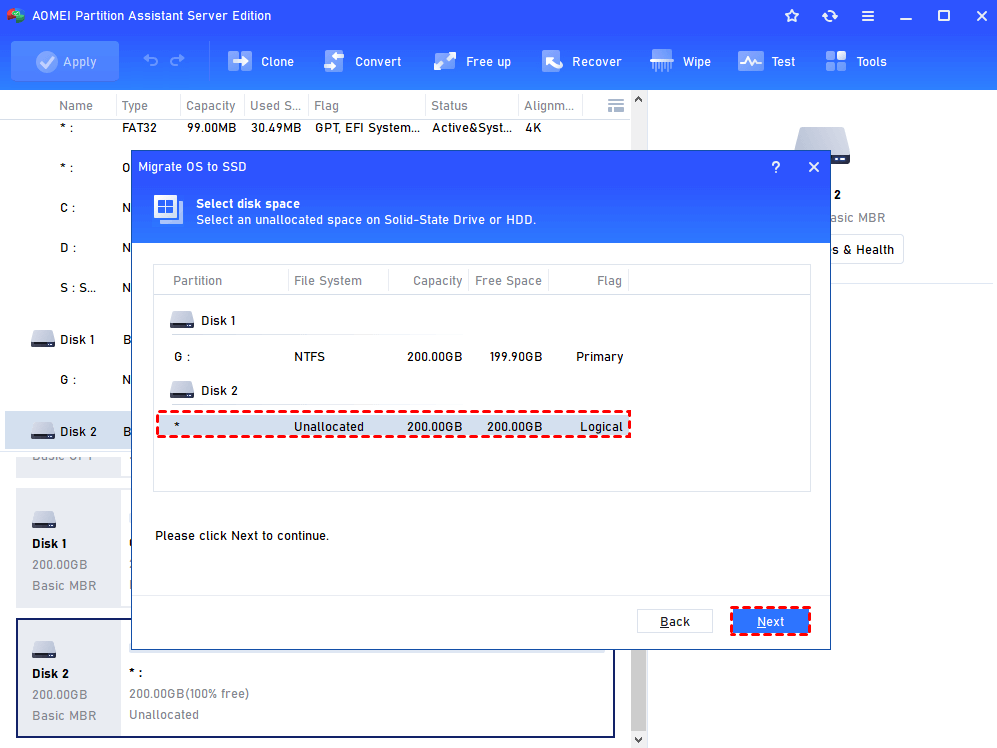
Step 2. Select an unallocated space on SSD in the next window and then click Next.
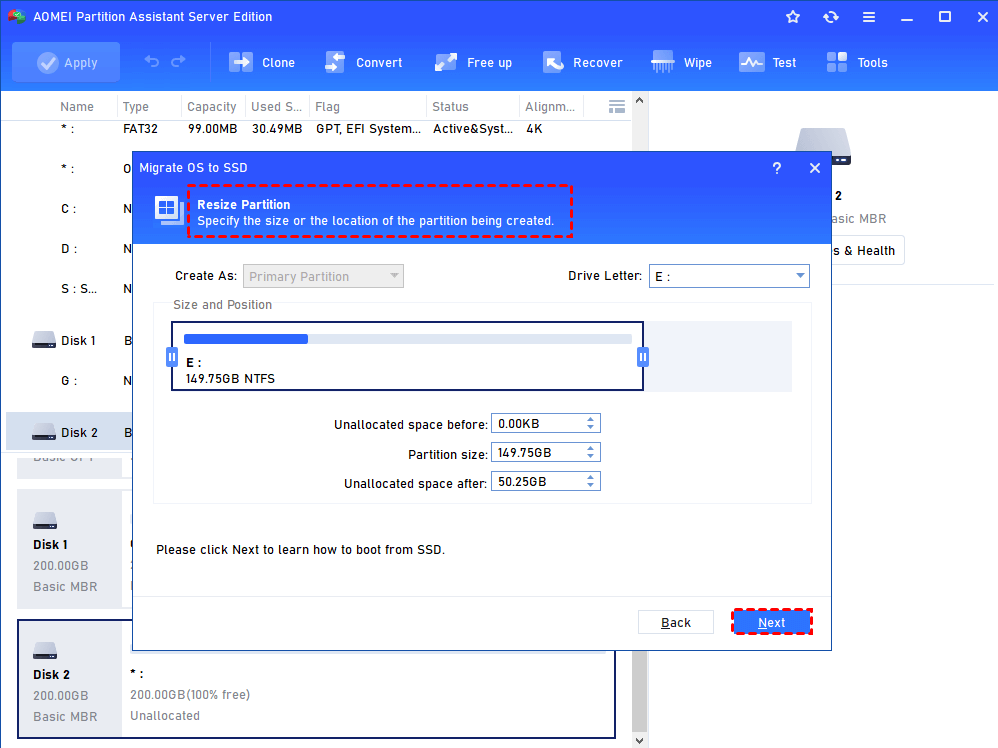
Step 3. In this window, you could modify the information (including size, location, and drive letter) of the partition on a new disk, of course, you can keep default settings.
Step 4. After setting up all the information, click Next to read the note about Boot Operating System.
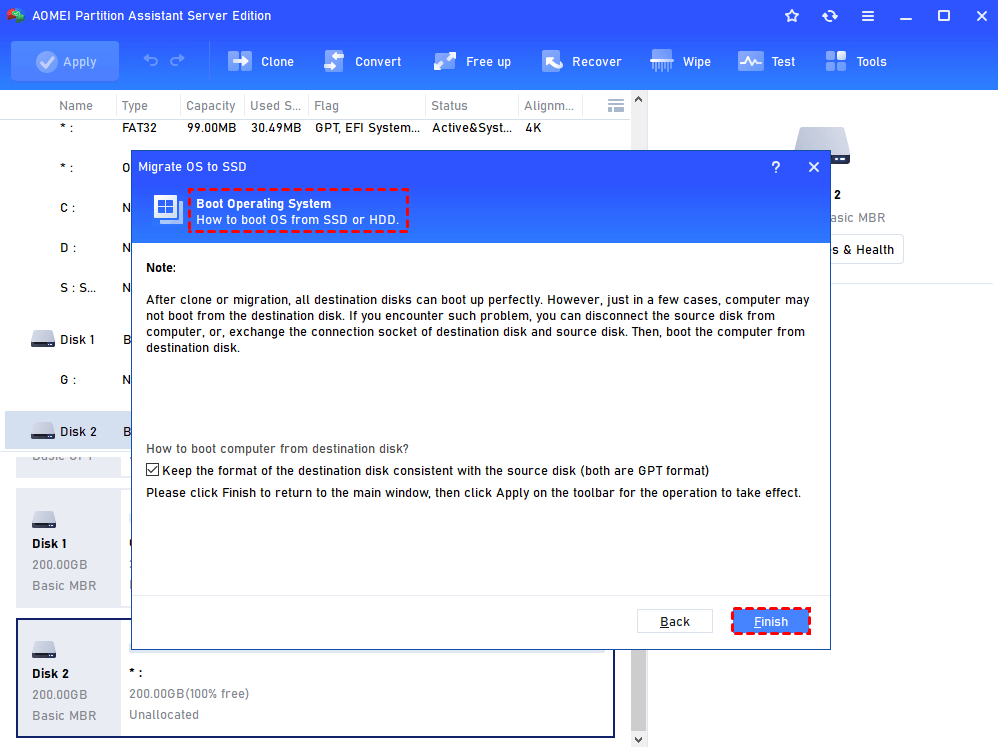
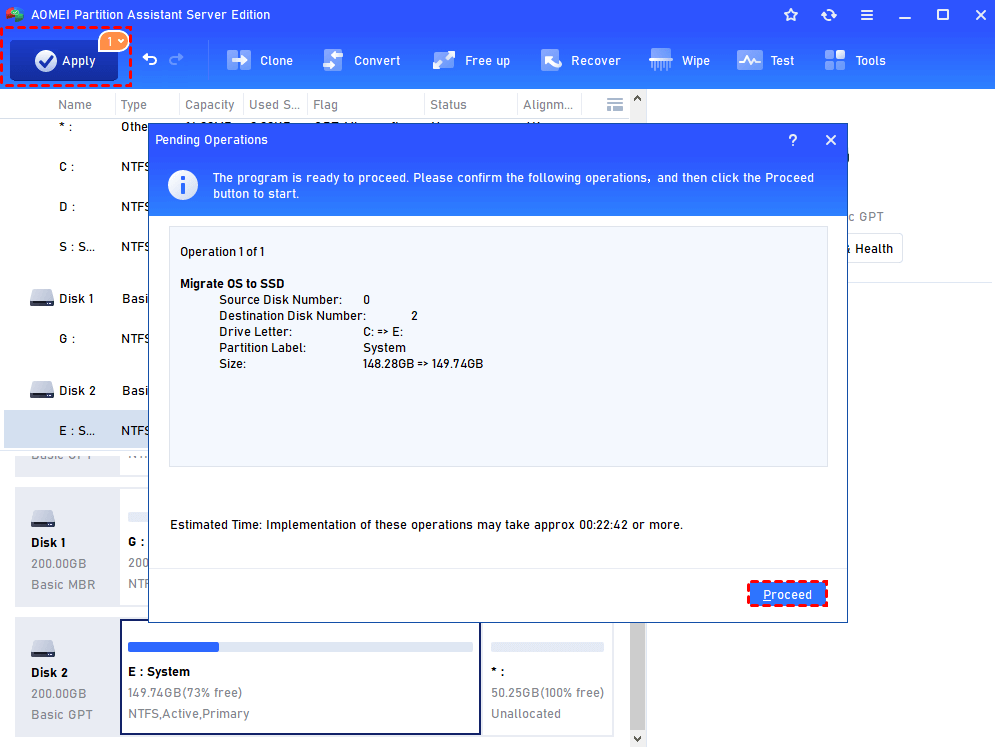
Step 5. Click Finish back to the main interface where you can preview changes. To save the changes, click Apply button to commit the Pending Operations.
1. To boot from the SSD drive, you also need to change the boot order in BIOS to boot the computer from the destination disk.
2. After migration/cloning, you can wipe your old disk to reuse it as a second data disk.
Summary
After you migrate your Server 2003 to an SSD, you can significantly feel the faster read and write speeds compared to traditional HDDs, which leads to a noticeable improvement in overall system performance, especially in terms of boot times, application loading, and data access.
With AOMEI Partition Assistant, you can easily and securely do this work. As a versatile Disk Management for Server 2003, this tool can also convert to GPT/MBR, clone disk, extend C drive, and so on.

