How to Check Disk Performance in Windows Server 2016
This tutorial will tell you how to check disk performance in Windows Server 2016 with a powerful utility and some methods to improve its running speed will be introduced too.
By Hedy / Updated on December 4, 2024
How do I check my Windows Server 2016 performance?
"Hi, my machine is running Windows Server 2016 and it has been working fine for a long time. But lately I've noticed that it's getting slower and slower. Not only is it slow to open the Task Manager, but the mouse pointer circles frequently, and even double-clicking some programs does not respond. I want to check its performance, any good suggestions? "
Why Windows Server 2016 become so slow?
Windows Server 2016 is a server operating system released by Microsoft on October 13, 2016. Since the release of Windows Server 2016, it has been favored by many users. But with prolonged use, the performance of Windows Server 2016 may become slow. This is mainly due to the following reasons:
✎ Not enough space on C drive
✎ Attacked by viruses or malware
✎ Outdated device drivers
✎ Too many programs running at the same time
✎ Too much disk fragments
✎ Too many junk files occupy hard disk space
Well, we can test disk performance in some ways. Through the detection results, we can take some measures in time to improve the running speed of Windows Server 2016. The following sections are designed to show you how to check disk performance in Windows Server 2016 and how to improve its performance.
How to check disk performance in Windows Server 2025/2022/2019/2016/2012/2025
In this part, I will provide 3 methods to show you how to check disk performance in Windows Server 2016. Including Windows built-in tools, and a professional third-party disk speed testing utility.
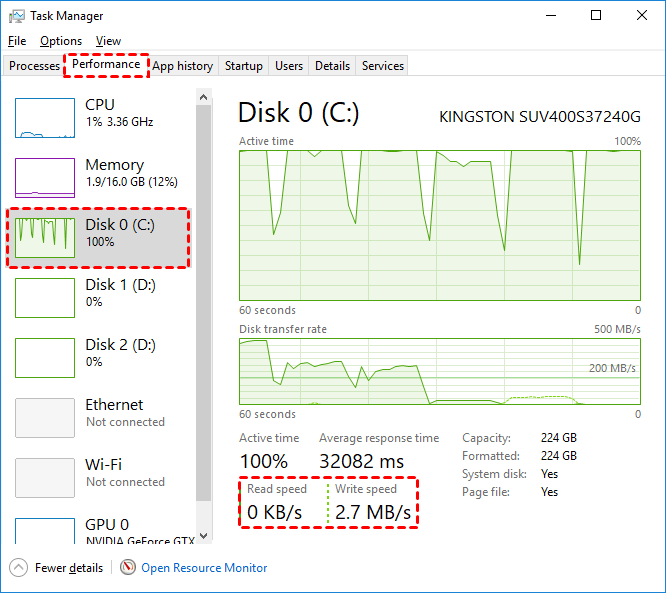
│ Way 1. Show disk performance on Task Manager
The fastest way to check the disk speed is in Task Manager. But if the disk performance information on the task manager is disabled, you need to type: diskperf -Y in CMD to enable it. After enabling, you can refer to the following steps:
Step 1. Enter “Task Manager” in the search bar and open it.
Step 2. Once opened, browse to the “Performance” option.
Step 3. Select the target disk to be tested from the list on the left.
│ Way 2. Test disk performance with DiskSpd
DiskSpd is a command-line disk testing tool created by Microsoft. It combines powerful IO workload definitions to measure and report disk performance. Since it supports free configuration and adjustment of parameters. This makes it the perfect tool for storage performance testing, validation and benchmarking.
Step 1. Get DiskSpd from GitHub.
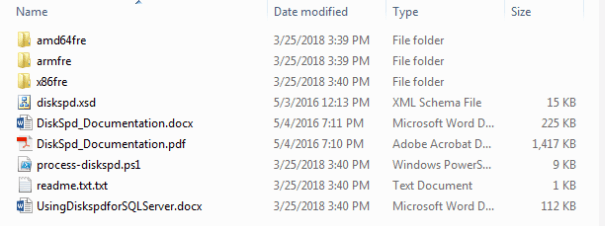
Step 2. DiskSpd does not need to be installed, just download and extract it to your local disk. After unpacking, you will have the following(choose one file according to your Windows system):
◢ amd64fre - for 64-bit systems
◢ armfre - for ARM systems
◢ x86fre - for 32-bit systems
Step 3. Search for CMD in the search bar, right-click to open it as an administrator. Type in:
diskspd.exe –c50G -d300 -r -w40 -t8 -o32 -b64K -Sh -L E:\diskpsdtmp.dat > DiskSpeedResults.txt.

Parameters:
● c50G: file size 50 GB (preferably a large file size so that it does not fit in the storage controller's cache);
● d300: test duration in seconds;
● r: random read/write operations (use -s if you need to test sequential access);
● t8: number of threads;
● w40: ratio of read and write operations 40% / 60%;
● o32: Queue length;
● b64K: block size;
● Sh: do not use cache;
● L: measurement delay;
● E:\diskpsdtmp.dat: Test file path.
Tip: When using diskspd.exe, there is a considerable load on the disk and CPU of the system under test. To eliminate performance degradation for users, it is not recommended to start it on production systems during peak hours.
Step 4. After the stress test is completed, the following performance data can be obtained from the output table:
✍ MiB/s — 241 (about 252 Mb/s, not bad)
✍ IOPS — 3866 (very good!)
✍ Average latency — 66.206 ms (quite a lot of latency!)
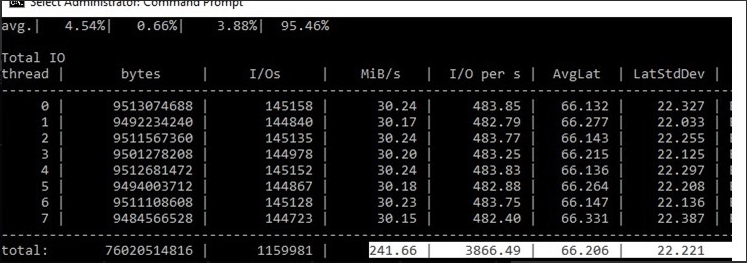
Step 5. The test results consist of two parts:
● The first part includes a summary of the options specified in the command, such as duration, warm-up and cool-down times, latency statistics, and other details.
● The second part includes the results of the test. Here you will see the time taken to complete the test, the number of threats and processors. Among them, please note: the "Total IO" table shows the reads and writes of each thread. Often the important information is the total MiB/s result, which tells you the average number of megabytes read and written per second.
│ Way 3. Check disk performance via professional disk speed test utility
As you can see, although you can use Task Manager to check the read and write speed of the disk, it provides too little information; you can also use DiskSpd to test the performance of the disk, but the command line tool is not friendly to most users. And the test results need to be compared by users themselves, which is very troublesome.
Fortunately, you can use AOMEI Partition Assistant Server. This is a powerful disk speed test utility with a graphic interface, which perfectly makes up for the defects of the former two. Not only does it provide detailed disk speed test results, but the testing process is also very simple. At the end of the test, the disk performance score will be displayed, and users can improve the performance of the disk according to the performance score.
Apart from that, it also provides effective measures to help you improve the performance of PC if Windows Server 2016 is running slow.
Step 1. Download and install this professional disk speed test utility, then launch it.
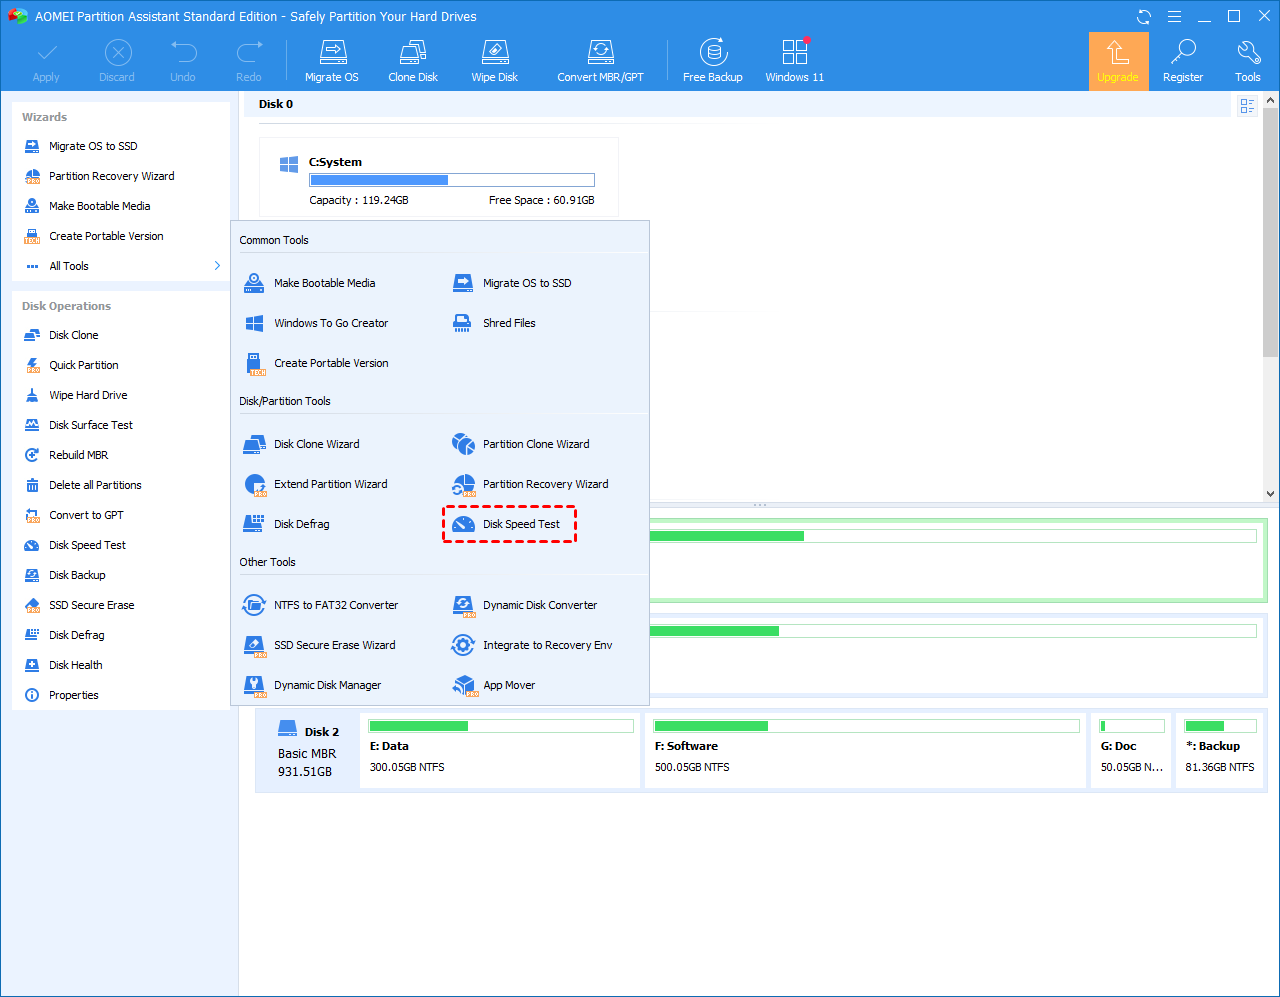
Step 2. On the main interface, click “Test” in the top toolbar, and choose “Disk Speed Test”.
Step 3. In this window, click "Pro Mode".

Step 4. In the new window, you can change various default parameters.
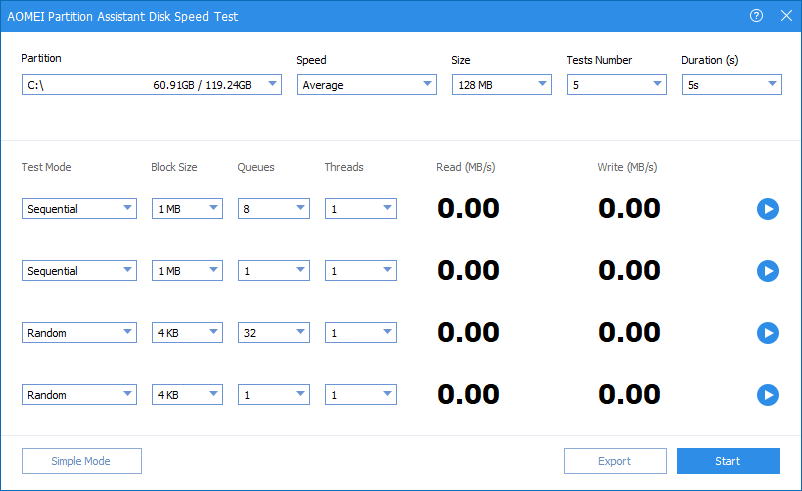
Step 5. After setting all parameters, click "Start". After the test is over, you can click "Export" to export the test results.
How to make Server 2025/2022/2019/2016/2012 run faster
Generally speaking, too many fragmented files on the disk, insufficient system disk space, or outdated HDD are the reasons for the slow running of the disk. So, you should take some measures to improve the running speed of Windows Server. It is worth mentioning that these methods can be completed through AOMEI Partition Assistant Server.
│ Solution 1. Disk defrag
Disk defrag is one way to address slow Windows Server performance. Because disk defrag is a continuous rearrangement of discontinuous data on sectors. In this way, when the computer reads the data, the search time is shortened and the speed is improved. Here are the detailed steps you can refer to:
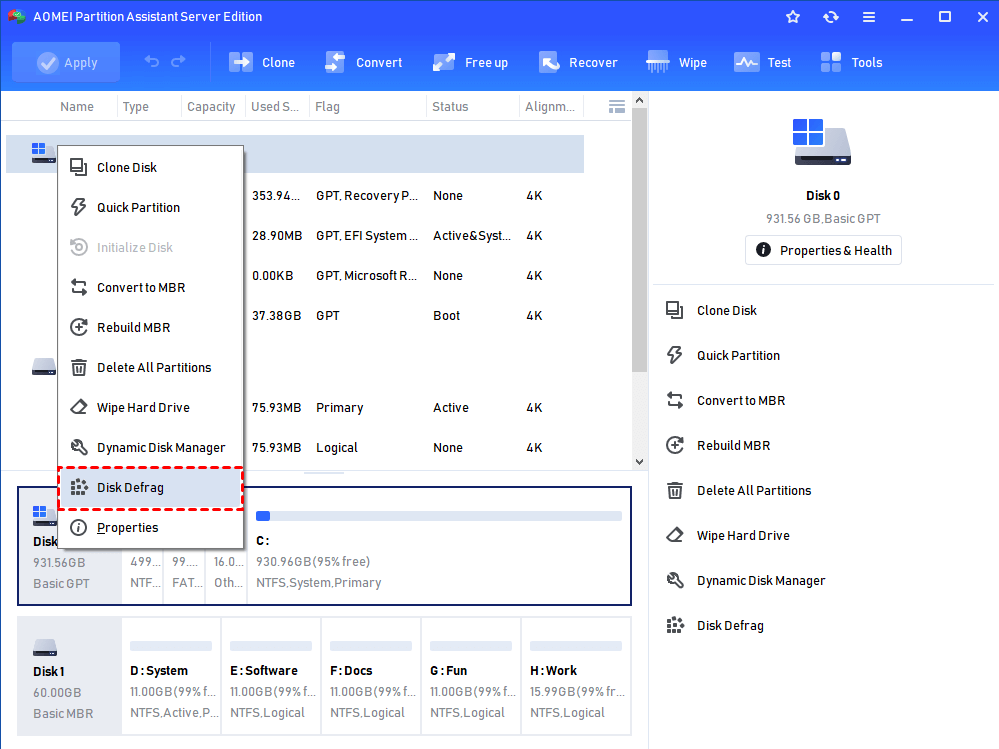
Step 1. On the left menu of AOMEI Partition Assistant, right-click the disk, and choose “Disk Defrag”.
Step 2. In the Disk Defrag window, click the Schedule button. But if desired, you can also defrag the disk or partition directly.
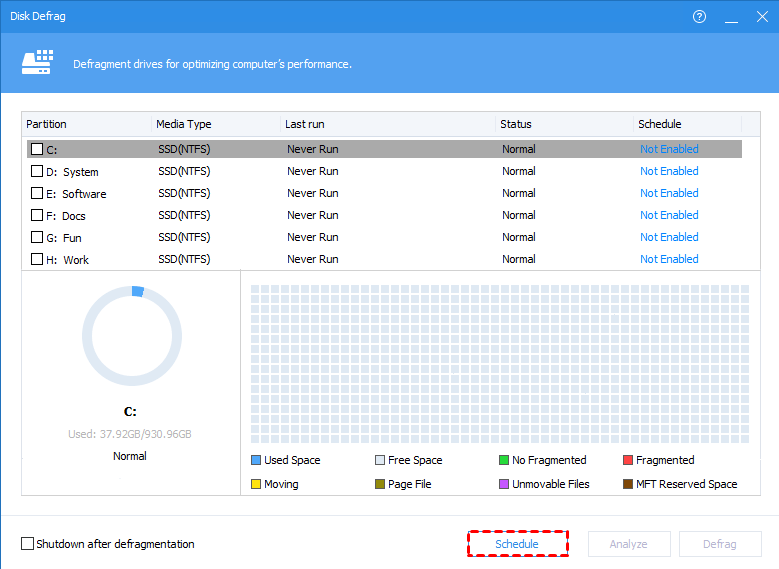
Step 3. Now you can choose which drive you want to defrag and decide whether to run the defrag daily, weekly or monthly. Then, you can consider what conditions are preset for defrag.
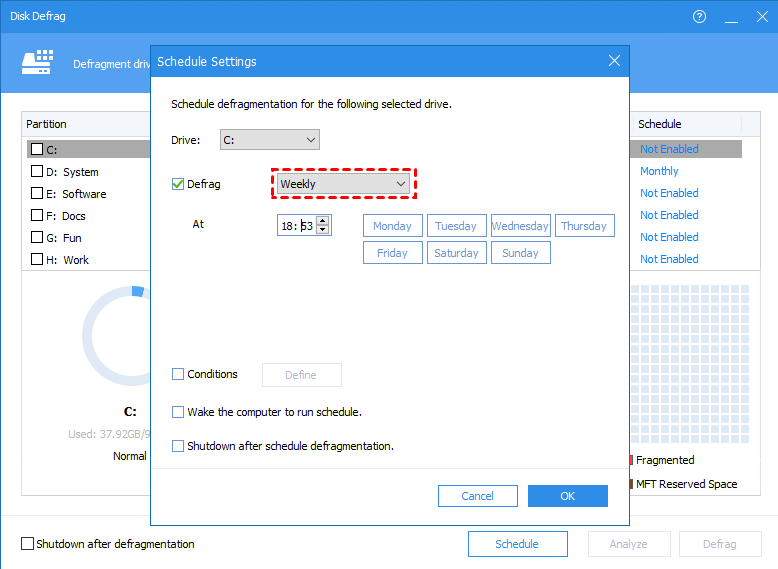
Step 4. You can also check "Condition" and click “Define” to set the fragmentation rate to trigger the schedule to defrag the disk. After all settings, click "OK" to submit operations.
│ Solution 2. Extend system drive
We usually install Windows Server 2016 on the C drive. However, low disk space on the C drive will cause the performance of Windows Server 2016 to degrade. Therefore, in addition to disk defrag regularly, we can also try to extend the system drive to solve the problem.
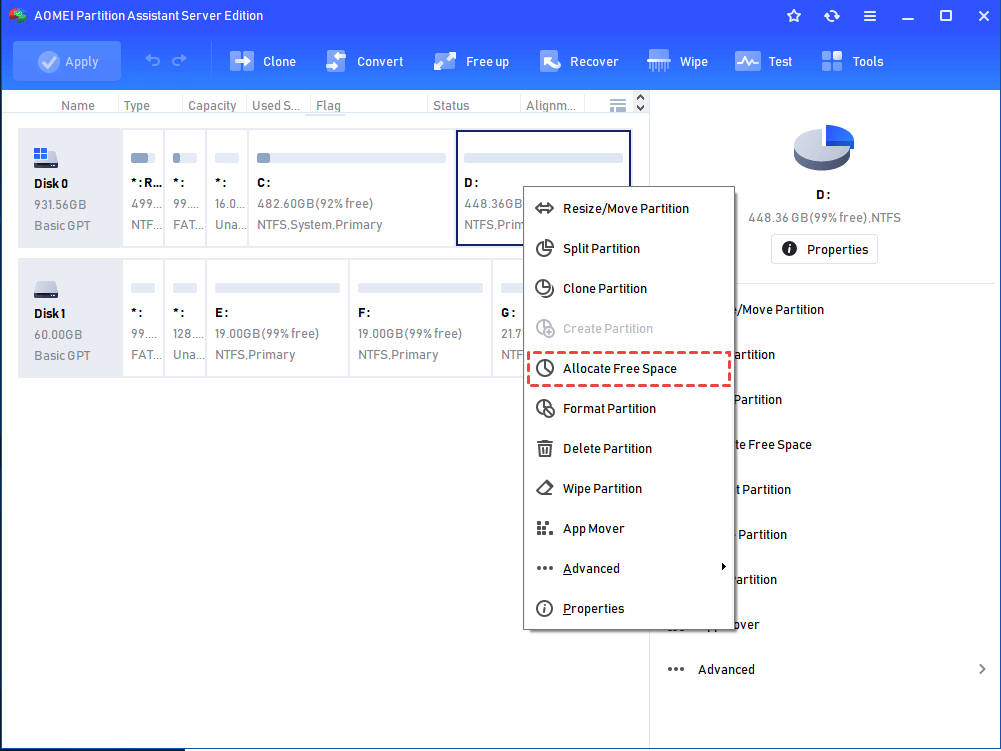
Step 1. Find a partition with a large storage space, right-click and select "Allocate Free Space".
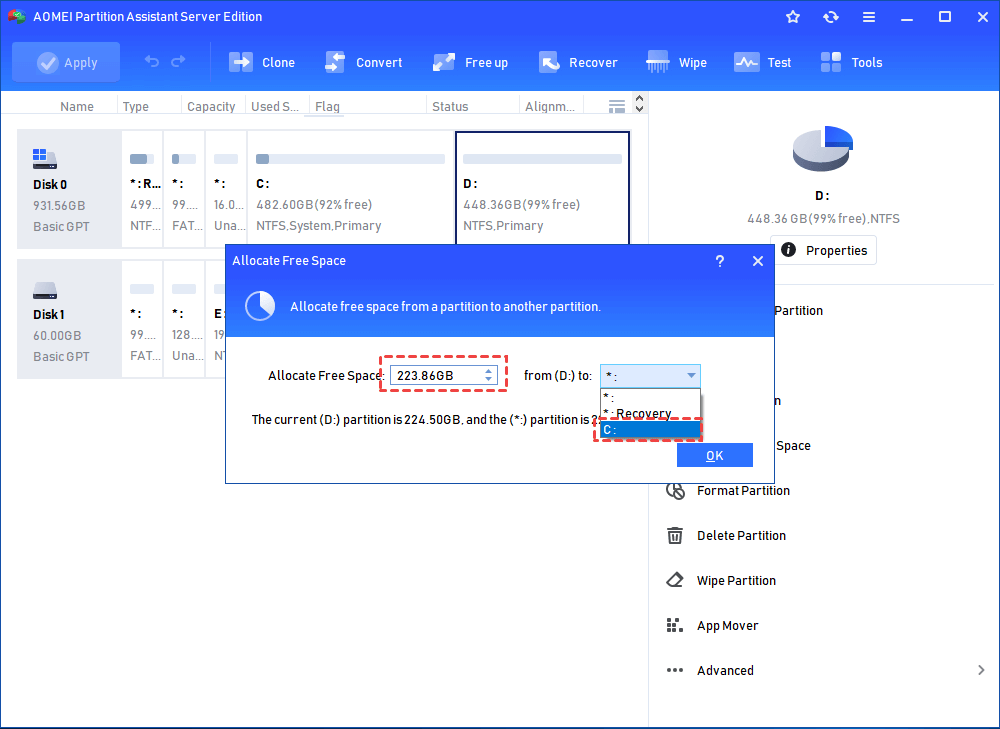
Step 2. In the Allocate free space window, modify the storage space to be allocated change the target partition to (C:), and click "OK".
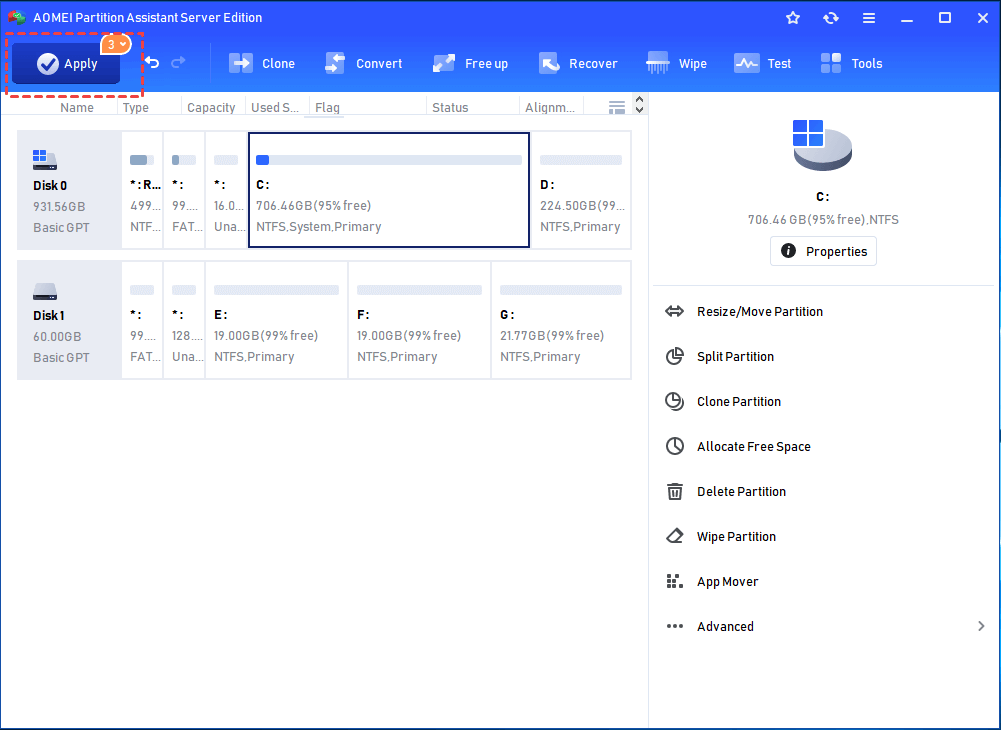
Step 3. Click Apply to check the operation. Once confirmed, select Continue.
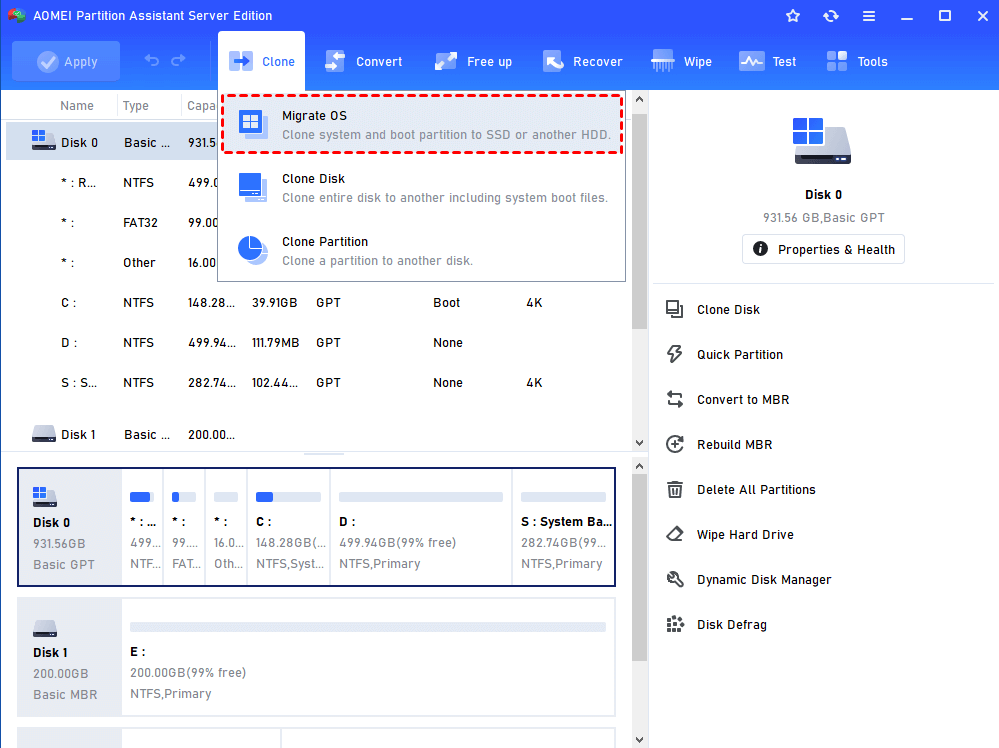
│ Solution 3. Migrate OS to SSD
As we all know, the read and write speed of SSD is faster than HDD. If Windows Server 2016 is installed on HDD, then you can migrate it to SSD for faster speed. AOMEI Partition Assistant Server supports moving Windows Server to SSD without reinstalling.
First, connect the SSD to the PC and make sure it can be detected.
Next, run the AOMEI Partition Assistant Server. Click “Clone” in the top toolbar, and choose “Migrate OS”.
Conclusion
Now, do you know how to check disk performance in Windows Server 2016? This article provides 3 ways to test disk speed and gives 3 methods to improve Windows Server performance.
AOMEI Partition Assistant Server is a powerful partition disk management software that supports newest Server 2025 and other Servers. With its help, you can manage Server PC flexibly and timely. If you don't get the expected performance after migrating to SSD, you can try SSD alignment.

