How to: Create Windows Server 2016 Bootable USB from ISO to Install OS
Whether you want to create Windows Server 2016 bootable USB from ISO for OS installation, or create a portable Windows Server 2016 bootable USB drive, you can find the step-by-step guide on this page.
By Hedy / Updated on December 5, 2024
Need to create Server 2016 bootable USB for OS installation
When you get a Netbook or a small form-factor computer that does come with a DVD for installing Windows Server 2016, you can download the Windows Server 2016 ISO from Microsoft official website, with which to create a bootable USB Windows setup media. Then you can install a new Server on your computer via that bootable USB drive. Compared with the traditional Windows server 2016 media creation tool like installation DVD or CD, the Windows Server 2016 bootable USB drive is more portable to take everywhere, so you can perform the OS installation more conveniently.
Steps to create Windows Server 2016 bootable USB from ISO
To make Windows Server 2016 bootable USB from ISO files, the first and foremost thing is to download the ISO files. If you have done that, you can use the DiskPart.exe tool to create a bootable USB Windows Server setup media.
Before proceeding, please note:
① All data on the USB drive will be wiped out during the process, so you can back up required files in advance.
② Ensure the USB drive has sufficient disk space to hold the Windows Server 2016 installation files. Usually, 8GB is enough.
Step 1. Insert the USB device to your computer and ensure it is detected by OS successfully.
Step 2. Click "Start" button, input "cmd" in the search box, right-click the program and choose "Run as Administrator" option.
Step 3. In the subsequent Command Prompt window, type "diskpart" and press "Enter" to launch the DiskPart tool. Next execute all the below commands in turn.
● list disk
● select disk #: # is the disk number of the target USB drive.
● clean
● create partition primary
● select partition 1
● format fs=ntfs quick
● active: set the selected partition active
● assign letter= r or other available letter
Importance:
To create UEFI bootable USB Server 2016, you should type “format fs=fat32 quick” to format the USB as FAT32 rather than as NTFS. But for FAT32 file system, you need to notice that you cannot copy the files over 4GB to it due to the FAT32 based partition limitation. To solve it, you can split the vim file into smaller files by running the command: “dism /Split-Image /ImageFile:h:\sources\install.wim /SWMFile:r:\sources\install.swm /FileSize:4096”.
Then type “Exit” to leave the Diskpart command environment.
Step 4. Find the Windows Server setup ISO in your computer and double click on it to mount the ISO.
Step 5. Copy the entire contents of the mounted ISO drive to your bootable USB flash drive.
Step 6. Now, back to the Command Prompt window again and run the following command “H:cd\boot\ bootsect.exe /nt60 r” to build the boot sector code in the specified partition. (H:\ is the drive letter of the mounted Windows ISO and r:\ is the destination USB drive letter)
Further reading: create portable Server 2016 bootable USB
Now you know how to create Windows Server 2016 bootable USB drive from ISO to install OS on another computer. But what if you want to create a bootable USB for a portable Windows Server 2016 USB, and then you can take your own familiar OS anywhere conveniently instead of carrying a heavy laptop? Then you can refer to the following content.
▶ Steps to create a portable Windows Server (2016) USB drive
To create Windows 10 or Windows 8 bootable USB as portable Windows, you can use "Windows To Go" feature offered by Microsoft itself. But for creating Windows Server bootable USB stick, you need to turn to a third-party tool called AOMEI Partition Assistant Server since Microsoft does not offer such a feature for Windows Server.
This software not only allows you to install Windows Server 2003, 2008 (R2), 2012 (R2), 2016, 2019, 2022, 2025 to an external hard drive as a portable Windows Server but also enables you to install Windows 11/10/8/7 onto a USB drive as portable Windows USB. Moreover, it supports creating Windows Server to Go with either ISO image files, or the current system.
Attention: please prepare an empty USB 2.0 or 3.0 flash drive (the latter will perform faster).
If you have Windows Server 2016 ISO image, you can take the below steps to create Windows Server bootable drive using ISO.
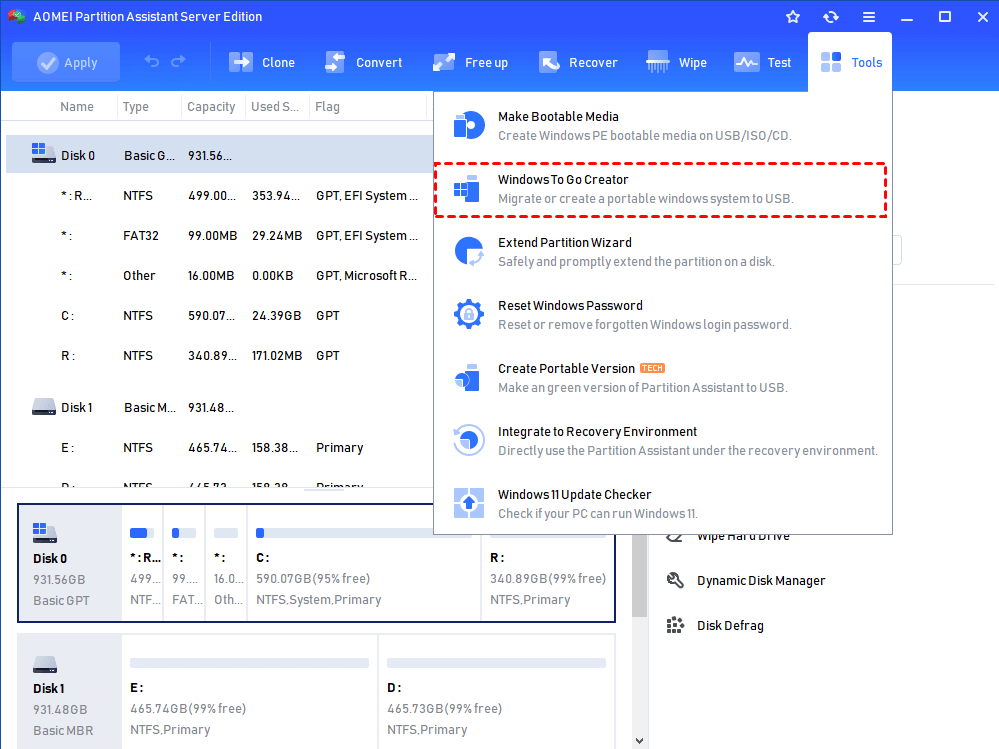
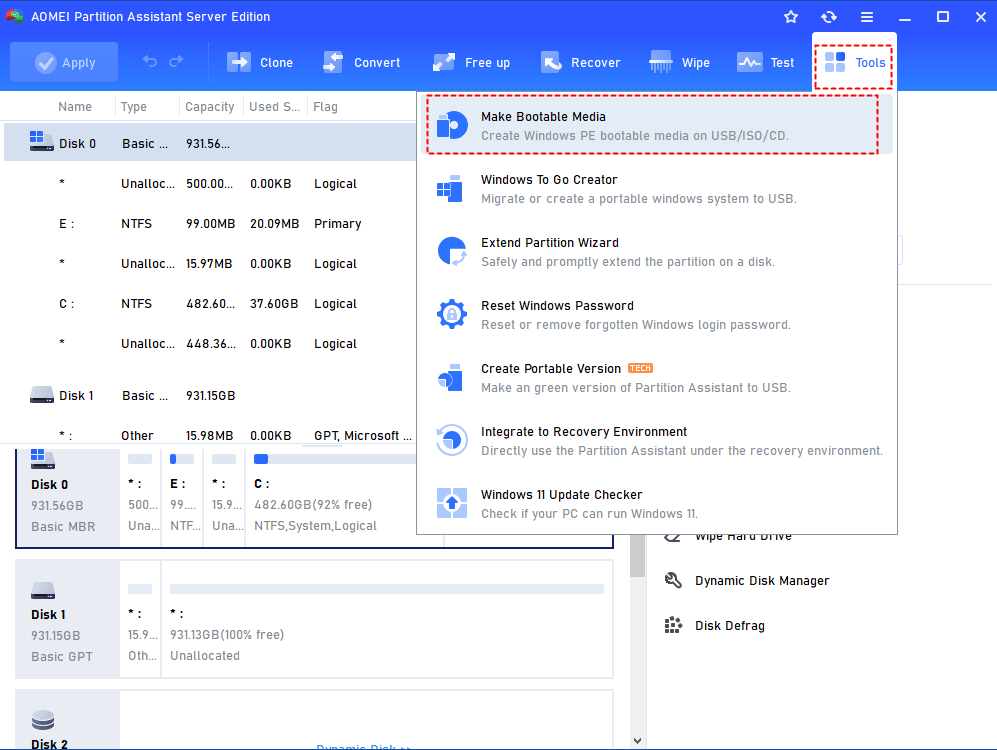
Step 1. Click “Tools” in the top toolbar, and choose “Windows To Go Creator”.
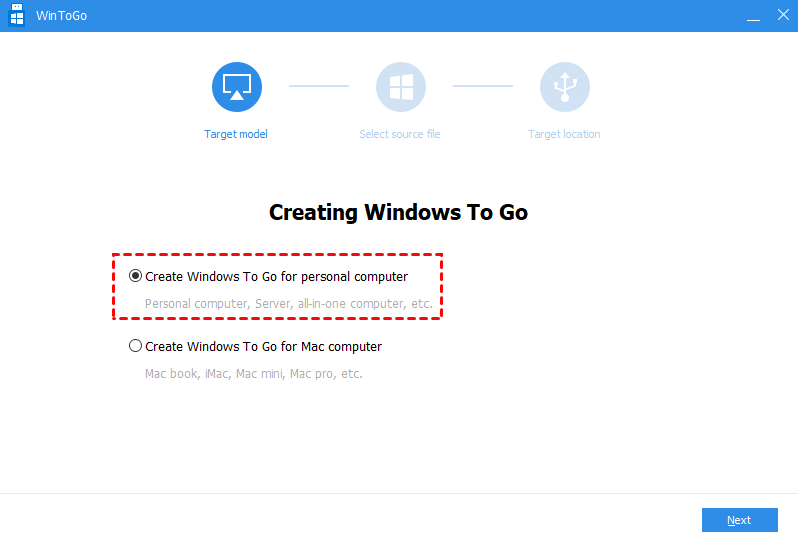
Step 2. In this window, choose the first way "Create Windows To Go for personal computer" and click "Next".
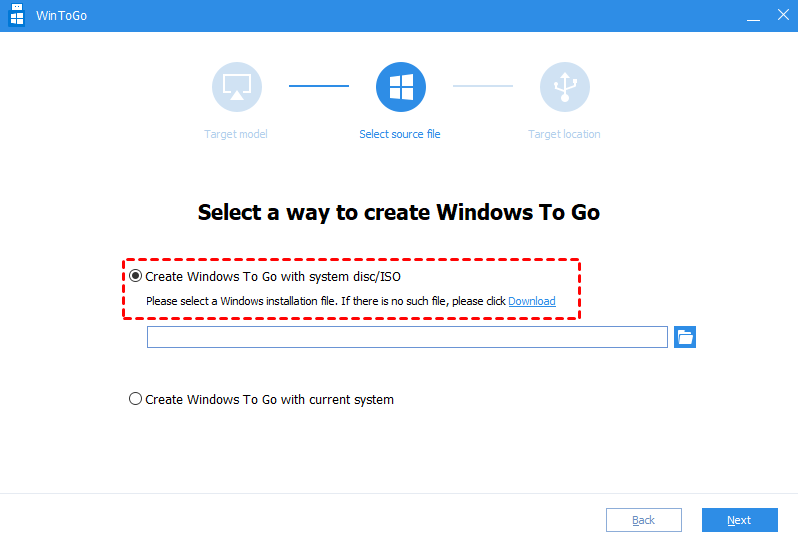
Step 3. Choose "Create Windows To Go with system disc/ISO" and select the Windows Server 2016 ISO files. Then click on "Next".

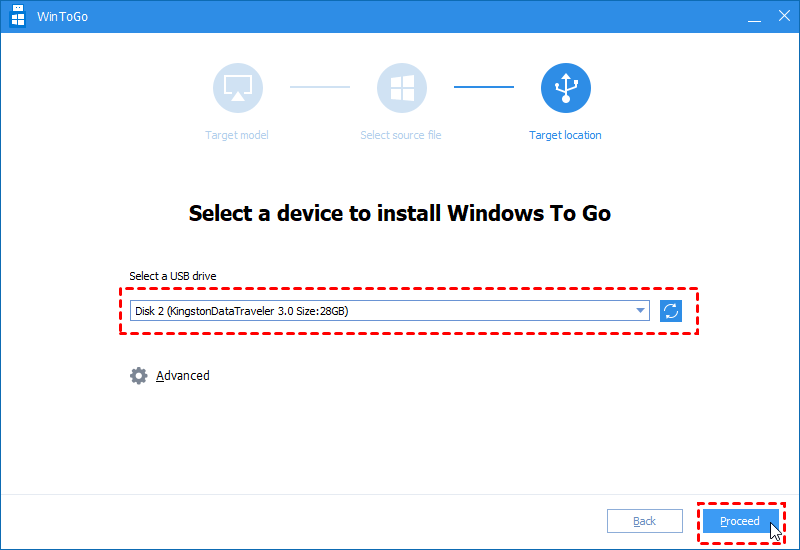
Step 4. Now, choose the right USB drive. If your USB drive does not appear, refresh it and try again.
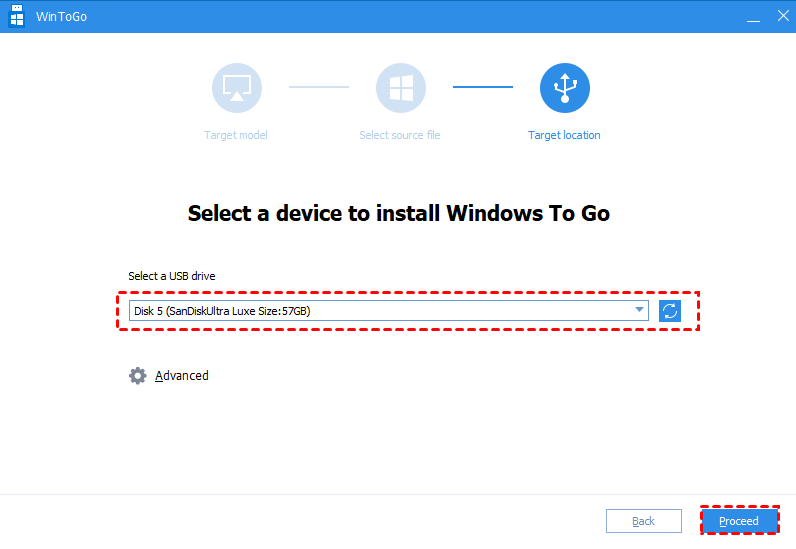
Step 5. Click "Proceed" to start the process.
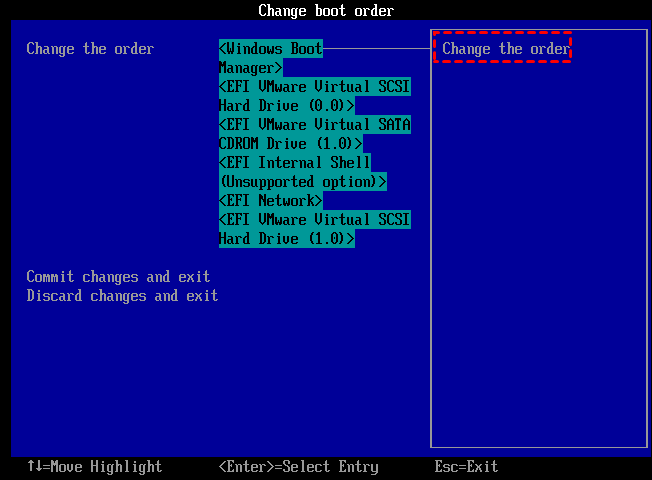
If the Windows installation files are not available, you can select the second method in Step 3 to create Windows to Go with the current system, which is much easier and more convenient. After the Server 2016 bootable USB is created, you can insert it into the target computer, restart it and change boot order in BIOS to boot computer from the destination USB drive.
❤❤❤
If your Windows Server cannot boot as normal due to damaged MBR, system disk errors, etc., you can also use this software to make a bootable Windows Server USB for repairing Server boot issue by rebuilding MBR, checking and fixing OS partition errors from BIOS.
Final Words
In this article, you can get all the necessary information on how to create Windows Server 2016 bootable USB for your specific purpose. As a versatile disk manager tool, AOMEI Partition Assistant Server is also able to move Windows Server to new hard drive (SSD/HDD), copy entire Server hard disk to another disk, convert system disk between MBR and GPT partition table without deleting partition/losing data, allocating free space from one partition to another and more.
To enjoy those amazing disk management functions on unlimited Servers/PCs within one company with only one license, you can try AOMEI Partition Assistant Unlimited. And the Unlimited Edition is featured with "Create Portable Version", which allows you to create AOMEI Partition Assistant to a removable device.

