Everything About Windows Server 2022 Disk Management
Here, we will introduce you all about Server 2022 Disk Management. You will learn how to access Server 2022 Disk Management, ,how it works, what’s the limitation and how to make up that as well.
By AOMEI / Updated on December 5, 2024
Windows Server 2022 Disk Management
Windows Server 2022 is now generally available as an update for eligible Windows Server 2019. Built on the strong foundation of Windows Server 2019, the Server 2022 has brought many new features such as advanced multi-layer security, secured-core serve, firmware protection, etc, all in an effort to provide the comprehensive protection that servers need today. If you have upgraded Server 2019 to Server 2022, or clean installed Server 2022, now you might want to partition hard drive to make the fullest use of disk storage space.
For this task, the Server built-in Disk Management can help. The Disk Management is a tool introduced by Microsoft since Windows XP as a replacement for the fdisk function in Command Prompt. It allows users to manage the disk drives installed on their computer. With this snap-in tool, users can finish most basic disk management tasks such as creating partitions, extending partitions, shrinking partitions, deleting partitions, formatting partitions, converting MBR to GPT, and so on.
How to open and access Server 2022 Disk Management?
As Server 2022 Disk Management is very helpful in managing hard drive partitions, it is important to learn how to open and access it. Here we conclude 6 ways to start this tool for your reference.
- Note:✎...
- You must be logged on as Administrator or a member of the Administrators group to use Disk Management.
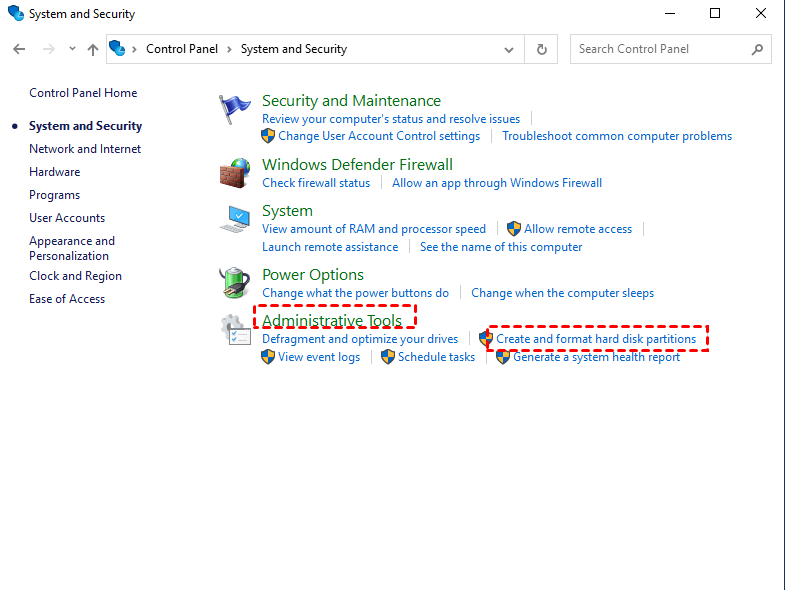
Method 1. Via Control Panel
Go to ”Control Panel” > ”System and Security” > ”Administrative Tools” > ”Create and format disk partitions”.
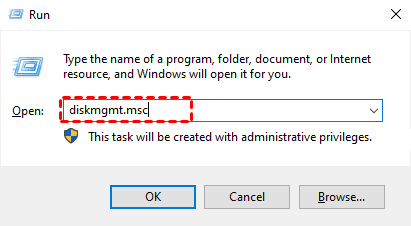
Method 2. Via dialogue box
Press “Win+R” at the same time to open Run dialogue box, input “diskmgmt.msc” and enter.
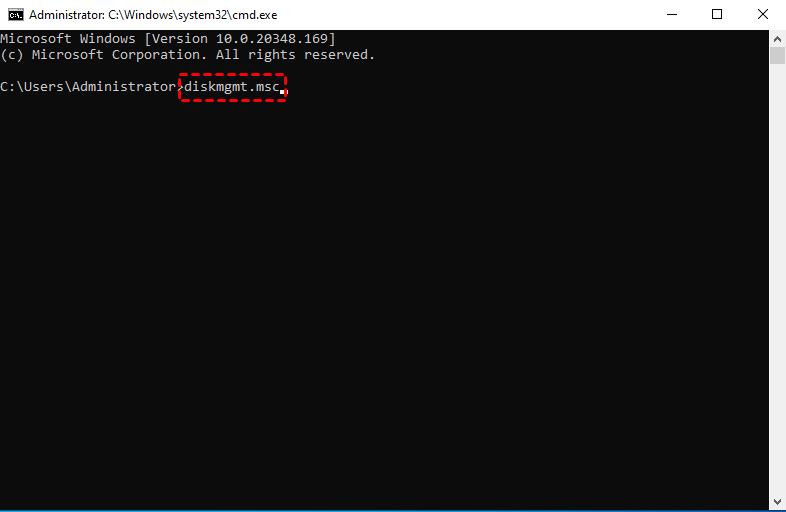
Method 3. Via Command Prompt
Alternatively, you can input “cmd” in the Run dialogue box, and execute "diskmgmt.msc".
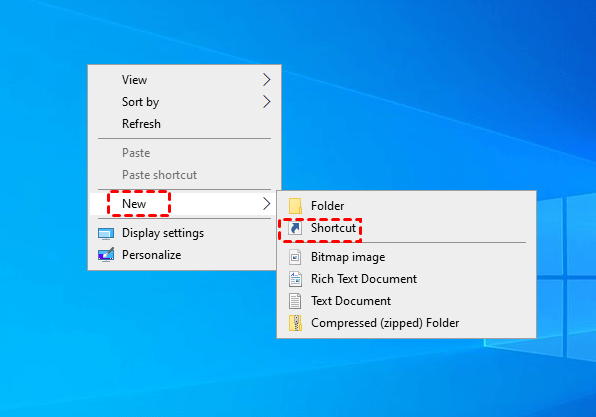
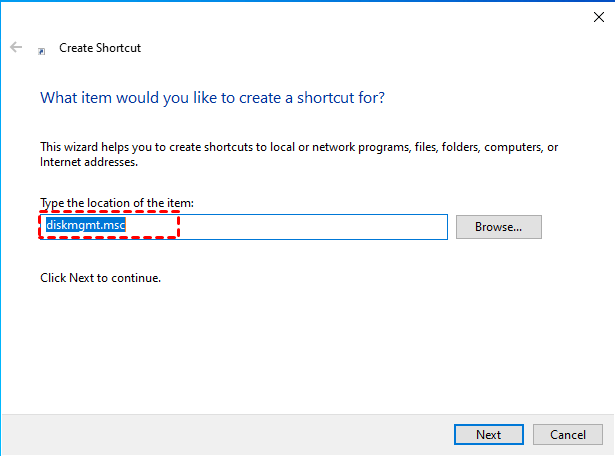
Method 4. Via “Shortcut”
Right-click on the desktop and choose ”New” > ”Shortcut”. Type ”diskmgmt.msc” and select”Next”. Name it as you wish and click on Finish. Then double click on the shortcut to start Server 2022 Disk Management.
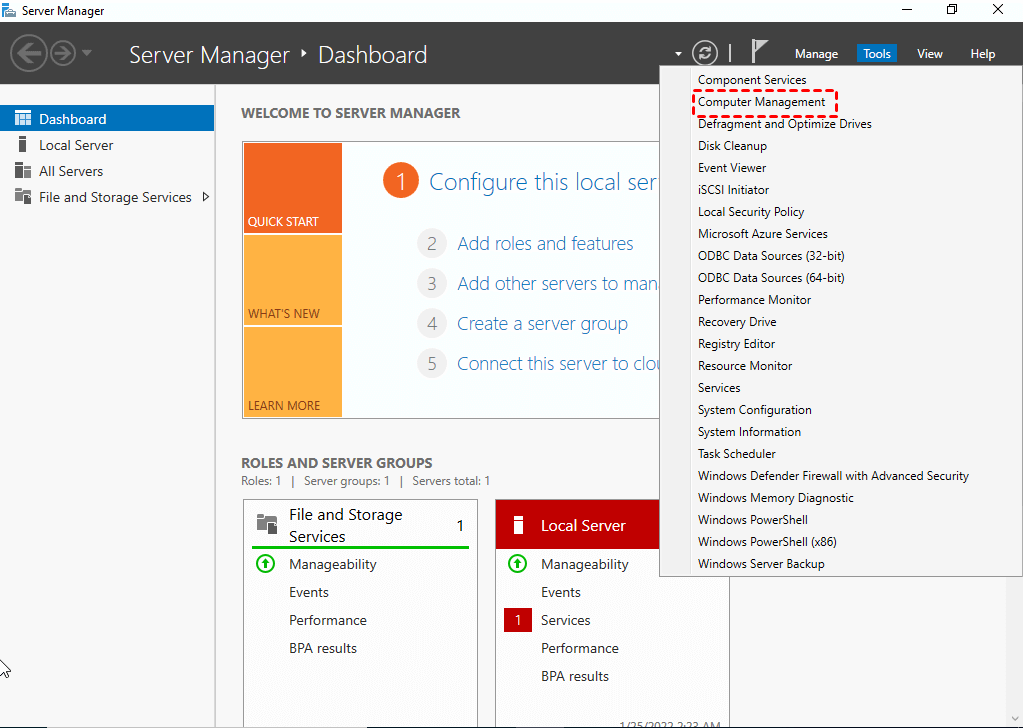
Method 5. Via Start Menu
Right-click the Start menu and select Server Manager. In the Server Manager interface, choose Computer Management under Tools tab.
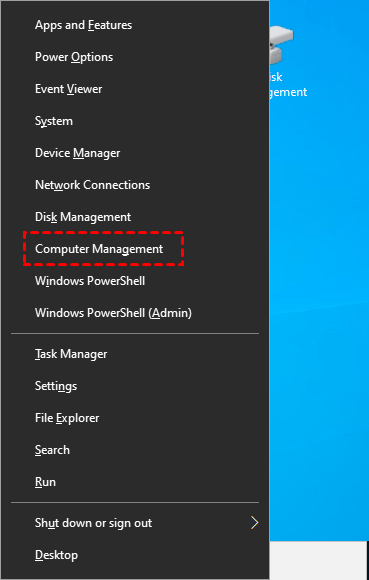
Method 6. Via Computer Management console
Press the Win + X keys on your keyboard and then tap on the Computer Management shortcut from the given menu to open Computer Management. Click Disk Management under Storage on the left side of the Computer Management window.
How to use Server 2022 Disk Management properly?
After you launch Windows Server (2022) Disk Management through any method above, you can perform the following disk partition managements.
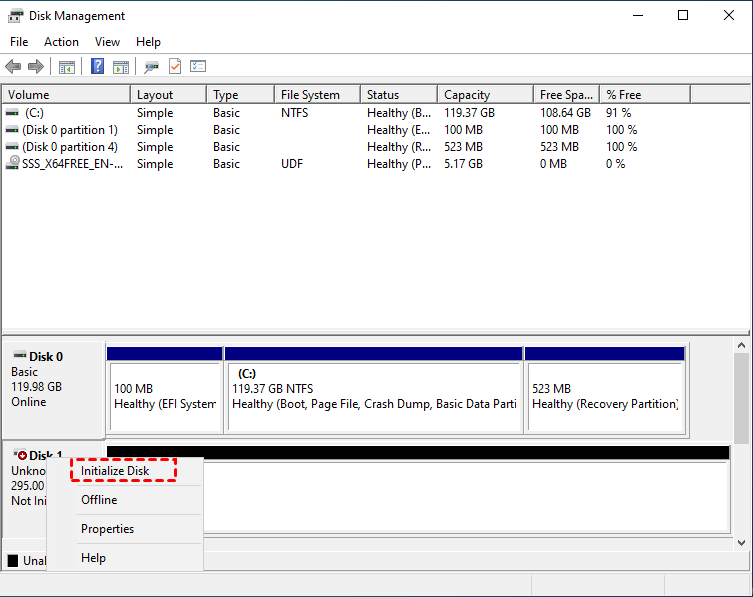
1. Initialize a new hard drive
Before using a disk for data storage normally, it is necessary to initialize the hard drive to MBR or GPT partition style. Right-click the new disk and choose “Initialize Disk”. In the next window, choose MBR or GPT as you need and click “OK”.

2. Create/Format partition
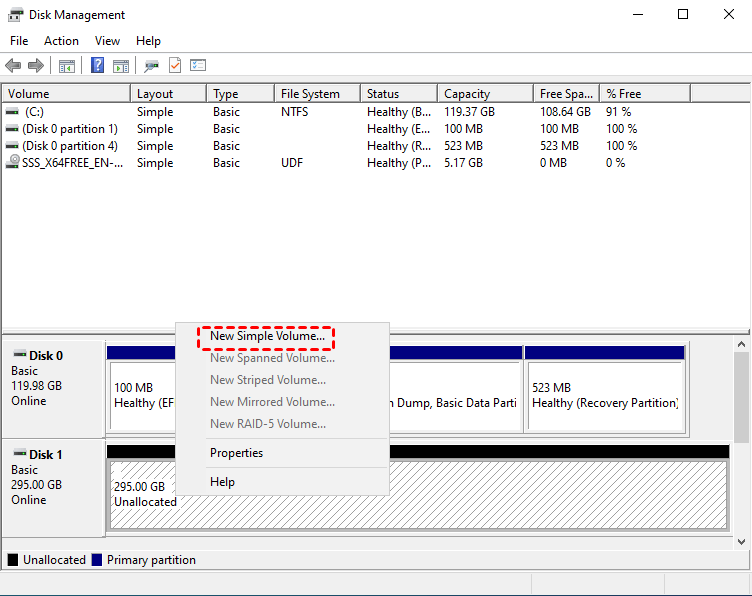
When the disk initialization process is done, next is to divide the entire disk storage into several partitions, namely partitioning the hard drive. Right-click the disk space (unallocated space) and select “New Simple Volume...”. Enter the size of the volume you want to create in megabytes (MB) or accept the maximum default size, and then select “Next”.
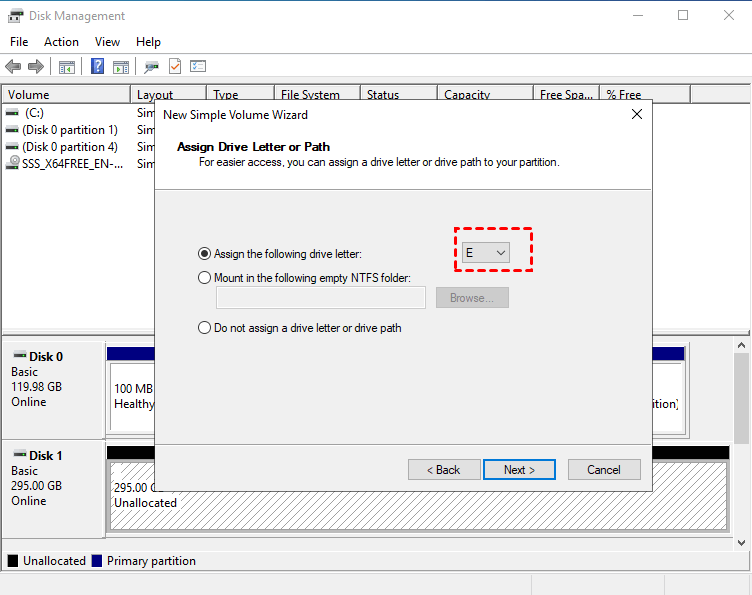
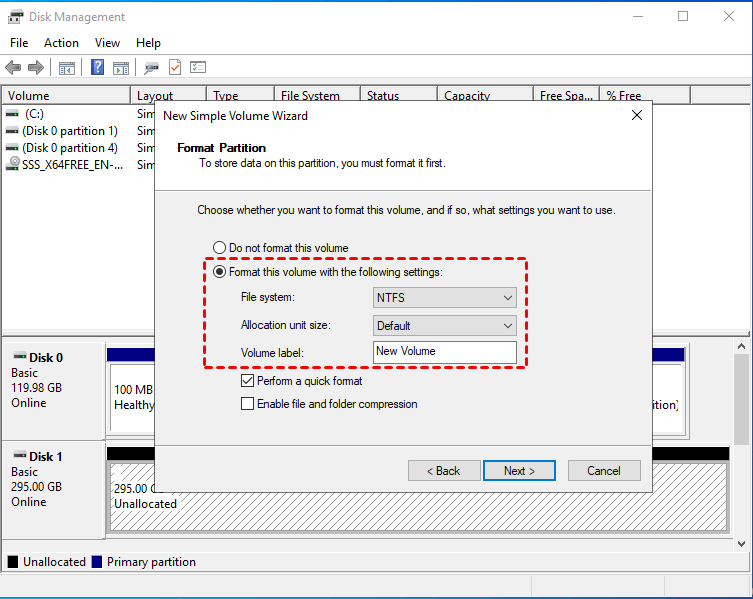
Accept the default drive letter or choose a different drive letter to identify the partition, and then select “Next”. In the Format Partition dialog box, choose the desired file system and click on “Next” (or you select “Do not format this volume” and format it later via the “Format Volume” option ). Review your choices, and then select Finish.
3. Delete partition
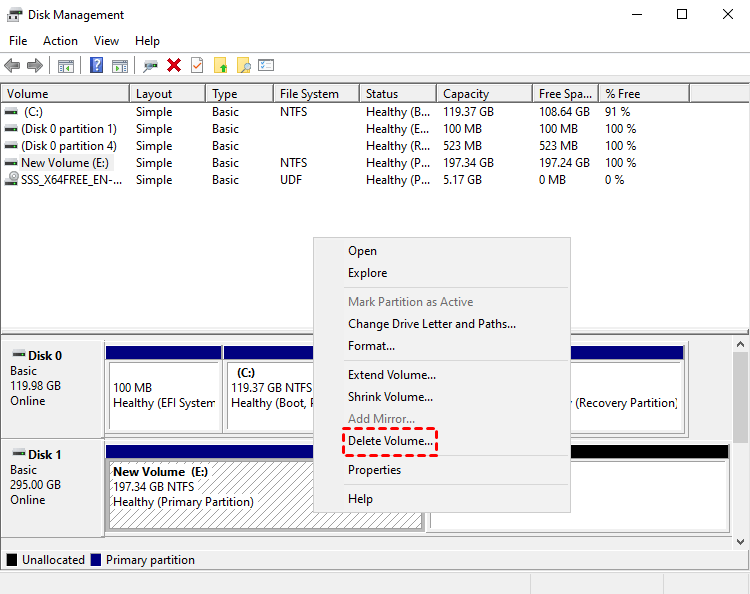
If you want to reduce partition numbers, free up disk space or erase all data on one partition, you can delete some partitions. Just right-click on the target partition, select “Delete Volume” and follow the prompts to finish the operation.
4. Shrink/Extend partition
Among all needs of disk partition managements, adjusting partition size might be the priority. This can be done through “Extend Volume” and “Shrink Volume” options. To shrink a partition is quite easy, right-click on the partition, select ”Shrink Volume” and you will get the maximum space that can be shrunk. Enter the size you want to shrink, and then select “Shrink”.
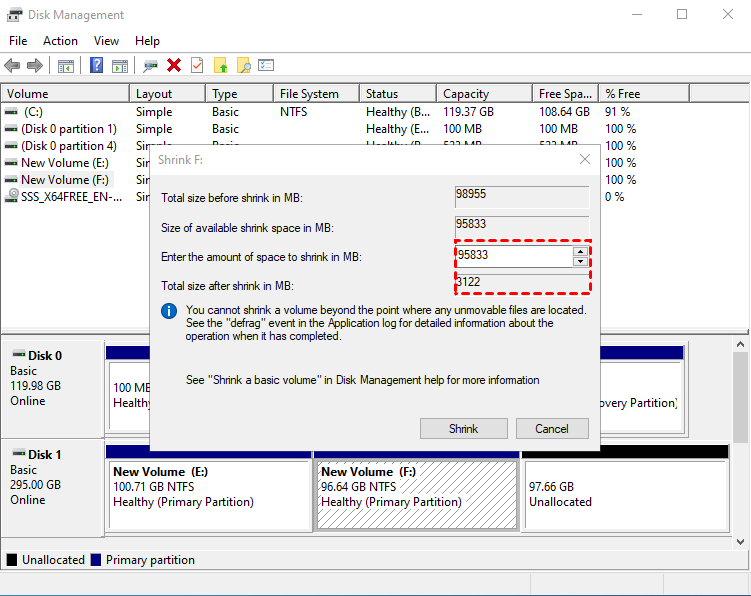
After the shrink is completed, an unallocated space will be generated after the partition you just shrunk, and you can use the space to create a new partition.
Compared with shrinking volume, extending a partition is more challenging since you can only extend a volume when there is an adjacent unallocated space on its right side. That’s why many users shrink a partition to get unallocated space, plan to add it into the target partition, but find the “Extend Volume” greyed out.
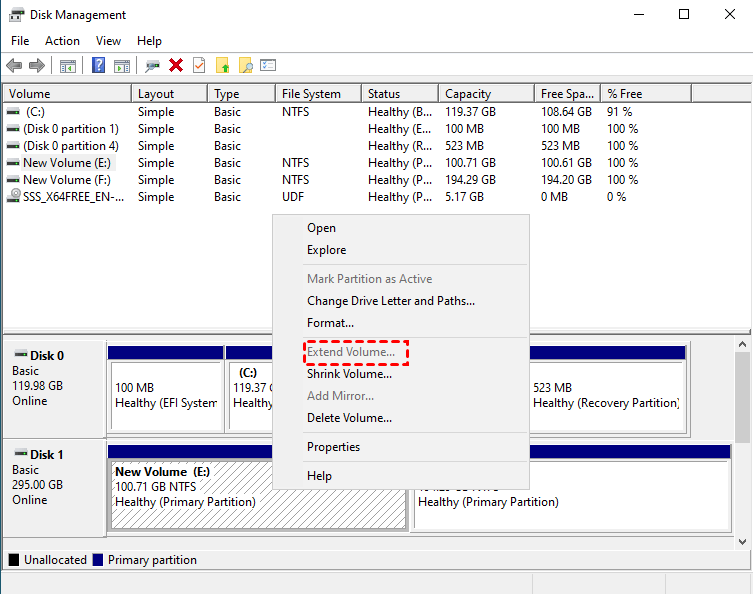
In one word, the unallocated space will be generated after the shrunk partition and cannot be moved to another location, while a partition can only be extend with adjacent unallocated space on its right side. So the unallocated space can only add back into the partition you just shrunk. To evade such an awkward situation, the only way is to delete the partition after the one you will extend to get contiguous unallocated space and extend it.
- Note:✎...
- “Extend Volume” and “Shrink Volume” only work on NTFS partitions.
5. Change disk partition style (MBR and GPT)
As it is well known that a disk has to be initialized to MBR or GPT partition style before holding any data. What if you want to change the current partition style into another one, from MBR to GPT or GPT to MBR since those two partition styles have their own advantages and limits? If you have tried that in Disk Management, there are chances you found the “Convert to GPT Disk” or “Convert to MBR Disk” option is disabled.
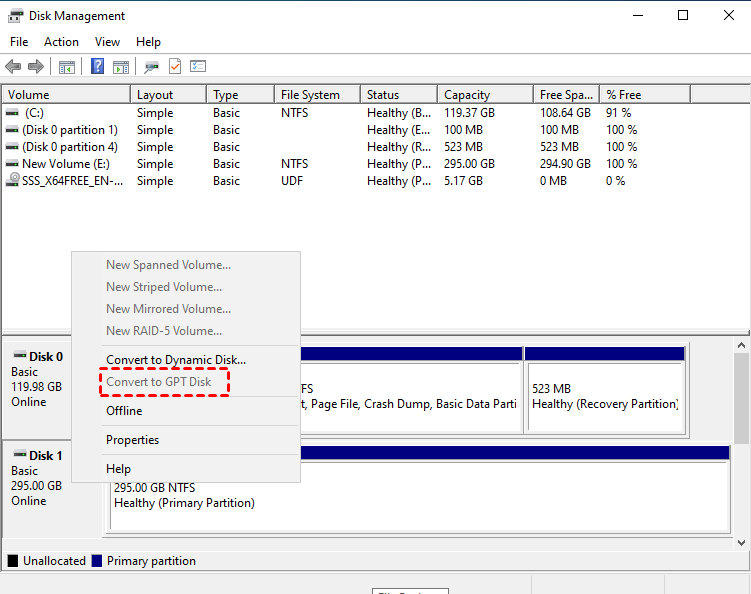
That’s because Disk Management can only convert an empty disk to MBR or GPT. If the disk contains any partitions, the conversion option will be unclickable. To solve that, you have to delete partitions ahead of time. Apparently, that will cause data loss, so back up important data first of all.
- Note:✎...
- the Disk Management cannot used to convert a boot disk since you are not allowed to delete a system partition when the OS is running.
Try a better Disk Management tool for Server 2022
Above are some most commonly used features of Windows Server 2022 Disk Management. Those features are useful, but with some limitations. In other words, some only work under some certain conditions, especially the “Extend Volume” and “Convert to GPT/MBR Disk” features.
To get around all those restrictions, it is smart to try a better Server Disk Management tool: AOMEI Partition Assistant Server. This software is fully compatible with Server 2025, 2022, 2019, 2016, 2012, 2008, 2003 and Windows 11, 10, 8.1, 8,7. It makes up the disadvantages of Server snap-in Disk Management utility and simplify tasks. You can download the demo version, follow the tutorial and simulate the operation.
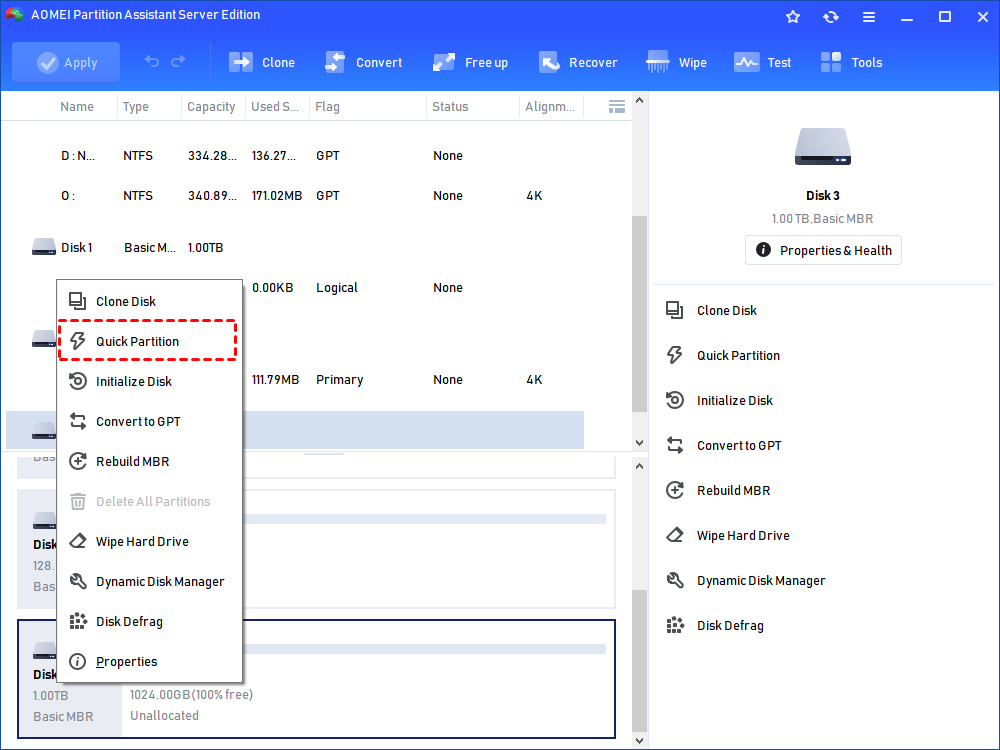
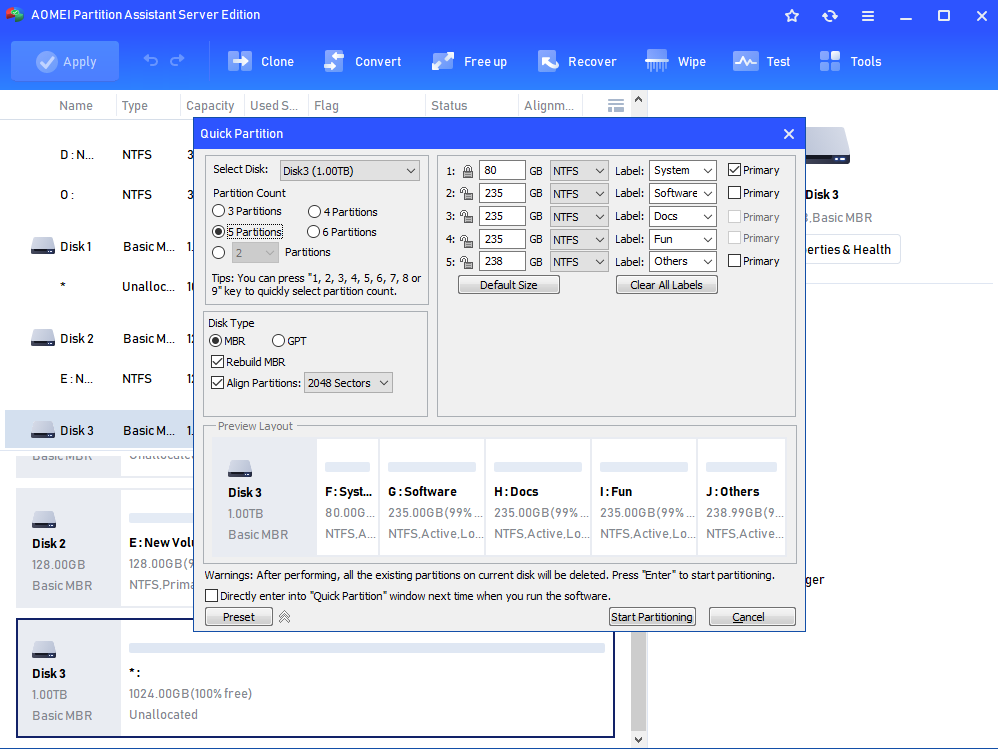
Quick partition
With Server 2022 built-in Disk Management, you need to repeat the “New Simple Volume...” operations several times if you need to partition a large disk into multiple partitions. However, with AOMEI Partition Assistant Server, you can quickly divide a hard drive into several partitions within one click. And you can set partition number and disk type; also set different size, file systems and label for each partition.
Format partition
By contrast, AOMEI Partition Assistant software provides more file systems for you to choose when formatting a partition. That include FAT32, NTFS, exFAT, Ext2, Ext3 and Ext4. Besides, it supports formatting 2TB hard drive to FAT32 while Server built-in Disk Management can only format drive, which is within 32GB, to FAT32 file system.
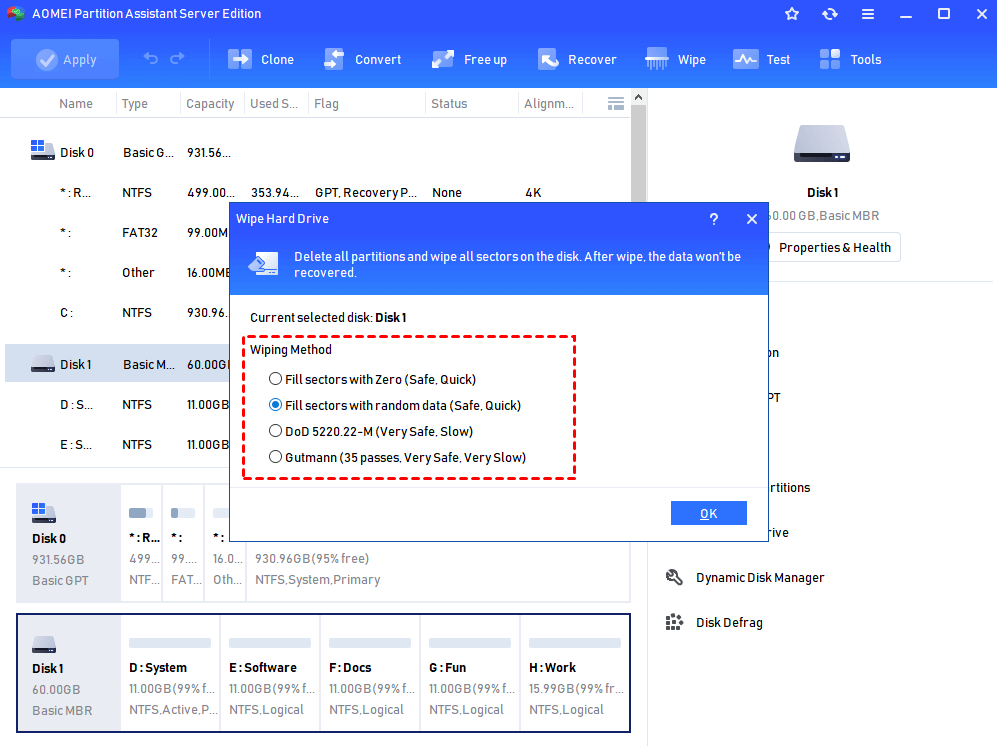
Delete/Wipe partition
When it comes to permanently erasing everything on one partition and preventing data recovery possibility, the “Delete Volume” in Server 2022 Disk Management is not safe enough. Now you can use the “Wipe Partition” or “Delete Partition” of AOMEI Partition Assistant Server to erase data, and write zero or random data to the partition sectors. Besides, you can use the “DoD 5220.22-M” or “Gutmann” wiping methods.
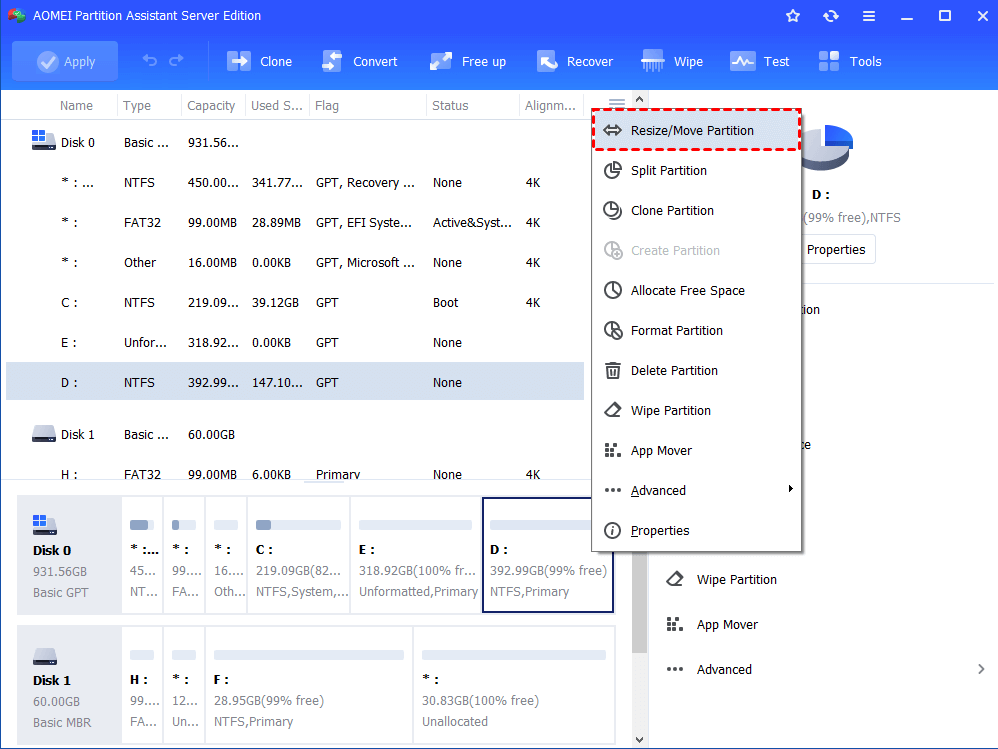
Move partition/Merge partitions
From above, we know the greatest hindrance during extending one partition is to make the unallocated space adjacent to the target partition. Now no need to worry and AOMEI Partition Assistant Server allows you to move the unallocated space right after the partition that needs to be extended via the “Move Partition” feature.
Besides, its “Merge Partitions” can directly combine unallocated space, no matter where it is on the disk, into another partition, or merge two adjacent partitions.
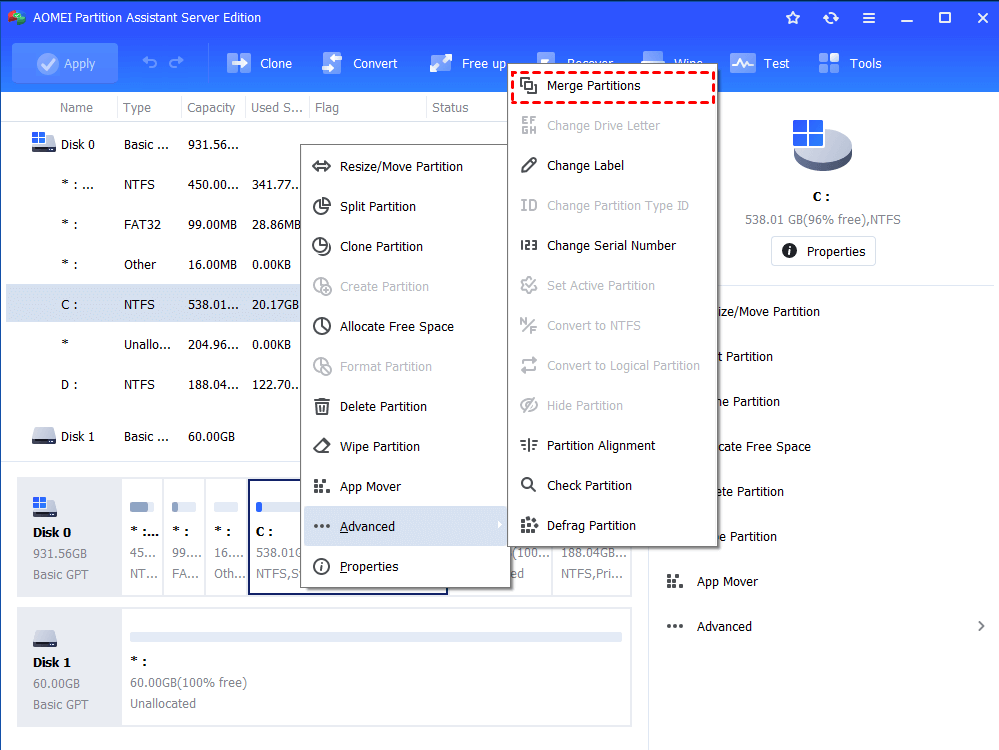
Moreover, it even enables you to transfer some free space from one drive to another with most ease through the “Allocate Free Space” .
- ★Tip:
- AOMEI Partition Assistant Server supports resizing both NTFS and FAT32 partitions.
Convert disk to MBR/GPT disk
Different from Disk Management, the AOMEI Partition Assistant Server can directly convert a disk between MBR and GPT even if it contains partitions. That does not require that you delete partitions beforehand, so there is no data loss risk.
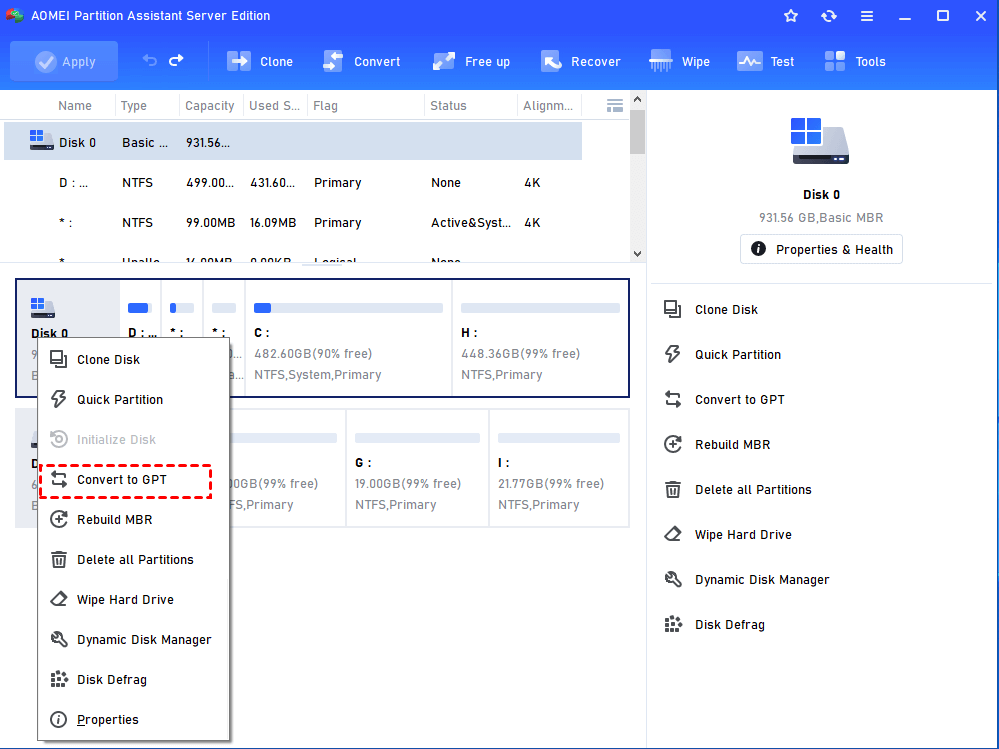
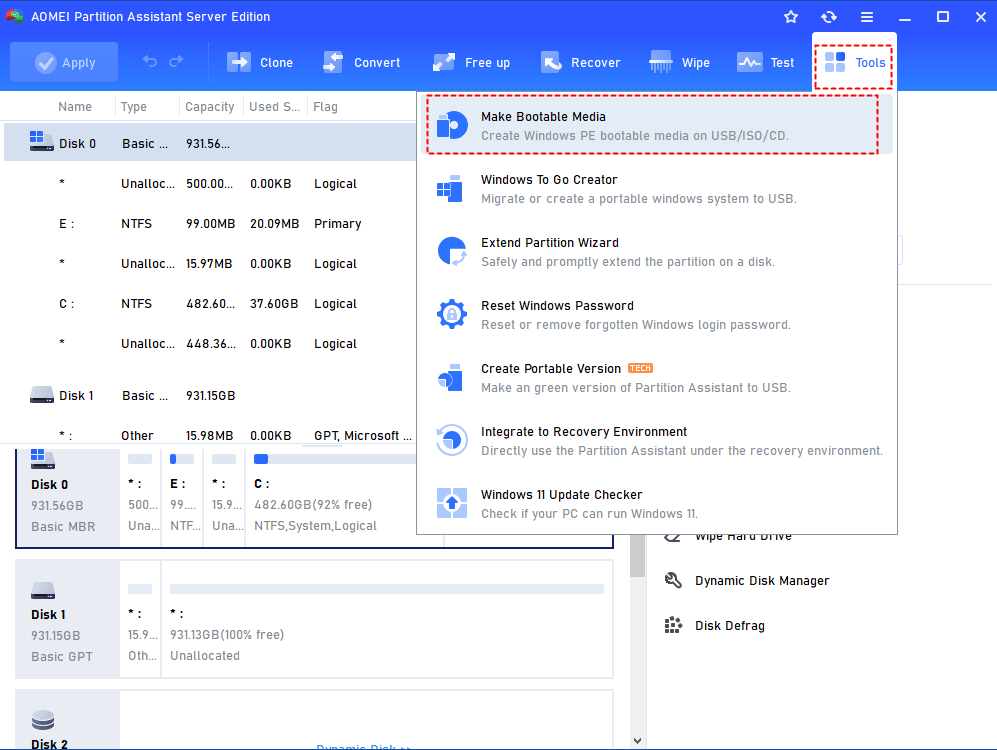
What’s more, it can convert a boot disk as well when the OS is running. If the Server OS cannot boot up for some reason, you can still make a bootable media via its “Make Bootable Media Wizard” and perform the conversion without loading OS.
So, under the help of the AOMEI software, you can easily manage disk partitions with most flexibility and ease. Apart from covering the shortages of snap-in Server 2022 Disk Management, this software also comes with many other advanced features that Server Disk Management does not offer. Following are some of the highlights:
- Migrate OS from one disk to another one (HDD/SSD) and make the destination disk bootable as well.
- Clone smaller disk to a larger disk, or a larger disk to a smaller disk.
- Move applications from one partition to another one.
- Recover lost or deleted partitions, including boot partitions with “Full Search” and “Fast Search” methods.
- Automatically defrag disk as you scheduled.
- Rebuild damaged MBR so as to repair some boot issues.
- ...

