Fix BitLocker Blue Screen on Windows 10/11 | 8+1 Startup Solutions
A BitLocker blue screen on Windows 10 or 11 during startup is common. This guide provides 8 solutions to bypass the error using your BitLocker recovery key, along with step-by-step instructions for resolving common triggers.
By Hedy / Updated on March 10, 2025
User case: Stuck BitLocker Blue Screen on Startup
Unable to boot laptop. Blue screen asks for bitlocker key, I don't have one. Logged I to Microsoft account and clicked manage recovery keys and it is empty. Tried changing various boot options in BIOS, nothing works. Tried to.recover windows , also said not possible. Must I wipe the hard drive and fresh install? How to do this without windows disk?
- Question from Microsoft Community
BitLocker is a powerful security measure that protects your hard drive data through encryption. Once enabled, it requires a password or smart card to access.
Typically, it works seamlessly and won't prompt for a recovery key during regular boot. Nonetheless, the Bitlocker screen may appear. What causes BitLocker blue screen? It usually happens due to the following circumstances:
-
Your system has undergone hardware changes.
-
Your PC runs in an outdated BIOS.
-
The file systems are corrupted or damaged.
-
You may have a faulty update.
-
BitLocker settings or configurations are incorrect.
If you find BitLocker blue screen on Startup in Windows 10/11, don't worry. Refer to the following comprehensive troubleshooting guide to get the easiest method with 8 effective solutions to fix this issue.
The easiest way for fixing Windows BitLocker issues
Sometimes, on modern devices with a Trusted Platform Module (TPM) chip and a Microsoft account, Windows may automatically enable BitLocker after setup, especially on Windows 10/11 Home editions. However, managing BitLocker encryption can be challenging for some users due to its complexity. Fortunately, there is a user-friendly alternative, AOMEI Partition Assistant, that simplifies encryption on all Windows systems, including Windows Home editions. To manage BitLocker, it offers these features:
- ★Tips:
- It supports all Windows systems, including Windows 11/10 Home Edition, bridging the gap for Home Edition users.
- It offers a range of features from recovery key backup, password changes, and drive lock/unlock to switching BitLocker status, all accessible through a single interface.
- Designed for users of different proficiency levels, especially suitable for beginners, ensuring a worry-free experience.
- Adopts AES encryption algorithm and complies with the strict security standards set by Microsoft BitLocker.
The Best Windows Disk Partition Manager and PC Optimizer
Here is a comprehensive guide to managing BitLocker with PA:
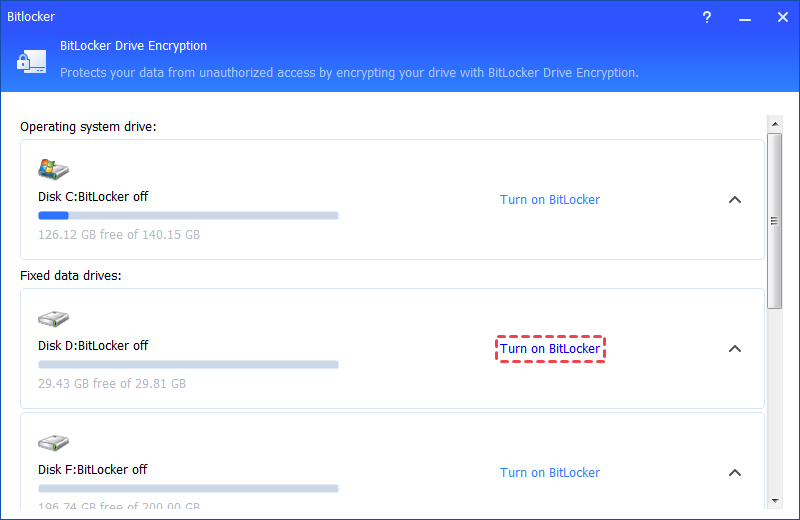
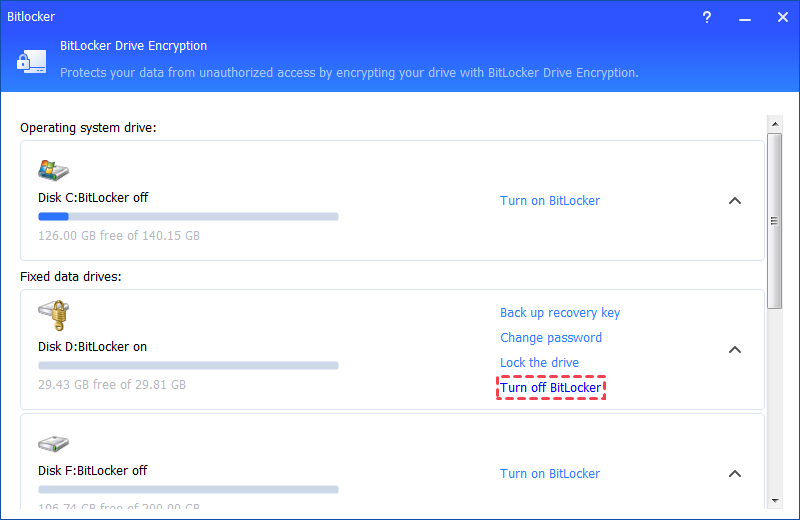
1. Turn on/off BitLocker:
To activate or deactivate BitLocker, users can easily find the target drive and click "Turn on BitLocker" or "Turn off BitLocker" in the program. Both password and recovery key options are available for authentication.
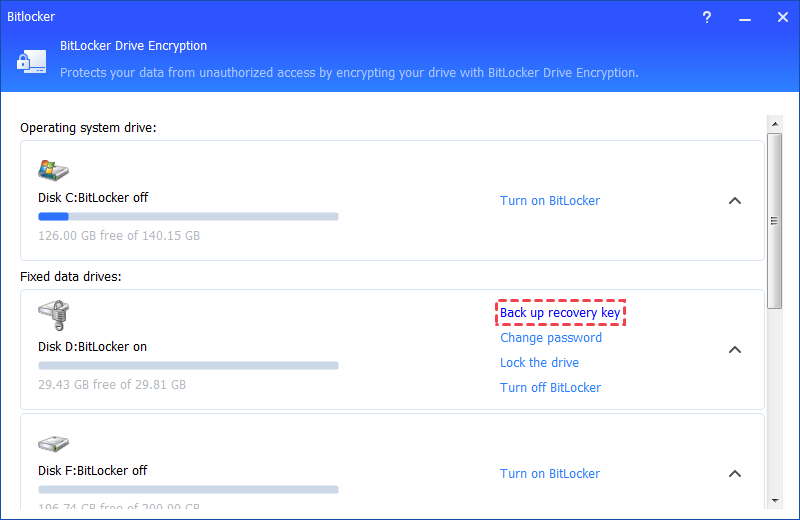
2. Back up the recovery key:
It is crucial to ensure that your BitLocker recovery key is backed up. Retrieving the key can be troublesome if forgotten or lost. PA provides the option to back up keys by saving them to a file or printing them.
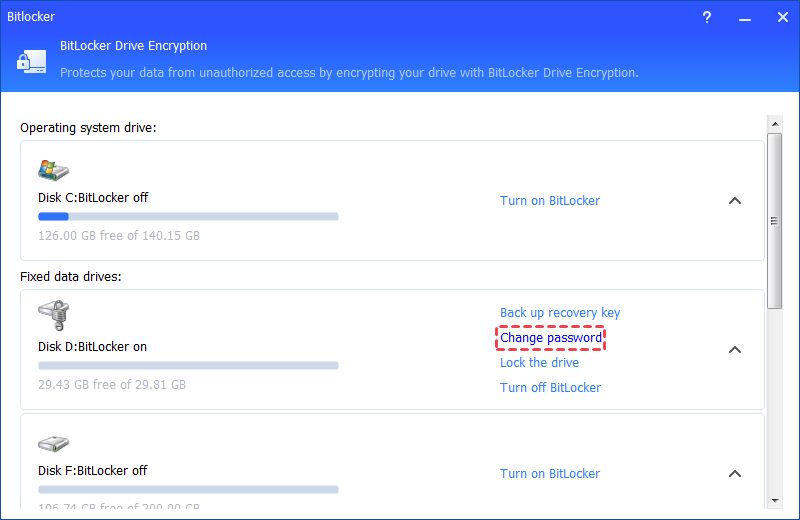
3. Change BitLocker password:
Regularly updating your BitLocker password increases data security. PA facilitates password changes using your current password or recovery key.
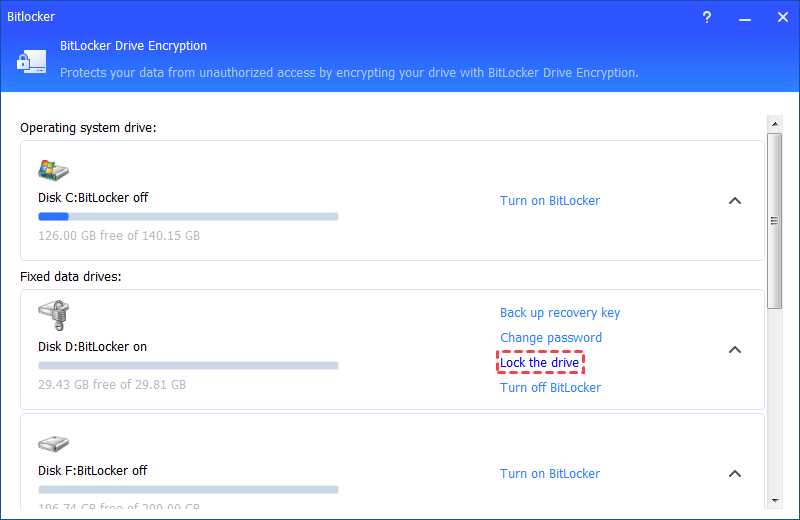
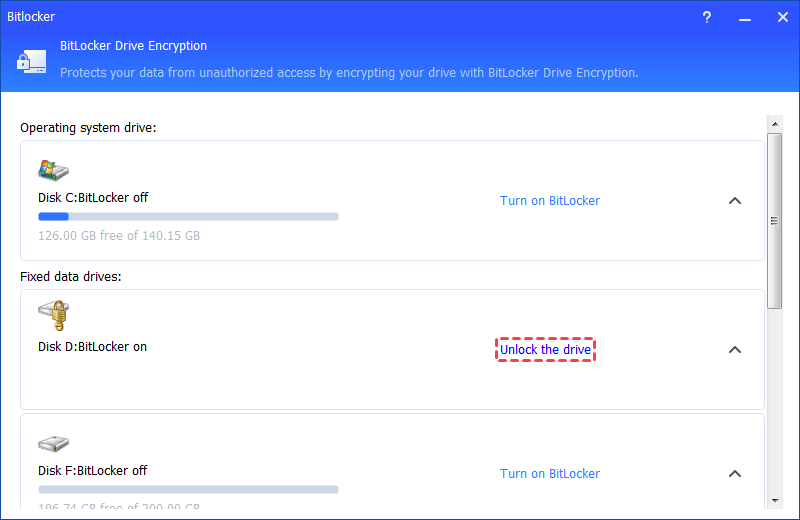
4. Lock/unlock the encrypted drive:
Locking a drive prevents access to all encrypted data on a BitLocker-encrypted volume. Unlock the drive using a password or recovery key to regain access to protected data.
AOMEI Partition Assistant provides an intuitive solution for BitLocker management, simplifying the encryption process and providing an easily accessible alternative, especially beneficial for Windows 10/11 home users. Feel free to download and explore its features!
The Best Windows Disk Partition Manager and PC Optimizer
How to fix BitLocker blue screen Windows 10/11
As mentioned above, the BitLocker recovery screen can be triggered for various reasons. However, after analyzing various user reports, 8 summarized workarounds can help you get around this hurdle. Before trying these solutions, it's crucial to keep all your important data safe.
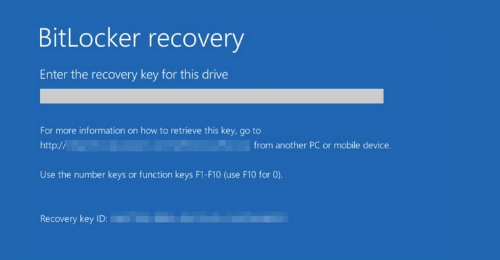
Way 1. Enter the BitLocker recovery key
One of the most effective ways to bypass the BitLocker blue screen Windows 11/10 is to enter the exact recovery key. During the BitLocker setup process, users are typically encouraged to save this key to their Microsoft account. You can sign in to your Microsoft account and find the BitLocker recovery key. Follow the following instructions:
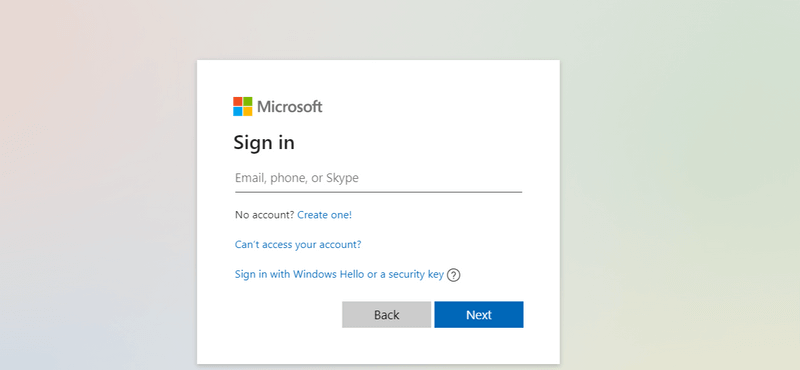
Step 1. Visit your Microsoft account.
Step 2. "Sign In" to the account with your credentials.
Step 3. Navigate to "Devices", and click "View details" under Computer.
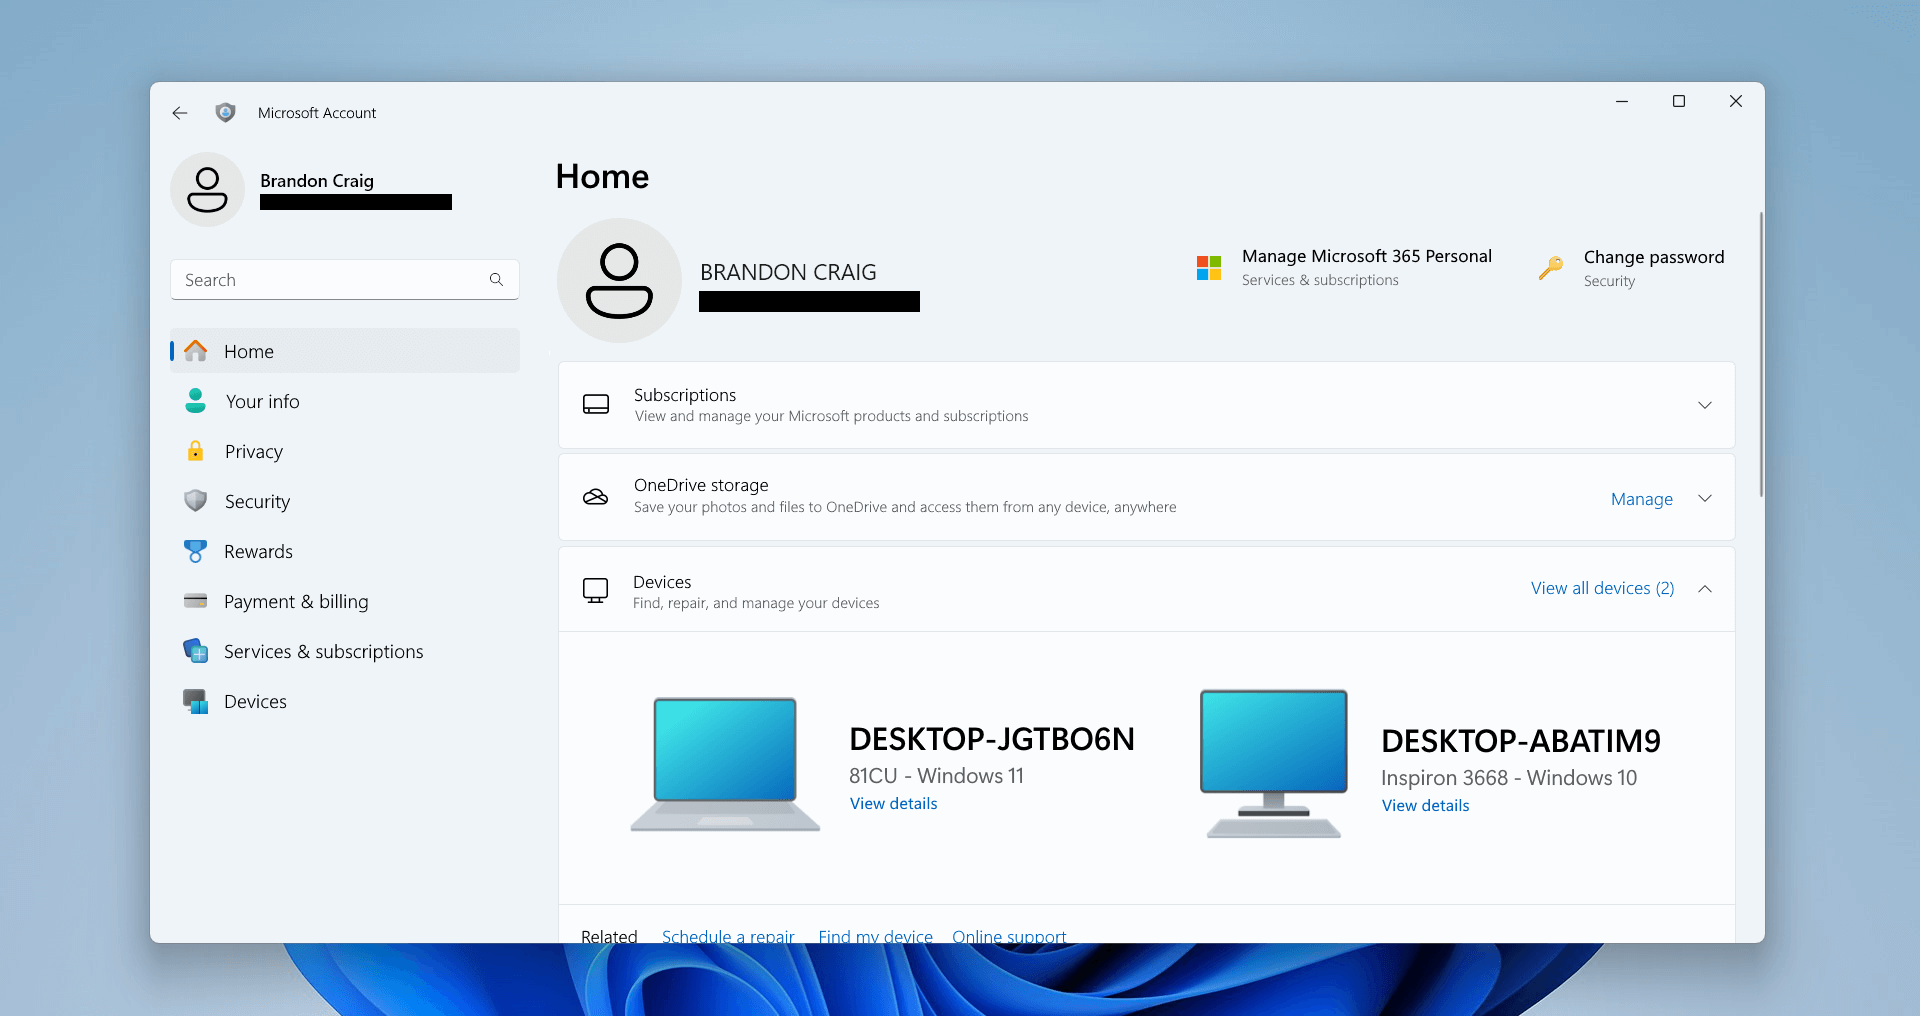
Step 4. Scroll down to find the "BitLocker Data Protection". Click "Manage recovery keys".
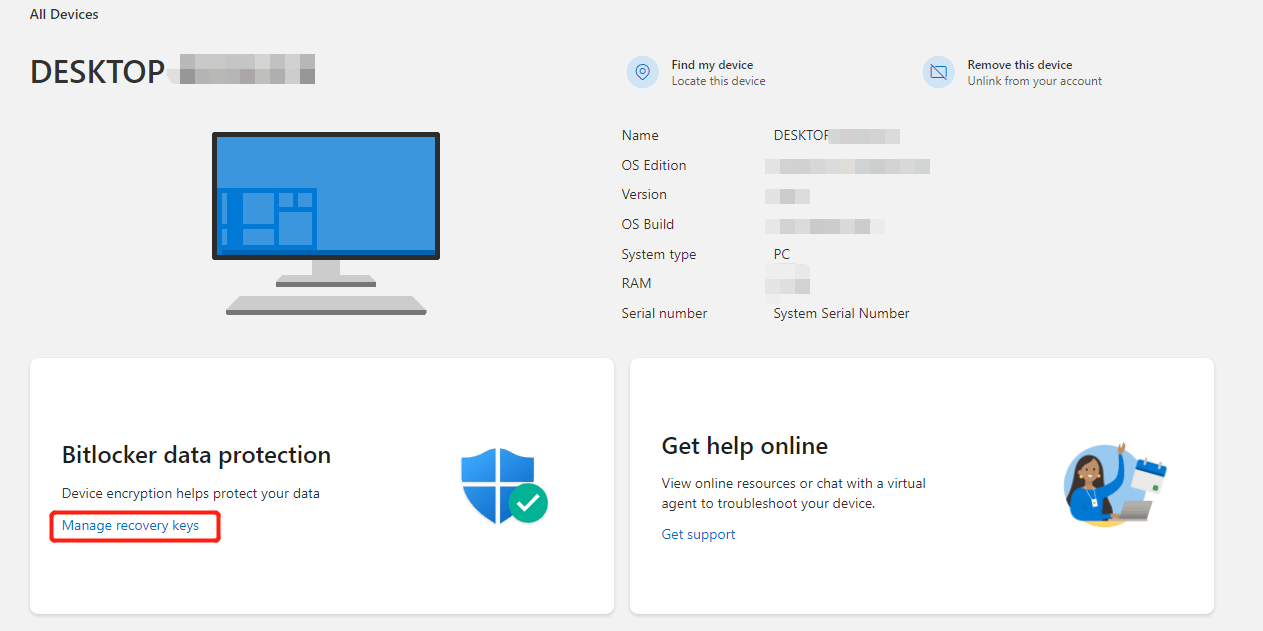
Step 5. Your exact recovery key will be displayed there.
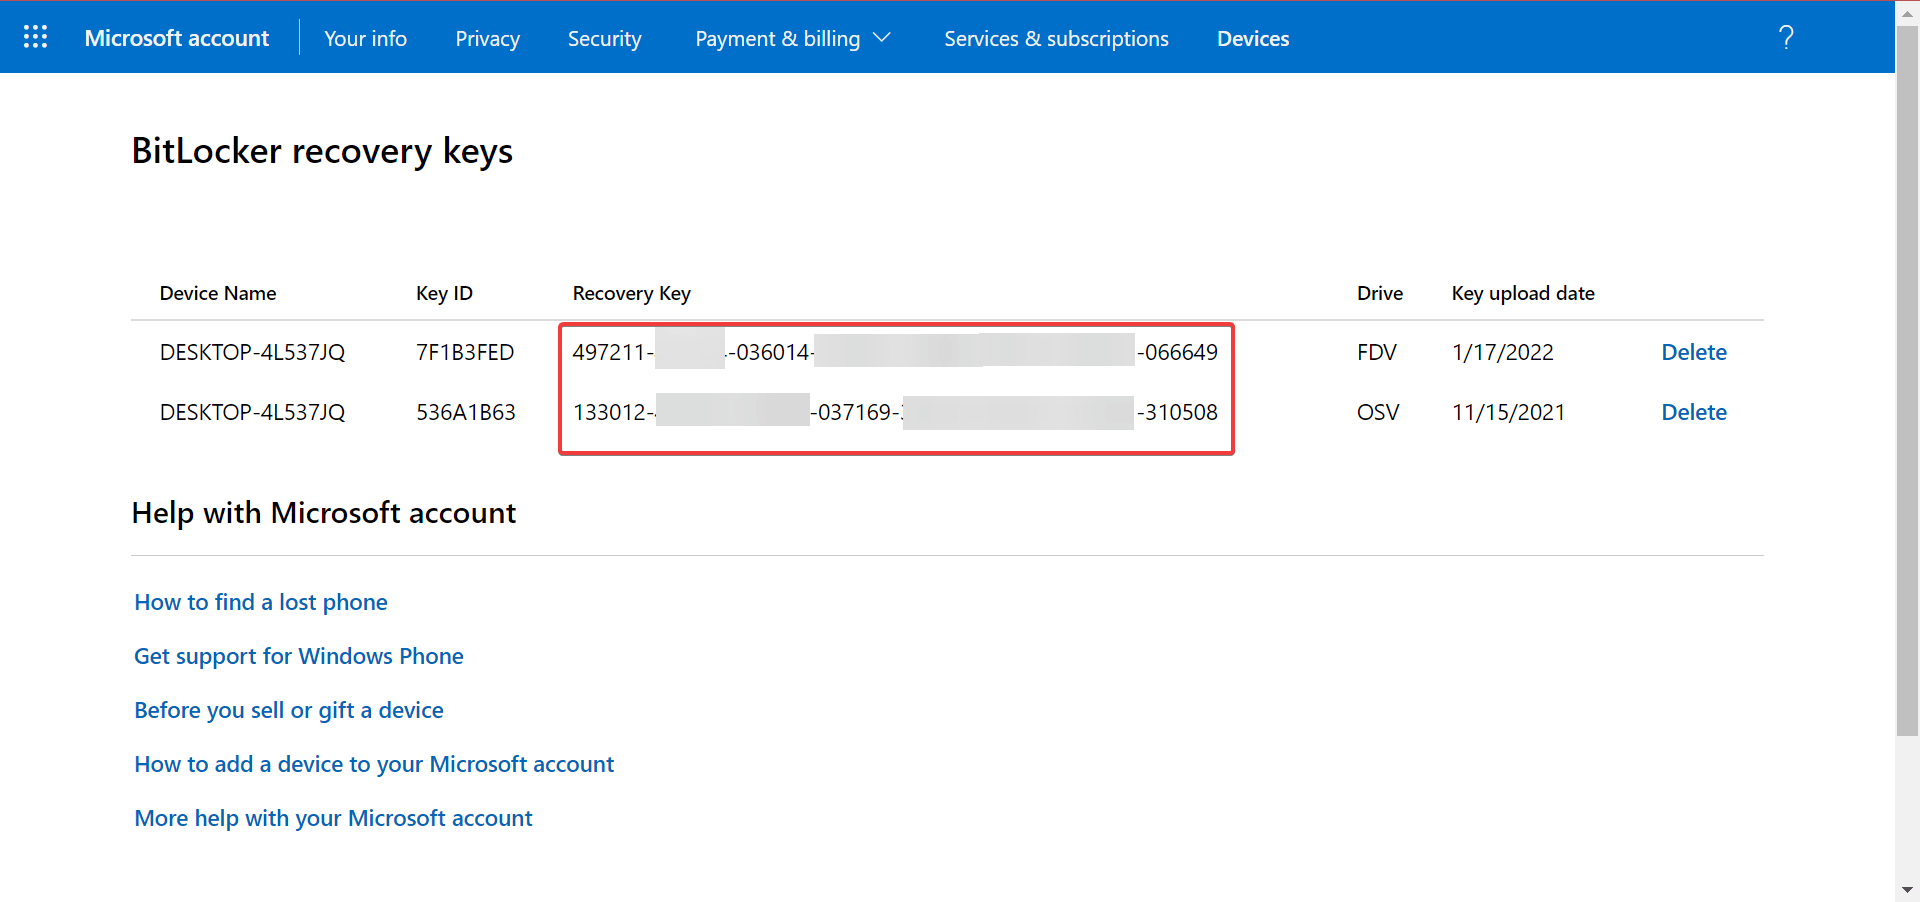
Apart from saving your BitLocker recovery key to the Microsoft account. Usually, there are other two options available: save the key to a USB drive or a printout. It is suggested to check your USB drive and any physical printed copy as well.
Way 2. Suspend BitLocker protection
To eliminate recurring BitLocker blue screen on startup, pausing BitLocker protection on Windows PC has proven effective. Here's a step-by-step guide:
Step 1. Click "Start" and type "Control Panel" to launch. Select the top result shown to continue.
Step 2. In Control Panel, navigate to "System and Security" and click "BitLocker Drive Encryption".
Step 3. In BitLocker settings, find and select "Suspend protection" to temporarily turn off BitLocker protection.
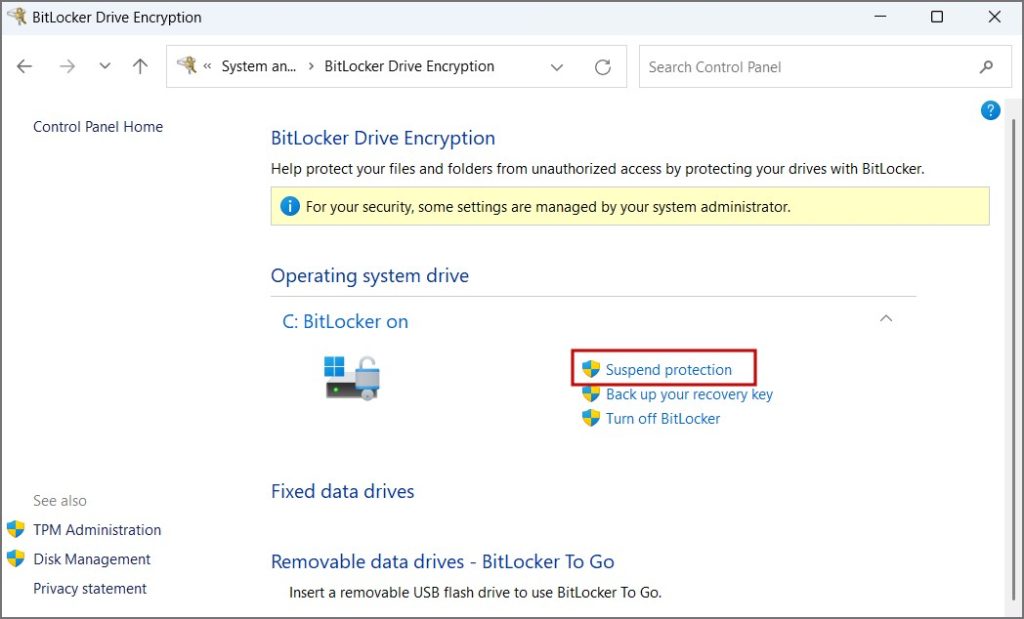
Following these steps will successfully suspend BitLocker and ensure you avoid the BitLocker recovery screen when you restart your Windows system.
Way 3. Reset the BitLocker Pin
If you find yourself using an organizational account and encountering a BitLocker blue screen on startup which requires you to enter the password or recovery key, there's a simple process to reset it. Please follow these instructions:
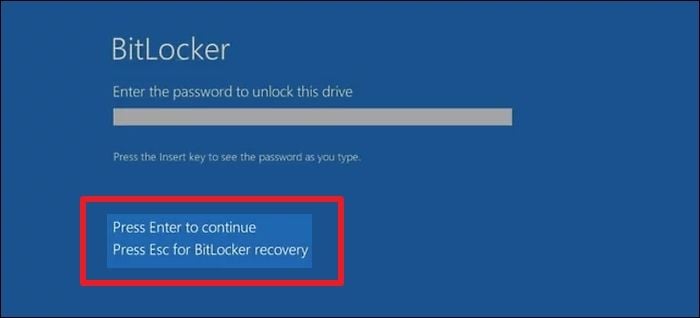
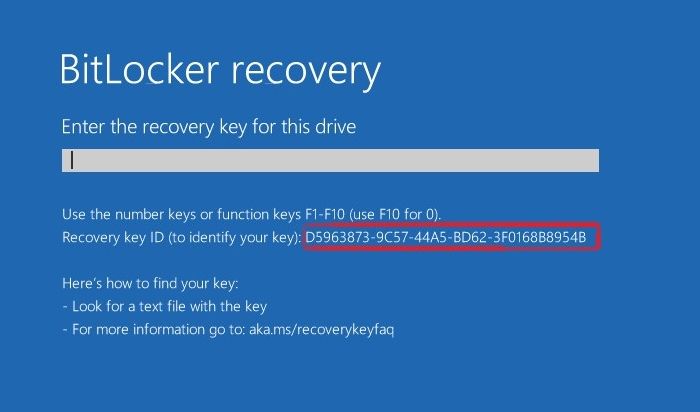
Step 1. On the BitLocker recovery screen, press the "Esc" key on your keyboard.
Step 2. The recovery key ID will appear on the screen immediately. Capture information quickly by writing it down or taking a photo before it disappears.
Step 3. After recording the recovery key ID, contact your system administrator and provide them with this information.
Step 4. Your administrator will proceed to find the recovery key that corresponds to the recovery key ID provided.
By following these steps and working with your system administrator, you can initiate the retrieval process of the BitLocker recovery key associated with your organizational account.
Way 4. Uninstall the newly updates
The appearance of the Windows 10 BitLocker blue screen is usually associated with recent hardware modifications. If you have recently made changes to your computer's hardware, we recommend undoing those changes to check if the BitLocker recovery screen is still there. In this order:
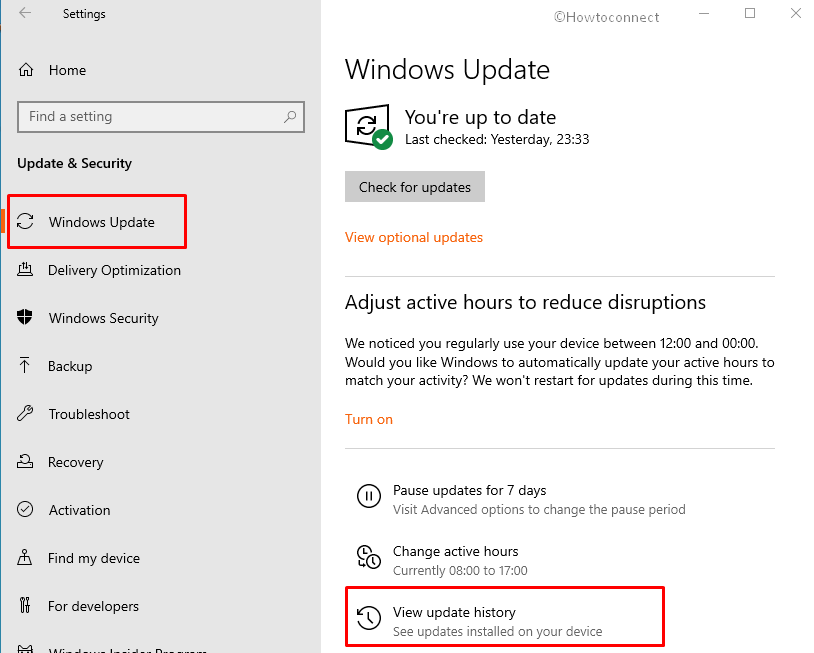
Step 1. Press the Windows key, type "update" and press "Enter".
Step 2. Click "View update history". (For Windows 11, select "Update History".)
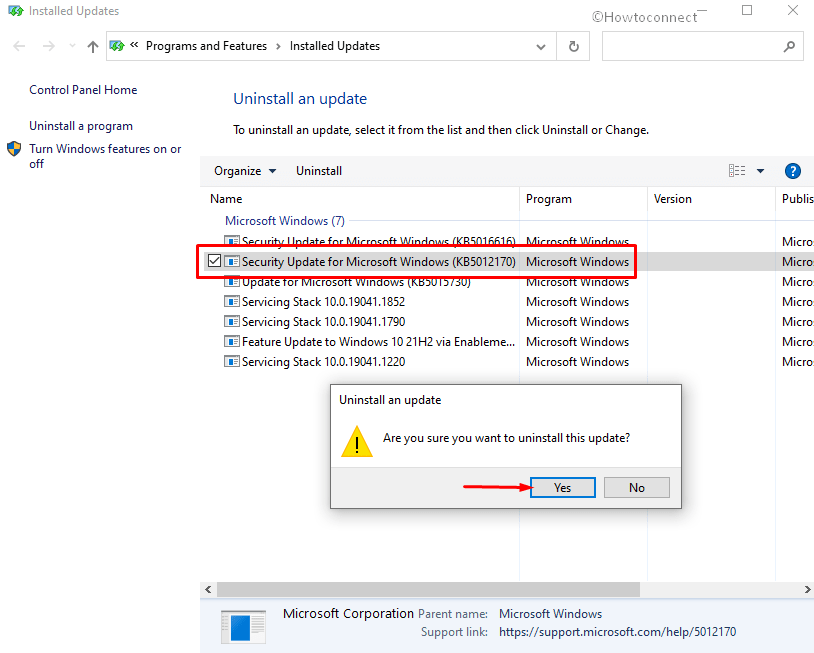
Step 3. Select "Uninstall updates".
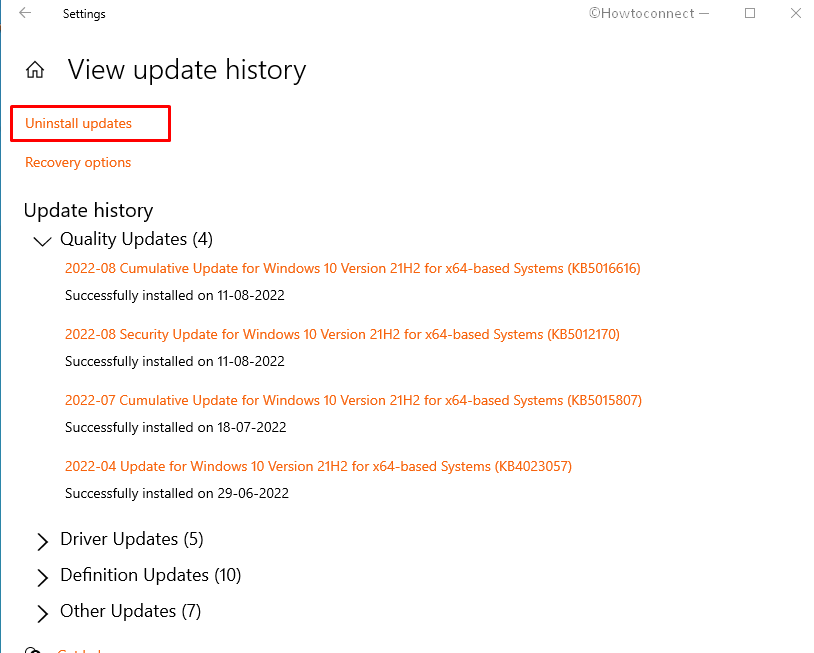
Step 4. Find the problematic update, double-click it, and proceed with uninstalling.
Step 5. Click "Yes" on the prompt to confirm the action.
By completing these steps, you may be able to resolve issues with the BitLocker blue screen Windows 10/11 issue related to hardware changes or incorrect updates on your Windows system.
Way 5. Use Legacy Boot
To switch your Windows system's BIOS mode from UEFI to Legacy mode and potentially resolve BitLocker blue screen Windows 11/10, follow these steps:
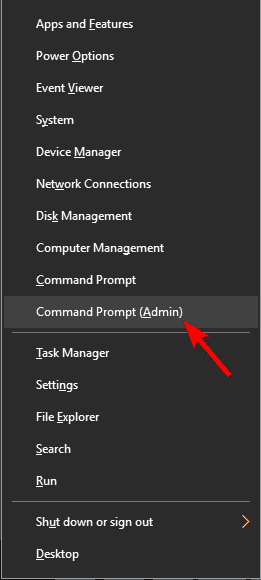
Step 1. Press the "Windows" Key + "X" and select "Command Prompt (Admin)" from the menu.
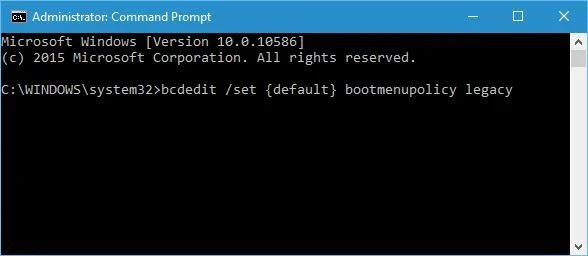
Step 2. In the command prompt, enter the provided script and press "Enter".
bcdedit /set {default} bootmenupolicy legacy
Please note that changing the BIOS mode to Legacy mode may cause the startup screen appearance to change from a graphical interface to a less visually appealing display.
Executing this script can facilitate switching to the old boot mode, potentially mitigating issues related to the BitLocker password screen.
Way 6. Update BIOS
Updating the BIOS can resolve issues that cause recurring BitLocker password prompt screens, often associated with outdated BIOS versions that break Windows 11 or 10. Here is a step-by-step guide:
Step 1. Press the "Windows" Key + "X" and select "Command Prompt (Admin)" from the menu.
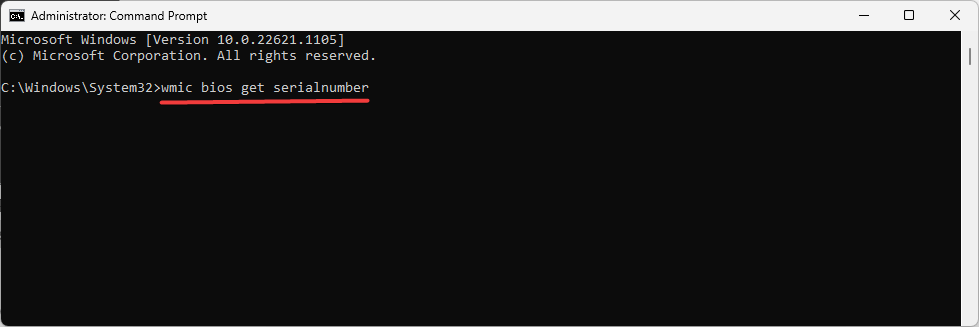
Step 2. In the command prompt, enter the provided script and press "Enter".
wmic bios get serialnumber
By the BIOS in these steps, you may be able to resolve the issue with the BitLocker blue screen on startup.
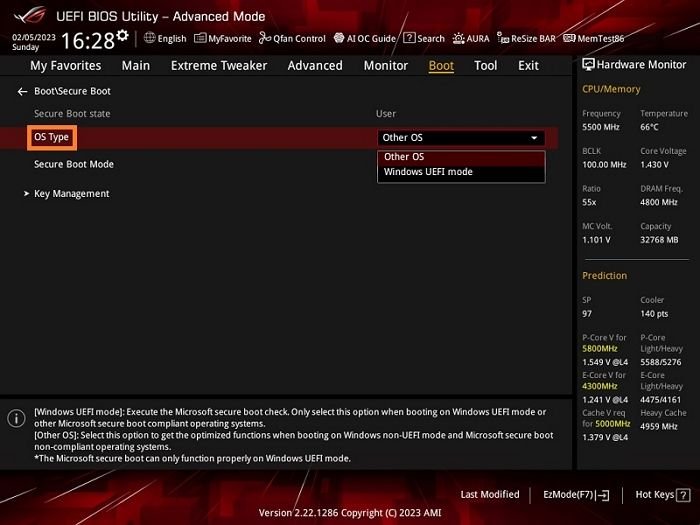
Way 7. Enable or disable Secure Boot
Users reported bypassing BitLocker recovery blue screen by manipulating Secure Boot settings. Please consider following these steps to enable/disable Secure Boot and evaluate the situation:
Step 1. On the BitLocker recovery screen, press the "Esc" key and select "Skip this drive."
Step 2. Go to the next screen, select "Troubleshoot" and then "Advanced Options".
Step 3. Access UEFI Firmware Settings in the "Boot" section.
Step 4. Find the "Safe Boot" option and modify its status. If it is enabled, try disabling it and vice versa. Confirm the changes.
By adjusting the Secure Boot settings outlined in these steps, you may be able to resolve the issue with the BitLocker recovery screen. If you think it is difficult for you, AOMEI Partition Assistant offers the easy solution for you.
The Best Windows Disk Partition Manager and PC Optimizer
Way 8. Remove BitLocker Protectors
If previous methods cannot work, unlocking BitLocker with Command Prompt may be an effective solution. Here are the steps to disable BitLocker using the CMD utility:
Step 1. On the BitLocker recovery screen, press "Esc" and click "Skip this drive" in the lower right corner.
Step 2. Next, select the "Advanced" tile and select the "Command Prompt" option.
Step 3. Once the command prompt opens, enter the following command and press "Enter":
manage-bde -unlock D: -password
Step 4. Execute the following command in the console and press "Enter" to disable the protector:
manage-bde -protectors -disable D:
Step 5. Then, restart the Windows system to verify that the BitLocker recovery screen still appears.
By executing these steps and commands in the command prompt, you can disable BitLocker's protector and gain access to the system.
Conclusion
BitLocker encryption is a powerful Windows feature to protect files from unauthorized access. However, prompting the BitLocker blue screen Windows 10/11 when starting up the computer can be annoying. So this passage focuses on fixing this issue and offers 8 easy yet effective ways with detailed instructions.
To make BitLocker management easier, you can use AOMEI Partition Assistant Professional. This versatile encrypting tool combines all BitLocker-related functions within one intuitive interface, allowing you to manage BitLocker with ease and at will.
Apart from BitLocker encryption, PA also encompasses features such as to cloning the encrypted drive for data backup, resizing the encrypted partition, and moving installed programs to free up space in the C drive. For Windows servers, please try the Server Edition.

