How to Shrink Volume in Windows 10 without Losing Data?
To shrink volume in Windows 10, you can use the Disk Management. If you meet the “shrink volume greyed out” or “shrink volume not enough space” problems, the AOMEI Partition Assistant Standard can be a great alternative.
By AOMEI / Updated on May 12, 2023
Why need to shrink volume in Windows 10?
If you just have bought a new PC with Windows 10 preinstalled, you probably find there is just one partition on the large hard disk. For example, if your new computer comes with a 500GB hard disk drive, there might be a single system partition (C: drive) of around 450GB. Thus, you need to shrink the volume from the end of to create unallocated space and make another new partition to store personal files. Then you can avoid saving all files on the system partition.
Besides, if there are already multiple partitions on your hard drive, but one of them is almost full and in low disk space, then you can shrink another partition with enough free space you seldom use and add the generated unallocated space into the partition that requires more space to make it bigger.
How to shrink volume in Windows 10 without losing data?
To shrink a volume or partition in Windows 10, 8, 7, you can use Windows inbuilt Disk Management tool or third-party partition manager. Next, step-by-step guides on how to shrink volume are shown for your reference.
Method 1. Using Windows 10 Disk Management
Disk Management is a system utility in Windows that enables you to perform advanced storage tasks such as setting up/initializing a new hard drive, changing a drive letter or assigning a new drive letter, formating partition, deleting partitions, etc. To shrink a basic volume, do as following:
▶Notes
1. You can only shrink basic volumes that have no file system or use the NTFS file system.
2. If the partition is a raw partition (without a file system) that contains data (such as a database file), shrinking the partition might destroy the data.
3. When you shrink a basic volume/partition, any ordinary files will be automatically relocated on the disk to create unallocated space. There is no need to reformat the disk to shrink the partition.
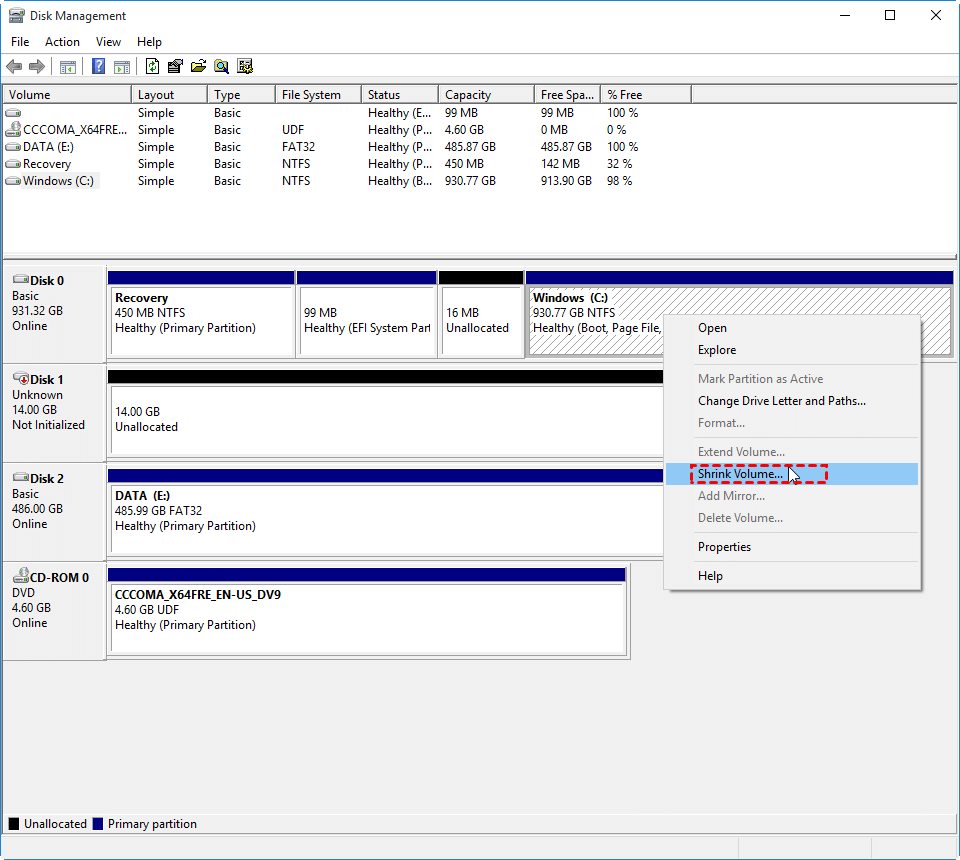
Step 1. Press "Win+R" simultaneously to open Run box, type “diskmgnt.msc” and press “Enter” to open Disk Management.
Step 2. In Disk Management, right-click the basic volume you want to shrink and choose “Shrink Volume”.
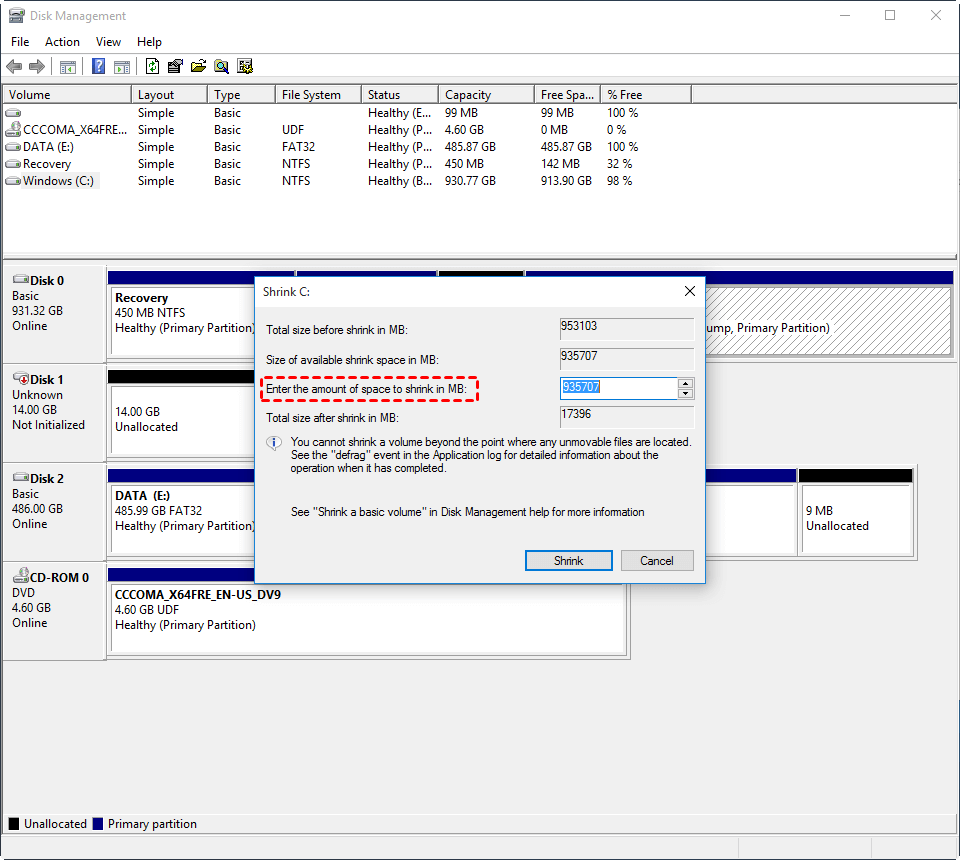
Step 3. Follow the on-screen instructions.
Generally, you can shrink a volume to your desired size successfully via the above steps. However, you may also meet the following two common problems:
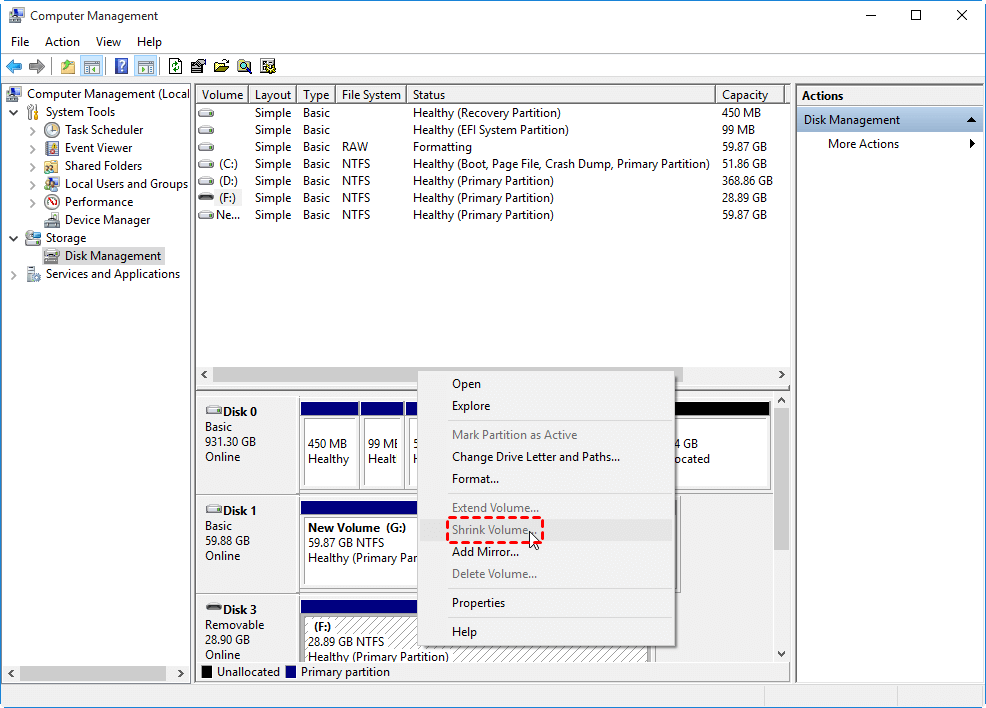
☹1. “Shrink Volume” greyed out in Windows 10
I have a large partition on my pendrive and I'm trying to split it into two partitions. I figure that I could shrink it and create a new partition using the newly available unallocated space. However, when I right click on drive D, the “Shrink Volume” is greyed out, Why?
This problem might be caused by two factors: the partition is not of RAW or NTFS, but is formatted with FAT32 or other file systems; the partition exists on a removable media like USB flash drive, SD card, etc. Disk Management does not allow users to resize partition on a removable media and it cannot extend or shrink FAT32 partition.
☹2. Cannot shrink volume for not enough space
There is a large D drive on my Windows 10 PC, and I plan to shrink it and enlarge my system drive. But when trying to shrink this volume with Disk Management, I encounter the problem that shrink volume not enough space, but it really has a lot of free space unused. Why?
This might because there are unmovable system files at the very end of the volume. Thus, you might need to run “Disk Defragment”, disable Hibernation mode, disable paging files or launch the “Disk Cleanup” to solve the “shrink volume not enough space” issue.
Method 2. Try a free partition manager
To easily shrink a volume in Windows 10 and avoid above awkward situations, it is advised to use the free partition manager: AOMEI Partition Assistant Standard. It can shrink a partition of either NTFS or FAT32 file system as well as shrink an encrypted partition. Besides, it can even shrink a partition up to its total amount of free space. Download the freeware and have a try, please.
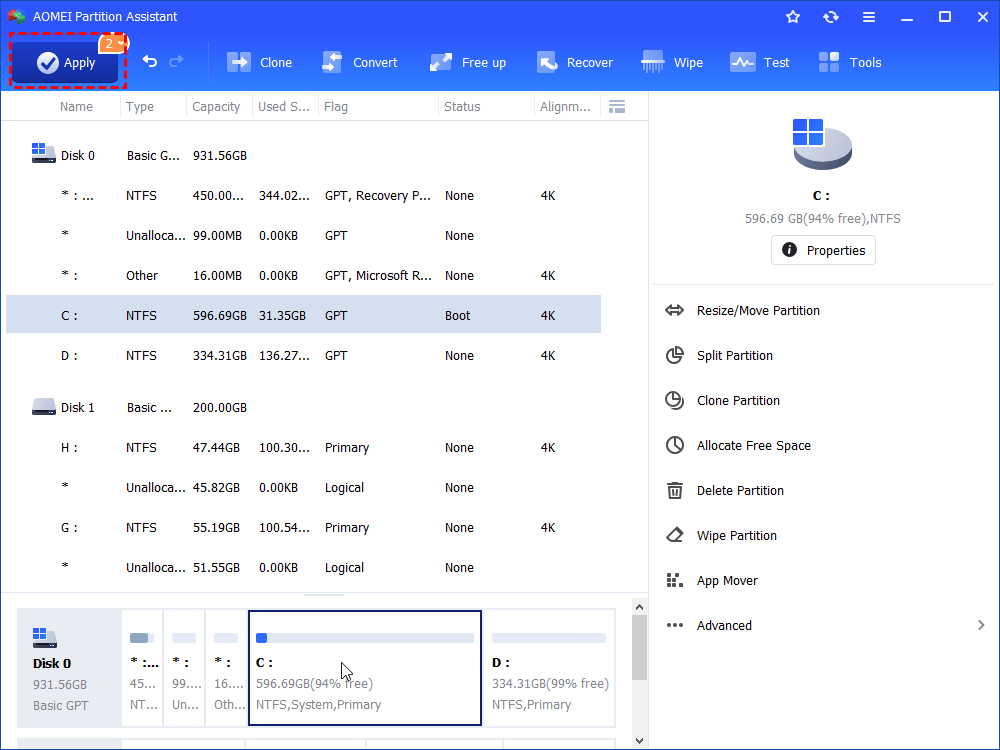
Step 1. Install and run AOMEI Partition Assistant Standard. Right-click the target partition and select “Resize/Move Partition”.
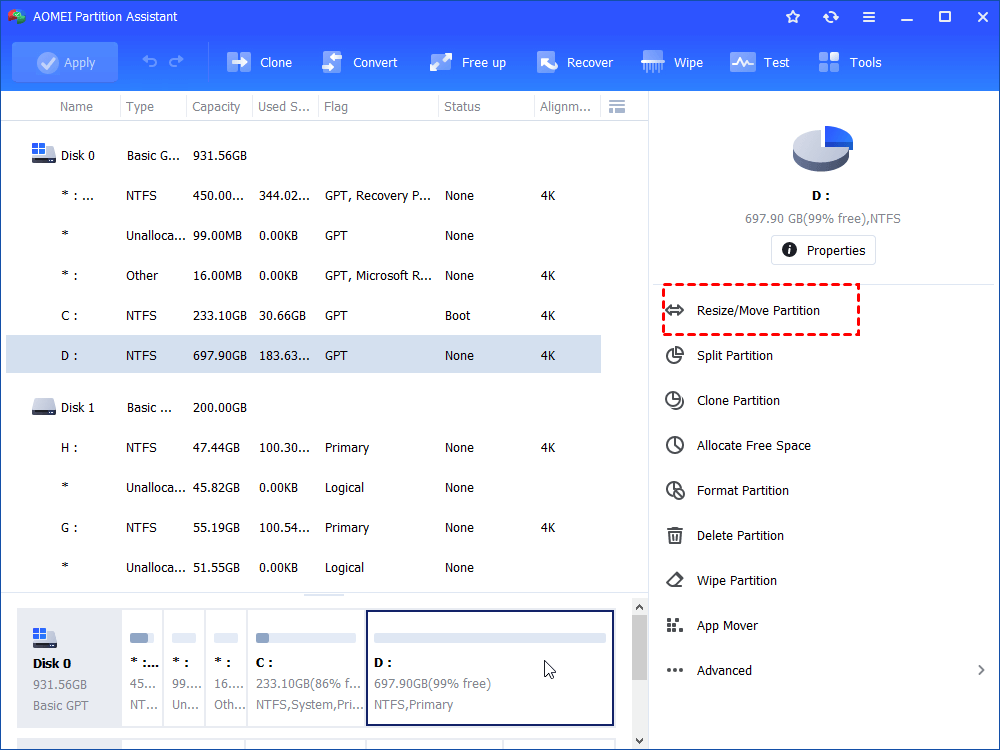
Step 2. Drag the bar to the left side to shrink it from the end to the desired size and click on “OK”.
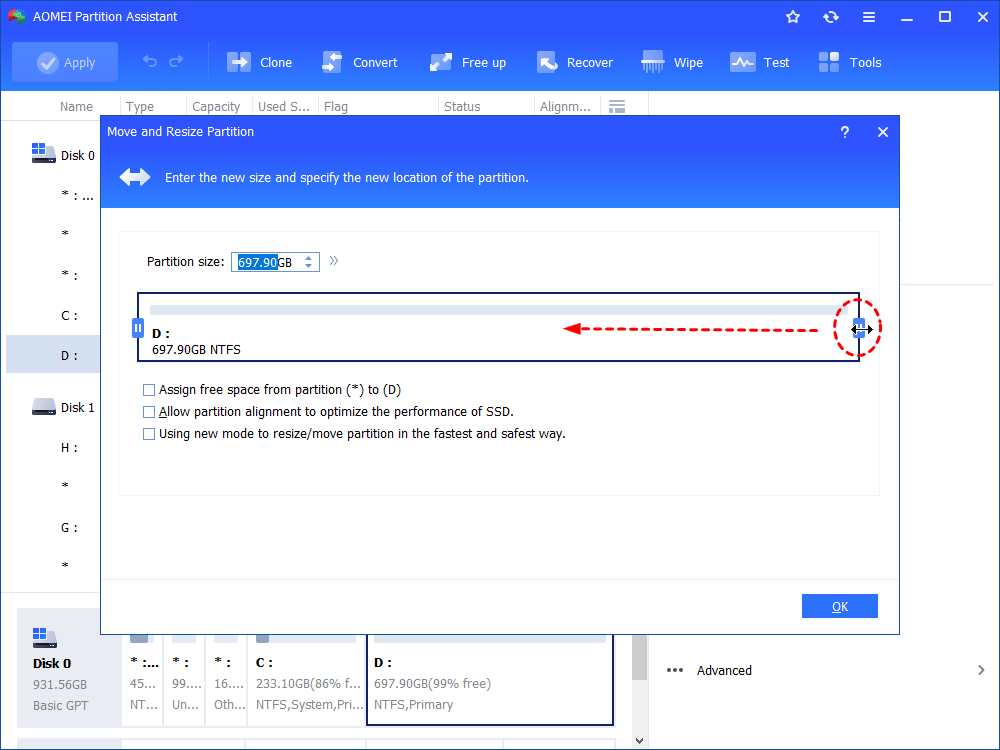
▶Note: you can also shrink the partition from its front by draging the bar to the right side, not only from the end.
Step 3. Click on “Apply” to commit the pending operation.
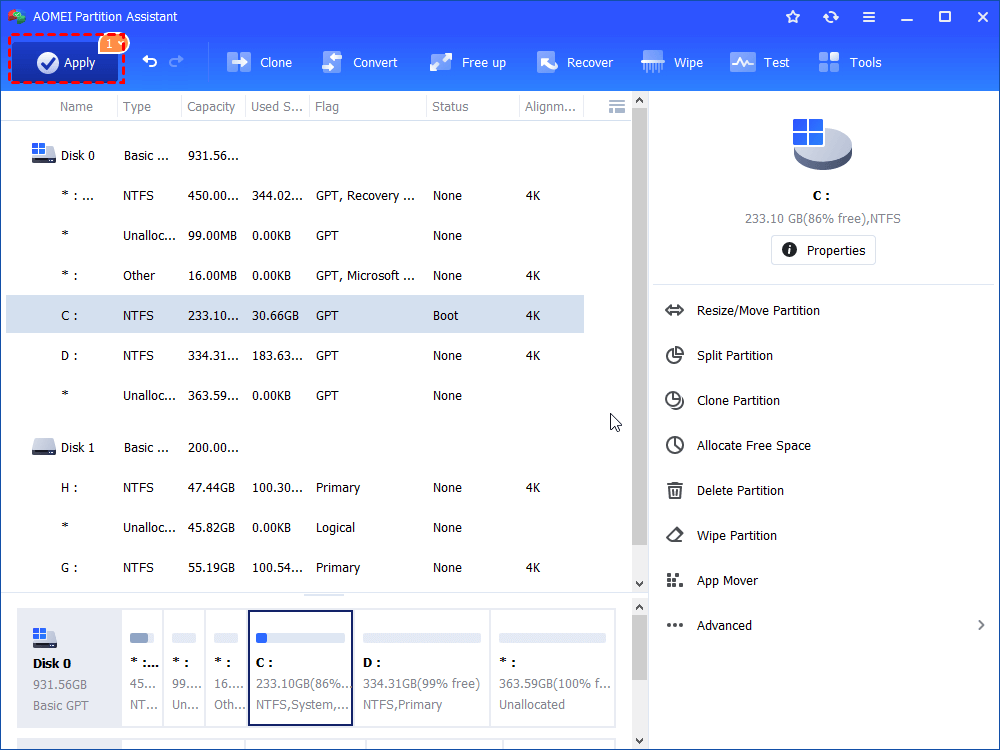
When you shrink a partition successfully with the free partition manager, you can use the unalloctated space to create a new partition, or extend another partition that needs more disk space.
Creating a new partition can be easily completed via Disk Management. However, extending another partition with unallocated space is very challenging because the Disk Management can only extend a partition with adjacent unallocated space, but shrinking a volume can only generated unallocated space on its right side and cannot be moved. But don’t worry, the AOMEI Partiiton Assistant Standard’s “Merge Partitions” feature can add the non-adjacent unallocated space into another parititon within 3 steps:
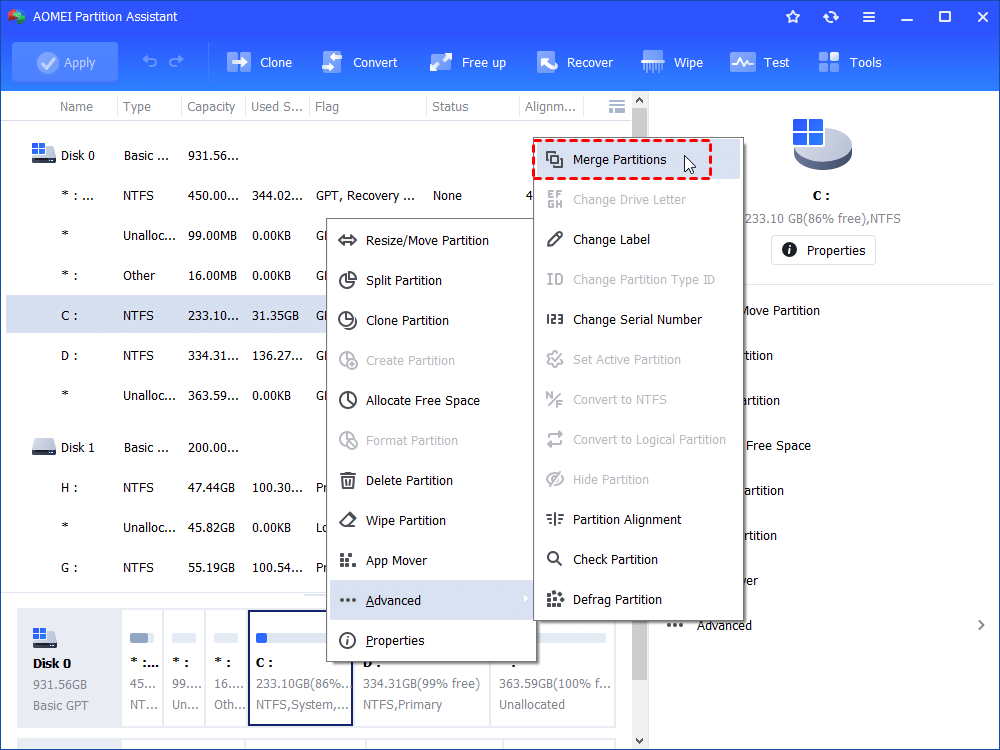
Step 1. Right-click the partition you wish to extend and select "Advanced" > “Merge Partitions”.
Step 2. Tick the unallocated space and click on “OK”.
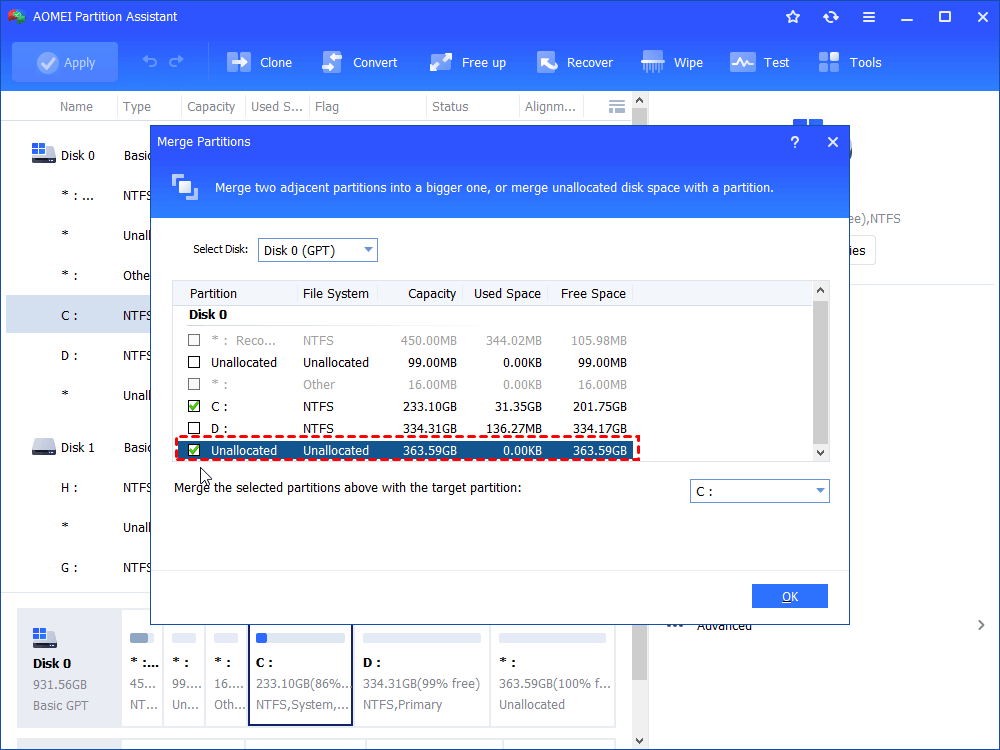
Step 3. Click on “Apply” to commit the pending operation.
Summary
With those two tools shared, you will be able to shrink a volume in Windows 10, 8, 7 successfully. Compared with Disk Management, this AOMEI Partition Assistant Standard software is more powerful for your partition management. It offers many other great features: clone partition, move partition, migrate OS to SSD, clone hard drive, etc.
To experience more advanced functions like allocating free space from one drive to another, splitting a partiton into two smaller partitions, securely erasing SSD drive, converting boot disk between MBR adn GPT, etc, you can upgrade to AOMEI Partition Assistant Professional.

