How to Fix 0xc1900101 during Windows 11 Installation?
If you fail to install Windows 11 due to 0xc1900101 error code, refer to this post as the best solutions and an alternative way for Windows 11 installation will be provided.
By AOMEI / Updated on May 12, 2023
Help, error code 0xc1900101 during Windows 11 installation!
"I was trying to install the new Win 11 update from Windows update but I kept getting error 0xc1900101. The installation started and after a while, it restarted and said "Attempting to recover installation” and “Undoing changes made to your computer". Then, I met the error 0xc1900101 on Windows 11 update.
Overview of 0xc1900101 at Windows 11 installation/Update
When you update Windows 10 to Windows 11 or install the Windows 11 operating system, sometimes, you might be prompted with the 0xc1900101 error code that prevents you from proceeding. So, how come? Actually, this code can appear at any stage of the upgrade/installation process. 0xc1900101 Windows 11 is a generic rollback code that usually indicates that an incompatible driver is present which can cause a blue screen, system hangs, and unexpected reboots. This is one of the many reasons that cause the issue. Of course, others like insufficient storage space and an outdated/faulty driver should also be considered.
5 ways to troubleshoot the 0xc1900101 Windows 11 error
On Microsoft.com, you’ll find many users complain about the error code 0xc1900101 windows 11 but there are hardly any practical suggestions. Luckily, some YouTube uploaders encountered the same problem and after great effort, they finally figured some ways out. Here, I collected the top 5 commonest solutions.
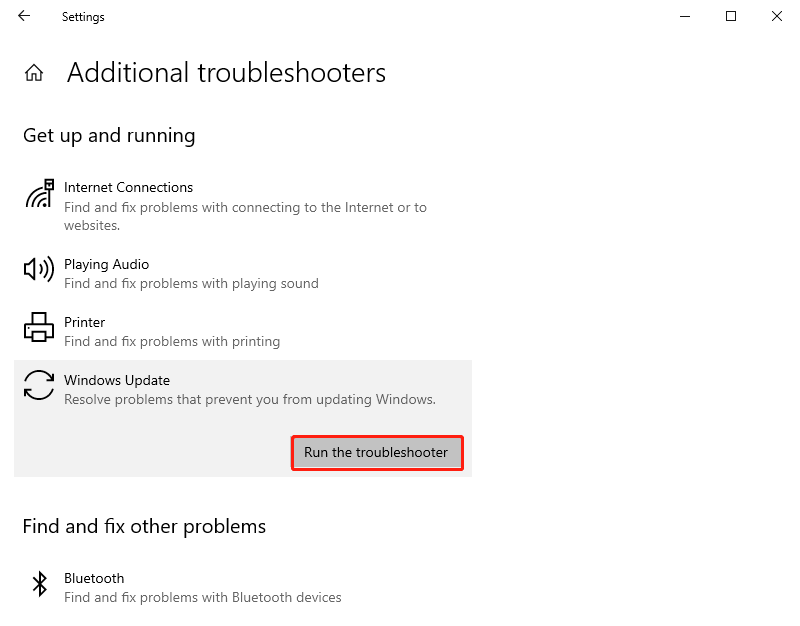
Way 1. Use the Windows Update Troubleshooter
If you get an error code while downloading and installing Windows updates, usually, you can turn to this Windows built-in tool for help.
1. Open "Settings" from the desktop.
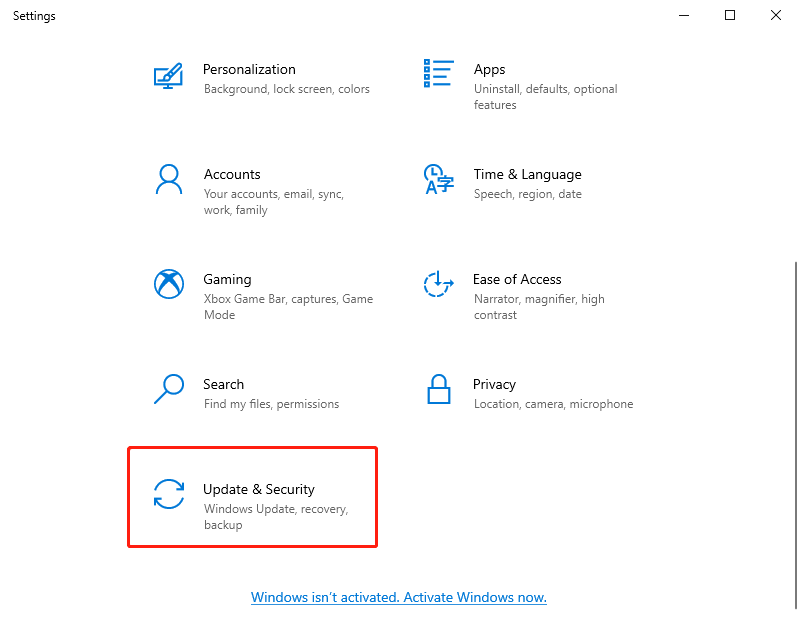
2. Go to "Update & Security > Troubleshoot > Additional troubleshooters > Windows Update".
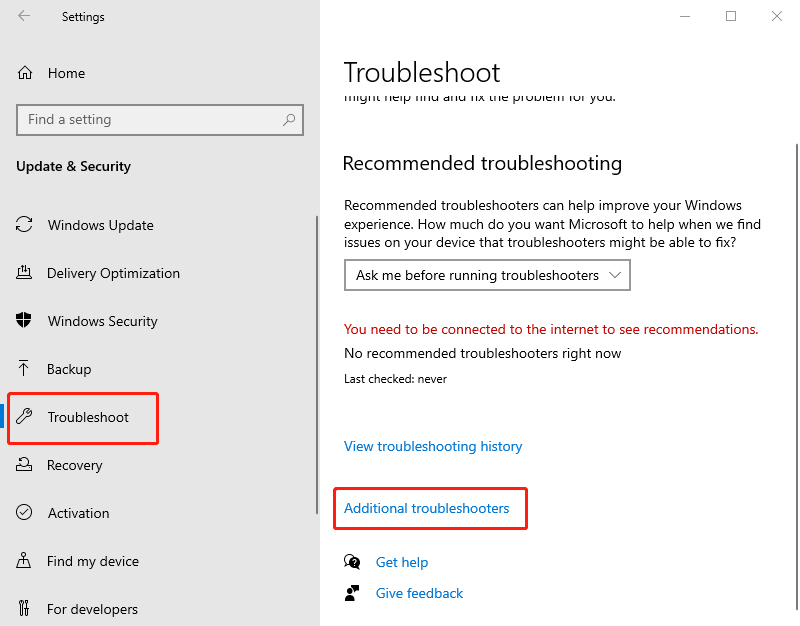
3. Hit the "Run the troubleshooter" button to check for problems
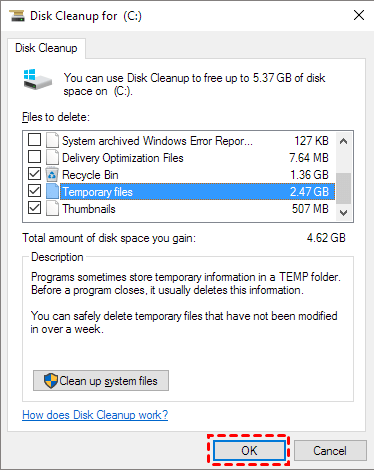
Way 2. Clean up the disk
How do I fix the 0xC1900101 error when installing Windows 11? Sometimes, error codes appear due to insufficient storage space. So, to avoid the error code 0xC1900101, you might as well try cleaning the boot drive with the Windows built-in cleaner – Disk Cleanup.
1. Search for "disk cleanup" from the search box on the desktop and launch it.
2. Select the boot drive – the C drive – and click on "OK".
3. Tick the files you want to delete and hit “OK”.
4. Confirm the prompt to proceed.
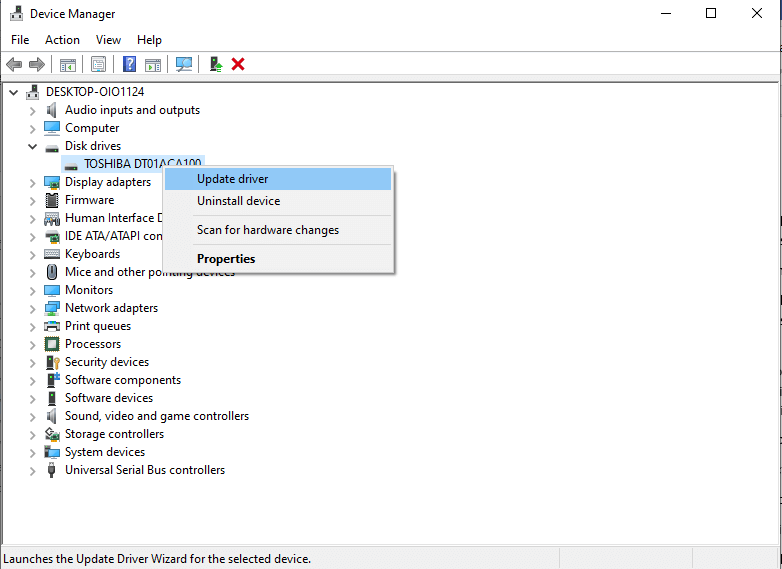
Way 3. Update your faulty driver
If the disk drive is outdated or encounters some glitches, the Windows 11 update may go wrong. Hence, update the hard disk driver to the latest version when 0xc1900101 Windows 11 comes. Follow the step-by-step guide below to learn to get it done correctly.
1. Press "Win+X" simultaneously and select "Device Manager" from the popup list.
2. Extend “Disk drivers” and right-click on the hard disk.
3. Select "Update driver" to start the update.
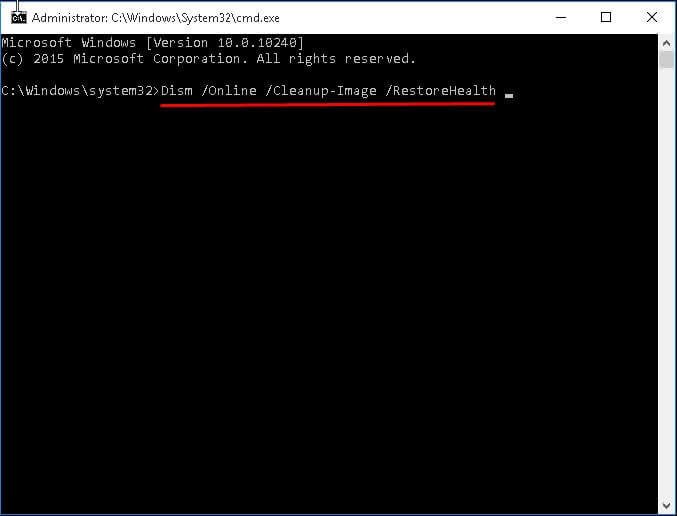
Way 4. Scan for potential disk errors
To resolve the 0xc1900101 error code on Windows 11, you can also scan for any potential disk errors and fix them by typing relevant commands into Command Prompt. The commands to scan and fix are as follows:
sfc/scannow
Dism/Online/Cleanup-Image/RestoreHealth
chkdsk C: /f/r/x
Hit the "ENTER" key after typing each of them.
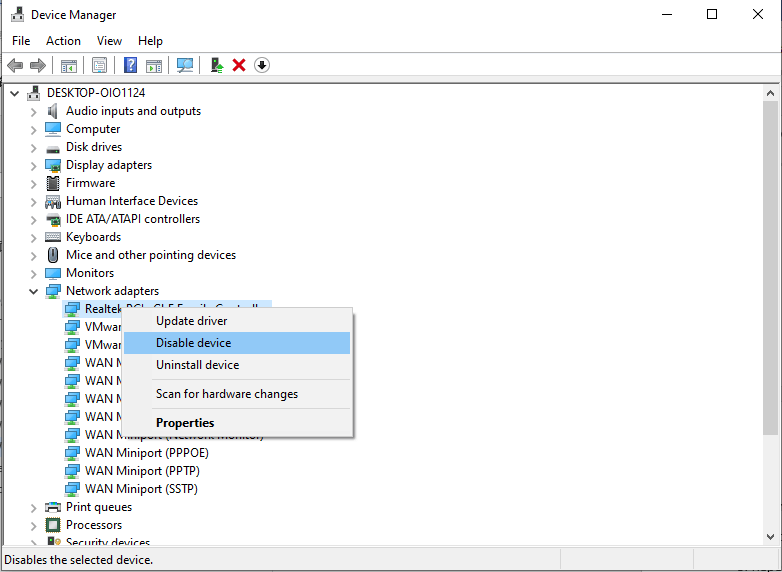
Way 5. Disable your network adapters
Many users claim that after disabling their networks adapters, the error code is gone.
1. Open "Device Manager" and extend "Network adapters".
2. Right-click on the first network adapter and select "Disable device".
3. Repeat it on other network adapters.
Easier and secure way to install Windows 11 to your PC
If you can’t install or upgrade to Windows 11 in traditional ways, you can turn to a third-party disk manager, for example, AOMEI Partition Assistant Professional, to migrate Windows 11 to your computer from another computer where Windows 11 is installed. By comparison to manual installation, this method should be less time-consuming and quicker.
Are still bothered by 0xc1900101 Windows 11? Try this powerful utility for disk management and make Windows 11 installation/upgrade much easier!
Step 1. Connect the boot disk where Windows 11 is installed to your current PC. Then, install and launch AOMEI Partition Assistant Professional and wait until all disk info appears
Step 2. Click on "Clone"> "Migrate OS" from the top column as the screenshot shows.

Step 3. Choose unallocated space on the destination disk and click on "Next". If the disk has no unallocated space, then, you should tick the option "I want to delete all partitions on the disk to migrate system to the disk".

Step 4. In the following window, you can resize the to-be-created partition or just let it be.

Step 5. Read the popup not and click on "Finish".
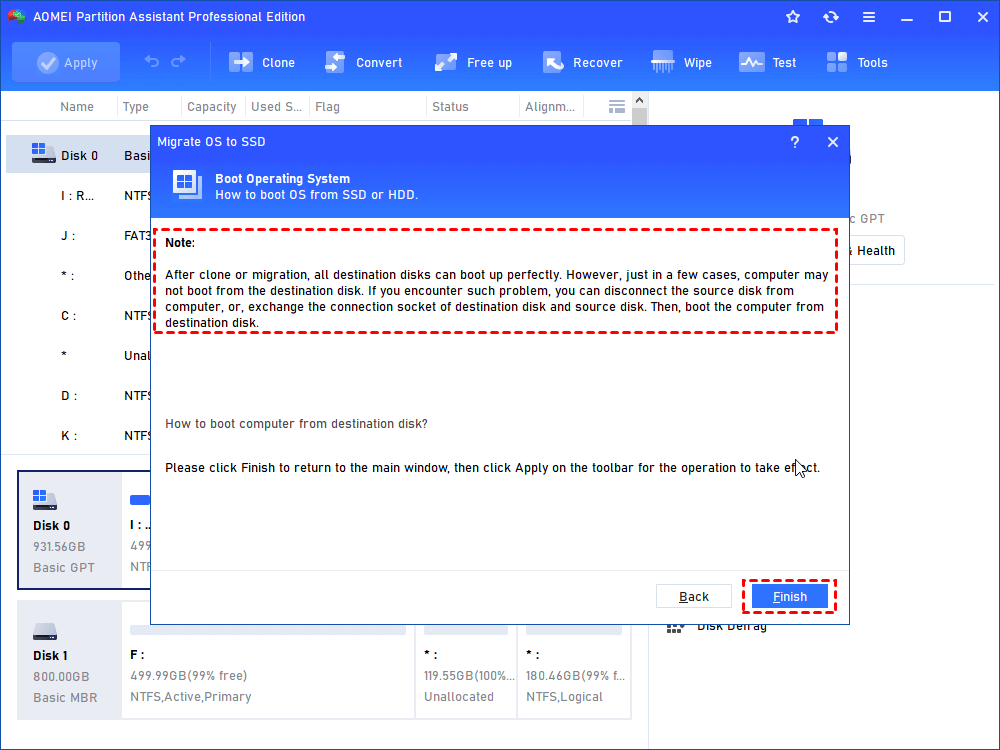
Step 6. Hit "Apply >Proceed" to start the Windows 11 migration.
When the OS migration is complete, you should disconnect the hard disk of the other PC and boot from the disk of your own PC.
Conclusion
How to deal with the 0xc1900101 Windows 11 issue during OS update or installation. To resolve the issue easily, you can try the top 5 solutions. Meanwhile, if you don’t like the traditional ways to update/install Windows 11, a powerful third-party utility – AOMEI Partition Assistant Professional – is provided to help migrate Windows 11 between 2 PCs. If you want to migrate the Server, you can try the Server edition.

