How to Use Bitlocker To Go to Encrypt USB Drives in Windows 11/10
If you want to encrypt your USB drives, SD cards, and other removable data drives, enable and use BitLocker To Go Windows 11/10. Users can download BitLocker To Go for Windows Home instead in this post.
By Hedy / Updated on March 21, 2024
What is BitLocker To Go Windows 11/10?
Unlike BitLocker, which encrypts the entire drive on a Windows computer, BitLocker To Go is BitLocker drive encryption specifically for removable data drives. It can be used to encrypt USB flash drives, SD cards, external hard drives, and other drives formatted with NTFS, FAT16, FAT32, or exFAT file systems.
Drives encrypted by BitLocker To Go Windows 11/10 can only be opened by using a password or smart card on another computer, thus protecting your removable data drives from unauthorized access. For example, if you set up an encrypted drive, BitLocker can help prevent hackers from accessing the drive by removing it from your computer and installing it on other computers.
Searching the Internet, I found that many users will ask: Does Windows 11 Home have BitLocker To Go? Unfortunately, BitLocker To Go, like BitLocker, only supports Windows Pro, Enterprise, and Education editions. It is not available on Windows Home edition.
But it doesn't mean Windows Home users cannot enjoy this feature. You can click here to move to the alternative.
How to encrypt a USB drive with BitLocker To Go Windows 11/10
If your version of Windows supports BitLocker To Go, you can refer to the following section and get comprehensive instructions on using BitLocker To Go Windows 10/11 to password protect flash drives.
Part 1. How to turn on/off BitLocker To Go
This guide explains how to turn on BitLocker To Go, how to turn off BitLocker To Go, how to lock a USB drive, and how to unlock a USB drive. Let's talk about them one by one.
How to turn on BitLocker To Go
Before you can password-protect USB drives and other removable storage devices with BitLocker To Go, you need to turn it on first. BitLocker is enabled by default on newer computers with Modern Standby hardware support, such as Windows 10 and Windows 11, when you log in to Windows with a Microsoft account. You can check the status and turn on BitLocker To Go by referring to the following instructions on how to enable BitLocker on Windows 11/10:
Step 1. Go to Start > Settings > Storage > Advanced storage settings > Disks & volumes.

Step 2. Locate the USB drive and the volume you want to encrypt. Click Properties and click the Turn on BitLocker option.

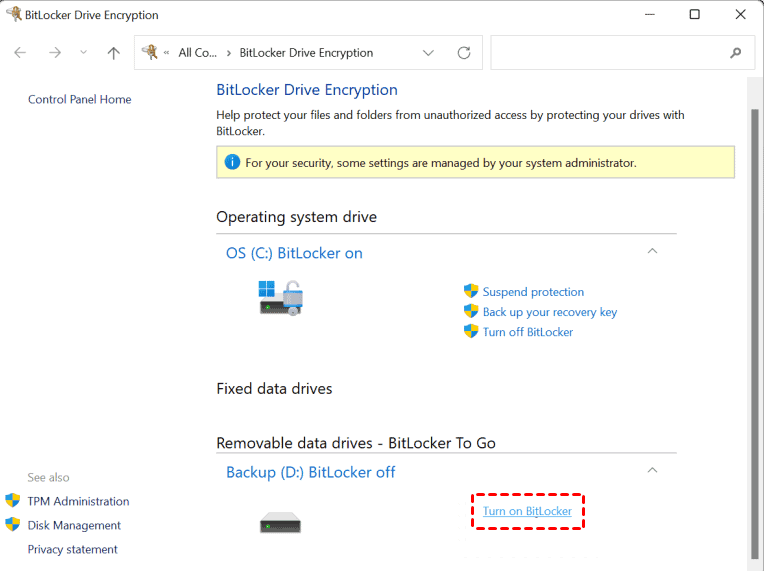
Step 3. Under the Removable data drives - BitLocker To Go section, click Turn on BitLocker.
Step 4. Choose your preferred way to unlock your drive: password or smart card. Here we select the password option. Enter and reenter your password. Click Next to continue.

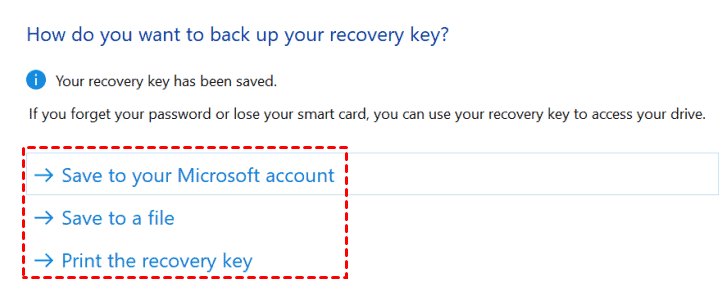
Step 5. Choose a way to save the Bitlocker recovery key: Microsoft account, a file, or print the recovery key. Here we select Microsoft account. Click Next to continue.
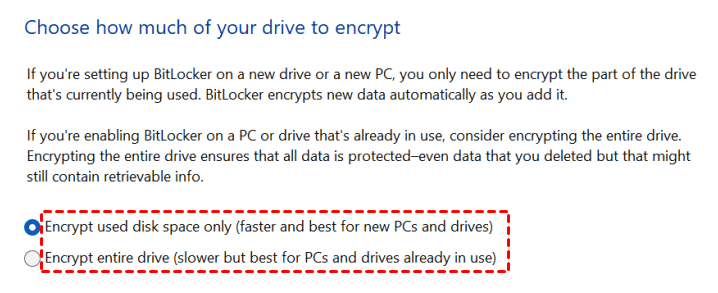
Step 6. Choose how much of your drive to encrypt: Encrypt used disk space only; Encrypt entire drive. Here we take Encrypt used disk space for example. Click Next to continue.
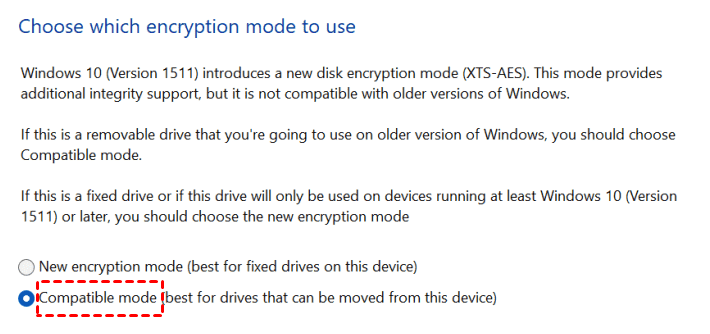
Step 7. Choose which encryption mode to use: New encryption mode or Compatible mode. Here we select Compatible mode for removable devices. Click Next to continue.
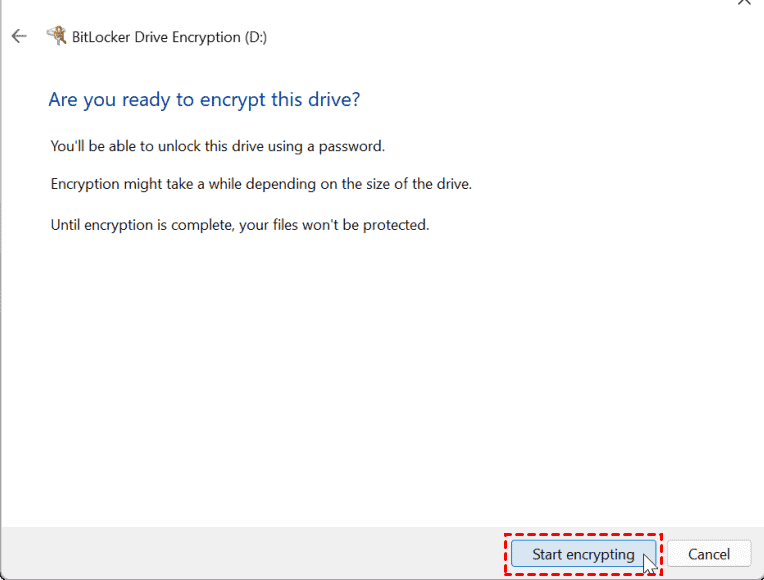
Step 8. Read the confirmation notes. Click Start encrypting to download Bitlocker To Go in Windows 10/11.
Step 9. Follow the dialog to confirm the download process. When the encryption process has finished, close the notification window.
Now you have turned on the BitLocker and encrypted the USB in Windows 11/10 successfully.
How to turn off BitLocker To Go
If you no longer want to use BitLocker To Go Windows 11/10, follow these instructions to turn off BitLocker:
If anything unexpected happens during the process, it is recommended to clone the encrypted partition to back up important files before continuing.
Step 1. Click Start, type Control Panel, and select the top result.
Step 2. Go to System and Security > BitLocker Drive Encryption.
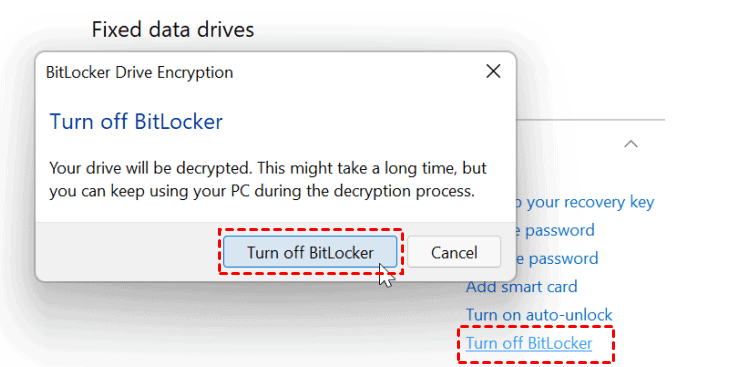
Step 3. Click Turn off BitLocker twice. And it will begin decrypting your USB drive.
Step 4. Follow the dialog to confirm the disable process. When the decryption process has finished, close the notification window.
Now your USB flash drive has been decrypted successfully.
Part 2. How to lock/unlock USB drives
If the USB flash drive is encrypted, how can I access the data on it and encrypt the USB flash drive again? In this section, you'll learn how to use BitLocker To Go Windows 10/11 to encrypt a USB drive, including unlocking and locking portable drives.
How to unlock a USB drive
When you select the volume and turn on the BitLocker To Go, you need to unlock it first to access the data on an encrypted USB. Details are as follows:
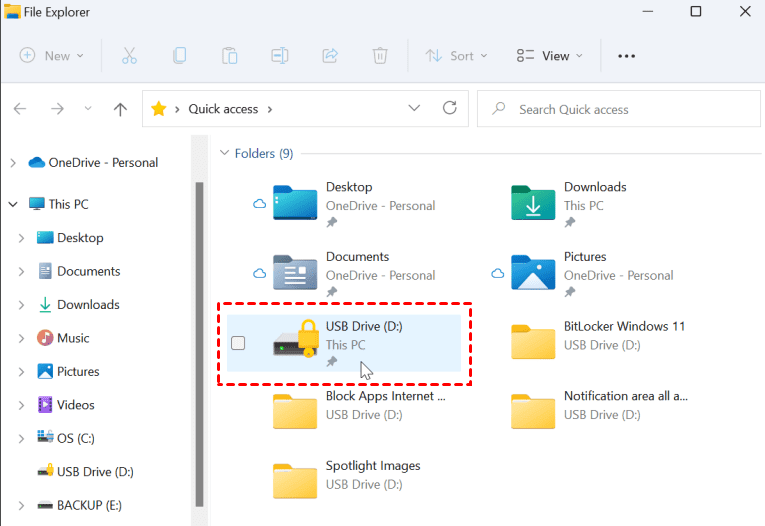
Step 1. Double-click My Computer or This PC to open File Explorer.
Step 2. In the interface, find the encrypted USB drive.
Step 3. Right-click on the drive, type your password saved before, and click Unlock.

Now you can access data on the USB drive.
How to lock a USB drive
An easy way to lock a USB flash drive is to shut down or restart your computer. But if you find it inconvenient or time-consuming, you can lock it from the command prompt. Here's a step-by-step guide:
Step 1. Press the Windows + R keys together to open the Run dialog box.
Step 2. Type cmd in the box. Then press Ctrl + Shift + Enter at the same time to run the command prompt as administrator.
Step 3. Click Yes to confirm.
Step 4. Type manage-bde -lock X: (replace the X with the letter assigned to the USB drive) and press Enter.
This command will lock the USB drive again.
BitLocker To Go Download for Windows 11/10 Home
As we mentioned before, BitLcoker To Go is not available on Windows Home edition. If you are running Windows 11/10/8/7 Home Edition, you will need to resort to third-party BitLocker software.
Here, we will bring you a versatile and powerful Windows partition manager called AOMEI Partition Assistant Professional. It comes with powerful BitLocker functionality and works on all versions of Windows 11/10/8/8.1/7, including Home edition.
It not only allows Home users to enable the BitLocker To Go feature, but also supports effective BitLocker management for high-version users, such as backing up recovery keys, unlocking, turning off or changing BitLocker passwords. You can download a free demo version to try it out.
Here is the BitLocker To Go download Windows 11:
Step 1. Install and launch the AOMEI Partition Assistant Professional.
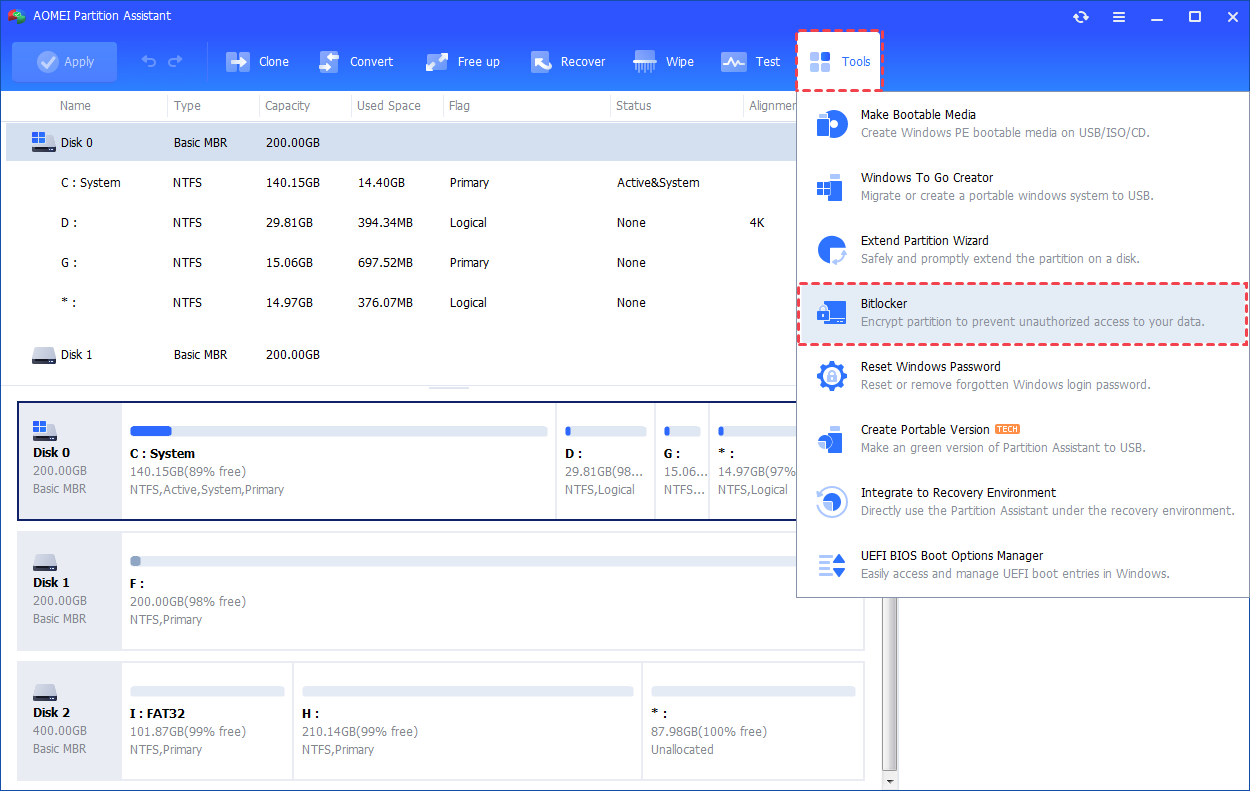
Step 2. Go to Tools > BitLocker in the toolbar.
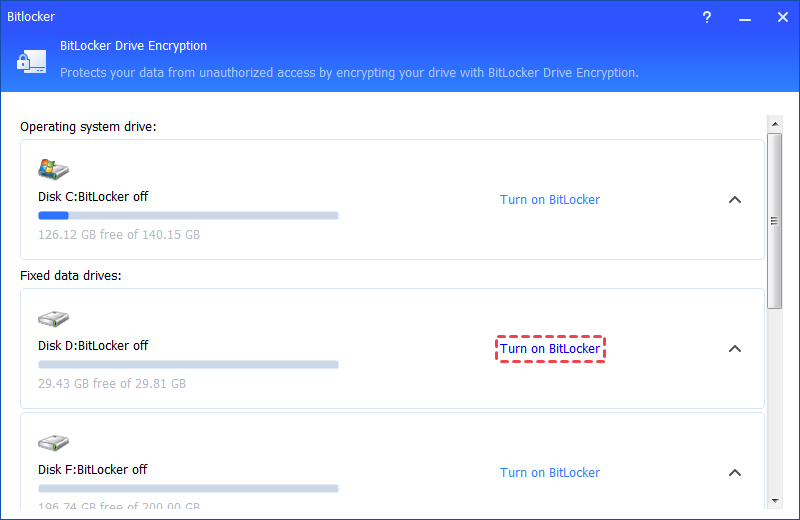
Step 3. All drives on the system are displayed, including operating system drives, fixed data drives, and removable drives. Find the partition on the USB to encrypt and click Turn on BitLocker. (Here, let's use drive D: as an example.)
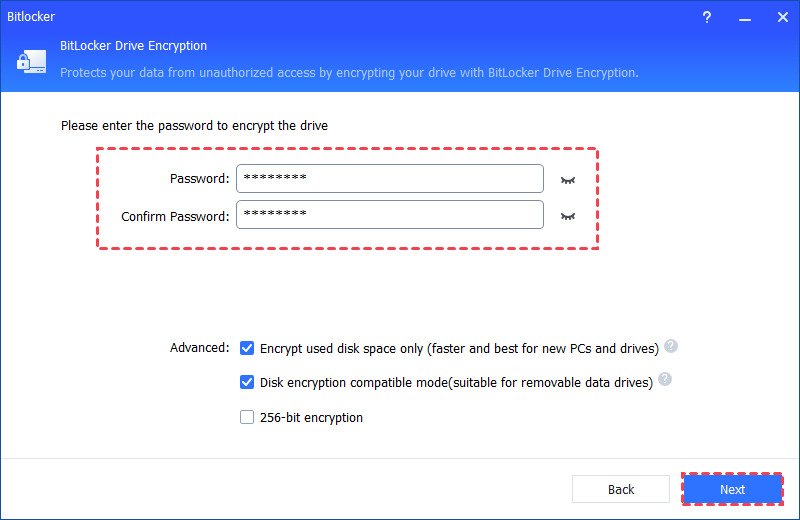
Step 4. Please set a password, confirm the password, and click Next.
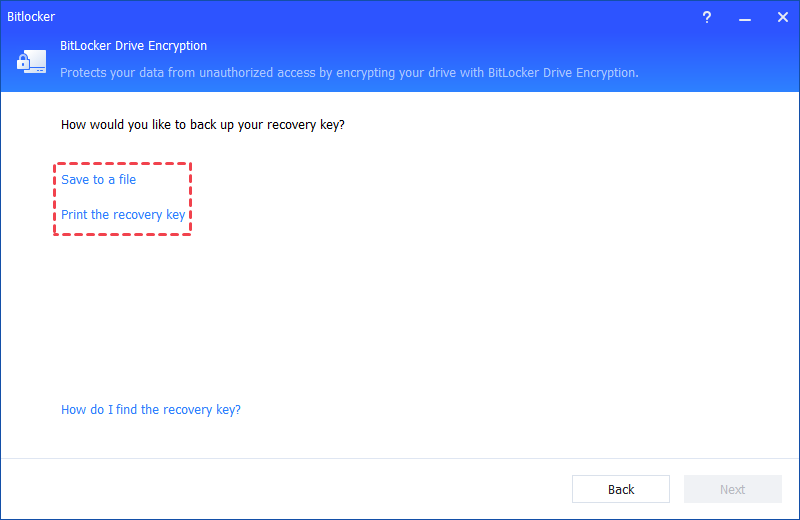
Step 5. Choose how to back up your recovery key. You can choose to Save to a file or Print the recovery key.
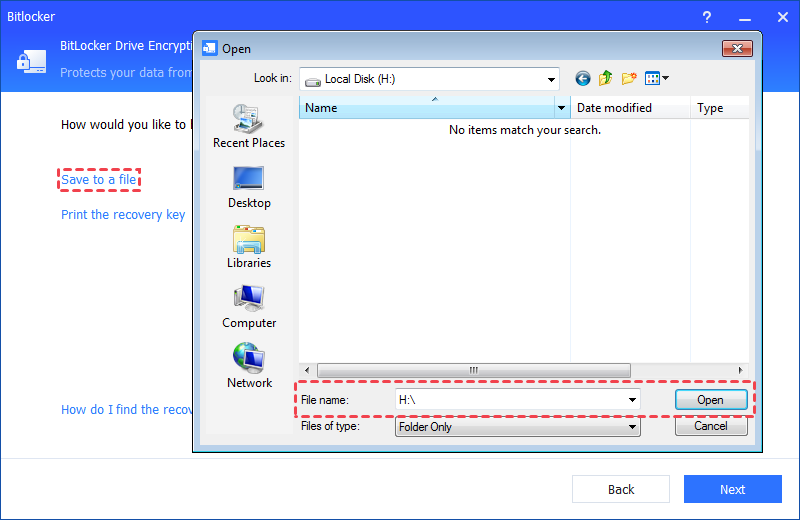
Step 6. If you selected Save to a file, choose a location on your computer to save the recovery key. Then, click Next to start the encryption process.
- If you want to encrypt your system drive, you will need to restart your computer to enter into the Windows PE environment.
- It may take some time to encrypt the USB drive. Do not terminate the program, remove the drive, or turn off the power until the encryption process is complete.
Step 7. Once the encryption process is complete, click Completed.
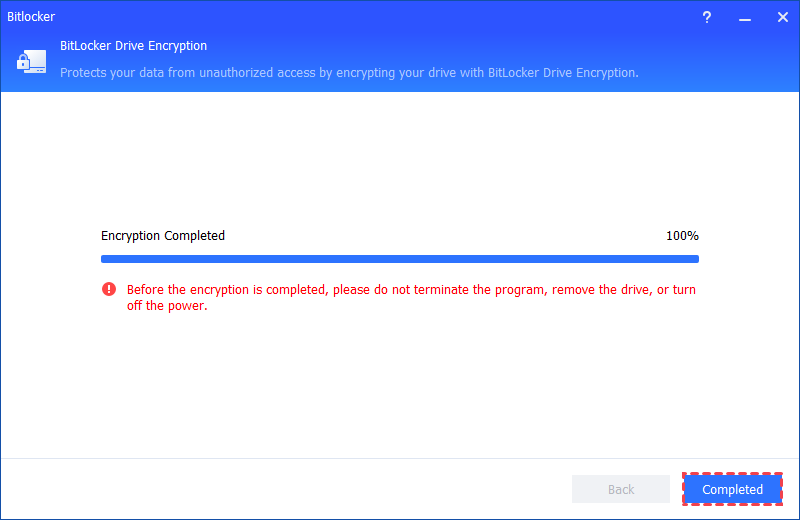
Finally, the USB drive is BitLocker encrypted.
Final words
BitLocker To Go Windows 11/10/8/7 allows you to protect crucial files on your portable drive against theft or infection. It is critical to protect your data, especially while you're on the go, and BitLocker is an excellent way.
Although BitLocker To Go is not available in Windows Home Edition, users can encrypt and safeguard their detachable storage disks with AOMEI Partition Assistant Professional. It also lets you resize encrypted partitions without losing data, format encrypted hard drives without a password, and clone BitLocker encrypted hard drives.
FAQs on BitLocker To Go Windows 10/11
Q1. Is BitLocker To Go available in Windows 11 Home?
No, BitLocker To Go only supports Windows Pro (Windows 7 Pro not supported), Enterprise, and Education editions. Windows 11 Home users can use an alternative like AOMEI Partition Assistant Professional to protect your drives.
Q2. How do I encrypt a USB with BitLocker Windows 11?
1. Plugged the USB into your Windows 11 computer.
2. Open File Explorer and find the USB Drive under the Devices and Drives.
3. Right-click the USB Drive and select Show more options from the context menu.
4. Click Turn on BitLocker.
5. Follow the windows to finish encrypting your USB drive.
Q3. How to enable BitLocker To Go on Windows 11?
Type Manage BitLocker in the search box on the taskbar, and then select BitLocker from the list of results.
Or, navigate to Start > Settings > Privacy & security > Device encryption > BitLocker drive encryption. Then you can Turn on BitLocker here.

