How to Create D Drive in Windows 11/10/8/7 [3 Free Ways]
It’s necessary to create D drive to separate storing the operating system and personal data, but how to create D drive in Windows 11, 10, 8, and 7? Here comes three free methods to create it with unallocated space or existing partitions.
By Hedy / Updated on November 19, 2024
The need to create D drive in Windows 11
When you purchase a new computer, the disk will be displayed as unallocated space which cannot be used directly before it's partitioned. If you install Windows operating system on it, Windows will generate C: drive to store the relevant files by default. That is to say, there is at least one partition on your disk if you don't manually create partitions before installing Windows 11, 10, 8, 7.
However, according to users' feedback, no less than three partitions can give you the best experience: one is only for storing system files, one is used for downloads like applications or programs, and the others are created for your personal data. The reasons are as follows:
| 🔔Data backup | When you need to recover the system one day, the whole C drive will be formatted. If you only have one partition with all data stored on it, you will lose all of them and can't restore them anymore. |
| 🚀Faster speed | Too much data taking up the free space of the C drive (system disk) will slow down your PC. |
| 🏆Better management | Different partitions storing different kinds of data may help you to manage them effectively, for instance, you can find what you need quickly next time. |
| 🔰Data Protection | If one of the partitions is infected by viruses or crashed by malware, you just need to recover the corrupted one, your other partitions are still safe. |
After considering all the reasons above, it's necessary and urgent to create D drive in Windows 11, 10, 8, 7.
What should you know before creating D drive?
If you are running on an MBR disk, please check the number of partitions you have already had on the hard drive. This is because an MBR disk can only support 4 primary partitions or 3 primary partitions and one extended partition with a number of logical drives on it. If it has already reached the limit, please change one primary partition to logical drive so that you can create a D drive or other partitions on it.
If you are running on a GPT disk, don't need to worry about whether you can succeed in creating drives because all partitions on GPT are called primary partitions which are unlimited and can be up to 128 partitions.
How to create D drive in Windows 11, 10, 8, and 7?
So how to create D drive in Windows 11? In this article, we will show you three ways: Disk Management, CMD and a third-party partition manager - AOMEI Partition Assistant.
- Create D drive in Windows 11 via partition manager - Easy for all users, including beginners.
- Create D drive in Windows 11 via Disk Management - You need to be familiar with the computer operations.
- Create D drive in Windows 11 via CMD - Require command line knowledge, more suitable for experts.
In addition, these two built-in utilities will not allow you to create and format a partition larger than 32GB as FAT32 file system. Keep reading to get more details and choose the one that is more convenient for you.
Way 1: Create D drive in Windows 11 via partition manager
AOMEI Partition Assistant can bypass the size limit of Windows built-in tools, enabling you to create and format a large drive (at most 2TB) to FAT32, NTFS, as well as exFAT file systems.
It also enjoys a good reputation in partition management, enabling you to create partitions with unallocated space and resize partitions to get unallocated space only in three clicks. If there is unallocated space, go ahead to part 2, if not, follow the guides below. No matter which situation you are in, you need to download the freeware first:
Selection 1. Create D drive from unallocated space
Step 1. Install and launch AOMEI Partition Assistant Standard. Right-click the partition like C drive and select "Resize/Move Partition" in the drop-down menu.

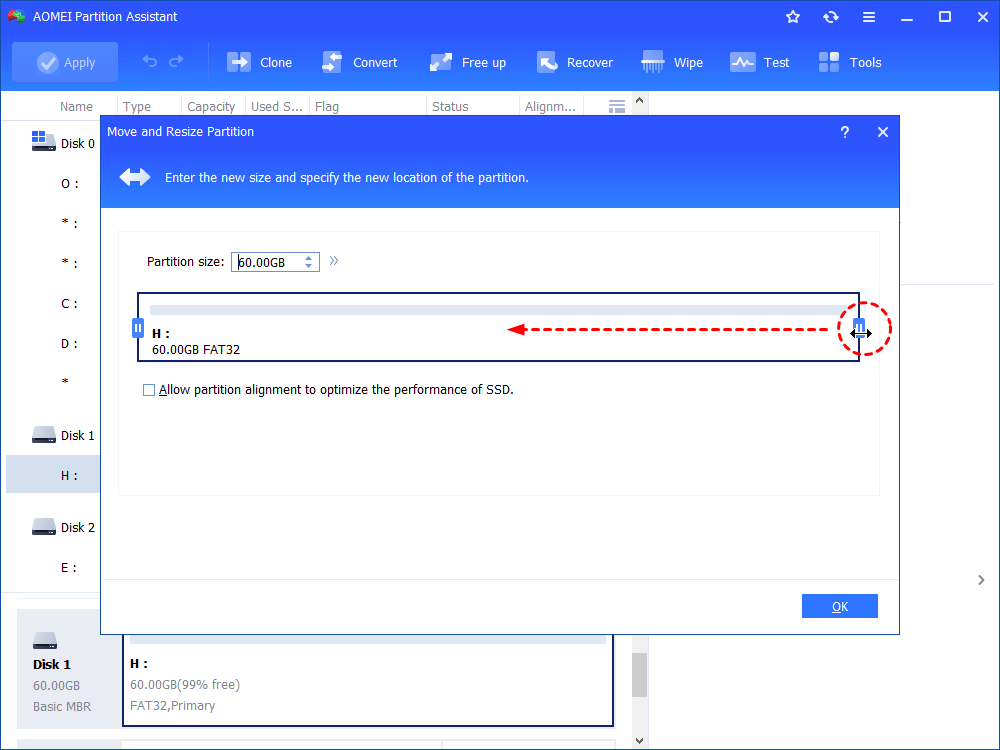
Step 2: You can dragging the edge circle leftwards to get the unallocated space, the size can be adjusted as you like. Click "OK".
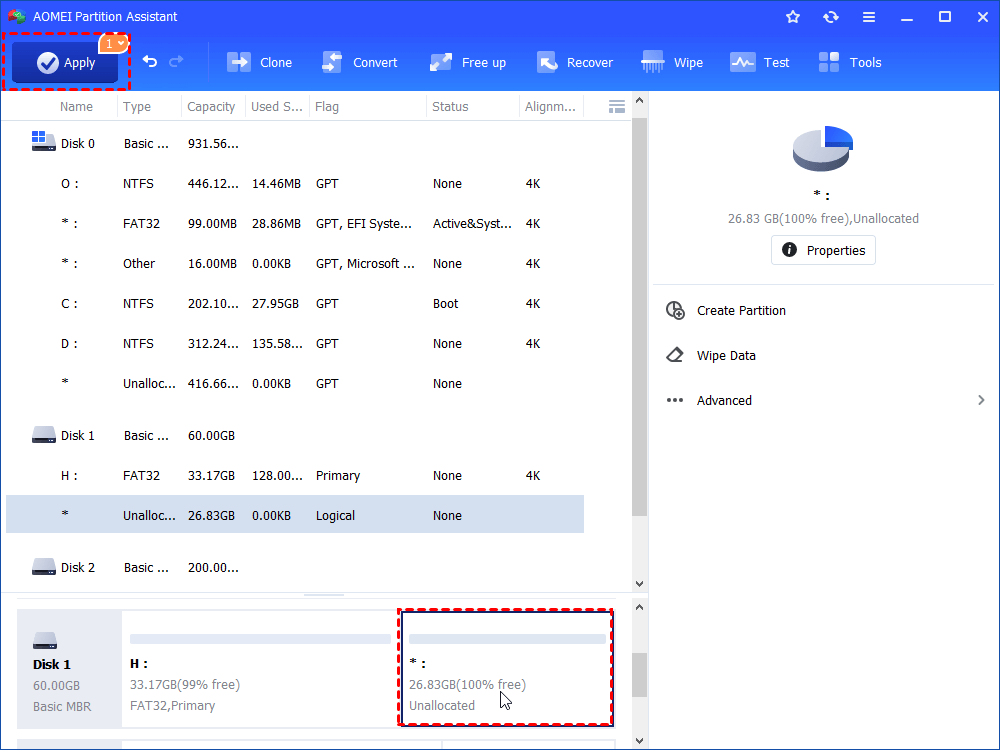
Step 3: Then, you will get the unallocated space.
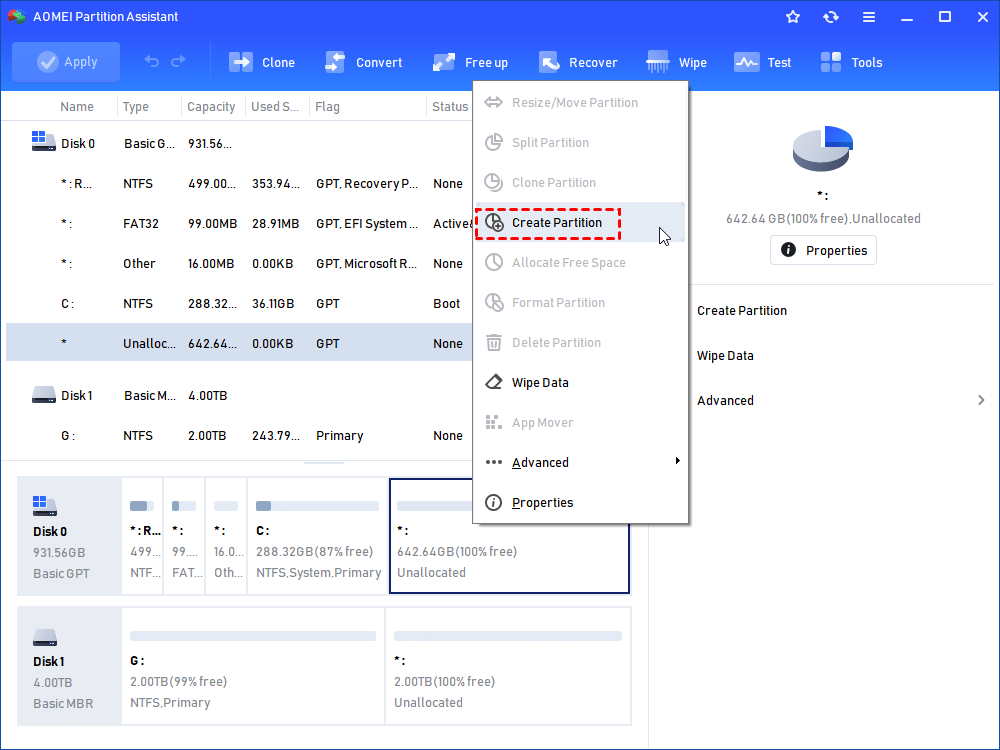
Step 4. Now, right-click the unallocated space and select "Create Partition".
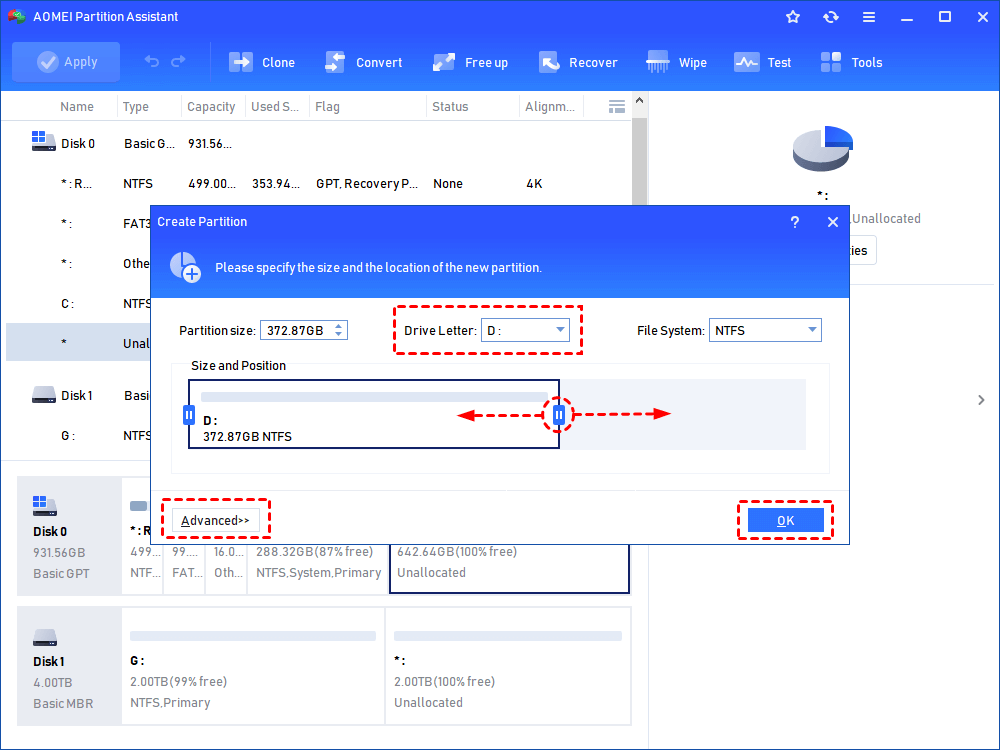
Step 5. In the pop-up window, you can set the drive letter (like D), file system (NTFS or FAT) and you could also specify the size of the new partition by dragging the edge circle to either side. Also, you can click “Advanced” to set more specific information.
Tips: Although you can set a partition larger than 32 GB to FAT32 with this software, FAT32 4GB size limit still exists. In order to avoid the error "Unable to copy large files" one day, we suggest you set the file system as NTFS.
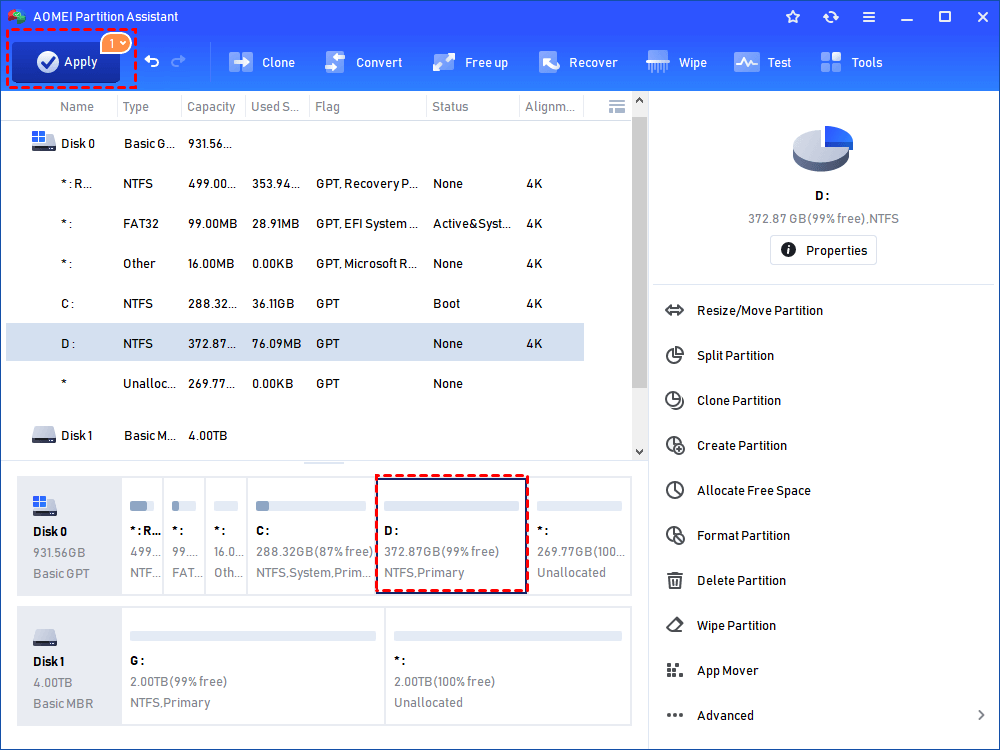
Step 6. Now you can preview the new created partition. Click "Apply" to commit the operation.
Selection 2. Directly create D drive from C drive
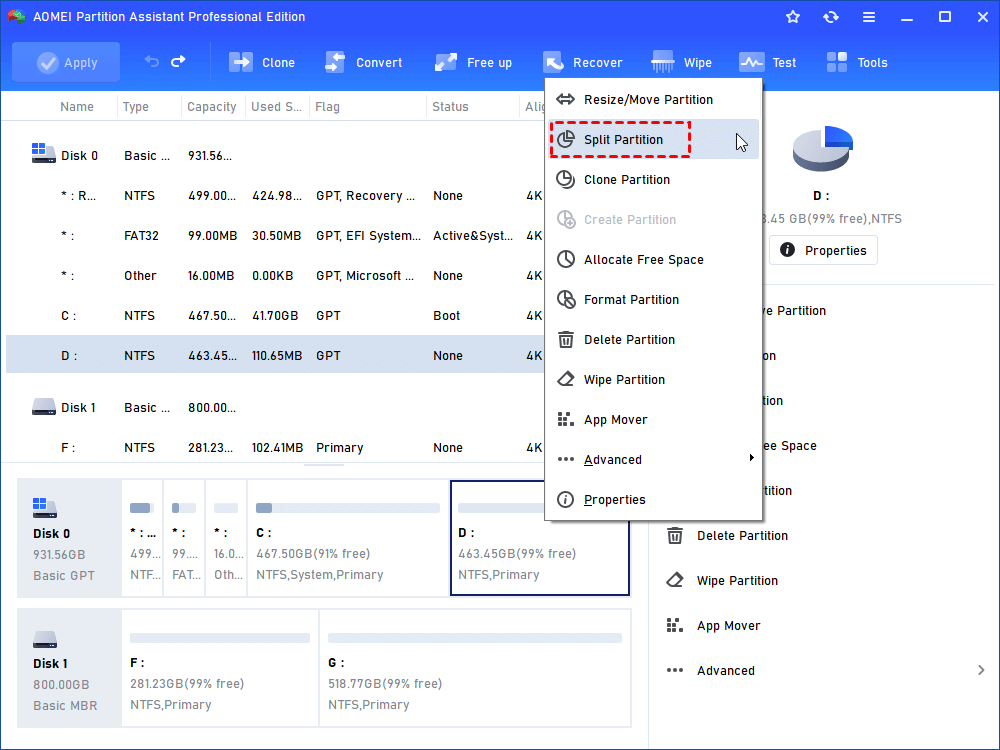
As we mentioned above, the previous ways are to create D drive on the unallocated space, but AOMEI Partition Assistant Professional can directly create a new partition on the existing partition via its "Split Partition" feature. Let's have a look at its amazing functions:
Step 1. Upgrade to the Professional version and run the software. Right-click the partition like C drive and select "Split Partition" in the drop-down menu (this function will reduce the size of the existing partition).
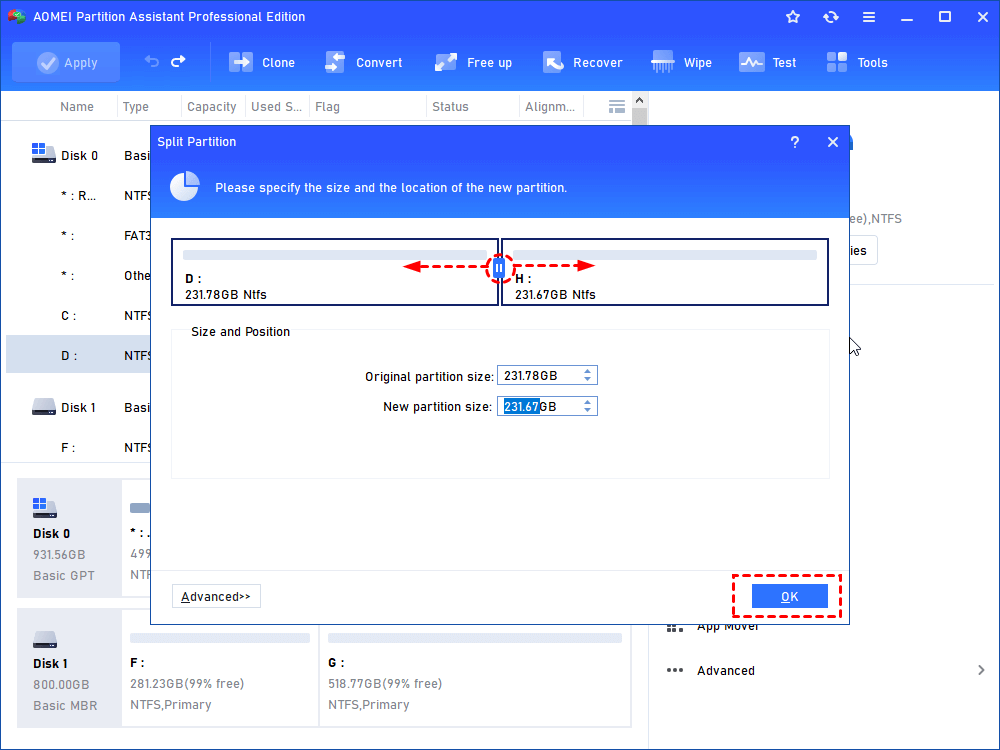
Step 2. Next, specify the size for creating a new partition by dragging the edge circle rightwards or leftwards. Then click "OK" to continue.
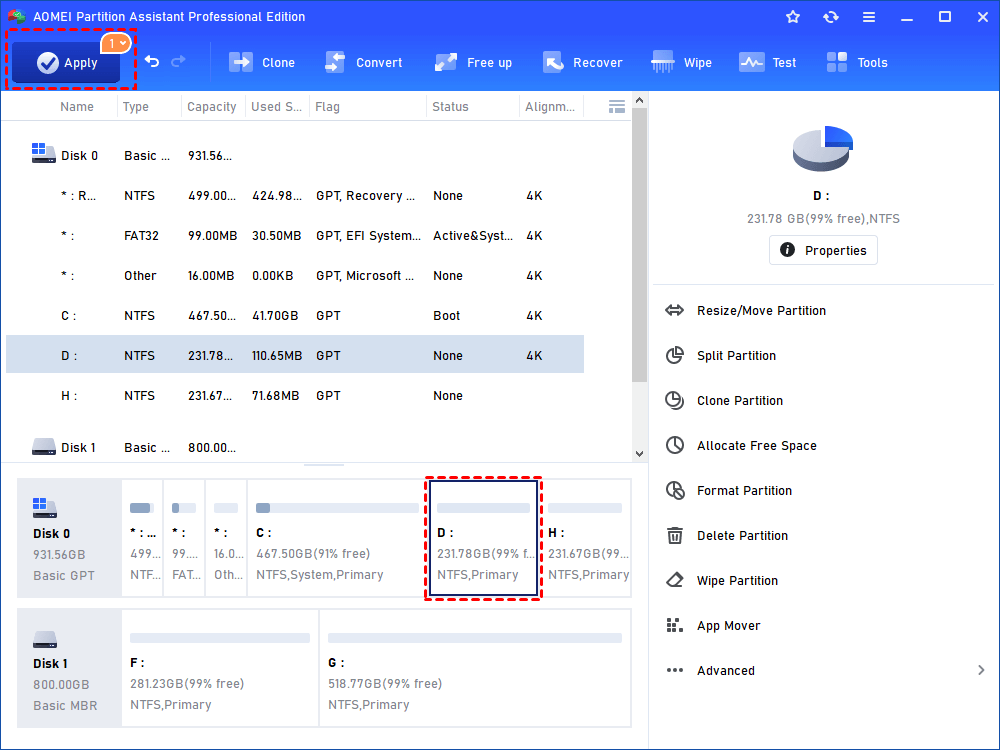
Step 3. To save the changes, please click "Apply" to commit the operation on the toolbar.
Way 2: Create D drive in Windows 11 via Disk Management
Disk Management is a Windows built-in utility for you to manage your partitions. To create D drive, please make sure there is unallocated space on your hard disk. If there is, jump to step 4; if not, you can shrink the existing partitions to get unallocated space, the specific steps are:
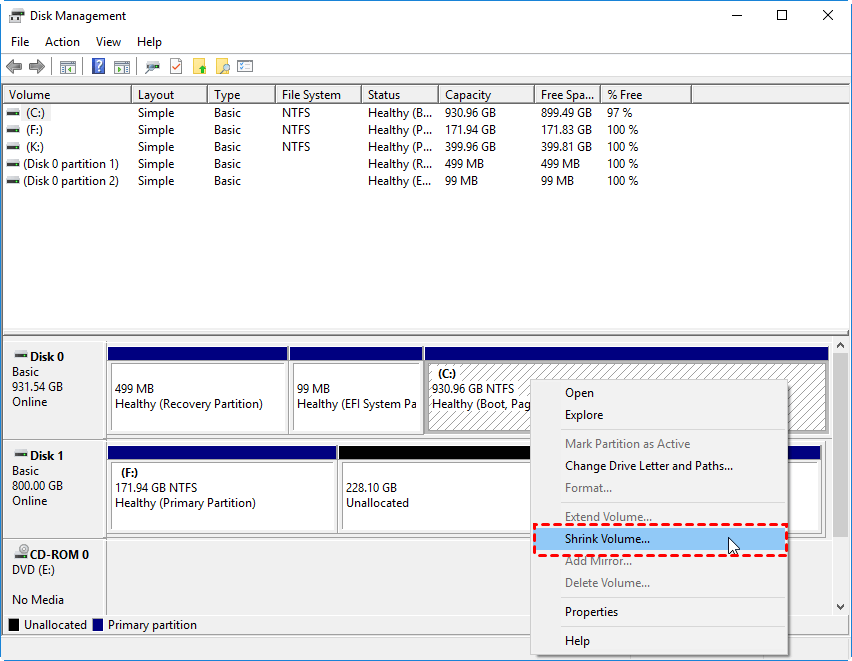
Step 1. Right-click the partition you need to shrink and select "Shrink Volume".
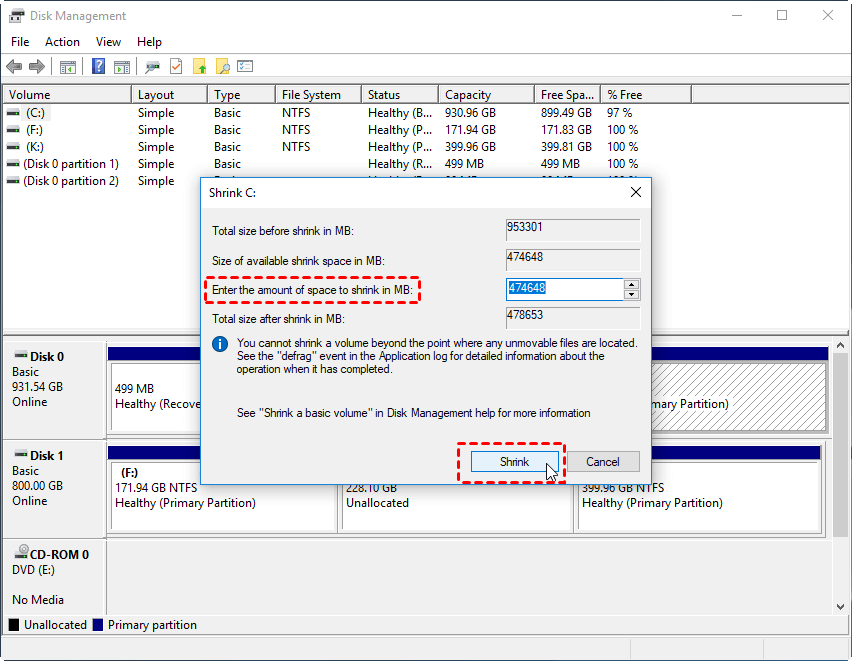
Step 2. In the pop-out window, enter the amount of the space to shrink and click on "Shrink".
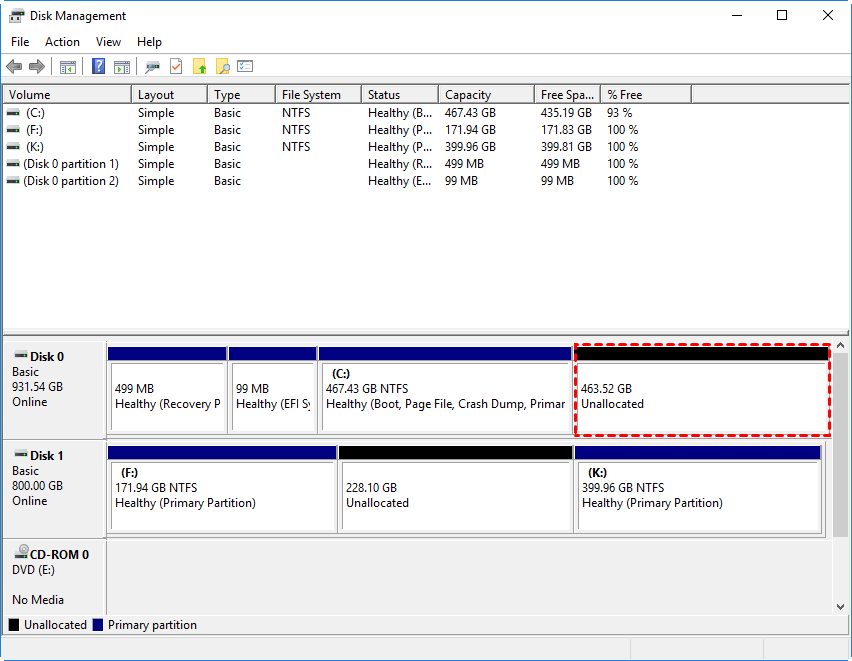
Step 3. When it is done, you will get the unallocated space.
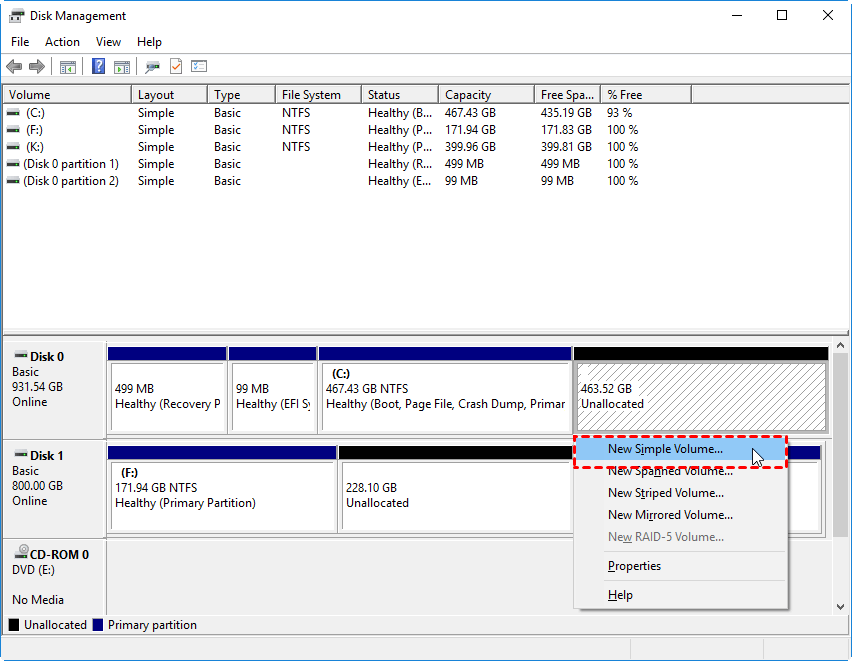
Step 4. Right-click the unallocated space, select "New Simple Volume" and click "Next" to continue.

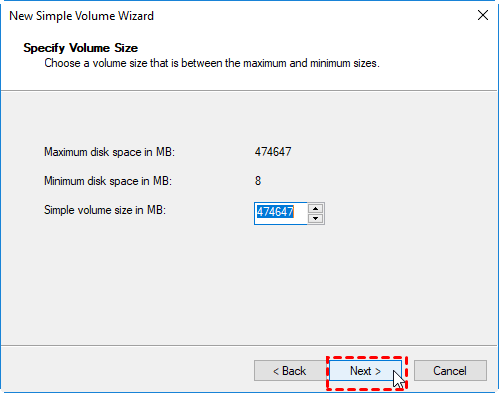
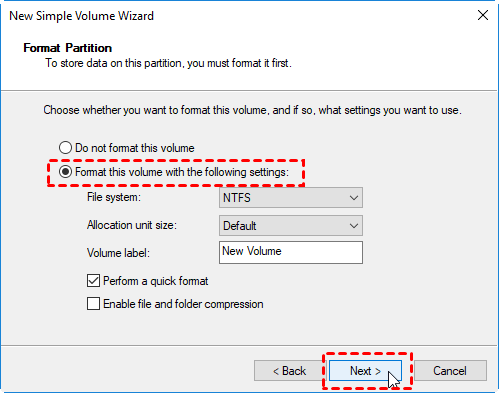
Step 5. After specifying the volume size, you will be asked to format this new partition to a specific file system. Set as you want, and click "Next".
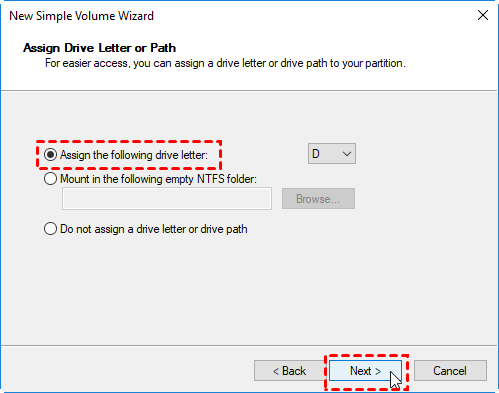
Step 6. Then, assign the drive with letter "D", choose "Next" and "Finish".
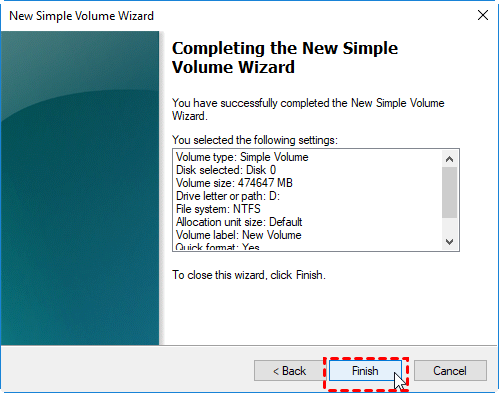
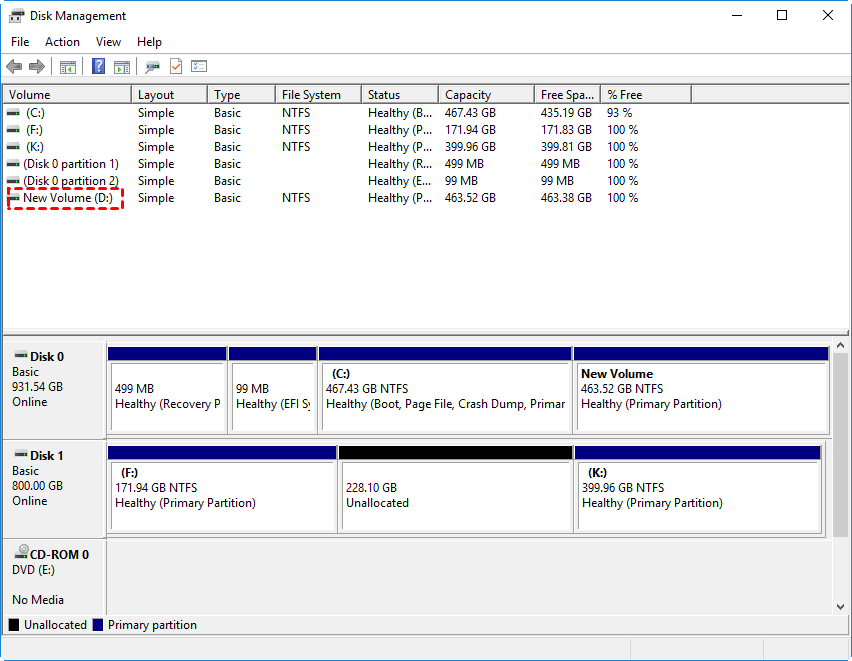
Step 7. Then, you will find D drive is on your disk.
Way 3: Create D drive in Windows 11 via CMD
Apart from using Disk Management, you can also create D drive in Windows 11 via CMD. But it asks you to have solid computer skills, otherwise, you may input the wrong command, leading to some unexpected error. The same as Disk Management, it also requires the unallocated space on your disk, if there is, just skip Step 3; if not, you have to shrink one partition to get the unallocated space first, do as below:
Step 1. Press "Windows + R" to open "Run" tool, and type "cmd" to open Command Prompt window. Then input "diskpart" and press "Enter" to run DiskPart.
Step 2. Type the following command one by one:
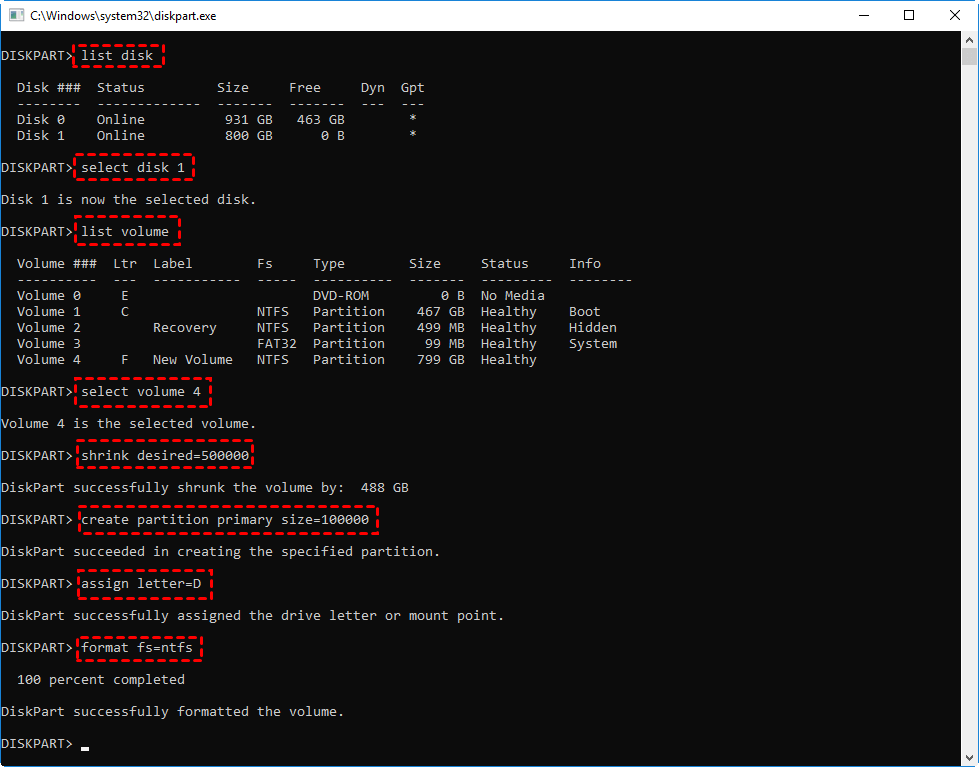
list disk (All the disks on your device will be listed)
select disk 1 (1 is the disk number of the disk on which you want to create D drive)
list volume (All the partitions on your disk 1 will be displayed)
select volume 4 (4 is the partition you think it's large enough to shrink)
shrink desired=500000 (You can change the number as you like)
create partition primary size=10000 ( the 10000 is the size of the new partition, you can input other numbers, You can also replace primary with extended or logical to create an extended or logical partition.)Step 5. Type assign letter=D (You can also choose another drive letter for the partition)
format fs=ntfs/fat32
(CMD cannot format a drive larger than 32GB to FAT32, if you input the command, it will show you "The Volume size is too big" .)
Note: No matter whether you choose Disk Management or DiskPart, you must format the D drive before you can use it. After formatting, you will see it in This PC/My Computer or File Explorer and store data on it normally.
Windows built-in tools have a lot of limitations and bother beginners, AOMEI Partition Assistant is a better and simpler alternative to disk and partition management in Windows.
Further reading: Can't design D letter to new drive
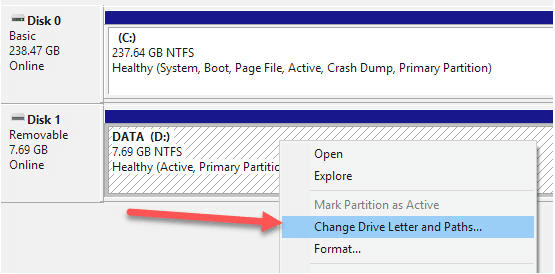
In some cases, you may find D drive letter is missing, which stops you to create D drive in Windows 11. The most possible reason is that the CD or DVD drive takes up the drive letter D after a reboot or reconfiguration. When suffering such a problem, we can open Disk Management, right-click the DVD and choose "Change Drive Letter and Paths" to assign it a different drive letter like E, after that, you will be able to use the letter D.
To know more about it, you can go ahead to D drive is missing.
Summary
On this page, we have presented how to create D drive in Windows 11, 10, 8, 7 via Disk Management, CMD, and free AOMEI Partition Assistant Standard. Hope at least one of them can satisfy your needs and requirements. Among them, AOMEI Professional can save a lot of time to create D drive or other new drives by splitting one partition into two. Besides, it will provide more advanced features such as: convert disk between MBR and GPT without deleting partitions, allocate free space from one partition to another, erase SSD securely and so on.

