How to Delete Windows.old in Windows 11 to Reclaim More Free Space?
How to delete Windows.old in Windows 11 after you upgrade from Windows 10? You can learn safe ways to delete it and some other tricks to release free space on the C drive.
By Lucas / Updated on May 12, 2023
About Windows.old folder
1. What is Windows.old folder?
In truth, it isn't a new feature in Windows 11. It begins with Windows Vista. When you upgrade from one version of Windows to another, Windows.old folder will be created automatically as a backup of your system data.
Users may easily restore Windows to an earlier version by using the data in Windows.old. The rollback option will be available for a limited number of days. After a set number of days, Windows will delete the folder automatically (usually within 30 days after the upgrade).
• A record of your prior version of Windows, which retains all system files and data from previous Windows installations.
• Data about users, such as user account settings, user profiles, and user folder files...
• Programs and applications installed
2. Can I delete Windows.old folder?
If you’re sure you don’t need to go back to the previous version OS, of course, you can delete Windows.old folder in advance to release more free space on your C drive since it usually occupies 15-20GB.
How to delete Windows.old in Windows 11?
Because deleting it can free up some storage space on your computer, we've prepared three methods for you to remove the Windows.old folder in Windows 11.
1. Directly remove Windows.old folder in File Explorer
Step 1. Open the file explorer or “This PC”, double-click, and open the C drive.
Step 2. Find the Windows.old folder, right-click the folder in File Explorer and press Delete to proceed.

Windows will notify you that you will need administrator privileges to remove the folder. Simply click “Continue” if you are logged in as an administrator or a member of the administrative group.
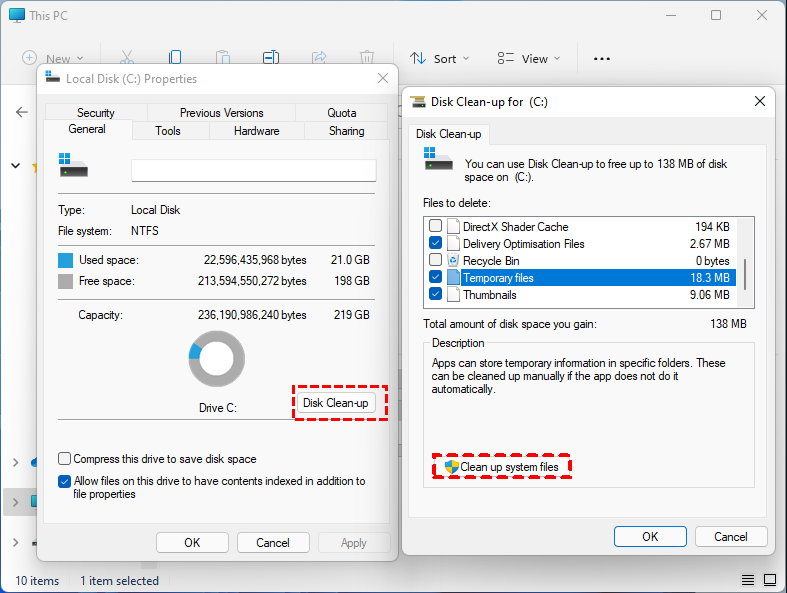
2. Delete Windows.old folder via Disk Cleanup
If Files Explorer still doesn’t allow you to delete Windows.old, you can try to remove it in the Disk Cleanup.
Step 1. Click the Start menu, then search for “Disk Cleanup”, and select the Disk Cleanup app. In the pop-up window, select the drive where the operating system is installed.
Step 2. Click “Disk Clean-up”, and click “Clean up system files” in the new pop window.
Step 3. Scroll through the list of folders and select “Previous Windows installation(s)” and click “OK”.
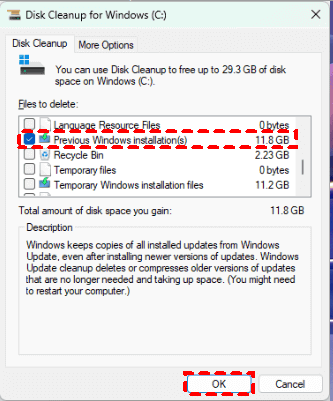
You may also get a second prompt to confirm that you want to delete previous Windows installations or temporary installation files. Click “Yes” to confirm.
3. Delete Windows.old folder in Storage Sense
Storage Sense, a built-in utility in Windows 11, may help you automatically clear up space, eliminate unwanted files, and empty the recycle bin. This utility can assist you in deleting Windows 11 Windows.old folder.
Step 1. Open the Start menu, simply type in Storage Sense and click on Enter.
Step 2. Under Storage management, turn on the Storage Sense option.
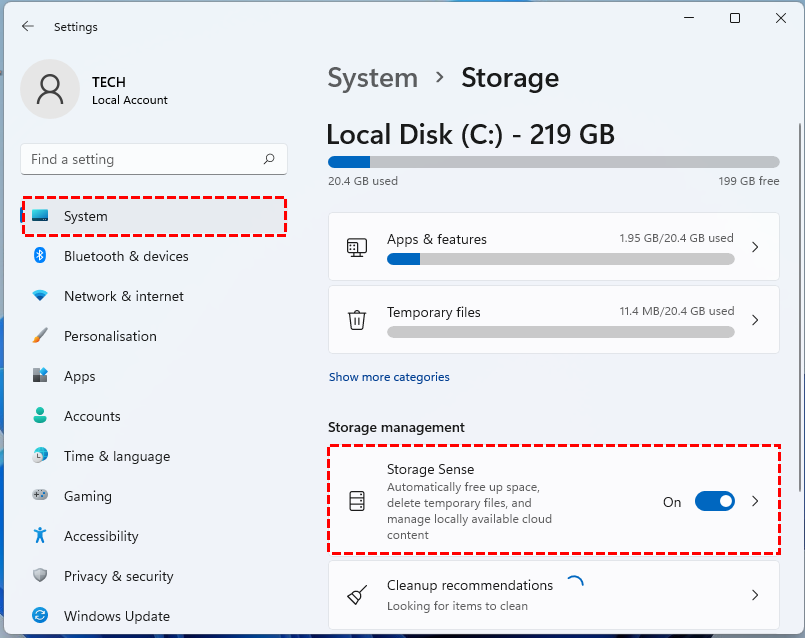
Step 3. Click on the Storage sense right arrow to access more options. Then click on the Run Storage Sense now button.

This process will clean cache files, error reports, and previous installation files.
Further reading: More ways to release free space on the system drive
After you delete the Windows.old folder, your C drive would at least release almost 10 GB or even more free space. However, if deleting Windows.old folder still can’t save your crowded C drive, you may need to try more ways.
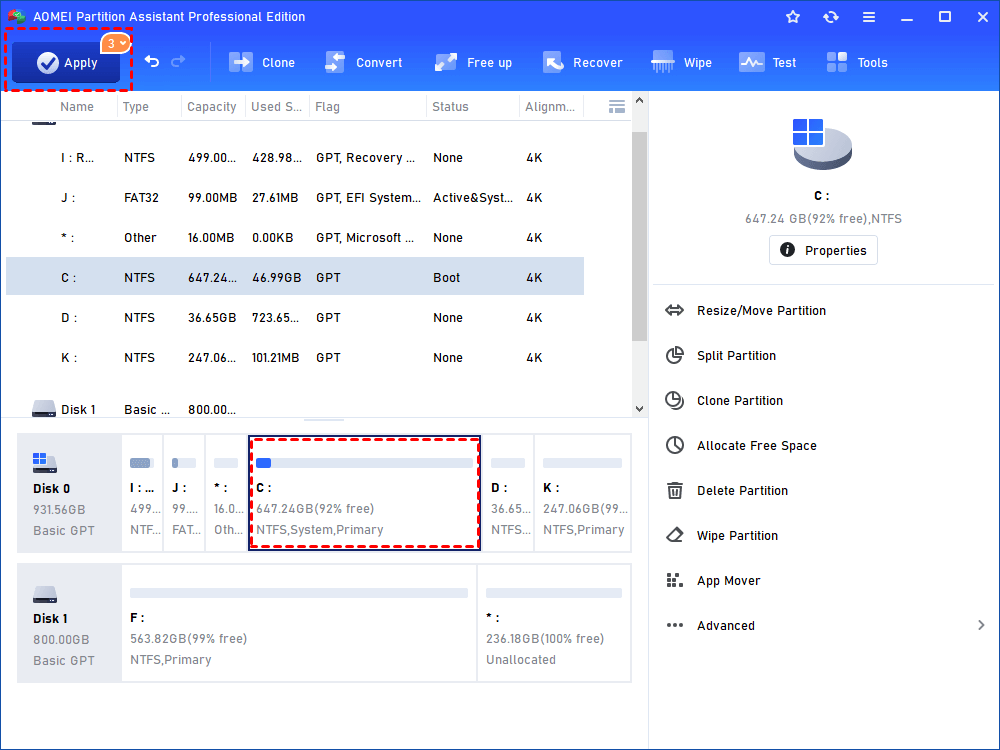
Since Disk Management has too many limits to impede you increase your C drive capacity flexibly, here we recommend you AOMEI Partition Assistant Professional, a multifunctional disk and partition manager for Windows 11/10/8/8.1/7/XP users to easily and securely extend your C drive.
This tool can merge nonadjacent unallocated space to the target drive and allocate free space from one drive to another.
1. Merge nonadjacent unallocated space to the C drive
If your disk has unallocated space, but it isn’t adjacent to the C drive, you can use “Merge Partitions” to directly add this space to the C drive.
Step 1. Install and run AOMEI Partition Assistant. Right-click the partition you want to add the unallocated space to and then choose "Advanced"> “Merge Partitions”.

Step 2. Select the unallocated space and then click “OK”.
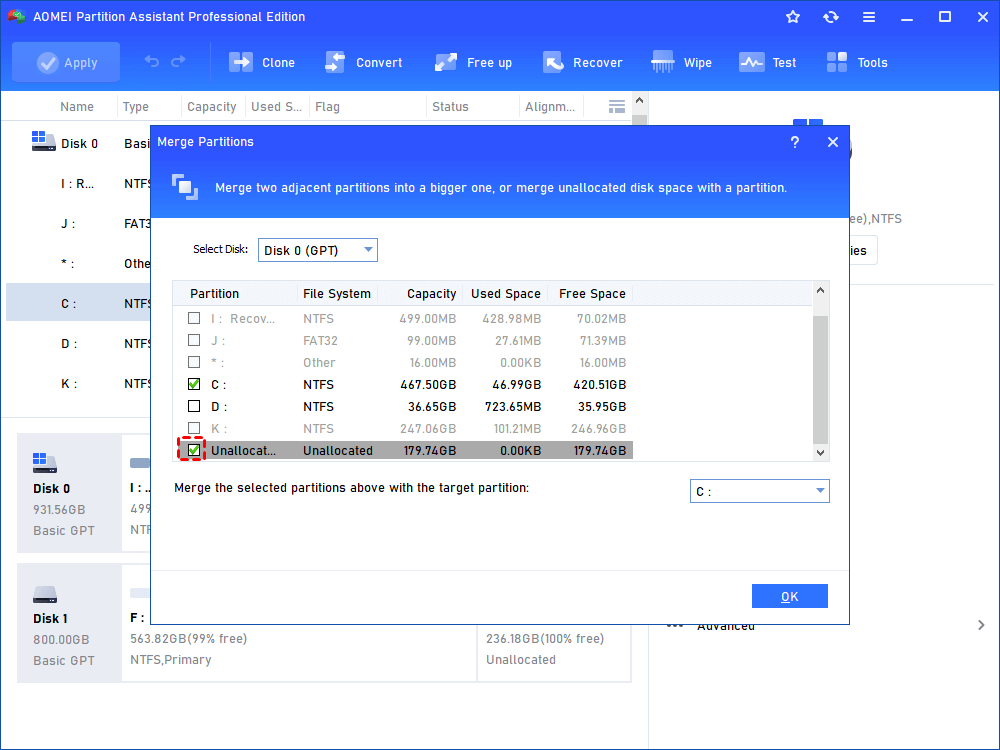
Step 3. In the new window, the size of the partition has been increased. To operate, please click “Apply”.
2. Allocate free space from another drive without any data loss
Step 1. Run AOMEI Partition Assistant, and right-click a drive with much free space, select "Allocate Free Space".

Step 2. In the new window, you can specify the space size and target partition. If it’s C drive, you need to select C drive from the given list, and click “OK”.

Step 3. Click “Proceed” and “Apply” to execute.

To sum up
Now you may already be familiar with Windows.old folder and also know how to delete Windows.old in Windows 11 with 3 methods. If you need to reclaim more free space on the C drive without any data loss, you can choose AOMEI Partition Assistant to easily and quickly extend the system drive. What’s more, this tool can also convert a disk to GPT/MBR, migrate OS to another disk, etc.

