Windows 11 Initialize Disk [Easy Ways]
In Windows 11 initialize disk to get your new disk ready for work! This post will list 3 ways to show how to initialize disk with easy steps. Find the best one for your disk!
By Lucas / Updated on October 24, 2023
Why should you initialize a disk?
When Windows 11 was released, lots of users complained about the bugs of this new OS. However, after some updates, some users would like to try this OS now. Due to the higher requirements of the capacity of the system drive, after the new OS is settled down, many of them may choose to buy another new disk to upgrade the device storage.
But, a new disk can’t work if you directly install it on your PC. It will show as unallocated when you check it in the Disk Management. You need to initialize it, and then format it. After these steps, you can use it.
Should I initialize disk MBR or GPT?
Initialization is to select a partition style. There are two styles you can choose: MBR and GPT. But, they are quite different.
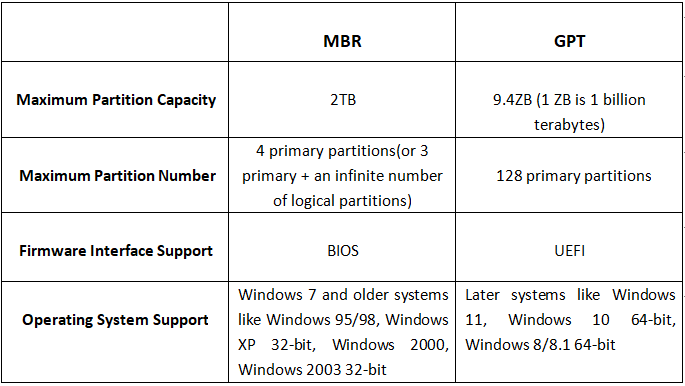
Disks may be partitioned into several sections known as partitions. Even if you just have one partition, it must have a partition style - GPT or MBR. The partition style used by Windows determines how to access the data on the drive.
For hard drives and SSDs, most PCs now employ the GUID Partition Table (GPT) disk type. GPT is more resilient and supports sizes larger than 2 TB. 32-bit PCs, older PCs, and detachable drives such as memory cards use the older Master Boot Record (MBR) disk type.
How to initialize SSD/HDD in Windows 11
After you understand some basics about disk initialization and disk type, now let’s see how to initialize a disk in Windows 11. In this part, we’ll use Windows tools to initialize disk.
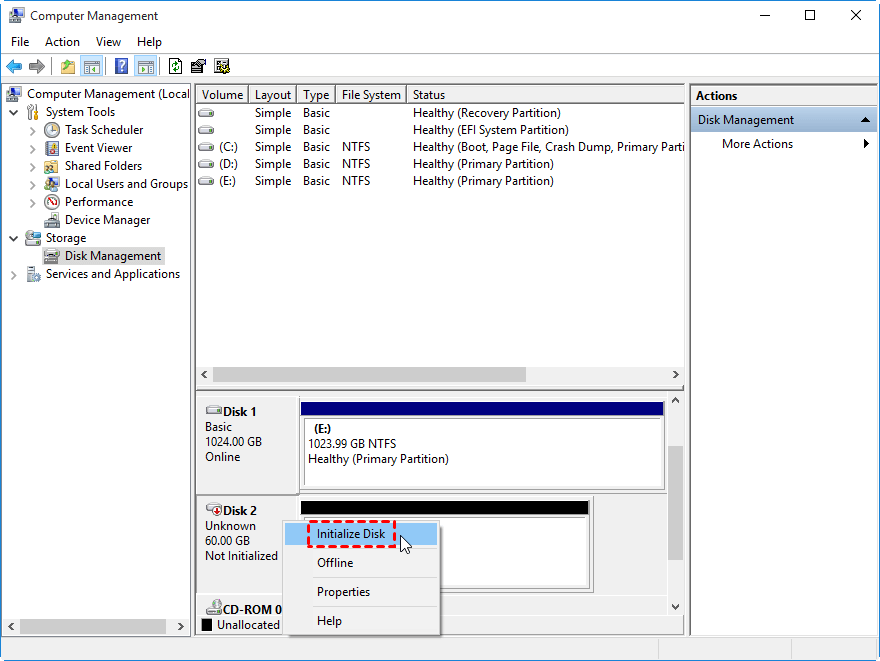
Opt.1. Use Disk Management to initialize disk in Windows 11
Step 1. In the search box on the taskbar, type Disk Management, right-click Disk Management, then select Run as administrator > Yes.
Step 2. In Disk Management, right-click the disk you want to initialize, and then click Initialize Disk. If this disk is listed as Offline, please right-click it and select Online at first.
Step 3. In the Initialize Disk dialog box, please check to make sure that the correct disk is selected and then click OK to choose the partition style you want.
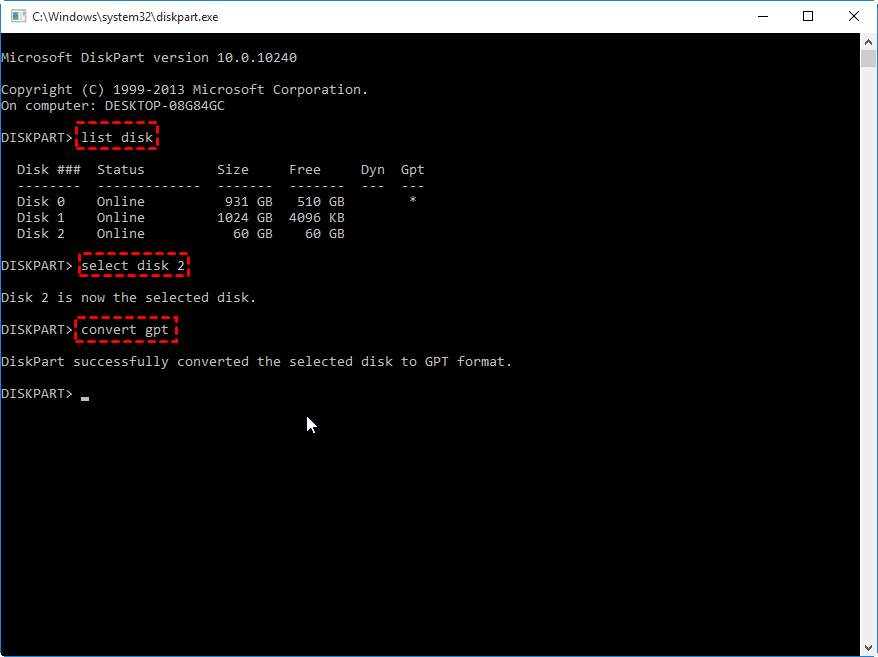
Opt.2. Use CMD to initialize disk in Windows 11
Step 1. Press the “Windows” key and “R” key at the same time, input “cmd” and hit on “Enter” to open Command Prompt window.
Step 2. Execute the following commands in turn and press Enter after each one:
• diskpart
• list disk
• select disk #
• convert gpt (if you want to initialize disk to MBR, please input “convert mbr”.)
Opt.3. Use PowerShell to initialize disk in Windows 11
PowerShell also requires you to use commands to manage your PC.
Step 1. Click the Search box and input PowerShell, then right-click the “Windows PowerShell” icon and select “Run as administrator” to launch the PowerShell window.
Step 2. Type in “get-disk” and press “Enter” to check all disks recognized by the current OS. The uninitialized disk is shown as “RAW”.
Step 3. Type in “initialize-disk n” (n represents the number of the disk you need to initialize) and press “Enter”.

Further knowledge: Convert disk between MBR & GPT without data loss
Initializing a disk is not complex work with Windows tools, you can choose the most familiar one to quickly initialize your new disk.
However, after you initialized a disk, Windows tools won’t allow you to change the partition style without cleaning your disk. In CMD, you need to clean the selected disk at first, and some users might know the MBR2GPT tool, but it can’t convert the data disk, only the system disk is available.
Then, if you want to change the partition style of your disk, you could only choose professional tools to prevent your data from being damaged. Here, we sincerely recommend you AOMEI Partition Assistant Professional.
This tool is specifically developed for Windows PC users. It perfectly supports Windows 11/10/8/8.1/7/XP with various practical functions. One of these features is “Convert to GPT/MBR”. Users can convert system and data disks between MBR and GPT with simple steps. All data is safe because there are no steps that require you to delete any partitions or clean the data.
Step 1. Install and launch the software.
Right-click the MBR disk you want to change, and choose "Convert to GPT".
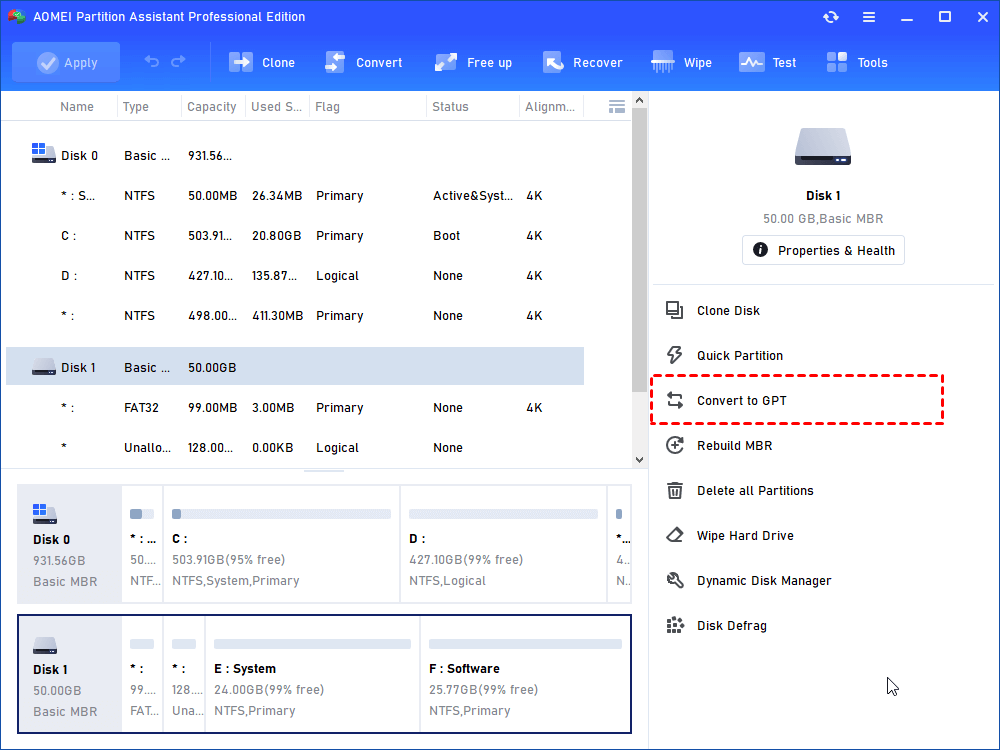
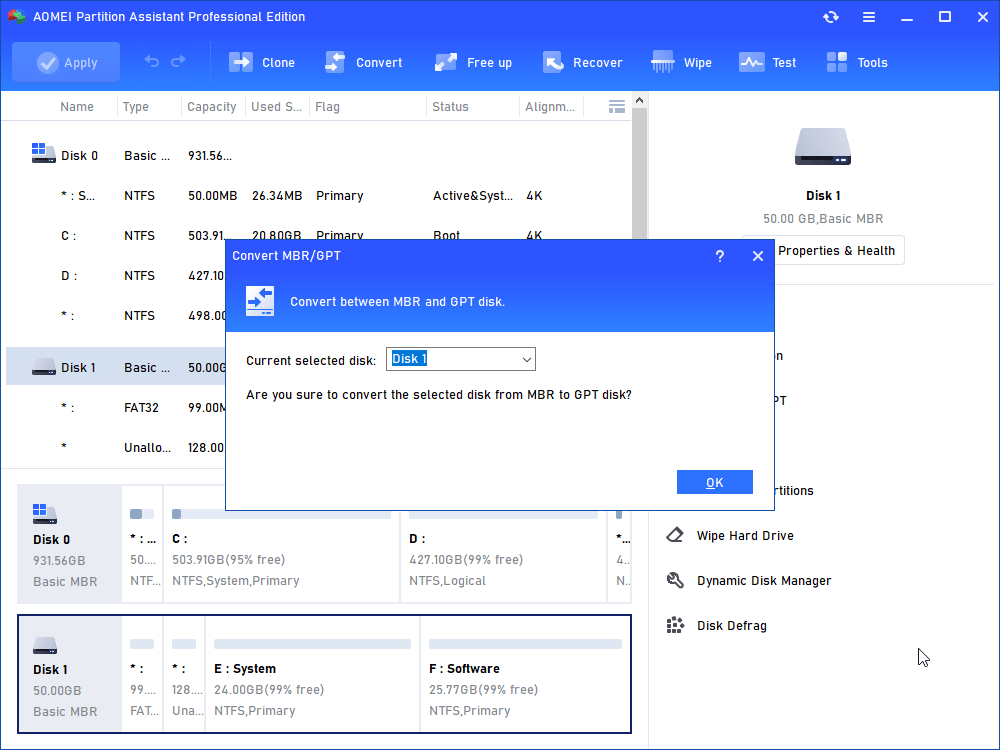
Step 2. Confirm the conversion.
In the pop-up windows, click OK to continue.
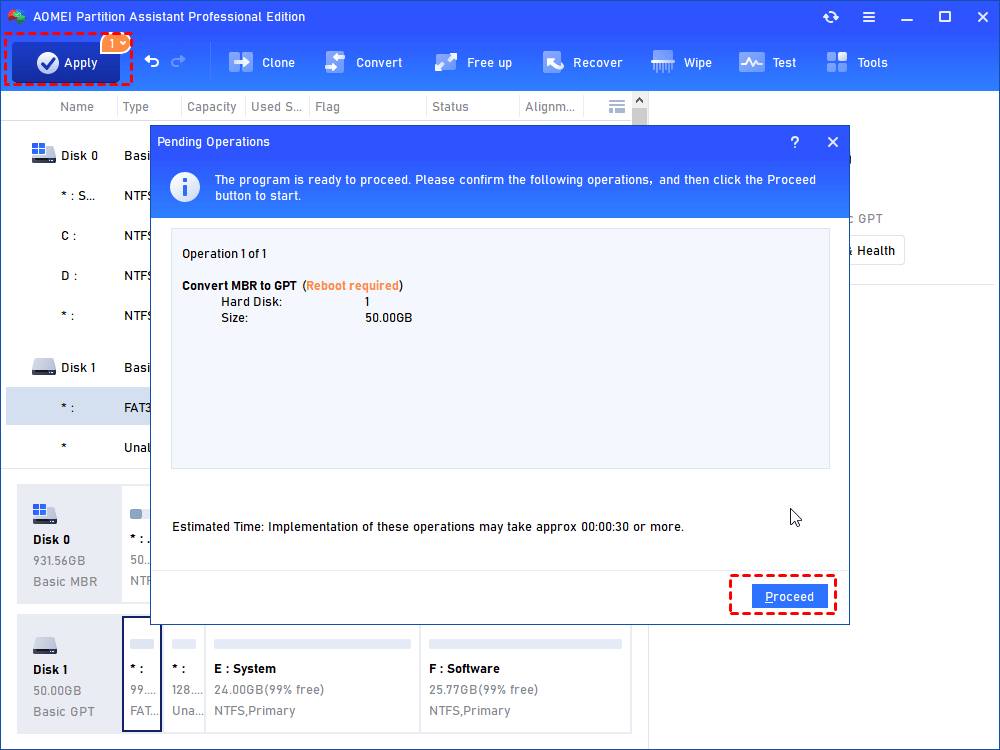
Step 3. Apply the conversion.
Click Apply to operate and then your disk will be changed to GPT disk style.
Step 4. Check if the computer can boot successfully.
Then your disk will be a GPT disk. And if you need it, this tool can also convert GPT disk to MBR with the same operation.
Final words
In all words, you have 4 choices when you initialize disk in Windows 11. Windows built-in tools should be enough. But if you want to easily and securely convert your disk, AOMEI Partition Assistant will be the best one.
Besides the function of partition styles conversion, this tool can also clone disk, move installed programs or Users folder, extend C drive… And if you need a Server manager, this software has the Server Edition on your service.

