How to Merge C Drive and D Drive in Windows 7?
If C drive is almost full but D drive is nearly empty, you can merge C drive and D drive in Windows 7 without losing data.
By Lucas / Updated on May 12, 2023
Why need to merge C drive and D drive in Windows 7?
When you find your computer runs slowly for a long time, when you launch or close some applications but it can’t react to these commands immediately, even the screen becomes gray, and when the boot time is becoming longer and longer, you should notice that maybe the C drive of your computer is running out of disk space.Unfortunately, C drive is the system partition in your Windows 7, and it may show a red bar sooner or later while D drive is nearly empty with a blue bar. Now, a good and simple way to solve the problem is to merge C drive and D drive in Windows 7 so as to resize C drive. Here, you can solve the problem with the built-in Disk Management of Windows7, or use a third-party partition software to merge partitions.
Use Windows 7 Disk Management to merge partitions
When you merge partitions with Disk Management, if there is no unallocated space on the disk, you need to delete another partition before merging. What’s more, the partition selected to be deleted must be adjacent and behind the target partition. This is to say, when you merge C drive and D drive in Windows 7, C drive as the system partition is the target partition, and D drive is the one need to be deleted and it will be merged into C drive, besides D drive must be adjacent and behind C drive. As follows:
Step 1: make sure D drive is adjacent and behind C drive. And right click D drive, select “Delete Volume”.
There will be a pop-up window, which will note you that this operation will erase all the data on D drive, and select “YES”. If there are some important data on it, you need to backup first with AOMEI Backupper.
Step 2: right click C drive, and select “Extend Volume”.
As you can see here, this is not the best situation. Windows 7 Disk Management can use an indirect way to help you merge C drive and D drive by deleting data. What’s more, when their locations are not adjacent, this job may become impossible. However, a third-party partition software can merge partitions without data loss and it will be very convenient. Among all the third-party freeware, AOMEI Partition Assistant Standard is a good choice for you.
Merge C drive and D drive in Windows 7 with free AOMEI Partition Assistant Standard
AOMEI Partition Assistant Standard, a free and professional partition tool, is accessible to Windows 7\ 8\ 8.1\ 10\ Vista\ XP, both 32 bit and 64 bit. Besides, it has many functions that Windows Disk Management doesn’t have, such as disk\partition copy, allocate free space, make bootable media. Click the button to download the software.
Step 1. Install, and launch AOMEI Partition Assistant Standard. Right-click partition C or D (here is C:), and choose “Advanced” and select “Merge Partition”.
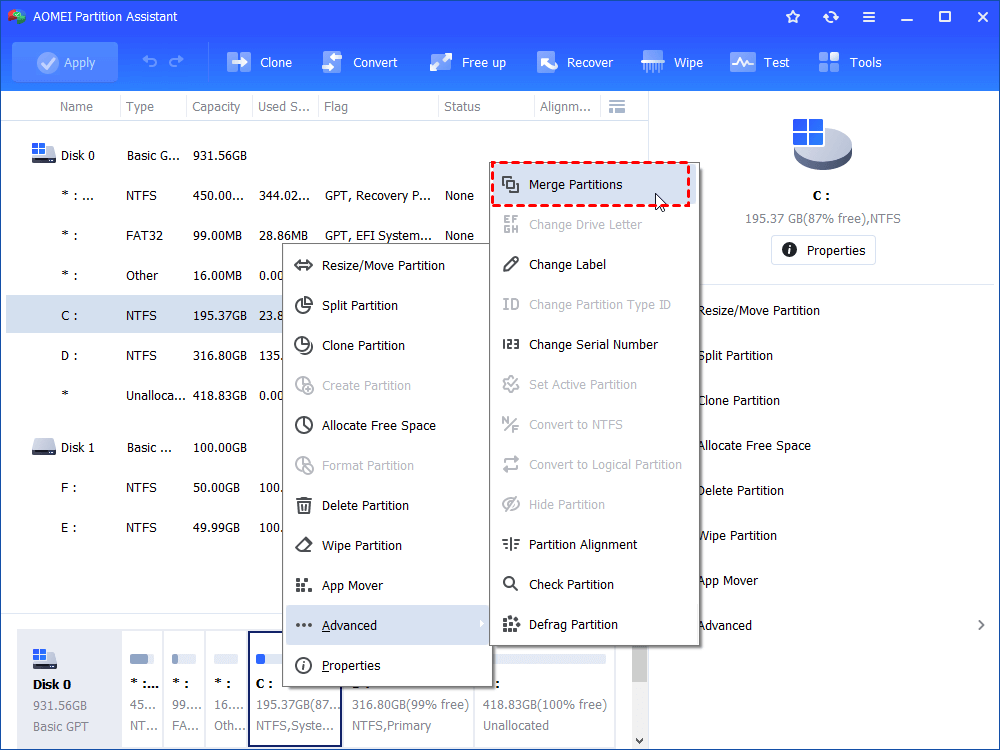
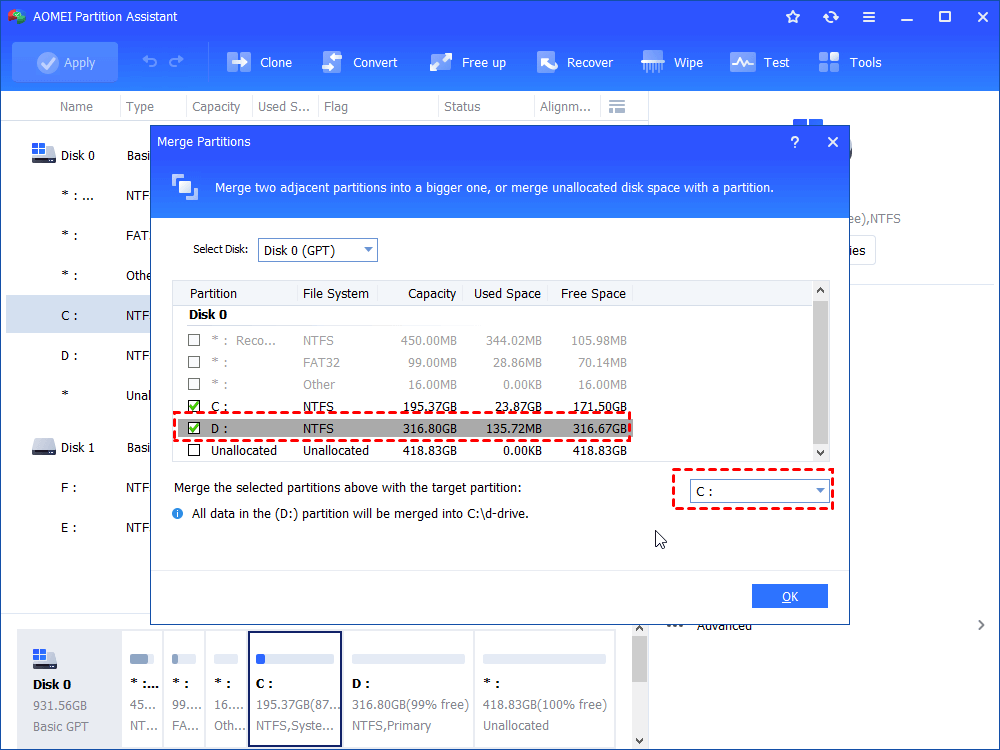
Step 2. In the pop-up window, tick the partition (here is D) and select the target partition C (the boot partition and system partition cannot be merged into a data partition). And then click “OK” to continue. In this case, all data in D drive will be transferred into drive C.
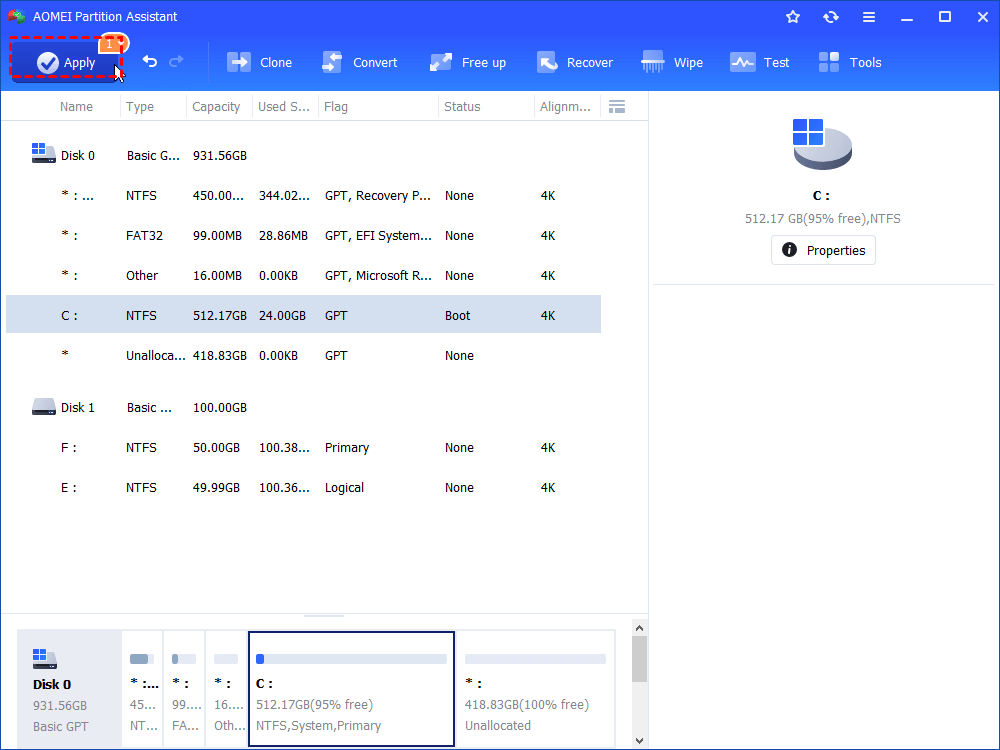
Step 3 You can preview changes in Pending Operations column on the left. To save the changes, please click "Apply" on the toolbar.
On one hand, merge C drive and D drive is a must when C drive runs out of space, while D drive is nearly empty, or you want to get fewer partitions to manage easily and create other partitions. On the other hand, if you lose those useful data on those partitions, it is really bad. It’s the best choice for you to use AOMEI Partition Assistant Standard, as it is free with many other useful functions, you can easily manage partitions and protect all your data from loss.

